Today's build....

Discussion of Rolling Stock related topics should go here
User avatar
Peter Butler
Driver
Driver
Posts: 5711
Joined: Sun Sep 09, 2012 10:33 pm
Location: West Wales

Today's build....

Post by Peter Butler » Thu Apr 03, 2014 10:36 pm

This morning (Thursday) is the day I am forced to go out with SWMBO to do the family shop! YUK!!!!!
I know it has to be done but it wastes so much modelling time.
On the other hand, it gives me thinking time to plan my next project, and by the time we got back home, had lunch and walked the dogs, I was fired up and ready to go.
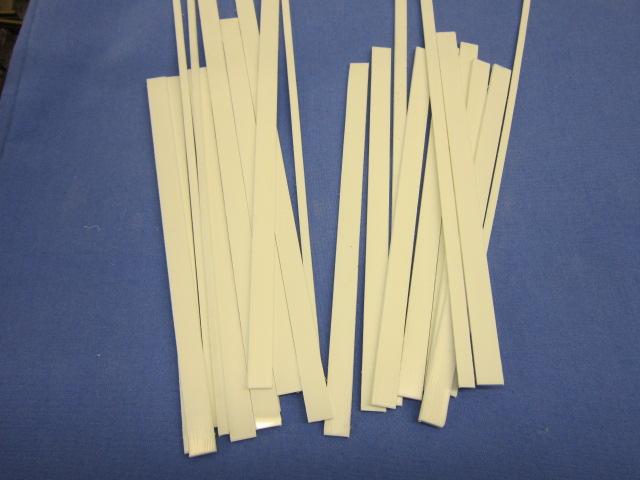
As you know, I dont do drawings, or work from plans, so I 'think' the build through before cutting material. This is the 'kit' of parts I cut to begin with...
Can you tell what it is yet?
Image
Image
Here's a clue....

Image
Soon the sides were assembled.. as before it is heavily influenced by W&L stock, nice and chunky!
Before dinner the body was complete bar detailing, which was put on this evening..

Image
Image
For the first time I have used rivet heads from Cambrian Models which look very good, but are the work of the Devil as they are almost impossible to pick up and my advice to anyone who wants to try them; order 3 times as many as you need because they will certainly go missing between bench and model!
The undercarriage is identical to that on my Guards Van.... whitemetal axleguards (courtesy of my friend, Big Jim!) and metal wheels bought off ebay!

Image
Tomorrow (only half a day again!!!) I will be spraying in grey primer ready for finishing.
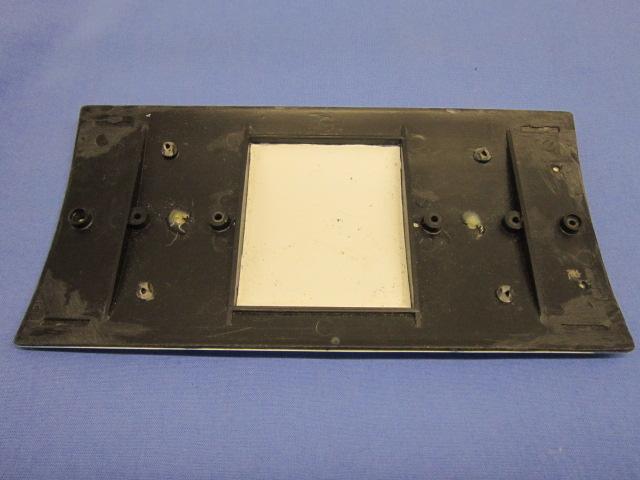
The roof is ready, same as before, taken from a toy train set and the whole model made to fit....
Image

laalratty

Post by laalratty » Thu Apr 03, 2014 10:37 pm

Excellent progress for half a days work, I know I couldn't progress something that rapidly!

BIGNY

Post by BIGNY » Fri Apr 04, 2014 11:08 am

Brilliant as always ! :D :D :D

User avatar
sstjc
Fireman
Fireman
Posts: 442
Joined: Mon Dec 22, 2008 10:47 am
Location: Faversham Kent
Contact:

Post by sstjc » Fri Apr 04, 2014 12:36 pm

Incredible... Stunning as always !
Regards
Barry

www.5inchrail.com

User avatar
Snailrail
Trainee Fireman
Trainee Fireman
Posts: 156
Joined: Thu Dec 05, 2013 5:49 pm
Location: Essex

Post by Snailrail » Fri Apr 04, 2014 6:18 pm

Good grief, you're prolific - I couldn't assemble a 2-piece kit that fast !
Another superb looking model

Brian

DickH

Post by DickH » Fri Apr 04, 2014 6:38 pm

Another brilliant model Peter - I have three of the Accucraft ones on order for later this year but yours looks as good if not better - think I need to come and have a "master class"…..

MDLR

Post by MDLR » Fri Apr 04, 2014 10:46 pm

Peter - if you're not too careful. I'll be asking you to do a Help & Advice presentation next year!

User avatar
Peter Butler
Driver
Driver
Posts: 5711
Joined: Sun Sep 09, 2012 10:33 pm
Location: West Wales

Post by Peter Butler » Fri Apr 04, 2014 11:41 pm

You're too kind Brian.... I only show the method I use, not try to teach others how to do it.
Anyhow, back to the build.
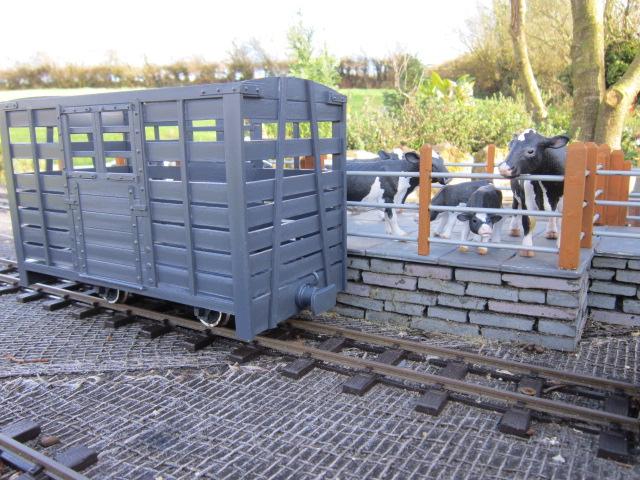
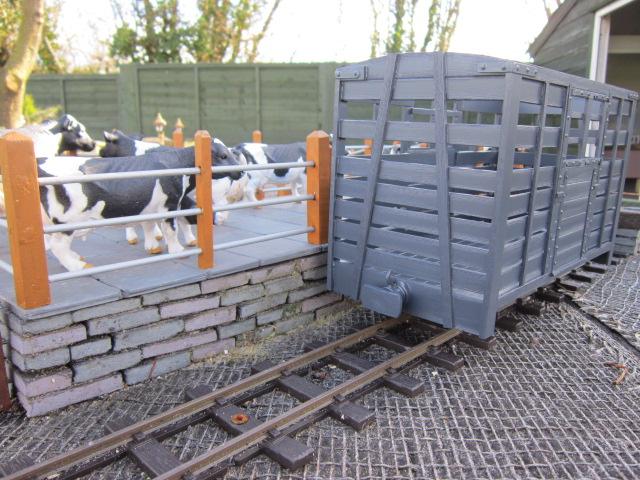
Today has been less productive due to other family matters. However, the next job on my list was to give a spray paint. This grey seems to be a good base colour for finish and weathering and is certainly well priced at just £1.00 from Poundland.

Image
Image
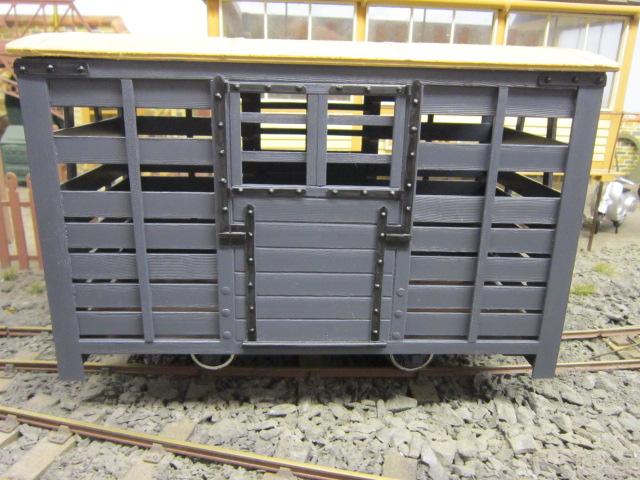
The roof from the toy train set had a lookout in the centre of the roof which I removed leaving a square hole. There were also various holes for screws or rails which needed disguising so I stuck a thin plasticard sheet over the lot! Unfortunately, this left some distortion from the solvent so I stuck a fine weave curtain lining material on to the top and gave it a canvas effect. Now it looks just right and quite prototypical.

Image
I picked out the metal strapping with a black wash of acrylic paint which makes the coachbolts etc. stand out better.
Image
If you look closely the grain effect of the woodwork stands out quite well and when I put a colour wash on top it should settle in the grain making it more pronounced.
Inside I painted the floor, which I scribed into planks beforehand. It is brown to represent planking but will be liberally scattered with straw before adding cattle.
I also decided to add weight under the floor with lead sheet and boxed it in with plasticard to hide it... I like to keep the out-of-sight areas a tidy as the visible ones!
My buffers arrived in the post this morning so they are fitted too.

MDLR

Post by MDLR » Fri Apr 04, 2014 11:47 pm

Peter Butler:98892 wrote:You're too kind Brian.... I only show the method I use, not try to teach others how to do it.
Showing other people is what it's all about...................... so long as you can talk (a bit)

bazzer42

Post by bazzer42 » Sat Apr 05, 2014 8:41 am

I have to agree a fNtastic wagon built in record time. Done the shopping and walked the dogs, I would have slept for an hour first....
Do you scrape grain with a razor saw? It works on foamboard so I assume it would on plasticard.

User avatar
Peter Butler
Driver
Driver
Posts: 5711
Joined: Sun Sep 09, 2012 10:33 pm
Location: West Wales

Post by Peter Butler » Sat Apr 05, 2014 10:20 am

Bazzer, yes I use a razor saw for the wood grain effect, and it works very well. I cut each piece to size first, then use the saw on all visible sides. If the piece is to be used as a step or buffer beam I also scratch the grain with a Stanley knife blade to make deeper grooves which give a more worn effect. After that a light finish with sandpaper to remove flaky bits.
BTW.... I don't sleep in the daytime..... life's too short!

User avatar
Gremlin
Trainee Driver
Trainee Driver
Posts: 695
Joined: Sun Feb 08, 2009 2:46 pm
Location: Kent

Post by Gremlin » Sun Apr 06, 2014 8:11 pm

Very nice work and so fast!
For wood effect I tend to use wood but they don't build up as quick as plasticard, I might give one a go in plastic. What thickness do you use? I know there are a few sheets knocking about but in rather bright red and green. I doubt the colour much matters though.

User avatar
Peter Butler
Driver
Driver
Posts: 5711
Joined: Sun Sep 09, 2012 10:33 pm
Location: West Wales

Post by Peter Butler » Sun Apr 06, 2014 11:46 pm

Gremlin:99000 wrote: I might give one a go in plastic. What thickness do you use? I know there are a few sheets knocking about but in rather bright red and green. I doubt the colour much matters though.
 The colour is not important, neither is the thickness particularly.  I tend to use a thicker sheet for rigid sections, eg, floors.  thinner for side walls if bracing is to be applied, and thinner still for cut-out sections like windows etc...  
  I find it difficult to give actual thicknesses as I simply don't know, it is done from experience.  The best thing to do is have a go yourself and see if you are happy with the results.
  A simple guide to follow is..... if it is difficult to do, you are probably using the wrong material!  You can achieve a much firmer, stable construction with plasticard than ply with less material thickness and build up multiple layer consrtuction as required.
 I have said elsewhere that I use a Stanley knife with a 1991 blade.  I do think this is an important tool for the best results.
Last edited by Peter Butler on Mon Apr 07, 2014 11:04 am, edited 1 time in total.

kandnwlr

Post by kandnwlr » Mon Apr 07, 2014 7:52 am

Peter Butler:99029 wrote:
Gremlin:99000 wrote: I might give one a go in plastic. What thickness do you use? I know there are a few sheets knocking about but in rather bright red and green. I doubt the colour much matters though.
 The colour is not important, neither is the thickness particularly.  I tend to use a thicker sheet for rigid sections, eg, floors.  thinner for side walls if bracing is to be applied, and thinner still for cut-out sections like windows etc...  
  I find it difficult to give actual thicknesses as I simply don't know, it is done from experience.  The best thing to do is have a go yourself and see if you are happy with the results.
  A simple guide to follow is..... if it is difficult to do, you are probably using the wrong material!  You can achieve a much firmer, stable construction with plasticard than ply with less material thickness and build up multiple layer concrtuction as required.


 I have said elsewhere that I use a Stanley knife with a 1991 blade.  I do think this is an important tool for the best results.

You´ve got me thinking (I know, doesn´t happen often). I´ve always avoided plasticard for 16mm because of a feeling that somehow in the heat of the moment I would squash whatever I had built by being clumsy. But your work really makes me wonder what I´ve been missing. ;)

User avatar
Peter Butler
Driver
Driver
Posts: 5711
Joined: Sun Sep 09, 2012 10:33 pm
Location: West Wales

Post by Peter Butler » Mon Apr 07, 2014 11:15 am

Plasticard makes a strong model in 16mm and although I haven't attempted the drop-kick test yet, I believe it would outlive a similar wooden construction.

kandnwlr

Post by kandnwlr » Mon Apr 07, 2014 11:46 am

Peter Butler:99044 wrote:Plasticard makes a strong model in 16mm and although I haven't attempted the drop-kick test yet, I believe it would outlive a similar wooden construction.
Then I´ll give it a bash. Though perhaps other words might be more appropriate .... ;)

User avatar
GTB
Driver
Driver
Posts: 1705
Joined: Sat Mar 05, 2011 2:46 pm
Location: Australia

Post by GTB » Mon Apr 07, 2014 12:09 pm

Peter Butler:99044 wrote:Plasticard makes a strong model in 16mm and although I haven't attempted the drop-kick test yet, I believe it would outlive a similar wooden construction.
Wood, well good quality stuff at least, will outlast polystyrene sheet in my experience.

I used both when I started scratchbuilding and my early models in HO are now 40+years old. The polystyrene has become brittle and if I dropped one of those early models it would shatter. The wood models would probably crack a joint or two if dropped, but that would be all.

White polystyrene sheet isn't UV stabilised and UV can penetrate through paint to some extent. Apart from damp, the only thing around here that threatens a wooden model are white ants, but the high UV flux is dynamite on unstabilised plastics.

I do use polystyrene sheet for some models, such as vans where I want a smooth surface and I can brace it internally. Polystyrene sheet is a nice material to work with, but I use wood for open wagons, as I've found over the years that the polystyrene can bow inwards as it ages and an open wagon can't be braced the same way as a van or passenger car.

Your climate may vary the results you get of course........ 8)

Graeme

User avatar
Peter Butler
Driver
Driver
Posts: 5711
Joined: Sun Sep 09, 2012 10:33 pm
Location: West Wales

Post by Peter Butler » Mon Apr 07, 2014 2:03 pm

I too have plasticard models (16mm) which are approaching 40 years old. All are in stable condition and do not appear to have become brittle, however, I will admit they have been kept in boxes when not in use and only then used on indoor exhibition layouts, away from damaging UV.
Below is 'George', my first 16mm scratchbuild, made entirely of plasticard and constructed during the early '80's.
Image
Image

kandnwlr

Post by kandnwlr » Mon Apr 07, 2014 2:12 pm

Peter Butler:99055 wrote:I too have plasticard models (16mm) which are approaching 40 years old.  All are in stable condition and do not appear to have become brittle,  however, I will admit they have been kept in boxes when not in use and only then used on indoor exhibition layouts, away from damaging UV.
Below is 'George', my first 16mm scratchbuild, made entirely of plasticard and constructed during the early '80's.  
Image
Image
That deserves a thread all to itself :D

User avatar
GTB
Driver
Driver
Posts: 1705
Joined: Sat Mar 05, 2011 2:46 pm
Location: Australia

Post by GTB » Wed Apr 09, 2014 7:06 am

Peter Butler:99055 wrote:All are in stable condition and do not appear to have become brittle,  however, I will admit they have been kept in boxes when not in use and only then used on indoor exhibition layouts, away from damaging UV.
For some reason I thought 'Peter Jones' when I saw the photos....

My early scratch built models spent most of the '70s and early '80s sitting on the layout I had at the time. It was in a sleepout in the back yard and while there were curtains on the windows, the room wasn't dark on sunny days. They were packed away as newer models replaced them from the mid '80s, but the damage was done by then.

I went through a ship modelling period in the '90s and this article on the USN Museum site was the first reference I found which explained why ship modelling books often warned about using lead in models. The same issue has also been reported in railway models weighted with lead, especially the fine lead shot sold as 'liquid lead'.

http://www.navsea.navy.mil/nswc/cardero ... ad_01.aspx

Their specs for constructing display models they commission also make interesting reading.

http://www.navsea.navy.mil/nswc/cardero ... ec_01.aspx

Graeme
Last edited by GTB on Mon Apr 14, 2014 9:35 am, edited 1 time in total.

Post Reply

Who is online

Users browsing this forum: Allu and 5 guests