There are various ways to etch brass, the most common way is to use a chemical etch to remove the unwanted metal. Ferric Chloride is often used for brass. The down side of using a chemical etch is the hazardous nature of the solution. Ferric Chloride is nasty stuff and not really what you want to be playing around with. I have used it in the past but didn't want to do it again.
The method I use is called Galvanic etching and is much safer.
What you need for it is.
12v DC supply, quite a beefy one is required, I used a car battery charger, but a car battery could be used.
Suitable container to take the plate and solution.
Copper Sulphate (Try your local agricultural supplier)
Brass
Brazing Rods (Local Motor Factors, NOT Halfords)
Inkjet Photo Paper
Laser Printer (borrow the one in work when no one is looking!)
Domestic Iron
 DSC_0246 by bigjimiflash, on Flickr[/img]
First draw your design on your computer and print using LASER printer on INKJET glossy photo paper.
I used Rymans own brand paper and it worked okay.
The more astute of you will notice the deliberate error. The image in the picture is the wrong way round. It should be printed as a mirror image.
 DSC_0245 by bigjimiflash, on Flickr[/img]
Next take your piece of brass, I used .030, or .7mm (in the new money). Clean the side you will be etching on really, really well. I rubbed it with fine wire wool and then rubbed with acetone (some nail varnish removers contain it, or try a proper Chemists). When the paper towel remains clean after the acetone wipe, it is clean enough. Keep your grubby mitts off the brass surface afterwards.
 DSC_0247 by bigjimiflash, on Flickr[/img]
Set the iron to its hottest setting with any steam off. When hot enough iron the brass and paper, keep the pressure on for a couple of minutes. Roll with a roller if you have one and iron again. What we are trying to do is melt the toner on the paper and transfer it to the brass. At this point do not be tempted to remove the paper. Place the brass in a tray of water and leave to soak and cool for a bit.
At this point some of us may be tempted to crack open a bottle of something and bask in the warm glow of satisfaction that comes with the successful mastering of a previously unused piece of domestic equipment. If this applies to you, congratulations, but please be aware that the domestic authorities may now refuse to press your shirts as you have now demonstrated that you can do it yourself.
 DSC_0258 by bigjimiflash, on Flickr[/img]
After a soak for 10 mins or so start to remove the paper. Peel away what comes away easily and soak again if needed. Remove the last bits of paper with a tooth brush or similar. Check the transfer carefully. Any small gaps in the toner can be filled with a sharpie type permanent marker. Larger gaps can be filled this way but it may be better to clean the brass and start again. Cover as much of the brass sheet that does not need to be etched with insulating tape.
 DSC_0259 by bigjimiflash, on Flickr[/img]
Find a container large enough to take the brass. Ideally it should be square and not to large as you want the two plates close together.
I used brazing rods as the cathode (neg side), They need to be as long as your brass sheet and ideally you could do with one for each inch of the width of the brass. Place the rods in and secure them with clips or clothes pegs. Place the brass in and set it so it is parallel with the rods. In an old jug mix the copper sulphate crystals with some warm water. I used about 8oz per pint. Watch out this solution will stain and I trust you are all wearing gloves and eye protection aren't you?
Fill the container with the solution until the level of the bits you want etched is covered.
Connect the positive lead to the bit you want etched (anode) and the negative lead to the rods.
Check the anode and cathode are parallel to each other. I found that a distance of about 2 inches apart worked okay with out over loading the power supply.
Cross your fingers, close your eyes and turn the power supply on.
Wait.
After a few minutes some brown gunge starts to form on the plates and rods. I cleaned this off every 15 minutes or so.
After about 45 minutes the plates were etched deep enough for me and the toner was starting to come off.
[/img]
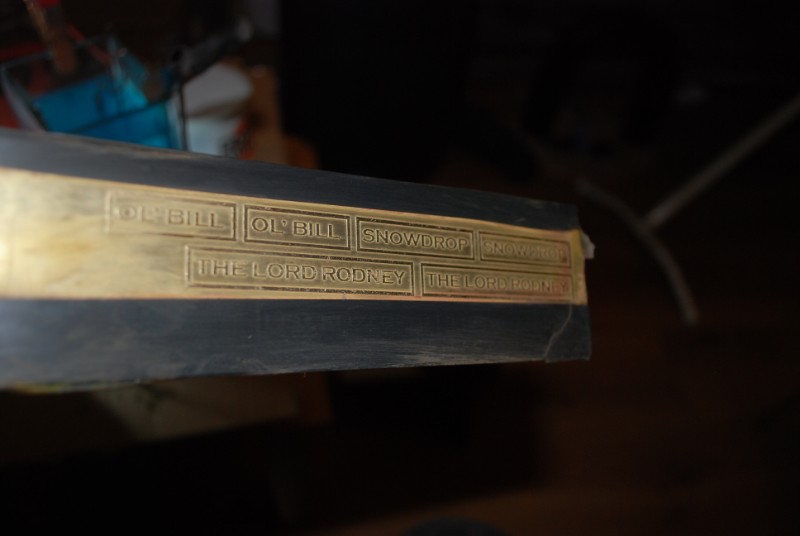 DSC_0264 by bigjimiflash, on Flickr
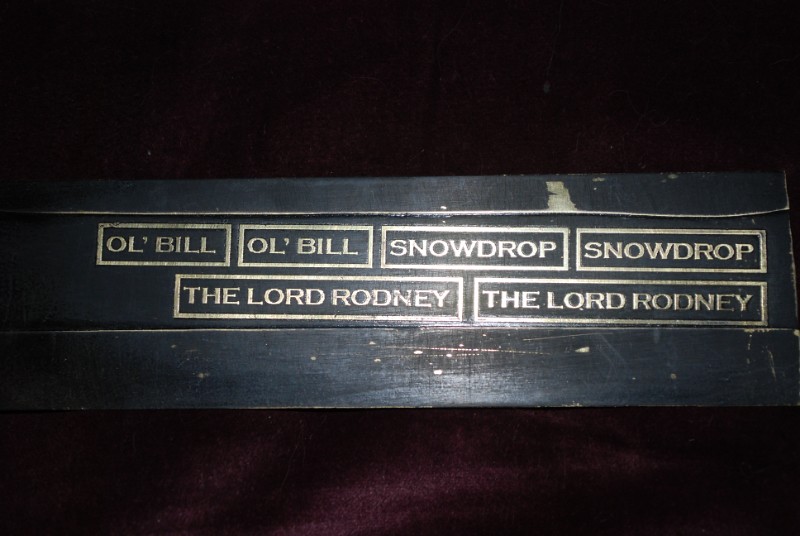 DSC_0266 by bigjimiflash, on Flickr[img]
I sprayed the plates with a couple of light coats of black and then cleaned the tops off with wire wool.
Ta da.
There are a few things to note. The closer the anode and cathode the faster the etch, however the chances of over loading the power supply is higher. The stronger the solution the faster the etch. Keep the anode and cathode parallel otherwise you will end up with an uneven etch.
Used solution can be kept for another go, or disposed of carefully.
I am told that this method works in line of sight so to speak, so there should be no need to mask the rear of the plate.
It is best if the brass is suspended in the solution rather than sitting on the bottom of the tank, You could use more rods as hooks or a couple of bulldog clips.
Have fun
Jim