A place for discussing battery-electric locomotives, whether they're diesel, steam or even electric outline
-
taliesin001
Post
by taliesin001 » Tue Oct 26, 2010 10:16 pm
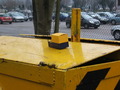
I've been thinking about building this for a while, this evening I decided to give it a go. I started at around half past 5 and the pics below show the progress by half past 9. For this I have used wood and cardboard, probably better to have used plasticard or brass but the wood and card I already had so that is what it was to be. Judging by the build time of only 4 hours I think the pieces went together quite easily, much better than expected. The body as shown below is finished, apart from the roof supports, the internal detailing and running gear are yet to be fitted another day. I have modelled the loco in 1950's style, as it has less bodywork and I have a fascination with the early preservation era when the loco was bashed around as it tore it's way through undergrowth (and yes that front rail in the pic is supposed to have a kink in it!) I think it will look good with my slate wagon train (they often used the simplex to collect wagons to be scrapped) and I might build the brakevan to go with it to replicate the adventures that were taken further and further toward blaenau. I'm also trying to work out what was written on the front at some point (the picture has the first word cut off, it reads "? or bust". I have heard the saying before but can't remember what it was, any help would be appreciated. Overall I am pleased with my initial efforts. I think it will be something that my brother can use as he is starting to become interested in this (he's 5) and helping me with the live steam stuff. I think it will be nice to have his own loco (which of course has to be from the FR because that's his favourite line!)

Uploaded with
ImageShack.us


Uploaded with
ImageShack.us

Uploaded with
ImageShack.us
-
laalratty
Post
by laalratty » Tue Oct 26, 2010 10:31 pm
The "or bust" if you're being prototypical to the 1950's I believe had "Tan-y-bwlch or bust" as the destination. If however you want to replicate 2004 I think the destination at one point was written as "Rhiw Plas Bridge and bust"

Model is looking great as well

Last edited by laalratty on Tue Oct 26, 2010 10:35 pm, edited 1 time in total.
-
taliesin001
Post
by taliesin001 » Tue Oct 26, 2010 10:34 pm
Thanks, that would make sense as I can see that the last letter of the first word is H.
-
Pendo Pilot
Post
by Pendo Pilot » Wed Oct 27, 2010 12:01 am
That looks fantastic fella. I like the construction method used as well. I've been after a fully armoured Simplex ever since I saw that one being done up on Salvage squad. After seeing what you have done I may just make myself one instead. What are you planning on using for the chassis? Also is it off plans or more freelance (Basically have you got any plans for 16mm that I could use as well..

).
Look forward to seeing the progress.
-
taliesin001
Post
by taliesin001 » Wed Oct 27, 2010 7:48 am
Have no idea what I'm doing for the chassis just yet. The plans are from the 7mm drawings book for the WHR, scaled up. However I have seen these 9mm drawings posted here, mine are actually pretty much the same.
http://forum.gn15.info/viewtopic.php?p= ... e55379c279
-
90733
- Driver

- Posts: 1955
- Joined: Wed Dec 16, 2009 6:17 pm
- Location: West Yorkshire
-
Contact:
Post
by 90733 » Wed Oct 27, 2010 8:59 am
Brilliant, looking good so far, and what a good idea for your brother to use too
Thanks
Jack
-
taliesin001
Post
by taliesin001 » Wed Oct 27, 2010 9:03 pm
Made a bit more progress today, until I ran out of brass tacks. I started on the riveting, and there is lots to do. also made two of the four brackets that are on the front (2 on each end). also think I have pretty much figured out the interior and am going to be completely scratchbuilding this instead of buyng casting, most of it will be hidden by figures and clutter anyway. Anyway here are the pics...

Uploaded with
ImageShack.us

Uploaded with
ImageShack.us

-
made-in-england
- Trainee Driver

- Posts: 826
- Joined: Tue May 13, 2008 4:22 pm
Post
by made-in-england » Wed Oct 27, 2010 9:14 pm
Looks mint!
Drawings please
Passengers are reminded not to tease the engines
-
Pendo Pilot
Post
by Pendo Pilot » Wed Oct 27, 2010 9:26 pm
Wow! Those brass tack rivets look excellent. You have been busy with that. I can see a few people knocking out simplexes at this rate following your example.
-
DolwyddelanLightRail
Post
by DolwyddelanLightRail » Wed Oct 27, 2010 9:34 pm
I Like very much!
-
Sir haydn
Post
by Sir haydn » Wed Oct 27, 2010 9:45 pm
looks great! I know how you must feel I have been riviting today and managed just over 500 before my eyes and fingers hurt!
-
90733
- Driver
- Posts: 1955
- Joined: Wed Dec 16, 2009 6:17 pm
- Location: West Yorkshire
-
Contact:
Post
by 90733 » Wed Oct 27, 2010 10:00 pm
Brilliant, and just goes to show not everything has to be metal ect......, hoping to build some stock in this style, using card and balsa wood, brilliant inspiratioin this.
Thanks
Jack
-
taliesin001
Post
by taliesin001 » Wed Oct 27, 2010 10:11 pm
made-in-england wrote:Looks mint!
Drawings please
Drawings are from the 7mm association, however I posted a link earlier today for some 9mm ones, just scale up
-
Crackingjob
Post
by Crackingjob » Thu Oct 28, 2010 9:40 am
Superb,but you should have used some rusted steel pins to give the real rust feel....but who cares SUPERB!....must get on with my card creations
Crackingjob
-
DVT Dweller
Post
by DVT Dweller » Thu Oct 28, 2010 1:18 pm
Thats looking fantastic, as someone that is starting to get a little more into kit bashing and slowly starting to think about scratchbodging, what are the brass tacks youve used? Are they just track pins?
-
taliesin001
Post
by taliesin001 » Thu Oct 28, 2010 3:54 pm
I don't know where the tacks are from, but yes you could use track pins (which is what these are likely to be). I have been out today and bought some hornby track pins which have the same sized head.
-
Narrow Minded
Post
by Narrow Minded » Thu Oct 28, 2010 7:16 pm
A good cheap option are
short (there's long and short versions) dressmaking pins
Available from any haberdashery habadashery haberdasherie
dressmakers shop!
Nice work on the Simplex so far, looking great!

-
taliesin001
Post
by taliesin001 » Thu Oct 28, 2010 9:59 pm
A bit more progress this evening. I went to the model shop this morning and got some paint and track pins. I thought that these and the previous tacks were the same size but it appears not! Therefore off came yesterdays ones and in went the new ones, I still ran out though with another side to do so I'm off to get some more tomorrow to finish the job. Other than that I started work on the inside. I think I have worked out what goes where, although what the drawing says and what the pictures say in terms of floor layout (which bits are raised and which aren't) are two different things so I've made a guess as the pictures don't really show any of the inside. I started with the fuel tank, made from a block of wood than was conveniantly the right size and wrapped two card strips around to represent the brackets that hold it in place. I put two rivets in each (what I had left) and the filler cap is an 009 coach lamp cover. I've had a brake stand for a while which I have used and the rest is just made of wood. I still need to do a bit of planking inside and make the radiator with a few pipes from the engine. Nothing is fixed in the pics which is why it looks a bit wonky. My grandad has also sorted me out a chassis to fix underneath. My aim is to have this nearing completion by early next week, my Russell should arrive around thursday and I will probably get distracted by that if I'm only halfway through.

Uploaded with
ImageShack.us

Uploaded with
ImageShack.us

Uploaded with
ImageShack.us

Uploaded with
ImageShack.us
-
Narrow Minded
Post
by Narrow Minded » Thu Oct 28, 2010 10:05 pm
Neat

-
Pendo Pilot
Post
by Pendo Pilot » Thu Oct 28, 2010 10:31 pm
Very Neat!!
Who is online
Users browsing this forum: No registered users and 23 guests