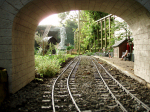
Time to build a railway...but where?

A place for the discussion of garden railways and any garden style/scale portable and/or indoor layouts
Post Reply
User avatar
ge_rik
Administrator
Administrator
Posts: 8051
Joined: Sun Oct 25, 2009 10:20 pm
Location: Cheshire
Contact:

Post by ge_rik » Thu Apr 21, 2016 4:29 pm

Peter Butler:117635 wrote:Thanks guys, I'm happy you are pleased to see the finished loco which has given me sleepless nights and empty pockets!
I have to admit I am more than satisfied with my efforts and will now put it through running tests to see how effective the battery power, and pulling power perform.  At the moment I am just satisfied to look at it and enjoy the moment.
BUT........  all my wife wants to know is... 'Are you going to sell it?'
WHAT??????......  you have to be joking!
What a stunning looking model, Peter. Well worth the effort and, by the sounds of it, the heartache (and earache??).

I hope the dry weather holds out long enough for you to do some test running (video evidence, please...... :D )

Rik
------------------------
Peckforton Light Railway - Blog Facebook Youtube

James from Devon
Trainee Fireman
Trainee Fireman
Posts: 210
Joined: Mon Feb 01, 2016 6:58 pm
Location: Devon

Post by James from Devon » Thu Apr 21, 2016 7:55 pm

Simply, Wow!, what a beautiful looking loco. You must be rightfully very happy with that!

I hope that it gives you much pleasure seeing it at work!

Jim
Garden railways don't run on steam or electric rather wine and Jedi master level patience

User avatar
Peter Butler
Driver
Driver
Posts: 5730
Joined: Sun Sep 09, 2012 10:33 pm
Location: West Wales

Post by Peter Butler » Thu Apr 21, 2016 11:10 pm

I took her out for a spin this afternoon drawing my three converted Bachmann coaches, which proved to be no load at all. The performance was unimpaired and she looked just right with them in train.
I was only able to try about ten laps of my line but with no apparent loss of power, next I will let her run until she stops and count the number of laps or the running time.
On a nice warm day that seems to be the best way to relax with a nice bottle of red! I can't wait!!!!!
The best things in life are free.... so why am I doing this?

User avatar
philipy
Moderator
Moderator
Posts: 6075
Joined: Sun Jan 30, 2011 3:00 pm
Location: South Northants

Post by philipy » Thu Apr 28, 2016 9:11 am

Just returned from holiday to read this, Peter, so belated congrats on a superb job.

Re the comment from your wife, I should think that with many more like that she could be top of the "For Sale" list!
Philip

User avatar
Peter Butler
Driver
Driver
Posts: 5730
Joined: Sun Sep 09, 2012 10:33 pm
Location: West Wales

Post by Peter Butler » Sat May 07, 2016 9:48 pm

Today, the weather was kind and a running day had been planned for Big Jim to visit with a selection of locos and stock, and beer!
It was an opportunity for new items to be tested and old favourites to be given their moment of glory. Quite a number of locomotives, steam and battery, were allowed their time on the circuit at B.U.R.P.S. and all performed faultlessly.......

Image

Big Jim had his 'Tin Turtle' which trundled around with wagons from 'Swift Sixteen' and was a delight to be seen.

Image

Other stock included a variety of steam locos.......

Image

Image

and a number of battery powered, diesel outlined locos...

Image

Image

Image

Image

The Double Fairlie made an appearance too..

Image

Image

Image

There was also an unidentified papperazzi photographer who was taking pictures for international publication..... these pictures are likely to be sought after and sold for inflated prices on the specialist market!

Image
The best things in life are free.... so why am I doing this?

Big Jim

Post by Big Jim » Sat May 07, 2016 10:50 pm

Blimey!
A strange man lying in your garden.

I appear to have inadvertently stolen a few bits of your slate. It caused much amusement at the local garage when I pulled out a pocket of loose change to pay for 20 lung beaters and spread slate chippings on the counter.

User avatar
LNR
Driver
Driver
Posts: 1904
Joined: Sat Feb 27, 2016 5:26 am
Location: Melbourne, Australia

Post by LNR » Sat May 07, 2016 11:18 pm

Sounds and looks like you had a perfect day Peter, glad to see your training your "visitors" to lie on the ground to view your railway. Great photos, ( did notice a shiny new tractor amongst many other things ) the area to the photographers right will provide a great background to photos in the future.
Grant.

User avatar
Peter Butler
Driver
Driver
Posts: 5730
Joined: Sun Sep 09, 2012 10:33 pm
Location: West Wales

Post by Peter Butler » Sun May 08, 2016 12:50 am

Hi LNR, the tractor is a recent purchase from a Toy and Train Fair. It is a Die Cast Fordson which came at the right price but was in a sorry state so is undergoing some cosmetic work to give it a new look. I am undecided as to whether it should be in working condition or as a wagon load in recently fully restored appearance?
These are the things that keep one awake at night!
The best things in life are free.... so why am I doing this?

User avatar
LNR
Driver
Driver
Posts: 1904
Joined: Sat Feb 27, 2016 5:26 am
Location: Melbourne, Australia

Post by LNR » Sun May 08, 2016 1:39 am

The tractor interested me because yours has not got the enormous mudguards (to counter the tractors propensity for rearing up ) and so appears smaller overall. Mine are removable, but all the ones I've seen pics. of in Australia had them. Yours also has the correct wheel cleats but unfortunately the wrong spokes. These are indeed the things that keep us awake at night. Shall look forward to seeing where you go with this.
Grant.
PS my weathering inspiration came from a fellow in the U.S. named Chuck Doan. He did an unbelievable job on one of these, definitely worth a look.
https://public.fotki.com/ChuckDoan/model_projects/
Go down to "Tractor for the Fordson Farm".

User avatar
Peter Butler
Driver
Driver
Posts: 5730
Joined: Sun Sep 09, 2012 10:33 pm
Location: West Wales

Post by Peter Butler » Tue May 10, 2016 12:03 pm

Grant, the Chuck Doan site is just incredible but I can't work to that standard, nor do I need to if my models are going to spend time out of doors in the British climate..... time well wasted I fear!
However, I do like to see some general muck on things which are designed to work in such an environment and I do what I can.
My own Fordson is currently undergoing such a transformation and I might show it on the Forum...... promise not to laugh now!!!
Another recent 'bargain buy' was a die-cast gun which was of unknown origin until I happened across another on display in a museum collection....

Image

Image

Mine was in a sorry state with parts missing, no box, battered paintwork and beyond repair to working condition... but I bought it.

Image

Image

Image

Image

As previously mentioned, I have a military train with a Rail-gun but when I saw this latest gun on offer I couldn't resist the chance of adding to my stock. So far I have stripped off all of the damaged parts and old paint, cleaned off the rust and repainted the gun. Next move will be to build a low bogie wagon for it to be transported.

Image

Image
The best things in life are free.... so why am I doing this?

User avatar
LNR
Driver
Driver
Posts: 1904
Joined: Sat Feb 27, 2016 5:26 am
Location: Melbourne, Australia

Post by LNR » Tue May 10, 2016 2:04 pm

Totally agree re leaving an object outside, that has involved as much time as I suspect would have gone into Doan's work. My vehicles don't stay outside, rather placed in daily situations. Shall wait in anticipation to see the Fordson.
That gun is an interesting acquisition, would it be made by "Crescent" perhaps.  Seeing the spring and other bits, was it to fire caps?
Grant.
PS sorry just realized the name on the box the gun is sitting on.

User avatar
Peter Butler
Driver
Driver
Posts: 5730
Joined: Sun Sep 09, 2012 10:33 pm
Location: West Wales

Post by Peter Butler » Tue May 10, 2016 3:34 pm

Hi Grant, there was a spring loaded firing pin which was bent and broken and has now been removed. I would guess a 'cap' would have been involved for effect, but what was used as a projectile I can't imagine.
In the museum there was another gun by the same manufacturer and I looked up the name on e-bay. This showed there is a collectors market for these items which fetch £60 - £100 (UK) in good, boxed condition.
Alas, mine will never be in that position.
The best things in life are free.... so why am I doing this?

User avatar
Peter Butler
Driver
Driver
Posts: 5730
Joined: Sun Sep 09, 2012 10:33 pm
Location: West Wales

Post by Peter Butler » Tue May 10, 2016 10:49 pm

I might have hurried this a bit but I wanted to take it to a club meeting tomorrow evening.... The Fordson has been well and truly mucked up to give the appearance of a tractor in unrestored condition (as they call it in these here parts!) and I can tell you I have seen several which look just like this. Others call them 'Barn Finds' and they are the ones which are plastered in rust, barely showing their paint colour underneath.
I have decided my Fordson will be mounted on a flat-bed trailer being transported to a garage for restoration.

Image

Image

Image

Image
The best things in life are free.... so why am I doing this?

User avatar
LNR
Driver
Driver
Posts: 1904
Joined: Sat Feb 27, 2016 5:26 am
Location: Melbourne, Australia

Post by LNR » Fri May 13, 2016 1:57 am

While researching info for my tractor, I certainly kept many pics. on file of Fordsons in the same or worse condition. I keep having to pull myself up and remember I'm modeling the 1920's, so back then the tractor would still be quite new, much as I'd like to do a really decrepit weathering job on it.
Grant.

User avatar
Peter Butler
Driver
Driver
Posts: 5730
Joined: Sun Sep 09, 2012 10:33 pm
Location: West Wales

Post by Peter Butler » Fri May 13, 2016 6:06 pm

I see your point Grant, however, my preservation line is set in the present time with anything running in either new or restored condition. A cheat I know but it works for me!
I can imagine my Fordson ageing with little regard by its owner at the time. I visualise it being run into the ground rather than spend time and money on it and finally being put out to grass when a replacement became inevitable.
At last it has been rescued and will be put onto a transporter to go for complete overhaul (which in my world isn't actually going to happen).
The best things in life are free.... so why am I doing this?

User avatar
Peter Butler
Driver
Driver
Posts: 5730
Joined: Sun Sep 09, 2012 10:33 pm
Location: West Wales

Post by Peter Butler » Sun May 22, 2016 10:38 pm

After a most enjoyable running session recently with Big Jim visiting the BURPS, I was most impressed by his Swift Sixteen bogie wagon and decided to buy a bogie set and a four-wheel set to use in my next scratch builds.
When they arrived I was well pleased with the quality of the moulding and the wheels in their tubes work extremely well. Having never seen them before I had no idea how they are generally assembled so I will show how I did it. This is not intended to be a tutorial, rather my way of tackling a new challenge.
Firstly, the woodscrew provided was not the way I wanted the bogies to be attached to my wagon... I needed a way to remove them from underneath if required, so I used a hex. head bolt of about 3mm diam. and drilled a 4mm hole through the bogie casting from its top centre.

Image

After this had been done the brass tubes were glued into the grooves with epoxy adhesive and allowed to dry. The side mouldings also have to be glued in place but first needed to be shallow-drilled to allow the pinpoint axles to recess into the large diameter holes without making contact, which might cause friction on them. I used the same idea on the axleboxes too! Superglue was used for the final attachment.

Image

The bolt head had to be fixed so that there was no way it could rotate when (if) the bogie had to be removed in the future. Firstly a few plasticard discs were cut and sandwiched together with the hex. shape cut out. Then a groove was cut across the bolt head and the discs so a brass rod could be fitted to prevent rotation. When finally glued to the underside of the wagon there should be no way this will move!

Image

Image

Once fitted, the nut will be loosely attached and held with a threadlock additive. Because the centre hole through the bogie is slightly bigger than the bolt diameter there will be adequate movement to let the L/R and up/down motion, which is built into the bogies, operate as intended.

Image

To ensure the side frames were equally attached on both sides of the bogie I used a piece of timber to set the height...

Image

All of these ideas evolved to suit my particular needs and are not intended to be the definitive way of assembly... I would be interested to hear of other ways of these bogies can be constructed.
The best things in life are free.... so why am I doing this?
User avatar
Peter Butler
Driver
Driver
Posts: 5730
Joined: Sun Sep 09, 2012 10:33 pm
Location: West Wales

Post by Peter Butler » Sun May 22, 2016 11:01 pm

So.... what to do with the bogies?
I showed a gun recently purchased at a Toy and Train Fair and want a bogie wagon to mount it on. This will run with my Armoured Train set when completed.
Before lunch today I decided on the size of wagon to fit the gun and began to cut plastic! The build was difficult due to the excessive weight of the gun, which is cast in metal and very heavy! I had to build-in some brass angle on either side of the well and fit a centre support along the length. For this I found a piece of aluminium carpet strip which is very strong. All is held together with layers of plasticard, superglue and solvent adhesive. I can vouch for its strength and rigidity!

Image

Image

Image

Although not yet mounted, this shows what all the fuss is about....

Image

So, by the end of today I have a bogie well wagon just waiting for detailing. Cambrian Models quickly supplied the rivet heads which ordered so I think I will be spending several happy hours glueing them in position.
More pictures to follow....
The best things in life are free.... so why am I doing this?

User avatar
LNR
Driver
Driver
Posts: 1904
Joined: Sat Feb 27, 2016 5:26 am
Location: Melbourne, Australia

Post by LNR » Mon May 23, 2016 1:57 am

A true heavy weight well wagon constructed and fit for purpose Peter. I like the curves on the side frames over the bogies, as someone once said, "It is only a very minor detail, but it sets the period.".
Grant.
PS hope you allowed for the rivet heads that end up on the floor lost!

User avatar
ge_rik
Administrator
Administrator
Posts: 8051
Joined: Sun Oct 25, 2009 10:20 pm
Location: Cheshire
Contact:

Post by ge_rik » Mon May 23, 2016 7:59 am

Another fascinating build, Peter, with your estimable level of detail.
LNR:118212 wrote: PS hope you allowed for the rivet heads that end up on the floor lost!
Not only on the floor. The way they ping off into the distance when trying to remove the flashing, I'd imagine they're peppered over every surface in my workshop! :lol:

Rik
------------------------
Peckforton Light Railway - Blog Facebook Youtube

User avatar
Peter Butler
Driver
Driver
Posts: 5730
Joined: Sun Sep 09, 2012 10:33 pm
Location: West Wales

Post by Peter Butler » Mon May 23, 2016 2:16 pm

Grant, I just had to include the curved side frames to get the correct 'feel'. I searched for a typical example to follow and found an illustration in one of my books.....

Image

As you say, It is a small matter but an important addition to set the period....it certainly hits the spot for me!
The best things in life are free.... so why am I doing this?

Post Reply

Who is online

Users browsing this forum: No registered users and 43 guests