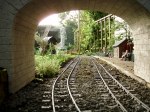
The (Windmill Hill) Welsh Highland Railway

A place for the discussion of garden railways and any garden style/scale portable and/or indoor layouts
Post Reply
User avatar
Andrew
Moderator
Moderator
Posts: 3422
Joined: Tue Jul 03, 2012 1:33 pm
Location: Bristol, UK
Contact:

Post by Andrew » Sun Mar 29, 2015 2:59 pm

Roberts wood light railwa:109586 wrote: 

ive just bought one of these... what does yurs run like?
Hello!

Pretty well I'd say - slow but steady... She's a little noisy, but I think that's part of the charm. I didn't think she was hugely powerful, until I trundled her through the tunnel the other day forgetting I'd left a rake of 4 or 5 wagons inside and she came out pushing the whole lot, albeit very slowly... I do worry that she'll wear out her ancient motor or strip her aged gears, but so far, so good... How about yours?

Andrew.

Roberts wood light railwa

Post by Roberts wood light railwa » Sun Mar 29, 2015 6:00 pm

hi

im waiting for mine to arrive at the minute so im just trying to gather abit of info on them. my friend has 2 which run well and pretty much as you describe so hopefully mine will be the same.
i really like the colour of yours, mines going to be red and white i think. thanks for the info.

i"ll post some pictures of mine once its here


james

User avatar
Andrew
Moderator
Moderator
Posts: 3422
Joined: Tue Jul 03, 2012 1:33 pm
Location: Bristol, UK
Contact:

Post by Andrew » Sun Mar 29, 2015 7:31 pm

Roberts wood light railwa:109602 wrote:hi

im waiting for mine to arrive at the minute so im just trying to gather abit of info on them. my friend has 2 which run well and pretty much as you describe so hopefully mine will be the same.
i really like the colour of yours, mines going to be red and white i think. thanks for the info.

i"ll post some pictures of mine once its here


james
I'm sure you'll be pleased with it... It's surprisingly easy to do a neat lining job because the lines are moulded and slightly raised - I continued them across the doors (which don't have the moulded lining) with microstrip. I've got another one which will one day be turned out in BR style green, with "cats whiskers" on the front..

Cheers,

Andrew.

Roberts wood light railwa

Post by Roberts wood light railwa » Tue Mar 31, 2015 5:53 am

That is also one of my options but seeing as the bother half has bought it me I've decided to let her take charge of the colours. Red and white it is

Cheers
James

User avatar
Andrew
Moderator
Moderator
Posts: 3422
Joined: Tue Jul 03, 2012 1:33 pm
Location: Bristol, UK
Contact:

Post by Andrew » Thu Apr 09, 2015 1:39 pm

Afternoon all,

This morning's beautiful weather saw the (WH)WHR's first passenger trains of the season.

The Ffestiniog rake did the honours, seen here awaiting passengers (and loco) in the temporary station at Trefechan...

Image


Number 3 having arrived, the train headed off into the tunnel...

Image


Climbing Penlan Bank...

Image


And emerging into the sunshine at Clarach...

Image


Having run round "Daisy" waits time at Clarach. Not a hugely picturesque view, but to my (deluded?) mind it's got something of those photos of Porthmadog (New) about it - a tin hut and not a lot else except a general lazy air of not much going on...

Image


Trundling back through Penlan:

Image


Back out of the tunnel:

Image


And awaiting the next run:

Image

All in all a very pleasant morning - the (WH)WHR is back in business! Incomplete, but getting there...

Anyone who finds themselves in the Bristol area is more than welcome to pop by and play...

All the best,

Andrew.

bazzer42

Post by bazzer42 » Thu Apr 09, 2015 6:16 pm

Lovely photos Andrew and I still love that tunnel. My afternoon disappeared without trains as the youngest returned from a trip to the states

User avatar
Soar Valley Light
Driver
Driver
Posts: 1490
Joined: Sun Dec 08, 2013 5:18 pm
Location: North West Leicestershire

Post by Soar Valley Light » Thu Apr 09, 2015 8:26 pm

Fabulous shots Andrew. Thanks for sharing. Please keep them coming, it's the sort of thing that really inspires me to persevere with all the work of rebuilding the garden to make railway construction possible.

Andrew
"Smith! Why do you only come to work four days a week?
"'cause I can't manage on three gaffer!"

User avatar
Andrew
Moderator
Moderator
Posts: 3422
Joined: Tue Jul 03, 2012 1:33 pm
Location: Bristol, UK
Contact:

Post by Andrew » Fri Apr 10, 2015 12:25 pm

Thanks for the kind word chaps, much appreciated. Posting on here encourages me to keep going too - there's still loads to do, but when I look back to the start of this thread and see how far the line's come in the last few years it makes me all the more keen to crack on with the job. Unfortunately I've got a busy couple of weeks coming up and time will be limited... Oh well...

Cheers,

Andrew.

User avatar
Andrew
Moderator
Moderator
Posts: 3422
Joined: Tue Jul 03, 2012 1:33 pm
Location: Bristol, UK
Contact:

Post by Andrew » Mon May 18, 2015 10:11 am

Hello again,

The weekend just gone has seen the first slate trains to run over the completed route - here's Russell awaiting departure with some empties for the quarry along with supplies of coal and gunpowder:

Image

And again, heading up Penlan Bank:

Image

It's a mostly Ffestiniog train at the moment, but more WHR wagons are on the way and a brake van will follow. Then I'll need to create the quarry itself - or at least the gates that supposedly lead to it!

Cheers,

Andrew.

User avatar
philipy
Moderator
Moderator
Posts: 6041
Joined: Sun Jan 30, 2011 3:00 pm
Location: South Northants

Post by philipy » Mon May 18, 2015 10:54 am

Looking good Andrew.
I'm sure its buried earlier in the thread somewhere, but what is the gradient between the the upper and lower sections?
Philip

User avatar
Andrew
Moderator
Moderator
Posts: 3422
Joined: Tue Jul 03, 2012 1:33 pm
Location: Bristol, UK
Contact:

Post by Andrew » Mon May 18, 2015 12:08 pm

Hi Philip,

The gradient's about 1 in 50 - steep enough to make the engines work hard and provide interest (and a Welsh Highland feel!), but not too crazy. The stations and sharper curves are level, but that doesn't always make for smooth running - if I'm not careful trains hit the level bit and start to speed up just where they should be slowing down! I guess that's what happens when you try to recreate Snowdonia in a very small back garden...

Cheers,

Andrew.

Joe

Post by Joe » Mon May 18, 2015 5:30 pm

looks very good, and like your russel

User avatar
Soar Valley Light
Driver
Driver
Posts: 1490
Joined: Sun Dec 08, 2013 5:18 pm
Location: North West Leicestershire

Post by Soar Valley Light » Mon May 18, 2015 7:34 pm

Hi Andrew,

The line is blending into the landscape very nicely, it's looking like a part of the landscape and the trains thread through it just like they are a part of it too. Really lovely.

Keep the pictures coming,

Andrew
"Smith! Why do you only come to work four days a week?
"'cause I can't manage on three gaffer!"

User avatar
Andrew
Moderator
Moderator
Posts: 3422
Joined: Tue Jul 03, 2012 1:33 pm
Location: Bristol, UK
Contact:

Post by Andrew » Wed May 20, 2015 2:33 pm

Hello again,

Here are a couple more photos taken earlier in the week showing recent progress.

I've been ballasting the track using "green" alpine chippings (and a little sieved earth) held in place with SBR, as per Peter Butler's method - thanks Peter, it works a treat! I'm really pleased with how it looks, and it blends relatively well with the section already ballasted using Rowlands Mix too. The whole of one side of the line is now ballasted, and the newly-done section which previously had a very functional appearance now looks positively attractive.

Here's Leach's Curve:


Image

And the wiggly bit leading from there to Vicarage cutting:

Image

The next bit to be tackled will be the upper station area, but first I need to complete the crossing. The wooden platform edging is in place - I think the gravel and earth platform surface will be held down with SBR too.

Image

Unfortunately, although it looks alright from here, the little resin corrugated hut is not in a good way - the paint is peeling from one wall and the roof. It's only been in the garden for less than a year so I don't think the paint took properly. I may replace it with a scratch-built structure in due course...

Cheers all,

Andrew.

User avatar
Peter Butler
Driver
Driver
Posts: 5714
Joined: Sun Sep 09, 2012 10:33 pm
Location: West Wales

Post by Peter Butler » Wed May 20, 2015 4:27 pm

That looks superb Andrew, I'm so pleased you too have tried this method and come up with satisfactory results. My initial ballasting has now survived the winter without problems.
The SBR seems to work best on gravel and crushed stone, but not on sand which absorbs water and dilutes the adhesive even after setting.
Experimentation is the way progress is made!
The best things in life are free.... so why am I doing this?

McRuss
Cleaner
Cleaner
Posts: 58
Joined: Wed Apr 03, 2013 9:39 am

Post by McRuss » Wed May 20, 2015 6:35 pm

Hello Andrew,

your ballast work looks very good.
May I ask what SBR is?

Markus

User avatar
Soar Valley Light
Driver
Driver
Posts: 1490
Joined: Sun Dec 08, 2013 5:18 pm
Location: North West Leicestershire

Post by Soar Valley Light » Wed May 20, 2015 7:06 pm

Markus,

I was just about to ask the same question. I'm pleased I'm not the only one who doesn't know!

Andrew,

That looks really good, just like the real thing. Where do you get the alpine chippings from please? My line is supposed to be very close to the granite quarries of the Charnwood geology, indeed I have it serving a minor one at one end of the line. However, a significant part of the traffic would have been Swithland slate in my imagined history. The waste from this process would probably have been a far cheaper material for use as ballast. As this has a slightly greenish tinge then the Alpine chippings you've used look ideal.

I look forward to seeing your station area completed. The crossing is looking good. I like the sound of your platforms too, something else I'm looking forward to seeing progress.

There is so much inspiration on this site!
"Smith! Why do you only come to work four days a week?
"'cause I can't manage on three gaffer!"

User avatar
Peter Butler
Driver
Driver
Posts: 5714
Joined: Sun Sep 09, 2012 10:33 pm
Location: West Wales

Post by Peter Butler » Wed May 20, 2015 10:55 pm

Markus and Andrew,   SBR (Bonding Agent) is used in the building trade as an additive for cement render. It acts as a flexible, waterproofing agent and used on its own is an exterior adhesive.
I buy mine from an ebay site (Builders merchants etc. stock it too, but can be more expensive)  On ebay type in item number  130764368144.  This supplier offers free postage!
The best things in life are free.... so why am I doing this?

User avatar
Andrew
Moderator
Moderator
Posts: 3422
Joined: Tue Jul 03, 2012 1:33 pm
Location: Bristol, UK
Contact:

Post by Andrew » Thu May 21, 2015 9:20 am

Yep, like wot Peter said!

As Peter's noted on his thread, it does take a long time to dry (4 days or more) and during that time the undried glue takes on an alarming purple/blue colour - attractive but not terribly realistic... After that it sets lovely and hard. On Peter's advice I covered it during the drying stage in case of rain.

Both my SBR and my chippings came from B&Q - I added sieved earth to the mixture and sprinkled some on top too, partly to make it all look a bit more run-down (this bit's supposed to be 40 year old NWNGR track) and partly to reduce any sheen left by the glue. The next section I'll do is supposedly relatively new track laid by McAlpines during the creation of the WHR, so won't have the added earth...

I went with the SBR method on these bits because they're laid on wood (the upper station is built like a long narrow "deck") and I thought anything more solid would crack due to the natural movement of the wood. I really like how it looks though, so now I'm undecided whether to use this method on other bits too, including sections which were Rowlands Mix-ed two years ago but are now beginning to crumble...

Cheers,

Andrew.

User avatar
philipy
Moderator
Moderator
Posts: 6041
Joined: Sun Jan 30, 2011 3:00 pm
Location: South Northants

Post by philipy » Thu May 21, 2015 1:12 pm

Soar Valley Light:110997 wrote:Where do you get the alpine chippings from please? My line is supposed to be very close to the granite quarries of the Charnwood geology, indeed I have it serving a minor one at one end of the line. However, a significant part of the traffic would have been Swithland slate in my imagined history. The waste from this process would probably have been a far cheaper material for use as ballast. As this has a slightly greenish tinge then the Alpine chippings you've used look ideal.
Andrew,
If its any help, I got my ballast from Derbyshire Aggregates, using the "green 2mm dried gravel" ( they also do 2-5mm and various other colours).
£10 for 25Kg, I collected mine and got 2 bags for a tenner!

http://www.derbyshireaggregates.com/mm5 ... aggregates
Philip

Post Reply

Who is online

Users browsing this forum: No registered users and 22 guests