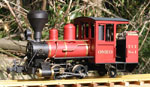

I've decided the TVT rolling stock will be equipped with wooden underframes and I've standardised on Accucraft W&L W-irons and couplers, but I make the wheels myself. The wheels are turned from solid steel, which adds plenty of weight low down. The basic underframe weighs about 300g without bodywork.
The wood I use is hoop pine, an Aust. plantation grown timber which cuts and works nicely. Initially I used a bandsaw to resaw the pine down to size, but this required a lot of cleanup to remove saw marks. I now use a Proxxon miniature bench saw, which is giving excellent results. Wood strip now comes out smooth, square, accurately sized and requiring minimal finish sanding.

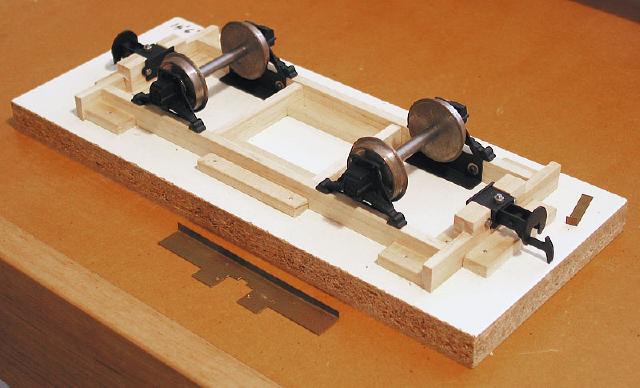
Being a great believer in standardisation, the TVT has only one basic 4 wheel underframe design, so I built a jig to assemble them.
This photo shows the assembly jig, which is just bits of wood nailed to an offcut of chipboard shelving. This holds everything in place and ensures the underframes are all the same size and come out square. It also shows the brass marking out jigs for the headstocks and side sills. These are used to ensure that the couplers end up on the wagon centreline and the axleboxes end up exactly opposite each other and all the same distance from the headstocks.

This one shows the jig with an underframe in position while the glue dries. I use aliphatic woodworking glue for assembling wooden parts.
It is easier to fit the w-guards to the side sills and the couplers before the underframe is glued together. The couplers are inset into the headstock to reduce the spacing between wagons to close to scale for most 3' gauge prototypes.
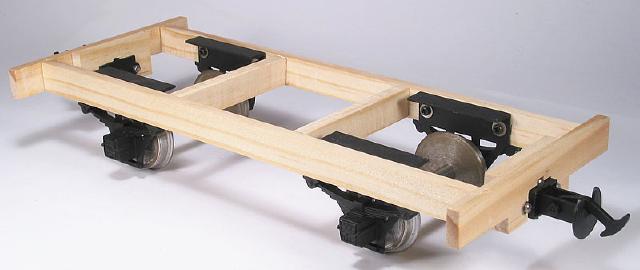
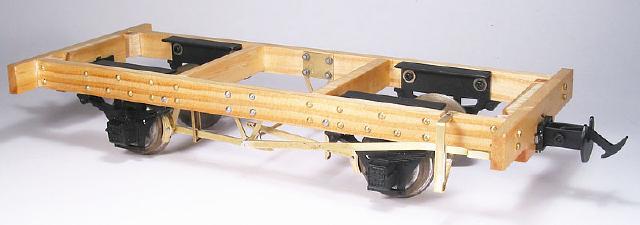
This pic. shows a standard TVT underframe as assembled, straight off the jig.
In the following photos., the underframe has now been detailed with bolt heads and a working handbrake.
The bolts are #18 x 3/8" brass escution pins, which are about the same size as a 1/16" brass rivet but a lot cheaper. I used to be able to get these from the local hardware store, but I now have to import them from the USA.
The brake shoes are made from a plumbing fitting found in the local hardware plumbing section. Bore the centre to wheel tread dia. and then part off as a ring of 8 brake shoes. Drill for pivot pins and cut the ring into 8 pieces. The idea came from one of Peter Jones books, although he was using them for locos I think.
The rest of the brake gear is built up from various brass strips, 10BA bolts, turned spacers and small nails cut to length for pivot pins. I have a small bench guillotine which I use for cutting brass strip from sheet, which is a very useful device for this sort of thing. Life's too short to cut it all out with a piercing saw.
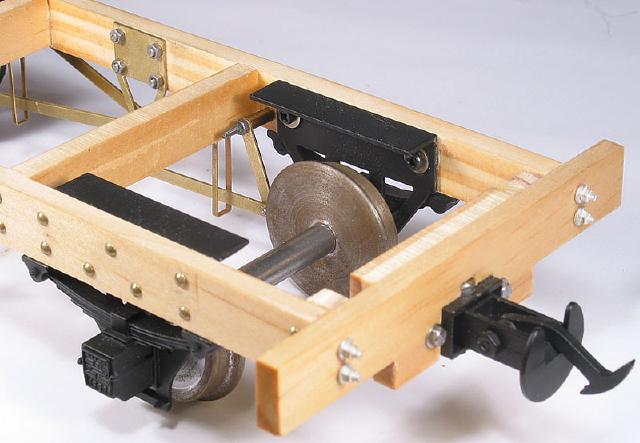
This close up of the handbrake ratchet frame shows only two notches. The handbrake is intended only as a parking brake to prevent runaways in in yards, so it only needs to be on or off. The upper notch makes sure the brakes aren't dragging and the lower one keeps the brake on.
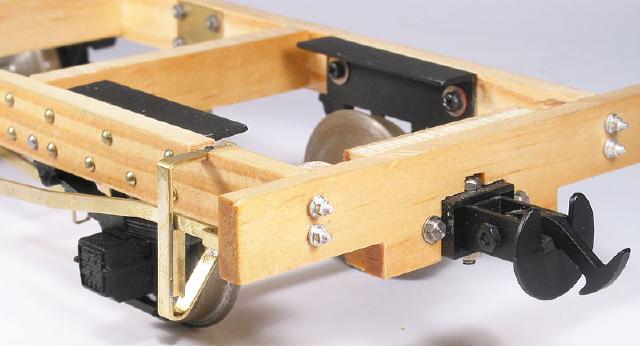
TVT wagons are airbrake fitted and this pic. shows the start of fitting the air brake rigging. Some of the wagons will have this arrangement of separate handbrake and air brake. Other wagons will have a combined arrangement, similar to early VR broad gauge practice.

The brake gear on these models is deliberately overbuilt, as it is designed to work and needs to be strong enough not to bend when used, or be damaged in a derailment.
Regards,
Graeme