Mary ann
-
taliesin001
-
taliesin001
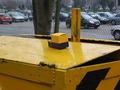
sorry about the dark pictures but this is what the body looks like painted, i am quite pleased with it. i have sorted the electrics, so that will complete the model to running condition, hoipefully during next week. I will also have to source some clutter in the form of coats, lunchboxes, make a couple of toolboxes and buy some tools etc to keep on the loco.


Uploaded with ImageShack.us

Uploaded with ImageShack.us


Uploaded with ImageShack.us

Uploaded with ImageShack.us
-
90733
- Driver

- Posts: 1955
- Joined: Wed Dec 16, 2009 6:17 pm
- Location: West Yorkshire
- Contact:


-
MTA

-
taliesin001
Here are a few lighter pics, with the fuel tank and brake wheel in place. This is the first time i've seen these bits together since they have been painted. I think this surely must be the quickest I've ever built anything! and the total coast will only have been £3.50 for the axelboxes (that's if you don't count all the bits I already had)


Uploaded with ImageShack.us

Uploaded with ImageShack.us
Uploaded with ImageShack.us


Uploaded with ImageShack.us

Uploaded with ImageShack.us
Uploaded with ImageShack.us
-
Pendo Pilot
-
Narrow Minded

-
taliesin001
Nearly finished now, had to cut a hole in the bottom as I realised after seeing the motor it probably wouldn't fit without. Other than that I built the radiator and pipework, added the roof supports, stuck everything down and added a floor, just need to get the electrics back off of my grandad and then it will all be finished, although i still need to add some levers and the bell. Also gave it a bit of weathering but that isn't too obvious it the pics. 
Uploaded with ImageShack.us

Uploaded with ImageShack.us

Uploaded with ImageShack.us

Uploaded with ImageShack.us


Uploaded with ImageShack.us

Uploaded with ImageShack.us

Uploaded with ImageShack.us

Uploaded with ImageShack.us

Uploaded with ImageShack.us


Uploaded with ImageShack.us
-
taliesin001
Basically you cut a piece of 6mm ply to shape, then make two overlays, one for each side to the same shape but with a rectangler for the actual radiator part, then fill this with some mesh. Along the top and bottom of this rectangler add a length of wire going round the whole object and stick into place. Drill a hole and add the ventilator, which I used an 009 gauge wheel and axel for. Paint it and done, doesn't take that long. This isn't exactly as prototype as it isn't actually mesh that is used and mine is a tads too thin, but from a distance it looks fine. I did the fron the same as the back because I don't know what it looks like from behind.
-
SillyBilly
Who is online
Users browsing this forum: No registered users and 20 guests