
Neat. You are getting the hang of model engineering.
The valve chest covers on your loco must be high quality castings. Some grey iron castings I've encountered have have a hard skin that can take the edge off a HSS cutter very quickly when taking a light cut.
A couple of things to think about though for the future.......
That probably was a 4BA counterbore. The pilot of a counterbore is designed to fit the clearance hole for a given fastener, not a threaded one. That's why it seemed to be oversize. That's how it works with metric ones, so I assume BA ones were the same.
Dave is right about not using a milling cutter in a bench drill. It usually leads to disaster, as drill chucks can be loosened by the cutter vibration.
How do I know this? There is a chunk out of my milling vice that constantly reminds me that it wasn't a good idea to use the drill chuck to do a quick milling job, instead of taking the time to replace it with the collet chuck.
Also the quill of a bench drill isn't designed for the side loads generated by a milling cutter. That's the reason the cutter wandered around when you practiced on a piece of steel. I think you dodged a bullet by deciding to turn the cutter by hand.
Regards,
Graeme
5" gauge 0-6-0 Sweet Pea
-
tom_tom_go

- Driver

- Posts: 4824
- Joined: Wed Feb 23, 2011 3:08 am
- Location: Kent, UK
- Contact:
Re: 5" gauge 0-6-0 Sweet Pea
Thank you guys, it is a slow process but I somehow get there in the end.
I am trying, I hope to one day be able to get into it properly using a lathe and mill.
I agree. The covers are interchangeable with both cylinders (I know this because each cover + cylinder is stamped with the numbers one and two for identification and when I received the loco the covers were on opposite cylinders and bolted upside down). Either that or the original builder was very diligent (the chassis has been made with care as the loco can run just under 10 PSI on my rolling road).
My engineering friend did mention this, however, I assumed as the seller had confirmed the part was sized incorrectly that it was wrong as I did message them explaining what I was trying to achieve.
I was very concerned about damaging the covers so this is why I turned it by hand. I only thought to do this as previously I had tapped the holes turning the chuck by hand, experience paid off here!

Re: 5" gauge 0-6-0 Sweet Pea
What a lovely documentation of the whole process, once u started i had to read the while thing. i could very much relate to the challenges and appreciate your ingenuity and resolution to solve them.
As regards your injector, onle one out of 2 on mine work, i have cleaned , adjusted and everyother thing in between, i will likely order the same one as you have , it looks much like the same size in mine. Can I burden you with to measure the approximate dimensions please?
Your solution to oiling the steam chests is great, however not easily possible on my own model as the steam chest is completely under metal shroud . Maybe u can work something out.
Coincidentally , 3 days ago i also ordered the same rolling Roads as you have, I will be making a running setup with maybe with the possibility of adding resistance to some of the rolling bearing to simulate load, I noticed my loco loves working against an opposing force.
-
tom_tom_go
- Driver
- Posts: 4824
- Joined: Wed Feb 23, 2011 3:08 am
- Location: Kent, UK
- Contact:
Re: 5" gauge 0-6-0 Sweet Pea
Thank you for the kind comments.
I will contact you via PM as this thread is about my loco.
I will contact you via PM as this thread is about my loco.
-
tom_tom_go
- Driver
- Posts: 4824
- Joined: Wed Feb 23, 2011 3:08 am
- Location: Kent, UK
- Contact:
Re: 5" gauge 0-6-0 Sweet Pea
Air test of the modified steam chest covers, no leaks on air!

Re: 5" gauge 0-6-0 Sweet Pea
Tom, good news, one step at a time 


Re: 5" gauge 0-6-0 Sweet Pea
Tom you need to make some dome nuts for the valve covers 
https://www.youtube.com/watch?v=OdSOd8zcPEM
https://www.youtube.com/watch?v=OdSOd8zcPEM
-
tom_tom_go
- Driver
- Posts: 4824
- Joined: Wed Feb 23, 2011 3:08 am
- Location: Kent, UK
- Contact:
Re: 5" gauge 0-6-0 Sweet Pea
I don't think I have ever seen domed nuts used on valve covers before. I would of thought that using them would limit how much you can tighten down the cover itself?SeamusOD wrote: ↑Fri May 22, 2020 9:38 pm Tom you need to make some dome nuts for the valve covers
https://www.youtube.com/watch?v=OdSOd8zcPEM
-
tom_tom_go
- Driver
- Posts: 4824
- Joined: Wed Feb 23, 2011 3:08 am
- Location: Kent, UK
- Contact:
Re: 5" gauge 0-6-0 Sweet Pea
These were some open cab ideas I had (purely chosen as they would be easier to make) before I decided I wanted a Kerr Stuart Wren style closed cab which I think will suit the loco given the size of the new chimney:
Reshaping the raised section still didn't look right to me (this part was intended for the whistle to be mounted to it):
This design was based on the 5" gauge 'Titch' cab but again it just didn't look right to me:
To go with the intended Wren style cab I have also decided I want a square saddle tank (this will have the benefit of storing more water than the current saddle tank):
- IMG_20200325_130523-01.jpeg (310.67 KiB) Viewed 11388 times
Reshaping the raised section still didn't look right to me (this part was intended for the whistle to be mounted to it):
- IMG_20200325_133542-01.jpeg (306.7 KiB) Viewed 11388 times
This design was based on the 5" gauge 'Titch' cab but again it just didn't look right to me:
- IMG_20200409_133543-01.jpeg (324.03 KiB) Viewed 11388 times
- IMG_20200409_133524-01.jpeg (317.43 KiB) Viewed 11388 times
To go with the intended Wren style cab I have also decided I want a square saddle tank (this will have the benefit of storing more water than the current saddle tank):
- IMG_20200328_121203-02.jpeg (343.17 KiB) Viewed 11388 times
- IMG_20200328_121212-01.jpeg (309.87 KiB) Viewed 11388 times
-
tom_tom_go
- Driver
- Posts: 4824
- Joined: Wed Feb 23, 2011 3:08 am
- Location: Kent, UK
- Contact:
Re: 5" gauge 0-6-0 Sweet Pea
Cleaning the surface rust covered tender chassis for painting using steel wire and flap wheel attachments in my die grinder:
Assembled and painted (I had to replace some of the steel bolts as they had snapped when being removed due to rust):
Practicing preparing and painting the tender chassis has taught me that despite leaving the paint to harden off for over a week it is easily scuffed so I will not use acrylic based paint on the loco as it is not durable enough.
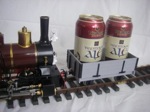
I don't plan to use the tender but here is what it looks like when paired with the loco:
Future painting will be with brushes and Rustoleum CombiColor paints which have been recommended by Nomis who painted his 7 1/4" gauge Wren using this brand.
- IMG_20200523_175611-01.jpeg (422.12 KiB) Viewed 11383 times
Assembled and painted (I had to replace some of the steel bolts as they had snapped when being removed due to rust):
- IMG_20200524_153237-01.jpeg (393.48 KiB) Viewed 11383 times
Practicing preparing and painting the tender chassis has taught me that despite leaving the paint to harden off for over a week it is easily scuffed so I will not use acrylic based paint on the loco as it is not durable enough.
I don't plan to use the tender but here is what it looks like when paired with the loco:
- IMG_20200525_130006-01.jpeg (366.65 KiB) Viewed 11383 times
Future painting will be with brushes and Rustoleum CombiColor paints which have been recommended by Nomis who painted his 7 1/4" gauge Wren using this brand.
Re: 5" gauge 0-6-0 Sweet Pea
Looks nice - I think you were right to discount the titch style cab (it always looks odd to me).
The wren cab is quite a straightforward design, and is more sturdy than it looks.
There are a couple of variations in spectacle plate to consider. Most (like mine) have the quite minimal flat plate, but there has been at least one with a more complete cab that you might like. Hold on....
The wren cab is quite a straightforward design, and is more sturdy than it looks.
There are a couple of variations in spectacle plate to consider. Most (like mine) have the quite minimal flat plate, but there has been at least one with a more complete cab that you might like. Hold on....

Re: 5" gauge 0-6-0 Sweet Pea
Partially enclosed cab on falklands island loco:
 210px-Falkland_Islands_1985_Camber_Railway_Anniversary_a by simon mace, on Flickr
Full spectacle plate on "bevan" at bressingham (which is a sort-of wren copy:
 unnamed by simon mace, on Flickr
And an even more traditional cab on the one that used to be at the goddfa ganol museum (although I think thjs one might have reverted to the original kerr stuart style now...)
 Screenshot_20200715-101256 by simon mace, on Flickr
210px-Falkland_Islands_1985_Camber_Railway_Anniversary_a by simon mace, on FlickrFull spectacle plate on "bevan" at bressingham (which is a sort-of wren copy:
unnamed by simon mace, on FlickrAnd an even more traditional cab on the one that used to be at the goddfa ganol museum (although I think thjs one might have reverted to the original kerr stuart style now...)
Screenshot_20200715-101256 by simon mace, on Flickr-
tom_tom_go
- Driver
- Posts: 4824
- Joined: Wed Feb 23, 2011 3:08 am
- Location: Kent, UK
- Contact:
Re: 5" gauge 0-6-0 Sweet Pea
Thanks for the pictures.
I quite like the standard cab of the Wren as it will be easier to make and allows unrestricted access for operation and maintenance.
The MES I am a member of has suggested to give LibreCAD a try for creating drawings of the square saddle tank and cab so they can be sent off to be laser cut:
https://librecad.org/
Re: 5" gauge 0-6-0 Sweet Pea
I know you didn't really ask for opinions, (but since this is social media you'll get them anyway) but I think the bottom two pictures in the post above are the most aesthetically pleasing. I do like round spectacles and a curved roof. I especially like the green one, as it has a tender like yours. I also agree with you that the square "Pannier" style tank looks better in this particular loco than does the round saddle tank.
-
tom_tom_go
- Driver
- Posts: 4824
- Joined: Wed Feb 23, 2011 3:08 am
- Location: Kent, UK
- Contact:
Re: 5" gauge 0-6-0 Sweet Pea
It's been a while, time for an update.
I fitted new commercial clack valves to the boiler back in August after one of them kept sticking open (after the last failed steaming I discovered that the ball valve in one of them had been sucked into the boiler). When I took apart the other valve I discovered the builder had fitted nitrile balls rather than stainless steel. There are various debates over recommended types of balls used in valves, however, I decided I wanted stainless steel.
Here are the new valves fitted:
I tested them soon after and had the engine in steam for a hour in the garden with the axle pump and injector taking turns filling the boiler with water (they use separate clack valves so this gave each one a proper test to prove they would be reliable).
I have not been able to get to my ME club this year to run the engine and with recent restrictions now in place due to the Coronavirus the club has to closed again to members. I decided as I will not get to run the loco for the foreseeable future that it would be a good time to take the engine apart and paint the chassis so it is ready for next year when hopefully I can get her on the club track again.
Painting is not something I enjoy and I admit I have been putting this off, however, with Nomis posting about his 7 1/4" gauge Wren 'Jynn' build and how he went about painting her it gave me a push to try hand painting my engine instead of using rattle cans (I like the idea of having to do little prep work and painting inside a warm workshop).
So to begin, I had to disconnect all the various pipe work and remove the saddle tank and boiler:
Which left me with this:
A view of the majority of the pipework (that horrible bend to the left side of the picture on the water pipe for the hand pump/axle pump was my first attempt before I bought some fire bricks and learnt to anneal pipes properly, I am going to redo before putting the loco back together):
Smokebox removed and deciding what needs to be taken apart next (notice the orange stuff around the cylinders):
Closer inspection revealed it was gasket sealant, however, the cylinders are already fitted with thick gaskets to reduce heat loss into the chassis so I guess the use of sealant was just a belt and braces approach:
Scraping it off was not getting me anywhere and I didn't want to remove the cylinders so I read that paint stripper works well if left on for a while and sure enough it faked off very easily, result!
I managed to remove all the wheels and motion complete which was another result (notice I have written 'FRONT' on the piece of wood, I just need to remember that I removed this with the chassis upside down!)
And here we are ready for cleaning and painting:
I was able to do all the man handling of the chassis on my own as without the boiler it is just about manageable (the hydraulic lifting table earning its keep here!)
I fitted new commercial clack valves to the boiler back in August after one of them kept sticking open (after the last failed steaming I discovered that the ball valve in one of them had been sucked into the boiler). When I took apart the other valve I discovered the builder had fitted nitrile balls rather than stainless steel. There are various debates over recommended types of balls used in valves, however, I decided I wanted stainless steel.
Here are the new valves fitted:
- IMG_20200820_180242-01.jpeg (334.76 KiB) Viewed 8294 times
- IMG_20200820_180248-01.jpeg (337.22 KiB) Viewed 8294 times
I tested them soon after and had the engine in steam for a hour in the garden with the axle pump and injector taking turns filling the boiler with water (they use separate clack valves so this gave each one a proper test to prove they would be reliable).
I have not been able to get to my ME club this year to run the engine and with recent restrictions now in place due to the Coronavirus the club has to closed again to members. I decided as I will not get to run the loco for the foreseeable future that it would be a good time to take the engine apart and paint the chassis so it is ready for next year when hopefully I can get her on the club track again.
Painting is not something I enjoy and I admit I have been putting this off, however, with Nomis posting about his 7 1/4" gauge Wren 'Jynn' build and how he went about painting her it gave me a push to try hand painting my engine instead of using rattle cans (I like the idea of having to do little prep work and painting inside a warm workshop).
So to begin, I had to disconnect all the various pipe work and remove the saddle tank and boiler:
- IMG_20200919_182729-01.jpeg (350.15 KiB) Viewed 8294 times
- IMG_20200919_181001-01.jpeg (402.41 KiB) Viewed 8294 times
Which left me with this:
- IMG_20200919_175901-01.jpeg (453.54 KiB) Viewed 8294 times
A view of the majority of the pipework (that horrible bend to the left side of the picture on the water pipe for the hand pump/axle pump was my first attempt before I bought some fire bricks and learnt to anneal pipes properly, I am going to redo before putting the loco back together):
- IMG_20200919_175906-01.jpeg (453.38 KiB) Viewed 8294 times
Smokebox removed and deciding what needs to be taken apart next (notice the orange stuff around the cylinders):
- IMG_20200920_163946-01.jpeg (471.89 KiB) Viewed 8294 times
Closer inspection revealed it was gasket sealant, however, the cylinders are already fitted with thick gaskets to reduce heat loss into the chassis so I guess the use of sealant was just a belt and braces approach:
- IMG_20200922_095710-01.jpeg (348.51 KiB) Viewed 8294 times
Scraping it off was not getting me anywhere and I didn't want to remove the cylinders so I read that paint stripper works well if left on for a while and sure enough it faked off very easily, result!
- IMG_20200924_175236-01.jpeg (334.94 KiB) Viewed 8294 times
I managed to remove all the wheels and motion complete which was another result (notice I have written 'FRONT' on the piece of wood, I just need to remember that I removed this with the chassis upside down!)
- IMG_20200922_095854-01.jpeg (436.07 KiB) Viewed 8294 times
And here we are ready for cleaning and painting:
- IMG_20200926_182102-01.jpeg (431.16 KiB) Viewed 8294 times
- IMG_20200926_182047-01.jpeg (446.59 KiB) Viewed 8294 times
I was able to do all the man handling of the chassis on my own as without the boiler it is just about manageable (the hydraulic lifting table earning its keep here!)
Re: 5" gauge 0-6-0 Sweet Pea
I don't have any useful advice: I just wanted to wish you good luck with it and may you have patience until the project is successful and satisfactory.
I, too, absolutely loathe painting. Especially metal.
May the force be with you.
I, too, absolutely loathe painting. Especially metal.
May the force be with you.
Re: 5" gauge 0-6-0 Sweet Pea
Interesting that the nitrile ball got sucked in towards the boiler...
I have tried to get into the habit of opening all steam valves slightly after blowing down - mostly to stop them from jamming as the cool - but it also stops a vacuum forming in the boiler.
Good luck with the painting. I didn't have to deal with any oily bits as my engine was a new-build. Might be worth experimenting with some different de-greasers to avoid trouble later?
I may have used petrol for degreasing before paint in the past (not really recommended for safety reasons - but it does work), although I have seen others say that modern additives can leave a residue that may affect paint.
-
tom_tom_go
- Driver
- Posts: 4824
- Joined: Wed Feb 23, 2011 3:08 am
- Location: Kent, UK
- Contact:
Re: 5" gauge 0-6-0 Sweet Pea
Thanks Keith!
-
tom_tom_go
- Driver
- Posts: 4824
- Joined: Wed Feb 23, 2011 3:08 am
- Location: Kent, UK
- Contact:
Re: 5" gauge 0-6-0 Sweet Pea
I have followed the same ritual since owning the loco and leave all valves open when not in use.
Degreasing wise, I am going to use Isopropanol (because I have some) but given it's highly flammable I am waiting for a day one weekend when it is not raining so I can take the chassis outside to clean. I have a cleaning gun for my air compressor so I might give that a go or just use a cloth and then air clean the chassis afterwards.
My issue now is what colours to choose. There is a huge choice of RAL colours on offer. As I want the loco to have a used look I was thinking RAL9004 signal black for the frames and RAL3020 buffer beam red for the buffer beams? (satin paint):
https://paintersworld.co.uk/7300-combic ... al-paint-1
Who is online
Users browsing this forum: No registered users and 1 guest