Discussion of Live Steam locomotives should be located here
-
Chris Cairns
- Driver

- Posts: 2366
- Joined: Mon Oct 29, 2007 7:25 pm
- Location: Glasgow, Scotland
Post
by Chris Cairns » Fri Dec 30, 2016 2:56 am
Glad to hear you found the problem Jim.
If you are going to pin the return crank I was advised to get 2 drill bits (one for each side) and where possible drill through one side of the return crank before fitting then drilling through the crank pin.
If you are not going to pin the return crank then either use an M2.5 socket head bolt & nut (
https://www.youtube.com/watch?v=4DHhK2lk0BY ) or an M2 x 12mm socket cap & nut (as per the Association's 'Victory'). I've attached the page from the Victory instructions showing the mod suggested for the clamping slot.
Chris Cairns
 Click to download file
-
Big Jim
- Moderator

- Posts: 2694
- Joined: Sat Jul 06, 2013 5:28 pm
- Location: Near Llanelli
Post
by Big Jim » Sat Dec 31, 2016 2:28 pm
Cheers Chris
-
Big Jim
- Moderator
- Posts: 2694
- Joined: Sat Jul 06, 2013 5:28 pm
- Location: Near Llanelli
Post
by Big Jim » Sun Jan 08, 2017 11:27 pm
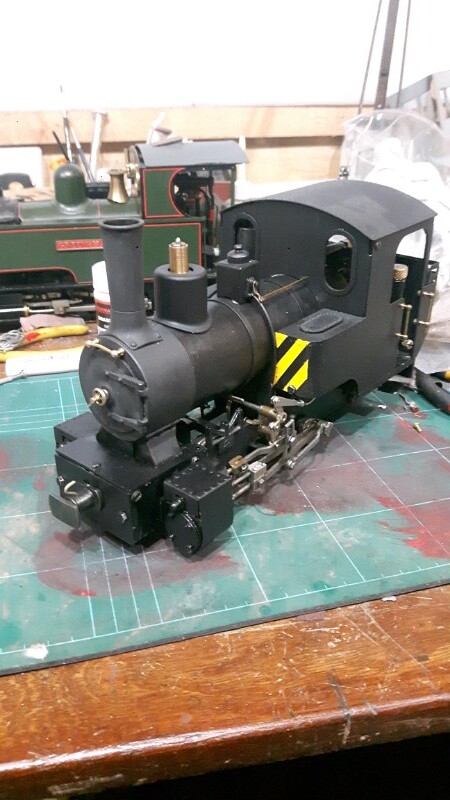
Well then, I had hoped to get the Brick finished tonight. However paint problems have put its rebuild back until tomorrow.
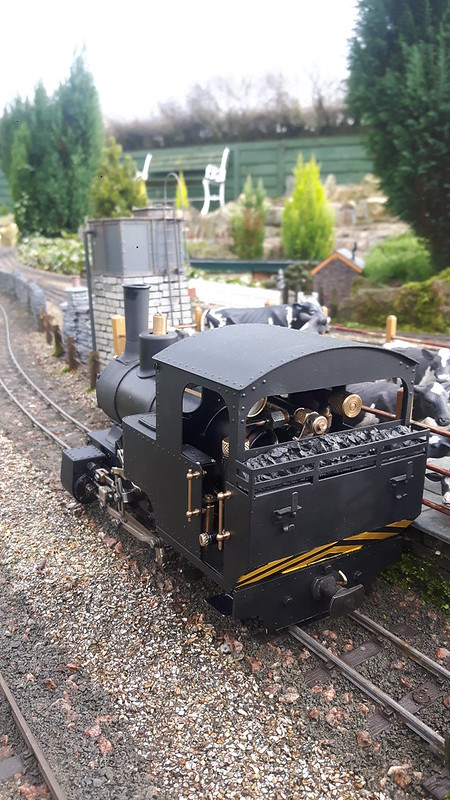
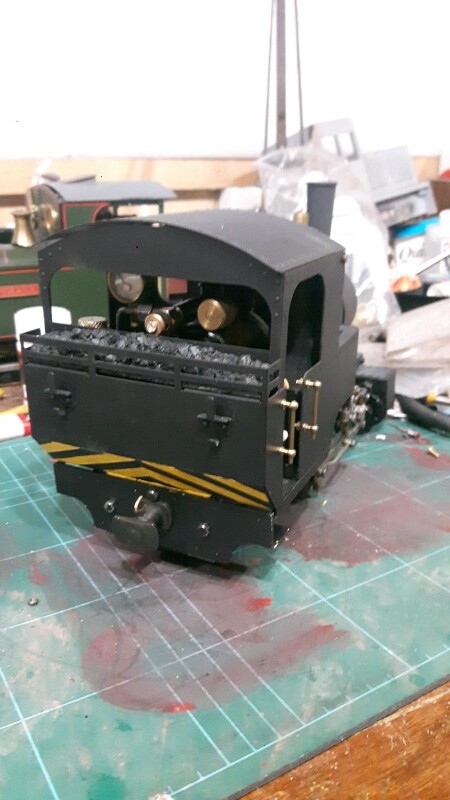
Ol' Bill's compleation was waiting for me to buy a length of RC control rod but I found one in the bottom of the scrap box. So in all his glory, I give you Ol' Bill.
 20170108_223617
 by
bigjimiflash, on Flickr
 20170108_223631
 by
bigjimiflash, on Flickr
I am going to have to get some metal blacking on the safety valve as it sticks out a bit.
If at first you don't succeed, use a bigger hammer!
-
LNR
- Driver
- Posts: 1542
- Joined: Sat Feb 27, 2016 5:26 am
- Location: Australia
Post
by LNR » Mon Jan 09, 2017 2:03 am
Nice colour for a working engine Jim. Maintained but not much spit and polish. That's the way I like to see engines. Hope it runs as good as it looks.
Grant.
-
Big Jim
- Moderator
- Posts: 2694
- Joined: Sat Jul 06, 2013 5:28 pm
- Location: Near Llanelli
Post
by Big Jim » Mon Jan 09, 2017 8:07 am
It runs rather nicely.
It may be up for a repaint rather earlier than I would like as the paint doesn't seem very tough. But I am rather pleased with it. The matt paint on the boiler has gone satin with the oil spray but I quite like the effect.
-
Chris Cairns
- Driver
- Posts: 2366
- Joined: Mon Oct 29, 2007 7:25 pm
- Location: Glasgow, Scotland
Post
by Chris Cairns » Tue Jan 10, 2017 4:14 pm
Looks great Jim.
Your safety valve seems to be a bit higher above the cover than I've seen on other Billy's.
Chris Cairns
-
williamfj
- Trainee Driver

- Posts: 605
- Joined: Sat Nov 20, 2010 9:20 pm
- Location: York
Post
by williamfj » Tue Jan 10, 2017 4:21 pm
Ol Bill looks really good, the cut back bufferbeam rather suits the Billy.
-
Big Jim
- Moderator
- Posts: 2694
- Joined: Sat Jul 06, 2013 5:28 pm
- Location: Near Llanelli
Post
by Big Jim » Tue Jan 10, 2017 5:03 pm
Thanks, It was one of the things that I wasn't keen on with the Billy, a dirty great front buffer beam and nothing behind it. I was going to build a foot plate but decided against it so I just cut a new buffer beam from brass and pressed some rivets into it.
I wondered about the safety valve, it screws into a larger lump of brass, which I think R/H refer to as a filler plug. It does look a little OTT, hence the desire to darken it.
Since this pic was taken I have gone over various chipped bits of paint and screw heads and it all looks okay. I think the handrails need a bit of a darken. When it has been run a bit I will see what needs doing regarding weathering.
I did wonder about the wasp stripes, I know they are a bit 'marmite' but I like them. I did toy with the idea of painting the buffer beams but I saw a picture of a SG loco at one of the NCB collieries in the Warwickshire area with just the tank fronts and rear bunker painted and it looked okay so I copied it. (In the same book was a saddle tank with the front of the tank painted with stripes that looked like they were radiating from the smoke box door and that looked stunning. )
The next project is to build a small breakdown/engineering train to run behind it. I don't fancy building a crane from scratch but you never know.
Thanks for the kind words folks
If at first you don't succeed, use a bigger hammer!
-
Dannypenguin
- Trainee Driver
- Posts: 632
- Joined: Tue Feb 26, 2013 9:57 am
- Location: Forest of Dean, UK
-
Contact:
Post
by Dannypenguin » Tue Jan 10, 2017 6:32 pm
Can't believe that's the same engine! :O
-
Big Jim
- Moderator
- Posts: 2694
- Joined: Sat Jul 06, 2013 5:28 pm
- Location: Near Llanelli
Post
by Big Jim » Tue Jan 10, 2017 9:46 pm
Yes it is that one.
-
Big Jim
- Moderator
- Posts: 2694
- Joined: Sat Jul 06, 2013 5:28 pm
- Location: Near Llanelli
Post
by Big Jim » Sun Jan 15, 2017 8:07 pm
If at first you don't succeed, use a bigger hammer!
-
Peter Butler
- Driver
- Posts: 5244
- Joined: Sun Sep 09, 2012 10:33 pm
- Location: West Wales
Post
by Peter Butler » Sun Jan 15, 2017 11:20 pm
A very nice looking loco and a beautifully smooth runner, well done for all your work Jim.
The best things in life are free.... so why am I doing this?
-
SimonWood
- Trainee Driver
- Posts: 658
- Joined: Tue Apr 07, 2015 9:46 pm
- Location: West Wales
-
Contact:
Post
by SimonWood » Mon Jan 16, 2017 1:29 pm
That finish looks even better in the daylight, Jim, it really does look good. (Lovely setting of course, too, Peter!)
Who is online
Users browsing this forum: No registered users and 12 guests