Bit of background first. Myself (Rob) and my girlfriend (Nicki) purchased our first house in September 2013. My dad already had a 16mm railway in his garden so while viewing properties I would always jokingly plan out a railway. Once we got our a house (Luckily with a garden) I was told I couldn't build a railway until some re-decorating was completed.
January 2014 came and no de-cording had been done (Infact isn't only just been done in the last few weeks). The windy weather however had blown down the fence at the bottom of the garden. Then came the smooth move of saying we'll build a wall to match our neighbours, but we might as-well make it wide enough to run a train on it. I'd learned from my dad's railway that while ground level tracks blend in better and are generally cheaper and easier to build, its a pain reaching down. I'm still in my 20's and I'm thinking about back problems... Anyway progress sort of continued on from then. Luckly my girlfreind does enjoy the railway and has helped a lot along the way. I guess she thought sooner it was done, sooner I got round to decorating.
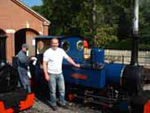
So some pictures before I ramble on to long.
First a track layout was created.

I was to use the shed for one end of the U shape, the layout software couldn't do a sharp enough curve but it will stay within the shed. The loop is below the run-around at the shed end. Both tracks rise and fall at 1/50 to clear each other.
Work Starts Feb 2014
First, out came the fence and the wall foundation dug.

Next the brick wall is built at the bottom of our garden. A path runs along the rear.

I should just say, my dad's a retired builder/joiner so its made life a whole lot easier. When I could get hold of him mind you! Retired my bottom!
Next the inner stone wall is started.

Then the next section is started.

We then fill the walls with rubble and top with soil. The station is left without soil to be concreted later.

Upright flags are used to support the base of the concrete track base so it can't sink as easy.

The keen eyed amongst you will spot the corner missing from our wall. A waterfall anyone?

A small 12V pump is used to circulate water from the tank below.
Let me know what you think so far. I'll put up another update tomorrow.[/img]