The Charnwood Forest Light Railway

A place for the discussion of garden railways and any garden style/scale portable and/or indoor layouts
User avatar
Soar Valley Light
Driver
Driver
Posts: 1451
Joined: Sun Dec 08, 2013 5:18 pm
Location: North West Leicestershire

Re: The Charnwood Forest Light Railway

Post by Soar Valley Light » Mon Apr 17, 2017 9:56 pm

Hello all,

For once updates have been more sparse than actual progress on the CFLR. The contractors have been pressing on with the civil engineering, filling in the trackbed with stone for drainage and stability, filling up the embankments to final level, trimming and filling the surrounding landscape and developing the 'finished article' in some of the structural civil engineering. Many of these activities are 'extras' to the original construction contract, the management have had to use all their ingenuity and skill to come up with ways to source and adapt all and any available materials to keep the costs to a minimum! :shock:

In truth, whilst there are still some minor works I can progress around the railway, I will be in danger of having to undo work to build the actual permanent way if I'm not careful though (That or settle for having modelled one of those unfinished schemes that never got beyond the earthworks stage!). The logical place to begin tracklaying (can you believe I'm finally considering it!) is from one of the turnouts. In for a penny in for a pound - I've designed, drawn up and begun building the special curved turnout for the throat of the main terminus. So far so good, but then it is still early days!

Anyhow, pictures speak a thousand words so here are a few of recent activities.
CLR Embankments 1.jpg
CLR Embankments 1.jpg (938.42 KiB) Viewed 4755 times
CLR turnout buiulding step 1.jpg
CLR turnout buiulding step 1.jpg (526.77 KiB) Viewed 4755 times
CLR Bridge 2 excavation.jpg
CLR Bridge 2 excavation.jpg (763.04 KiB) Viewed 4755 times
CLR Bridge 1 excavation.jpg
CLR Bridge 1 excavation.jpg (899.76 KiB) Viewed 4755 times
CLR view along embankment.jpg
CLR view along embankment.jpg (756.38 KiB) Viewed 4755 times
CLR high bank.jpg
CLR high bank.jpg (924.42 KiB) Viewed 4755 times
CLR embankments central section.jpg
CLR embankments central section.jpg (913.85 KiB) Viewed 4755 times
CLR Embankments 1.jpg
CLR Embankments 1.jpg (938.42 KiB) Viewed 4755 times
As you can see, part of the work has involved digging out for a couple of underbridges. I plan to build wing walls and abutments out of small granite, topped off with some sort of plate girder span on the outside of the filcris runners.

I've always intended to do something to hide the concrete trough sections which I used to retain the earth beside the path into the sunken operating area. I've managed to source a few extra bricks to remove the first section. I'm hoping for more to replace further sections, or to face over them (depending upon my ability to source the bricks!).

I'll try not to leave it so long before the next up date!

Andrew
"Smith! Why do you only come to work four days a week?
"'cause I can't manage on three gaffer!"

User avatar
LNR
Driver
Driver
Posts: 1542
Joined: Sat Feb 27, 2016 5:26 am
Location: Australia

Re: The Charnwood Forest Light Railway

Post by LNR » Tue Apr 18, 2017 1:19 am

Coming along in leaps and bounds now Andrew. It's great to see, as an outsider, the vision that you have always had in your mind, coming to fruition. On with the track work.
Grant.

User avatar
ge_rik
Administrator
Administrator
Posts: 6580
Joined: Sun Oct 25, 2009 10:20 pm
Location: Cheshire
Contact:

Re: The Charnwood Forest Light Railway

Post by ge_rik » Tue Apr 18, 2017 7:55 am

Looking really good, Andrew. Filcris certainly encourages the inclusion of sweeping curves. I'm just visualising a train chuffing along that section with the embankment and bridges.

Rik
------------------------
Peckforton Light Railway - Blog Facebook Youtube

User avatar
markoteal
Trainee Driver
Trainee Driver
Posts: 763
Joined: Mon Apr 18, 2016 6:23 pm
Location: Yorkshire

Re: The Charnwood Forest Light Railway

Post by markoteal » Tue Apr 18, 2017 10:23 am

Great curves Andrew - be great to see the trains working their way through that landscape and across that landscape
Where did I put that uncoupler?

User avatar
Dwayne
Trainee Driver
Trainee Driver
Posts: 681
Joined: Mon Jul 04, 2011 12:15 am
Location: Oklahoma City

Re: The Charnwood Forest Light Railway

Post by Dwayne » Tue Apr 18, 2017 1:26 pm

Great work Andrew. Loving the progress and looking forward to your track laying. :thumbup:

SpudUk
Fireman
Fireman
Posts: 329
Joined: Thu Feb 27, 2014 4:25 pm
Location: Bridgend

Re: The Charnwood Forest Light Railway

Post by SpudUk » Tue Apr 18, 2017 2:48 pm

Everyone seems to be using Filcris these days - is it actually any good?
Chris Auckland

User avatar
daan
Fireman
Fireman
Posts: 266
Joined: Wed Apr 12, 2017 9:25 am

Re: The Charnwood Forest Light Railway

Post by daan » Tue Apr 18, 2017 6:15 pm

Very nice curves in the landscape there Andrew.. It looks like a river meandering through the garden. like it's always been there.. indeed very close to tracklaying now. Nice touch to make the track and points yourself..
Also nice that you'll be able to spot train at eyelevel later on, due to the dugout in the middle. Gives a lot of nice photo oppurtunities!
"En schöne Gruess" from an Alpine railway in Holland.

User avatar
Soar Valley Light
Driver
Driver
Posts: 1451
Joined: Sun Dec 08, 2013 5:18 pm
Location: North West Leicestershire

Re: The Charnwood Forest Light Railway

Post by Soar Valley Light » Tue Apr 18, 2017 9:31 pm

Thanks for all the encouraging comments chaps, they really help.

Chris,

Filcris is a great material to work with and obviously very durable. It's not cheap but then it should have the benefit of lasting several times the lifespan of wooden alternatives. I've noticed that it expands in very hot weather. I knew about this before I began with it, having discussed it with a very enthusiastic and satisfied user of it who I met at the Filcris stand at Peterborough two years ago. His comments were unsolicited, the Filcris team weren't involved in the talk. He recommended burying the construction, telling me that he had no problems after he'd done this. It's early days for my line yet but so far I agree with everything he said. I've only had the Filcris in place fro about six months but in the hot weather about a week ago I did notice some minor pushing out on the exposed curves where filling up was still ongoing (about 1/4" (5mm) at worst). Those sections which I had finished burying never shifted. So far so good! Pippindo has used the stuff up in the air and exposed and tells me he has had no problems with this. He has used top boards on top of his frame runners whereas I have not. That probably accounts for the greater rigidity.

Daan,

The view should indeed be good, at the end of the sunken path I've built a simple bench out of blue brick and a short length of 12" to the foot scale crossing timber! :shock: :roll: Sitting there puts the line at eye level (or thereabouts), there is also sufficient ledge space on the adjacent walls for storing cups of tea and glasses of beer...... I can't wait! :lol:

Andrew
"Smith! Why do you only come to work four days a week?
"'cause I can't manage on three gaffer!"

SpudUk
Fireman
Fireman
Posts: 329
Joined: Thu Feb 27, 2014 4:25 pm
Location: Bridgend

Re: The Charnwood Forest Light Railway

Post by SpudUk » Wed Apr 19, 2017 7:47 am

Thanks Andrew - I'll watch with interest as it approaches completion!
Chris Auckland

User avatar
Lonsdaler
Driver
Driver
Posts: 1229
Joined: Tue May 20, 2014 9:50 am
Location: North Yorkshire

Re: The Charnwood Forest Light Railway

Post by Lonsdaler » Wed Apr 19, 2017 4:16 pm

SpudUk wrote: Tue Apr 18, 2017 2:48 pm Everyone seems to be using Filcris these days - is it actually any good?
It is excellent to work with, and holds curves well. But beware the temptation to use other 'plastic wood'. I have a dealer of recycled plastic wood near to me, so thought I would try some of their offerings which appeared to be cheaper, having previously used filcris. The equivalent offered for the 'strings' is supposed to be roofing batten. It seems very susceptible to stretching and shrinking according to temperature - more so than filcris.
So I would say by all means try other brands, but try to see it in use before you buy.
(The section I made using the cheaper stuff has been packed out with gravel to try and increase it's 'thermal resistance', but as it's meant to be a causeway, I'm not going to be able to bank it like Andrew has - although that is exactly what I've done with filcris elsewhere.
Phil

Sporadic Garden Railer who's inconsistencies know no bounds

My Line - https://gardenrails.org/forum/viewtopic ... 41&t=11077

User avatar
Soar Valley Light
Driver
Driver
Posts: 1451
Joined: Sun Dec 08, 2013 5:18 pm
Location: North West Leicestershire

Re: The Charnwood Forest Light Railway

Post by Soar Valley Light » Sun Apr 30, 2017 9:03 pm

I thought I'd entered an update here a couple of weeks ago but I seem to have failed to see the job through!

The particularly chilly weather hasn't encouraged my out door activities, although I have progressed with some planting to good effect. I've also increased the stockpile of bricks ready for more walling to screen or replace the concrete troughing units. If you discount stacking some logs on the drying racks and feeding the birds each day that's just about been it outdoors. Indoors has been a different matter! I set too with a pile of Cliff Barkers crossing timbers, chairs, rail and my own template drawing and set about constructing the first turnout. It's been a journey of discovery, despite my experience in 12" to the foot scale. I've just about finished the beast today, although just when I thought I had done so I noticed that I'd missed all the intermediate slide chairs between the switch toe and the heel joint! Nothing more I could do today as the my last two slide chairs had just gone under the crossing nose to form the 'A' chair. Mr Barker can stand by for an order shortly! There were a couple of draughting issues. The first was a real schoolboy error made at the calculation stage, when calculating the switch heel off set dimension I neglected to add to it the width of the rail head, consequently my calculated switch angle was out and the gauge edge of the rail was drawn where the back edge should have been, meaning the turnout lead was too long by 9mm and there was an inadequate flangeway at the heel. The former was 'fudgeable', the latter rather less so. The error was discovered as a result of using a roller gauge to set the second switch heel immediately after I'd fixed the heel chairs for the first. fortunately the plastic was still soft enough to ease the chair out to provide a proper flangeway. Building up the crossing nose was another learning curve, it's gone together ok but is untested as yet. I'm sure I shall improve on the process with the next turnout. The procedure seemed to work ok, based largely on the normal procedure for building up full sized turnouts. I used a single rail for the outside 'straight' (or through) leg. this would normally be a stock rail and a check closure rail fished together at the switch heel but omitting the heel joint stiffened up this 'datum' rail. This was chaired up and fixed down. Next I formed the switch rail to the required curve and formed the 'loose heel' joint. Next I made up another long rail for the other stock rail and check closure combined. this was fixed down to gauge at the switch toe and switch heel, and the heel joint formed but left loose beyond that. Now came the construction of the crossing V and the wing rails. These were assembled loosely and the through route fixed down, taking great care to get the crossing nose to gauge and line. The 'straight' closure rail came next, chaired up and glued down. This was followed by the curved closure rail which got the same treatment. Both these rails sat in the switch heel hinge fishplate at one end and were fished to the wing fronts at the other end. Having fished these joints in this way I'm less concerned about any mechanical weakness in using fishplates in future. Last but not least the curved long outside rail was gauged and fixed down from the switch heel to the crossing. The very last thing was to cut and bend the checkrails to shape and fit them. Having drawn an awful lot of turnouts over the years I was surprised to find a gauge error in my drawing at the crossing nose end. The lesson there is that, if you are drawing your own templates, take your time and exercise the greatest care when measuring the gauge. I took a few pictures during the work........

Andrew
Attachments
clr turnout 3.jpg
clr turnout 3.jpg (292.53 KiB) Viewed 5191 times
CLR turnout 4.jpg
CLR turnout 4.jpg (341.22 KiB) Viewed 5191 times
CLR turnout building 5.jpg
CLR turnout building 5.jpg (476.61 KiB) Viewed 5191 times
CLR turnout buiulding step 1.jpg
CLR turnout buiulding step 1.jpg (526.77 KiB) Viewed 5191 times
Last edited by Soar Valley Light on Sun May 28, 2017 9:15 pm, edited 1 time in total.
"Smith! Why do you only come to work four days a week?
"'cause I can't manage on three gaffer!"

User avatar
Dwayne
Trainee Driver
Trainee Driver
Posts: 681
Joined: Mon Jul 04, 2011 12:15 am
Location: Oklahoma City

Re: The Charnwood Forest Light Railway

Post by Dwayne » Mon May 01, 2017 1:28 pm

Good job Andrew. The first switch is always the most difficult and a learning experience. :thumbup:

One thing I learned was to always begin first with frog...

User avatar
tom_tom_go
Driver
Driver
Posts: 4824
Joined: Wed Feb 23, 2011 3:08 am
Location: Kent, UK
Contact:

Re: The Charnwood Forest Light Railway

Post by tom_tom_go » Thu May 04, 2017 11:38 am

Oooh, stainless steel track :thumbup:

That's going to look great when it get's outside with a little surface rust over it.

User avatar
daan
Fireman
Fireman
Posts: 266
Joined: Wed Apr 12, 2017 9:25 am

Re: The Charnwood Forest Light Railway

Post by daan » Thu May 04, 2017 1:55 pm

Wow, very nice trackwork..! I have tried making my own switches once.. In 009 and was 'cured" after that experience.. :lol:
What sort of sleepers do you use? It looks like some sort of wood to me..
"En schöne Gruess" from an Alpine railway in Holland.

User avatar
ge_rik
Administrator
Administrator
Posts: 6580
Joined: Sun Oct 25, 2009 10:20 pm
Location: Cheshire
Contact:

Re: The Charnwood Forest Light Railway

Post by ge_rik » Thu May 04, 2017 3:11 pm

That trackwork looks blooming good to me, Andrew. Really looking forward to seeing it in situ. This is going to be a high-grade railway when it's done.

Rik
------------------------
Peckforton Light Railway - Blog Facebook Youtube

User avatar
Soar Valley Light
Driver
Driver
Posts: 1451
Joined: Sun Dec 08, 2013 5:18 pm
Location: North West Leicestershire

Re: The Charnwood Forest Light Railway

Post by Soar Valley Light » Thu May 04, 2017 8:17 pm

Thanks guys,

I hope you're right Rik!

Daan,

I'm using Cliff Barkers Gauge 1 products. They are good quality and easy to use.

Andrew
"Smith! Why do you only come to work four days a week?
"'cause I can't manage on three gaffer!"

User avatar
Soar Valley Light
Driver
Driver
Posts: 1451
Joined: Sun Dec 08, 2013 5:18 pm
Location: North West Leicestershire

Re: The Charnwood Forest Light Railway

Post by Soar Valley Light » Sun May 28, 2017 9:14 pm

Hello All,

Progress on the CFLR has been slow of late. It's the time of year when the allotment demands much more attention and work has been a little demanding too. There has been a spin off benefit to this, it has allowed the earthworks to settle, this has been more significant than anticipated. In several places the ground has dropped away from the Filcris track support structure, resulting in it's partial exposure. This in turn has led to significant thermal movement. With no track in place I have easily been able to tip more material on the embankment structures giving additional support and building levels back up. In fact I have overtipped slightly to a new level slightly higher than the track bed level. Unfortunately the one short stretch I've already planted up with alpines is one of the highest sections of bank and so worst affected. Overtipping is not an option without moving the plants and so I'm looking at possible alternatives first.

Well, that's a brief update of the last couple of months, now for today's news. Regular readers of this saga may wish to avail themselves of soft seating and padded surroundings to guard against injuries from fainting. The first permanent track on the CFLR was laid this afternoon! :bounce: I've been holding off making a start pending completion of the station throat turnout, however, it struck me straight between the eyes yesterday (completely out of the blue and for no good reason! :? ) that the track through the tunnel needed to be a single length, with no join part way through. Laying the track before tunnel construction would have been far simpler and far more sensible :bom: , unfortunately the construction of the 'non- railway' elements of the structure meant that this wasn't possible (and I admit to not being sensible! :oops:). A three foot length of track just gets me from portal to portal. Now, I'm not so daft that I didn't consider clearances when building the hole, I even considered end and centre throw :study: . As previous posts on here show, the Filcris base went in before any other work so the walls and stonework was positioned by measuring off this. I've comforted myself with this knowledge every time I've looked at the structure and thought "That looks bloody tight!" :shock: The proof of any pudding is always in the eating and today it was time for desert! I carefully positioned the length of track centrally through the tightest section at the north end of the tunnel. Time to fix it down now in sufficient places to resist any lateral movement. I've settled on using brass pins to pin the track to the Filcris base. Great idea - if you're not working in a tunnel with access only from the ends! :evil: I managed it, tricky though it was. A piece of 12" to the foot equipment proved the saving grace in the form of a welders wedge, used for aligning the rails prior to dropping a thermit weld on the big railway but on the CFLR just the right size for knocking in brass pins halfway through a tunnel!!! :sunny: 
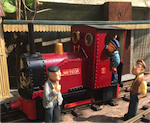
Now for the real moment of truth - out with a bogie open (the longest vehicle on the CFLR), the Observation coach (the widest vehicle on the CFLR) and an Accucraft Lawley (the biggest lump of motive power). All were pushed through the bore and clearances carefully watched. They all got through, although in the case of the 'Obo', only just!
CLR obo coach clearance off side.jpg
CLR obo coach clearance off side.jpg (450.36 KiB) Viewed 4984 times
CLR Obo coach clearance near side.jpg
CLR Obo coach clearance near side.jpg (759.91 KiB) Viewed 4984 times
CLR Lawley clearance off side.jpg
CLR Lawley clearance off side.jpg (571.75 KiB) Viewed 4984 times
CLR Lawley clearance near side.jpg
CLR Lawley clearance near side.jpg (665.21 KiB) Viewed 4984 times
My appetite was now whetted for this track laying business and so I layed a further length north of the tunnel. This is the tightest curve on this part of the railway at about 1320mm radius. I wanted to make sure the curve tied in with the alignment through the tunnel - it did :thumbup:
CLR Tunnel north approach track laying.jpg
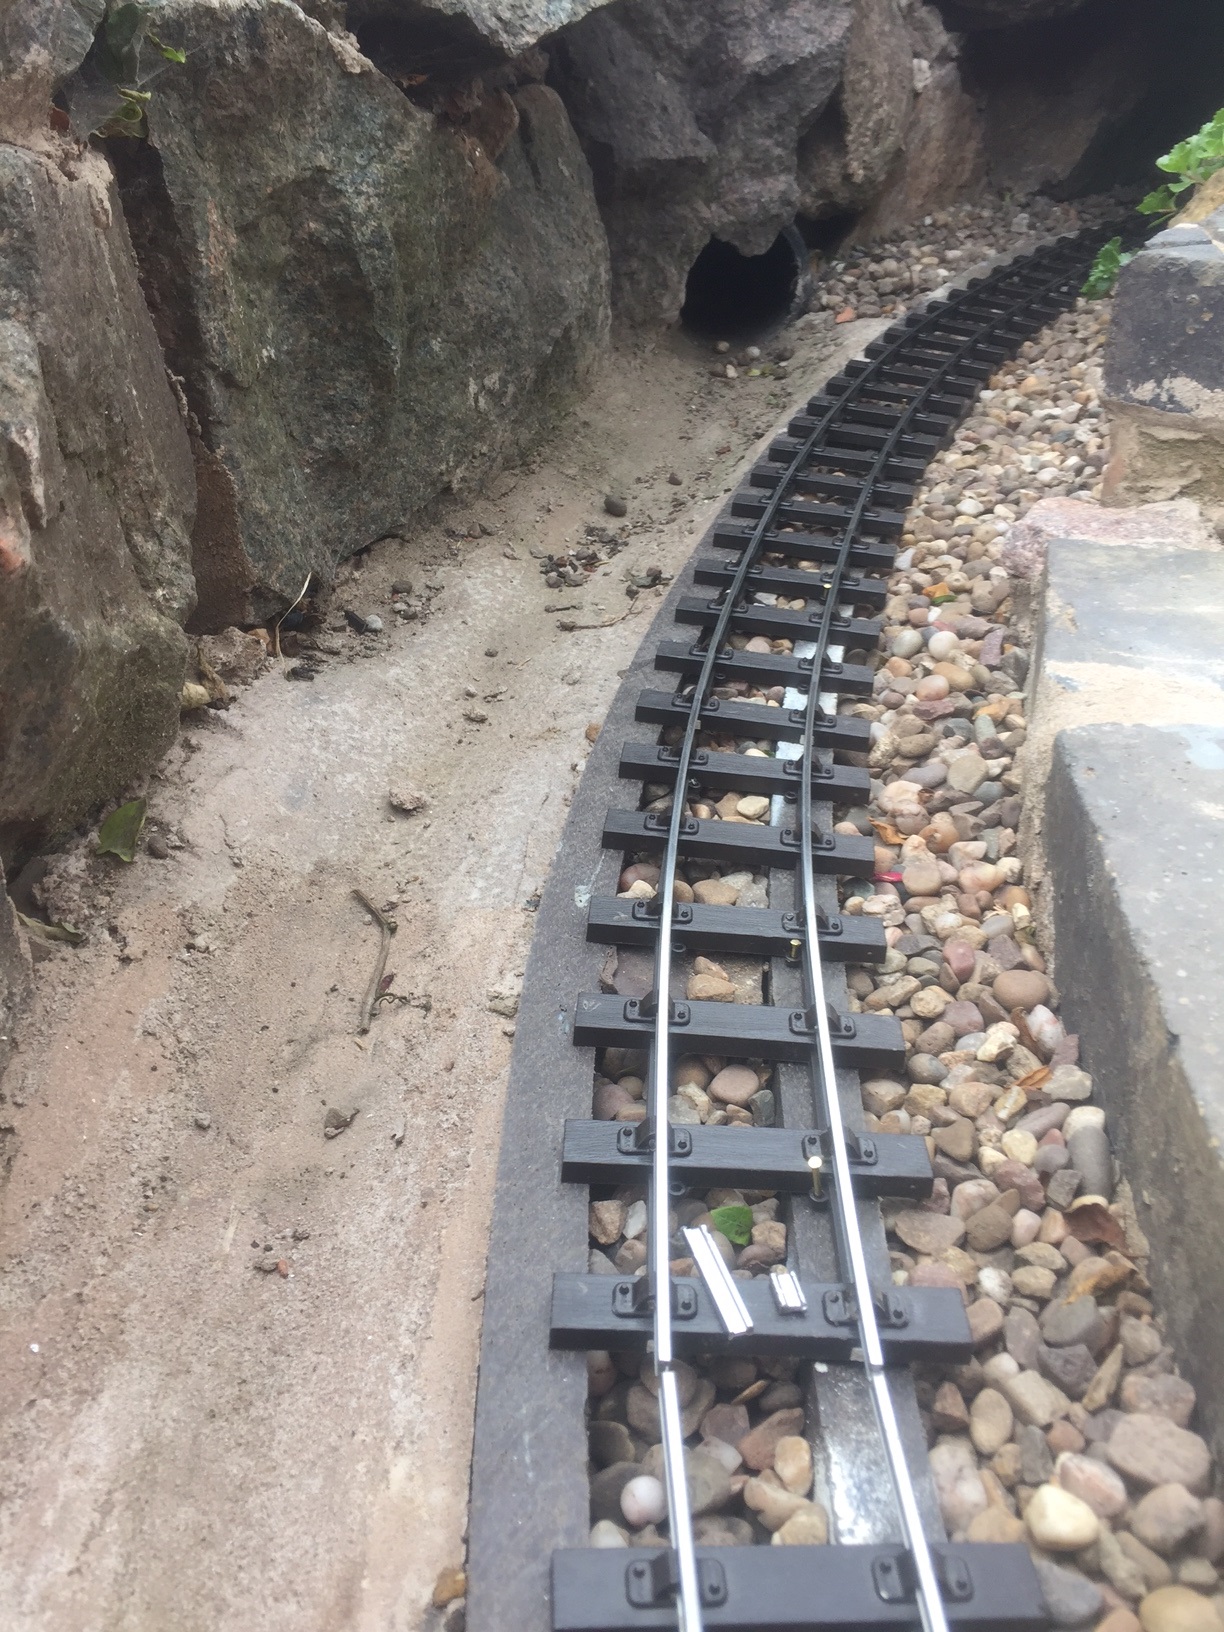
CLR Tunnel north approach track laying.jpg (752.11 KiB) Viewed 4984 times
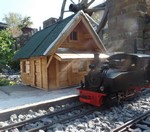
I looked at continuing through the step area towards the station throat turnout but resisted fixing anything down, deciding that finalising this would be far better done once the turnout is finally completed and ready to lay.
CLR proposed turnout location.jpg
CLR proposed turnout location.jpg (779.51 KiB) Viewed 4984 times
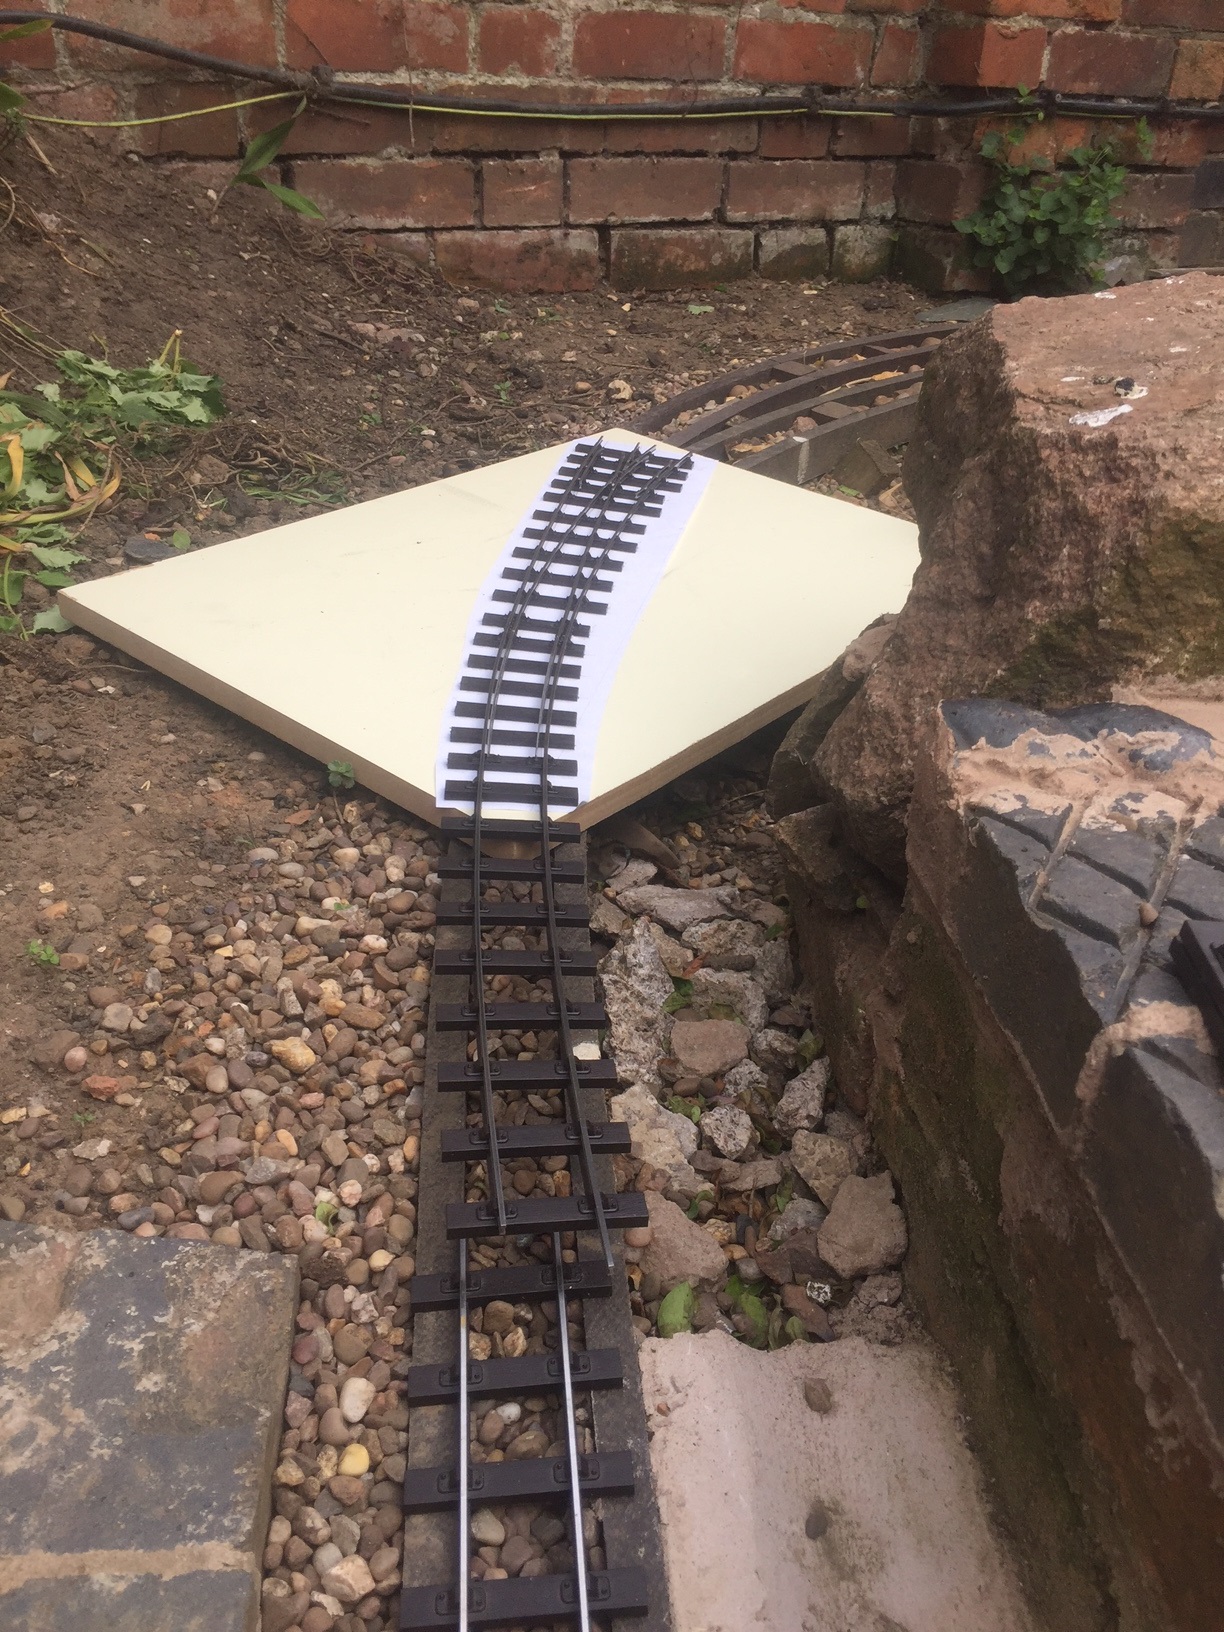
So, operations transferred south of the tunnel, another three lengths of track went down before the need to wrap up and get the evening meal ready called a halt. Construction on this section was the first attempt at what I propose to be the standard method of construction. A strip of terram (used in full sized track renewals) is cut twice the width of the sleeper base. The earth is lowered either side of the Filcris and the terram rolled out centrally and the edges are trapped with pea gravel. The track is then positioned on top of this and carefully pinned down to the Filcris support through the terram, making sure that the pins are nicely clear of the edges of the support. It seems to work OK, I'll see how it stands up to the thermal effects. I'm very hopeful that the covering of the Filcris supports in this way, especially with a white material, will help shield it from the worst of the sun's heat.
CLR head of steel May 17.jpg
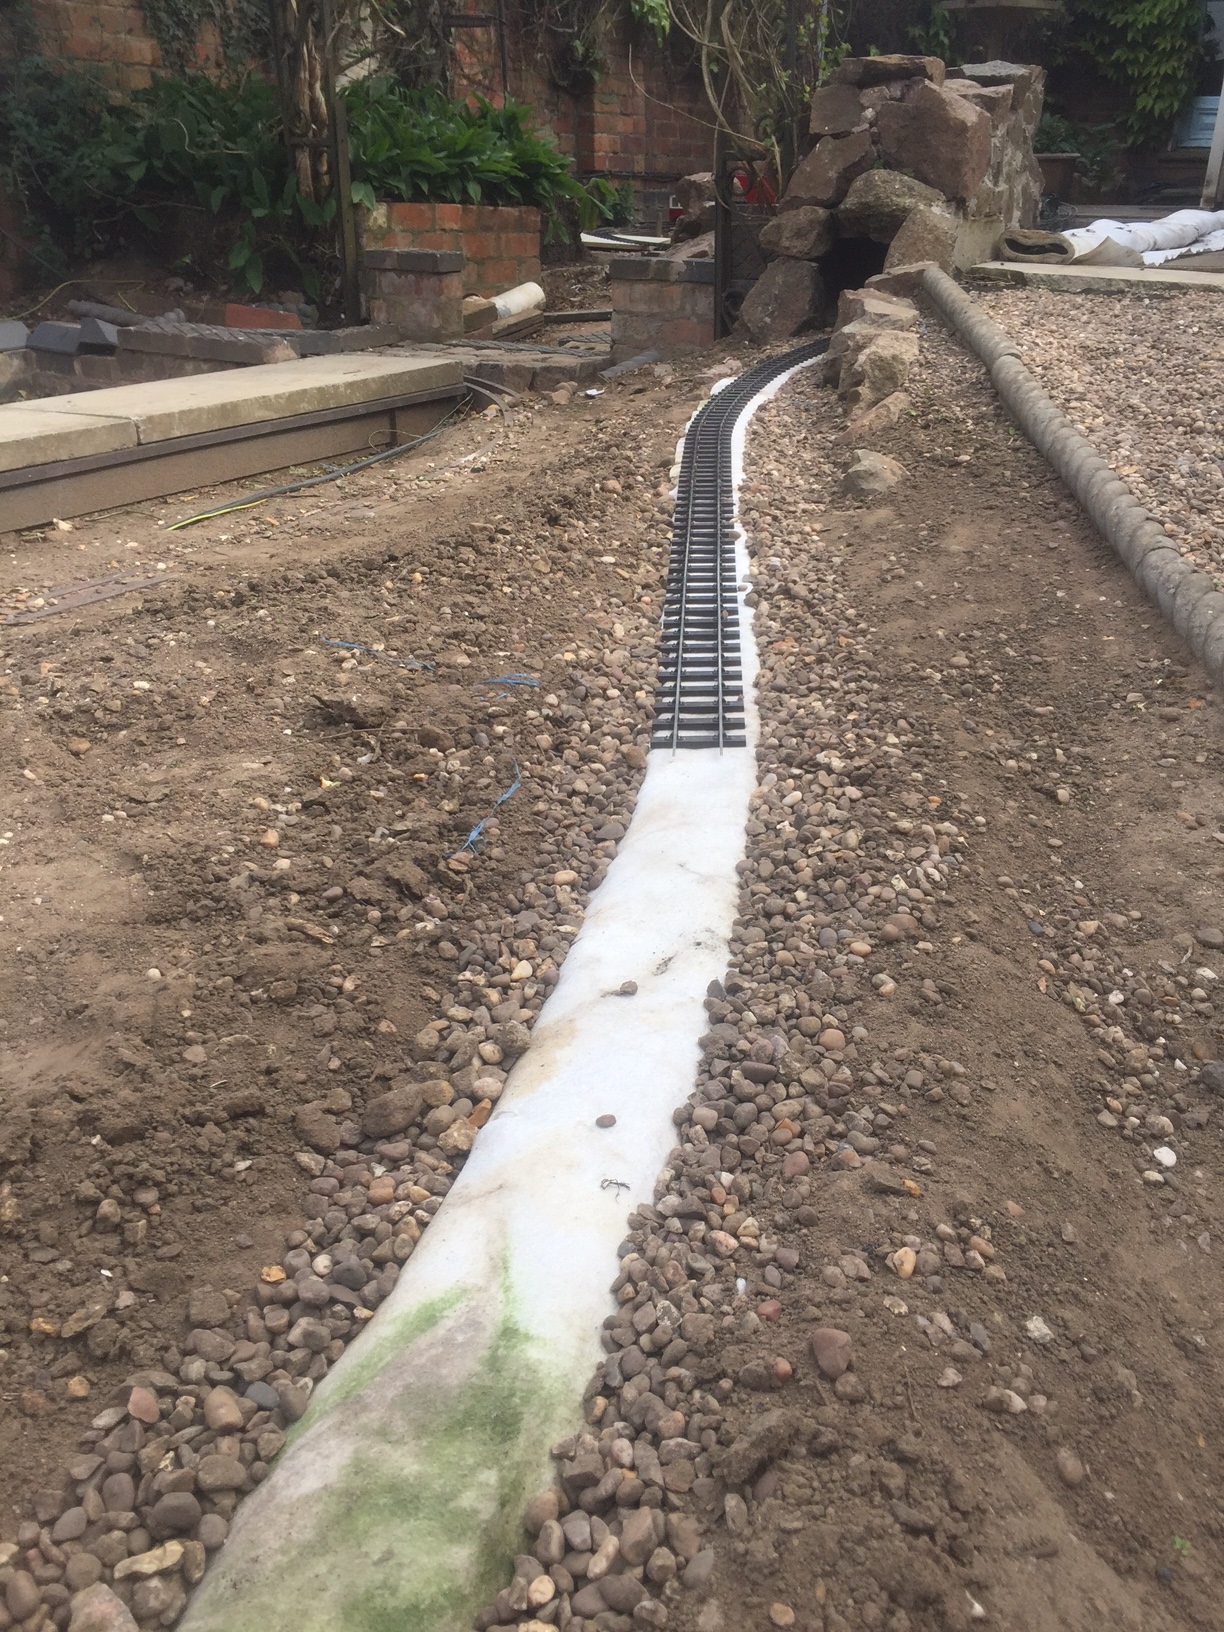
CLR head of steel May 17.jpg (938.38 KiB) Viewed 4984 times
The section through the tunnel and up to the station throat have not had the terram installed. Thermal issues shouldn't be a problem here, the tunnel is in shade (Obviously :shock:), the Filcris foundation round the curve and through the steps is far more rigidly supported (no signs of movement have been detected thus far) and much less weed problem is expected as the ground beneath is rubble and mortar.
clr track through tunnel.jpg
clr track through tunnel.jpg (727.95 KiB) Viewed 4984 times
To say I'm chuffed (pun intended :king: ) would be an understatement! The temptation to get the Lawley back out of the box and raise steam was hard to resist. It's over two years since I steamed anything now, I never had much experience and I think I may need some hands on guidance and advice when the time comes again!

There was a down side to today though and it's a warning to all. I bought the Observation coach at Peterborough two years ago. I saw it almost as soon as I got there and agonised about it all day. It was still there at 4:0pm and at that point I weakened - I was clearly meant to have it! It's a beautifully made coach and even more beautifully finished. It has lain in it's box ever since, safely stored away in the cellar with the rest of the stock (it's a very dry seller and I have an de-humidifier running permanently for the benefit of the Hornby Dublo). When lifted the Obo up to remove it from the box the first thing I noticed was a sheet of folded kitchen roll on which the coach had been lying. Now, being a Dublo collector I know all about the risks of wrapping things in kitchen roll and I've seen the damage it can do to paint work. I never noticed the seller put this under the coach when I bought it, if I had it would have been removed immediately. Sadly it had wreaked it's havoc on the coach side. I've soaked the paper off but the damage is done to the paint. The only option will be to rub down and re-paint. Such a shame for a model as lovely as this. Beware the kitchen roll people! :evil:
CLR tissue paper damage.jpg
CLR tissue paper damage.jpg (90.67 KiB) Viewed 4984 times
I'm all fired up to go and lay more track tomorrow but looking at the weather I may have to consider the alternative option of working on the new bathroom :x

All the best,

Andrew
"Smith! Why do you only come to work four days a week?
"'cause I can't manage on three gaffer!"

User avatar
Peter Butler
Driver
Driver
Posts: 5245
Joined: Sun Sep 09, 2012 10:33 pm
Location: West Wales

Re: The Charnwood Forest Light Railway

Post by Peter Butler » Sun May 28, 2017 9:33 pm

Great work Andrew and good progress... you are certainly right about limited clearance though, there seems to be no room for error in that tunnel, even another coat of paint might be pushing your luck!
I hope the weather is kind enough so you can continue tomorrow now that the enthusiasm level is raised.
More pictures of the results please.
The best things in life are free.... so why am I doing this?

User avatar
Dwayne
Trainee Driver
Trainee Driver
Posts: 681
Joined: Mon Jul 04, 2011 12:15 am
Location: Oklahoma City

Re: The Charnwood Forest Light Railway

Post by Dwayne » Sun May 28, 2017 11:33 pm

Well done Andrew! Looking forward to further updates. :thumbright:

User avatar
LNR
Driver
Driver
Posts: 1542
Joined: Sat Feb 27, 2016 5:26 am
Location: Australia

Re: The Charnwood Forest Light Railway

Post by LNR » Mon May 29, 2017 12:32 am

Heartiest congratulations Andrew, on the track laying. There's no stopping you now. Tunnel clearances do look tight, do you have a rock blasting crew?
Shame about the coach, do hope you are able to repair it to your satisfaction.
Grant.

Post Reply

Who is online

Users browsing this forum: No registered users and 6 guests