Page 5 of 10
Posted: Fri May 08, 2015 8:08 pm
by Soar Valley Light
Looking at Keith's pictures it strikes me that these devices would be a reasonably good size to be used as a bogie on a larger item of rolling stock.
Posted: Sat May 09, 2015 12:38 pm
by Andrew
Looking good Keith!
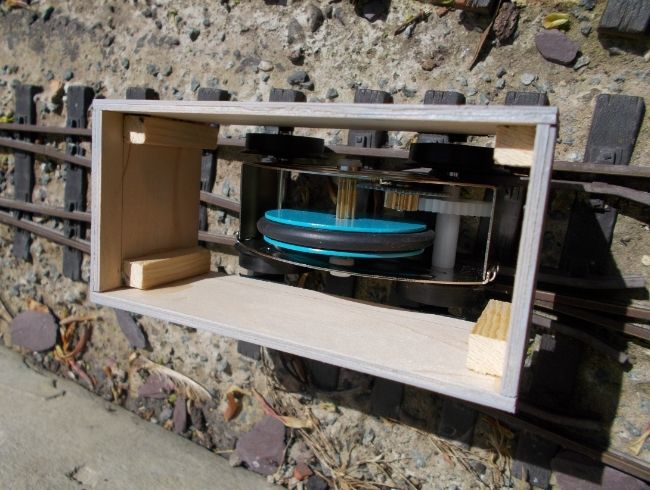
My own momentum project is taking shape - I seem to have managed to glue the broken plastic gear back together (for now anyway!), and have shortened the axles and fitted Binnie wheels, a great fit on the axle. The axles needed shaving slightly to fit the Binnie axleboxes, but that was easy enough to do.
I've now started work on the body. It was to have been based on a photo of a 2 plank Welsh Highland wagon but the proportions don't look quite right for that (I didn't have any drawings) so it'll just be a WHR-influenced freelance design.
Here it is so far, with the body awaiting detailing and just perched on the axleboxes temporarily:
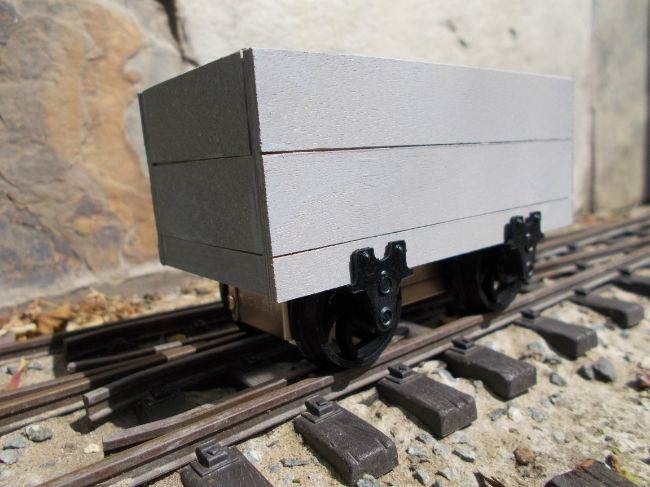
It's pretty light, but even with the body's small size I think I'll find enough room to add sufficient weight to make it work... I'll keep you posted...
Cheers,
Andrew.
Posted: Sat May 09, 2015 4:50 pm
by Keith S
The small size suits the Zecar's short wheelbase. A piece of steel or lead would weigh it down enough I should think.
I'm looking forward to seeing some more videos of these things in action!
Posted: Sun May 10, 2015 9:43 am
by Alan P
Below is a clip of mine behind my MSS Saddle Tank. Without the Momentum Van i'd never been able to get it to run anything like that slowly.
You can also clearly see the van giving the loco a nudge as it stalls on the curve.
<object width="640" height="480"><param name="movie" value="
http://www.youtube.com/v/wp6zAOWWmSc?ve ... ram><param name="allowFullScreen" value="true"></param><param name="allowscriptaccess" value="always"></param><embed src="
http://www.youtube.com/v/wp6zAOWWmSc?ve ... n_US&rel=0" type="application/x-shockwave-flash" width="640" height="480" allowscriptaccess="always" allowfullscreen="true"></embed></object>
Posted: Sun May 10, 2015 10:40 am
by Peter Butler
Alan, your momentum van works brilliantly, I must get on with mine now. Even more impressive is the lovely line you have created. Nice buildings and scenic effects. Do you leave them outside or place them each time you run?
Posted: Sun May 10, 2015 10:51 am
by Alan P
Thanks Peter.
Everything is left outside. The row of terrace houses, the pub, watermill and the signal box are all Modeltown resin kits.
The station, water tower and coaling stops are all scratch built. Most of it seems to survive ok although my little back yard is very sheltered.
Posted: Sun May 10, 2015 1:10 pm
by Andrew
Alan P:110744 wrote:Thanks Peter.
Everything is left outside. The row of terrace houses, the pub, watermill and the signal box are all Modeltown resin kits.
The station, water tower and coaling stops are all scratch built. Most of it seems to survive ok although my little back yard is very sheltered.
I particularly like the station building, lovely...
My MV is now on its wheels - I'm waiting for some glue to dry before test-running... I've glued a couple of fishing weights onto the dummy "top", which will be covered with a heap of coal. If that's not enough I've got some curtain weights which I can glue to the body inners...
Cheers all,
Andrew
Posted: Sun May 10, 2015 9:45 pm
by Alan P
Thanks Andrew. I'll be very interested to see some pictures of your MV and Peter's when they are finished.
slow
Posted: Thu May 14, 2015 7:30 pm
by cheshire
I am struggling with basics of youtube! but this might be a link to a clip of my momentum wagon in action. The loco used to stall every time on the curves, and race on the straights. its not perfect (especially trying to drive and film!) but its much much more realistic.
https://www.youtube.com/watch?v=reqlTnqEVI0
https://www.youtube.com/watch?v=f8LsG1m_6oE
https://www.youtube.com/watch?v=bFtdFe1JgkI
Posted: Fri May 15, 2015 2:34 am
by Keith S
Looks like it works pretty well. It doesn't seem to be very noisy. I like that lady Anne too.
Posted: Fri May 15, 2015 8:28 am
by Dr. Bond of the DVLR
Its a very attractive wagon load as well, splendid stuff.
Posted: Fri May 15, 2015 8:26 pm
by Soar Valley Light
Very nice. A great looking wagon doing a cracking job. I love it.
Your Lady Anne is quite a character and I absolutely love your railway. It really looks like it's a part of the landscape. I'm inspired!
Posted: Sun May 17, 2015 8:40 pm
by Andrew
Evening all,
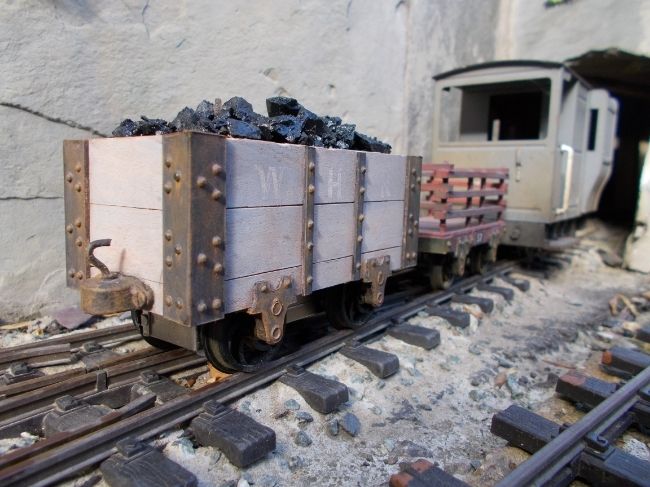
My own momentum vehicle, a little coal truck is now complete - here it is with a Binnie slate wagon and a Mamod guards van to enable a size comparison:
And a side view:
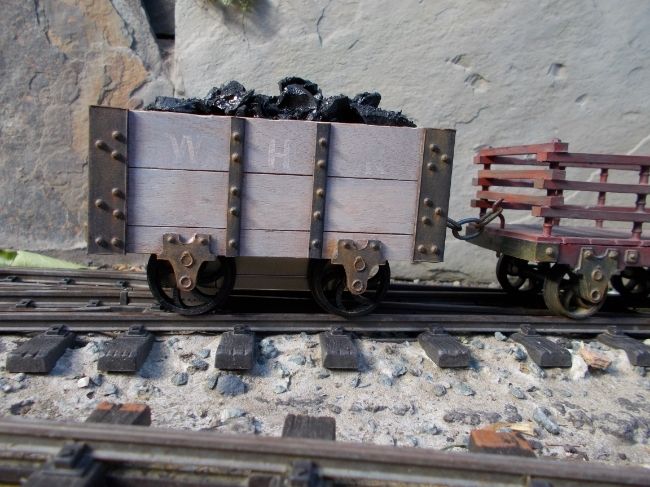
I don't currently have a working manually controlled loco that isn't geared, but I tested it out behind my RH Russell, and it works pretty well I think. It seems to give the train a much weightier feel, making acceleration smoother (at least once the geared wheel has caught up with the rest of the train) and helping regulate speed - I had some lovely slow runs up my 1 in 50 gradient. It encourages smoother deceleration too, because if you stop too suddenly it looks plain daft bumping to a halt and then sitting with its wheels spinning - although it's pretty heavy for its size, it can't shift a stationary Russell! More testing is required, but so far, so good. I'm looking forward to running it with visiting manual locos too.
Perhaps best of all I've discovered how much I like building grotty little trucks - three more are now under construction!
Cheers,
Andrew.
PS video to follow sometime - attempts to drive and film at the same time weren't good!
Posted: Sun May 17, 2015 8:51 pm
by Soar Valley Light
That's a really lovely little wagon Andrew. Well done.
I'm itching for the day when all the work on the house and garden is complete, my railway is at least under construction and I have space for a little bit of a workshop in the cellar (squeezed in with the HD Meccano electric mice)!
Posted: Sun May 17, 2015 9:24 pm
by Peter Butler
I agree, that looks just right.
As 'Thomas' would say, 'A really useful truck'.
Posted: Sun May 17, 2015 11:39 pm
by Keith S
I wish now that I had put a bit more effort into mine. I just slapped the mechanism into a IP covered van and it's very plain.
Everybody else seems to have done a nice job weathering and/or coming up with something unique.
I'll have to dress mine up a bit, somehow.
Posted: Mon May 18, 2015 5:00 pm
by Howardws
Has anyone considered machining grooves into the wheels and fitting O-rings to reduce the inclination to slip and thus reduce the weight required? This works well on an old Faller Playtrain tank engine with plastic wheels that belonged to one of my sons and that my grandson now plays with.
Posted: Tue May 19, 2015 3:58 am
by 11thHour
Howardws:110938 wrote:Has anyone considered machining grooves into the wheels and fitting O-rings to reduce the inclination to slip and thus reduce the weight required? .
Intuitively, since the mechanism only drives on one wheel and since the coupling height is above the axle height (when looking side on) if you wish to get the maximum 'drag' effect from the mechanism the driven axle should be closest to the engine. Thus the front wheels tend to dig in, whist the rear wheels tend to lift. The ideal (from an engineering point of view) is for the coupler to be level from the track with the axle, which would make it work equally well in both directions.
Tim
Posted: Tue May 19, 2015 5:30 am
by Keith S
That is exactly what I have noticed. Th effect is greatest when the axle is closest to the engine.
Posted: Sun Jul 19, 2015 10:52 am
by Peter Butler
Well, it's been some time since I bought my 'Zecar' and things have gone very quiet on this thread, but at last I have made mine into a working vehicle.
The wheelbase has been extended with a plasticard frame and metal wheels fitted. The driven axle running in its own original bushes and the trailing axle in brass. The axleguards are cosmetic and have no contact with the axles.
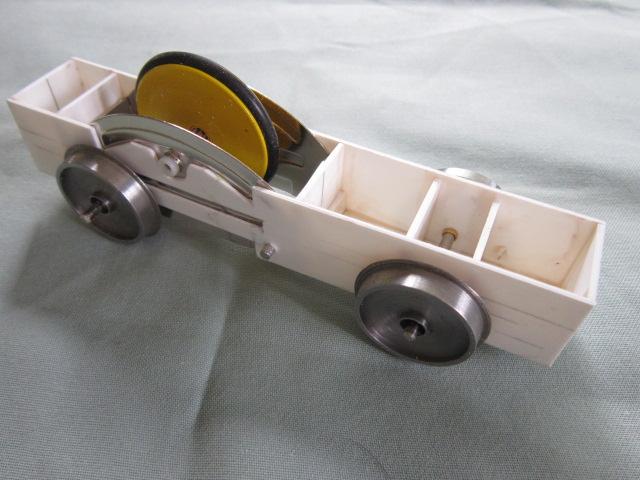
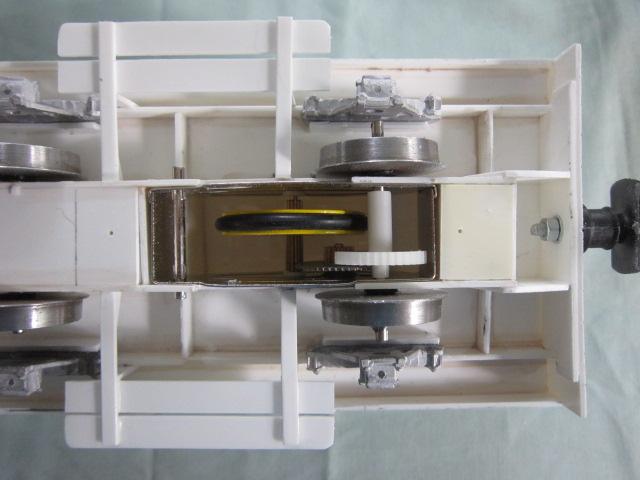
The finished vehicle is a goods van which can be run with any train combination.
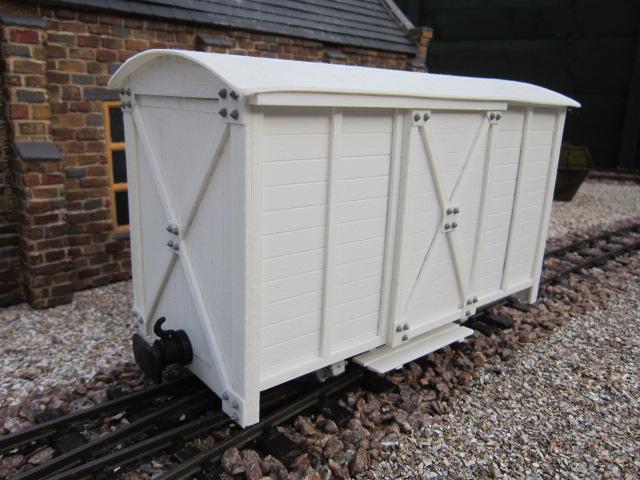
Further build details can be found on my 'Time to build a railway'... thread.