Page 2 of 2
Posted: Sun Dec 07, 2014 10:34 pm
by MDLR
It's interesting that it looks totally different to mine...............

............... which looks a litte "Welsh Highland" hauling 16mm scale stock...........

Posted: Mon Dec 08, 2014 7:57 am
by GTB
tom_tom_go:106236 wrote:
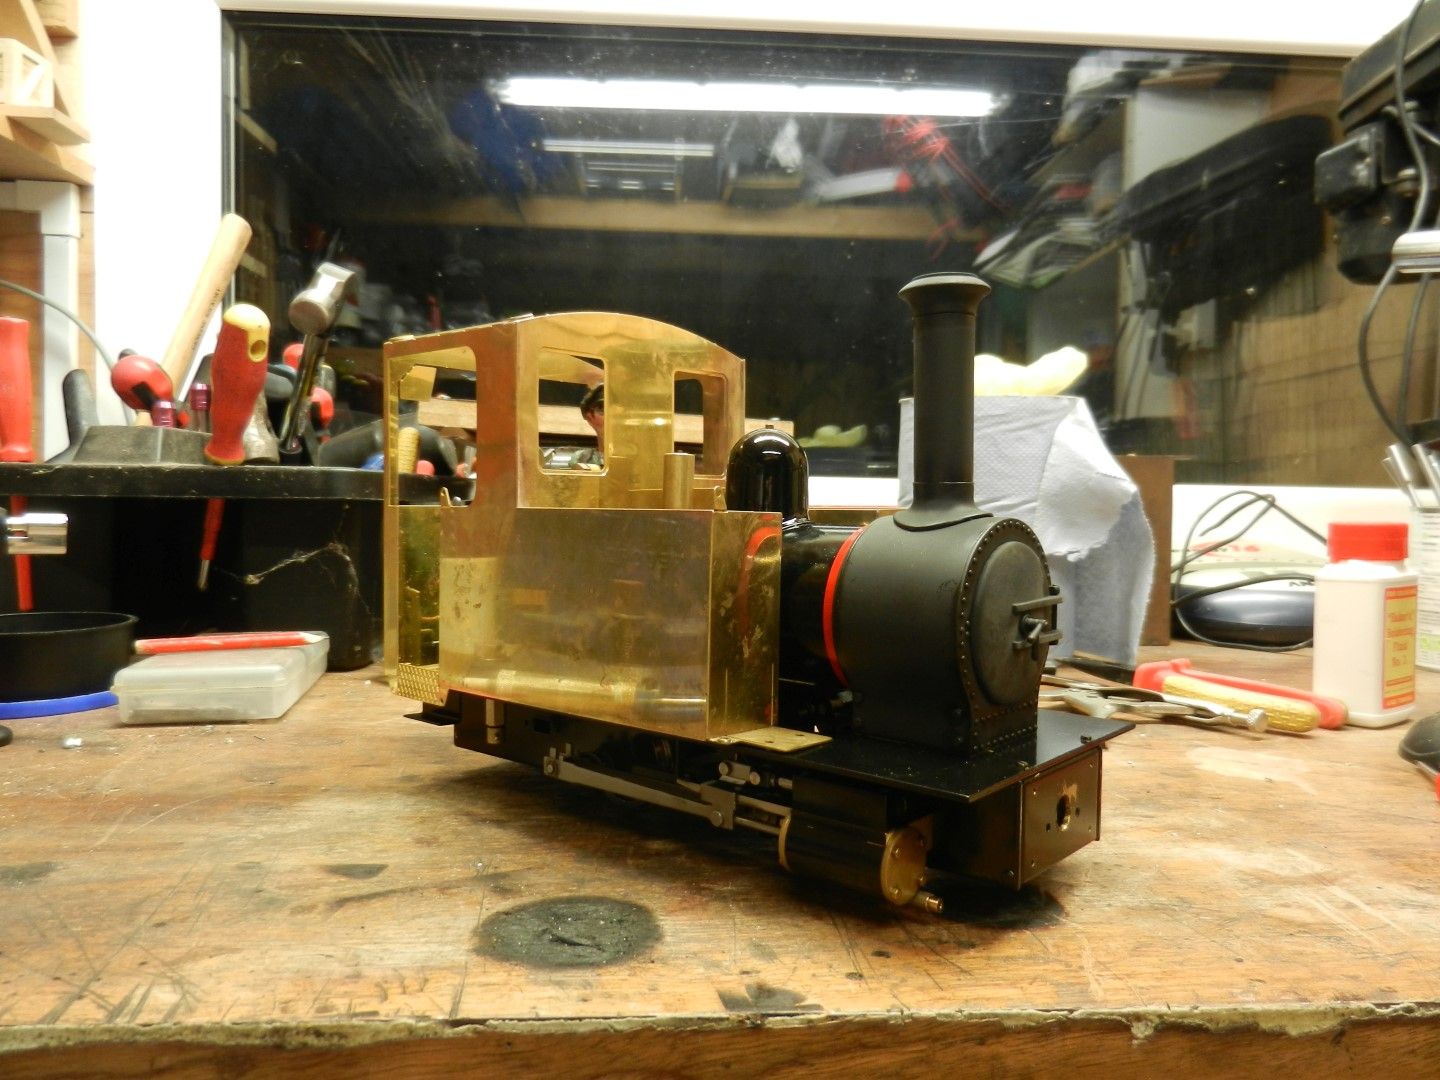
How do others solder really fine parts so it looks like as if it was simply glued into place?
Looks good, I can't see any excess solder......

When attaching small parts, I tin both parts first, put a bit of liquid flux in the joint and heat until I see any excess solder squeeze out of the joint. If possible, heat from the back. When it cools down I clean off any excess solder with a fibreglass brush (then pick the bits of glass out of my fingers with fine tweezers

).
it also helps in large scale to have a soldering iron that can generate a decent amount of heat. Mine is a 100W soldering station and with a 3mm chisel tip I can solder seams in 0.8mm brass bodywork with that. I had one person argue with me that you can do everything you need with a 25W iron. I can only assume he had never tried soldering a garden scale size body together.....
Regards,
Graeme
Posted: Thu Dec 11, 2014 10:39 pm
by Chris Cairns
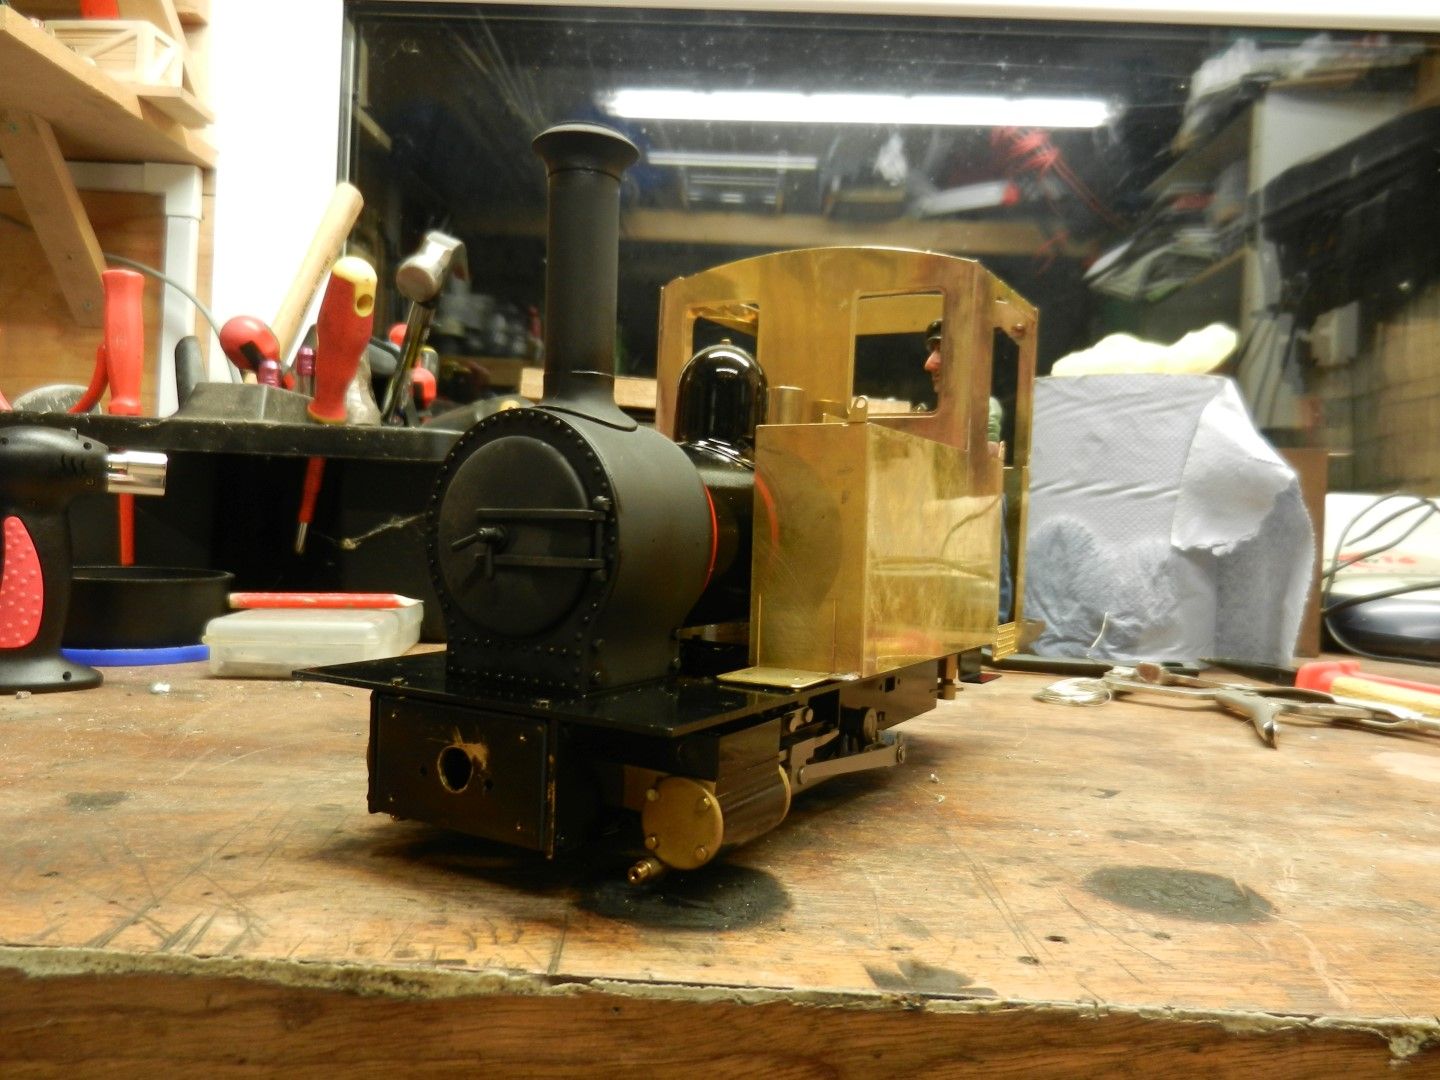
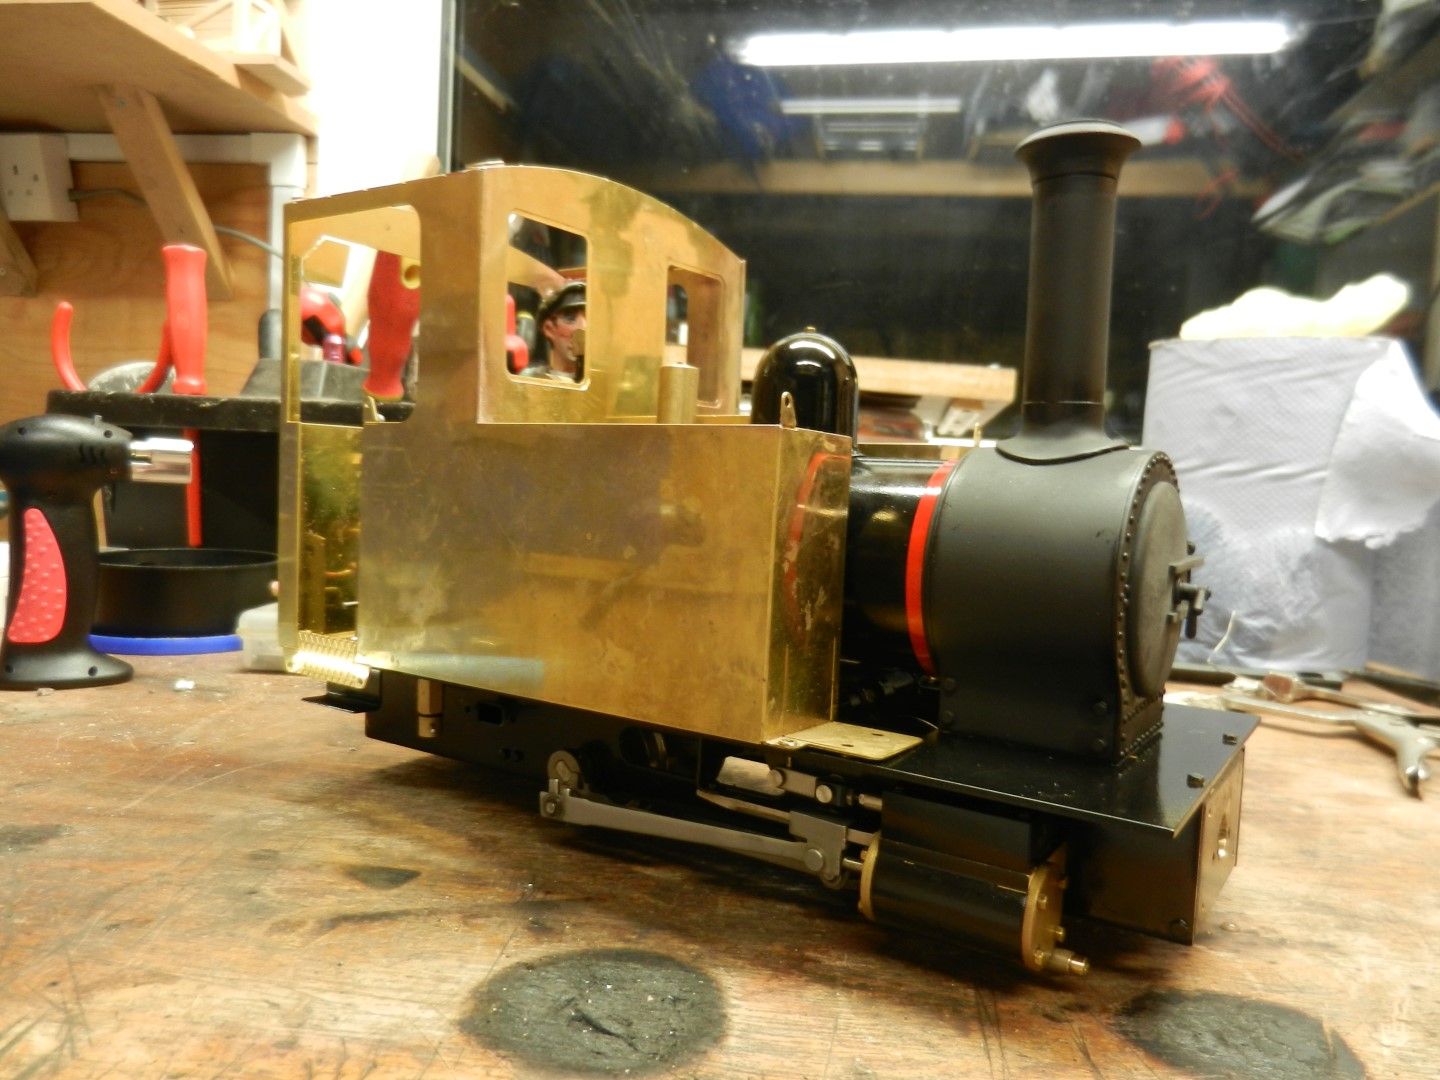
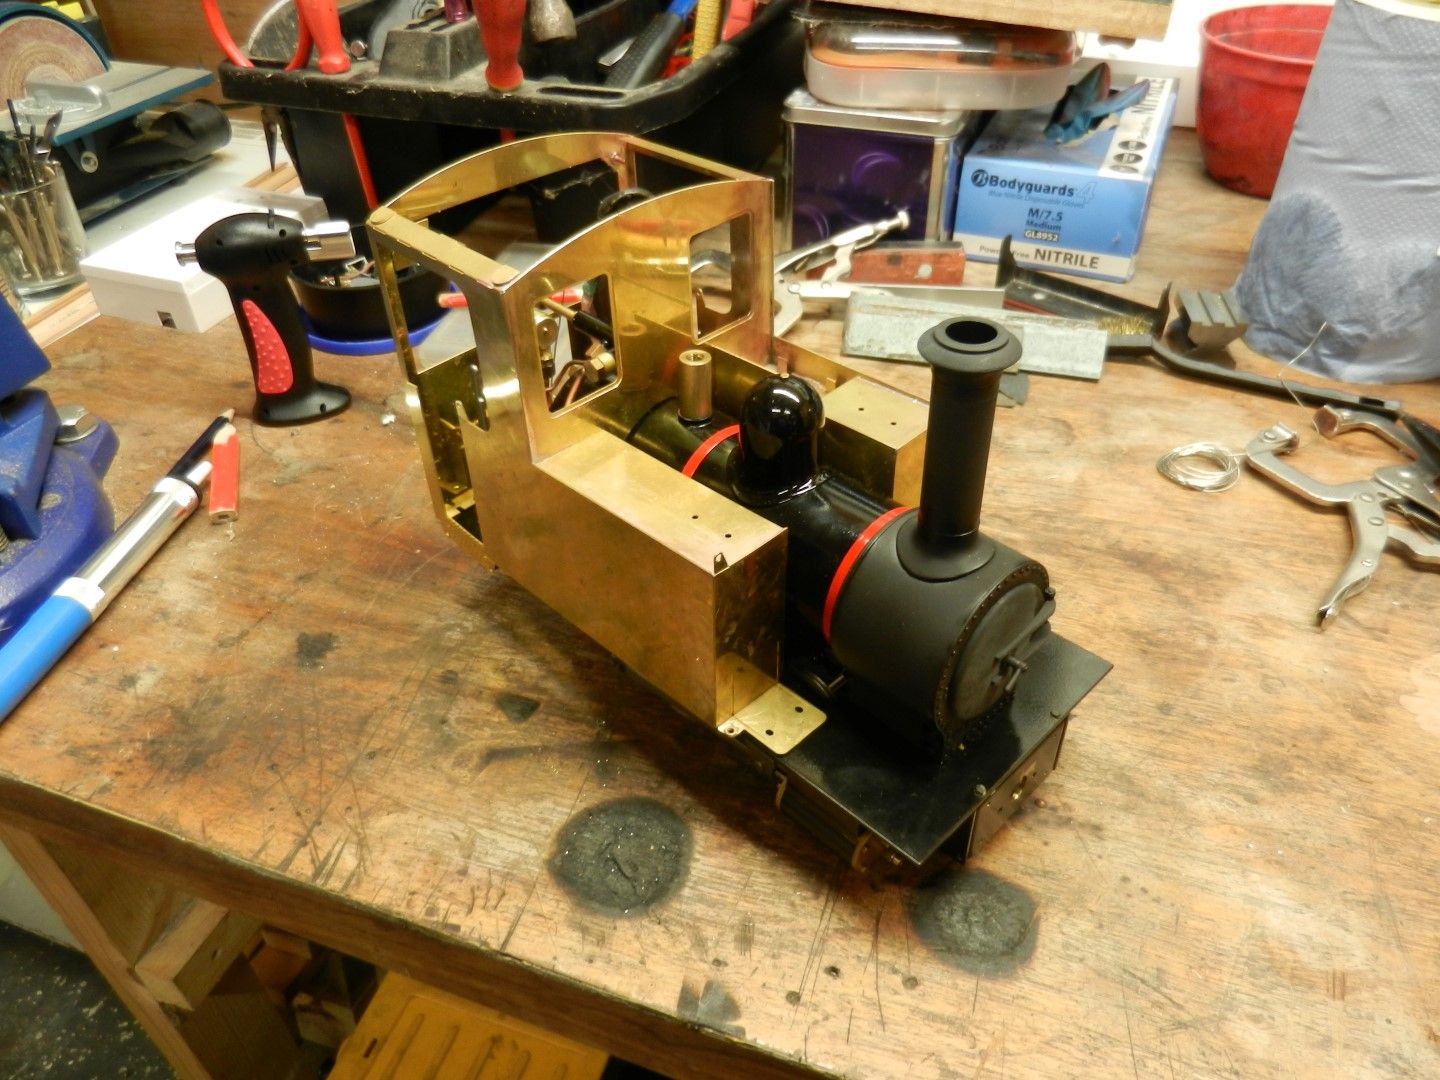
Hopefully the Help & Advice theatres that were video'd at this year's Peterborough show will make it onto a 16mm NGM DVD at some point (MDLR?). I attended the Soldering theatre which included how to fit those small parts - the body kit being used in the demonstration was Brian's (MDLR).
Chris Cairns
Posted: Thu Dec 11, 2014 10:53 pm
by MDLR
The editing is ongoing as I type this - there was an awful lot to edit!
Now, a question for all you Accucraft owners. I'm an Accucraft virgin - always ran Roundhouse and Mamod in the past. With a Mamod, you watch it like a hawk. With a Roundhouse, if you start off with full gas and water, the gas runs out first with just a little water left in the boiler. I find that if I do this with the Baldrig, there's only about a syringe-and-a-bit of water used - I can happily get away with two fillings of gas without the water running dry. Is this to be expected?
Posted: Sun Dec 14, 2014 2:12 pm
by tom_tom_go
This is my first Accucraft as well, however, I got into live steaming because of seeing Accucraft 0-4-0's run at a nearby garden railway that I was invited to see once I had joined the association.
The old boy then use to get pressure up first then fill up the gas again to get a longer run.
Posted: Sun Dec 14, 2014 6:13 pm
by St.Michael
I really enjoy following your work... and wonder if something like that could be my next steamloco-project, after the O&K loco ( two or three years from now...

Time is a strange thing )
Posted: Sun Dec 14, 2014 7:24 pm
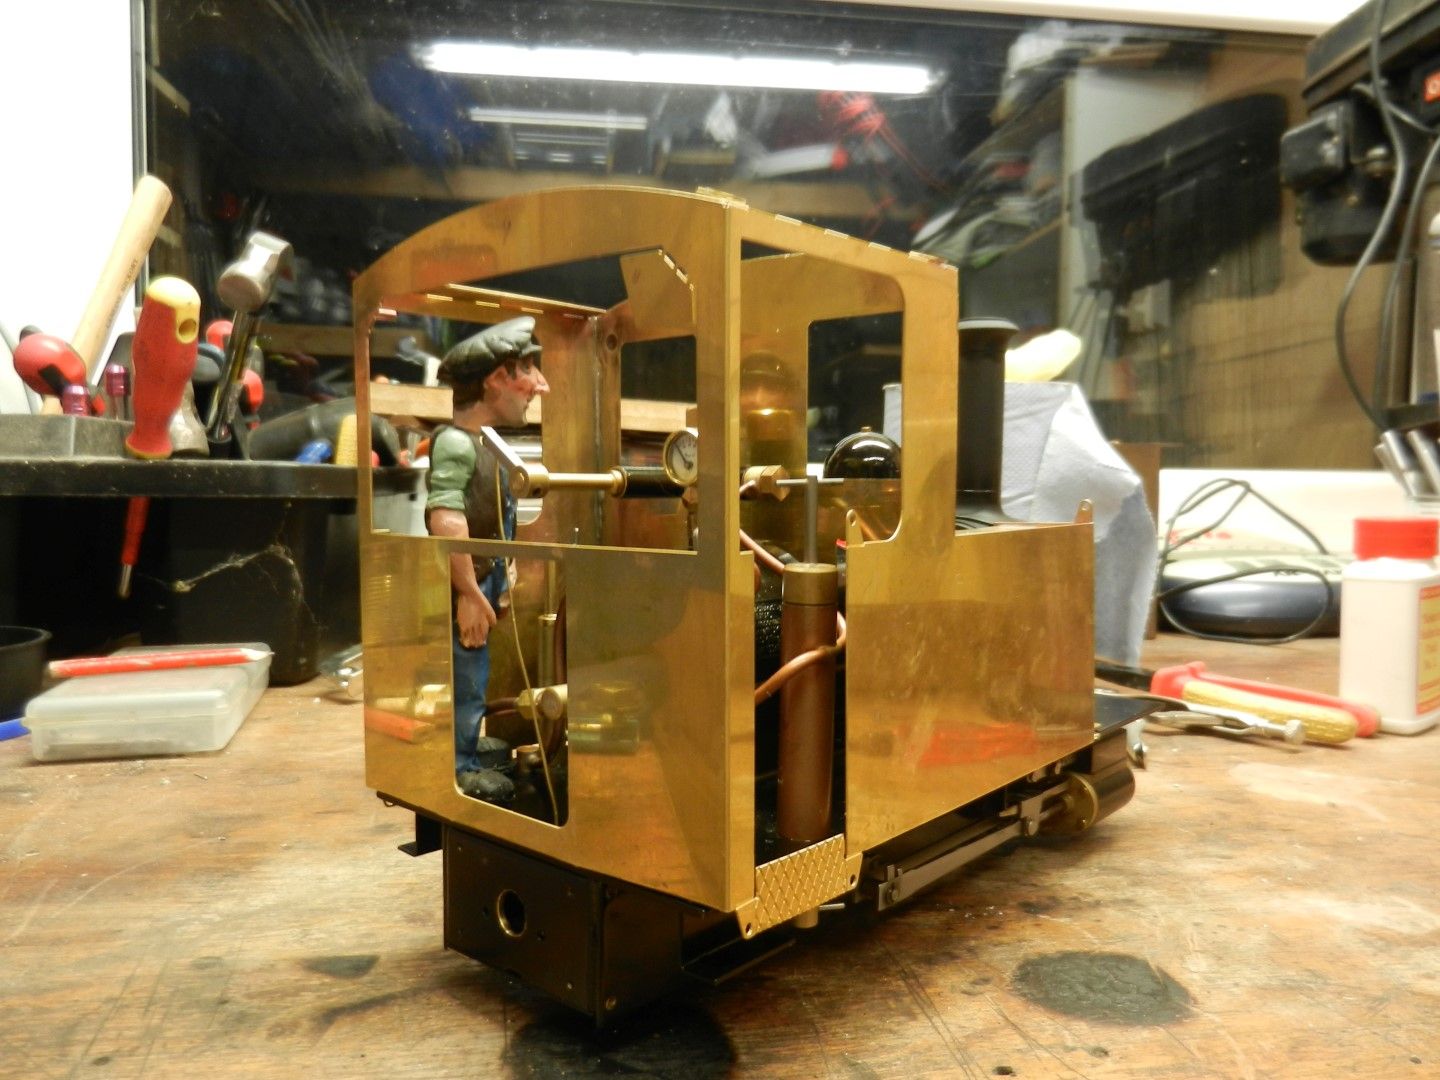
by Big Jim
Very nice, I think that gas control mod is very nice and makes a huge difference to the cab area. Looking forwards to seeing it finished.
Posted: Fri Mar 20, 2015 4:21 pm
by tom_tom_go
I have fitted TTD steam & gas valves, makes a big difference:
http://www.thetraindepartment.com/ttd-upgrade-valves/
The gas is very easy to adjust now and the regulator has much finer control.
Cheap upgrades, including shipping (from the US) was under £25.00
Posted: Mon Mar 23, 2015 7:07 pm
by Chris Cairns
I've fitted a TD77 replacement steam valve to my Ragleth (yet to test it), with one to fit to my Edrig at some point.
A fellow 16mm NGM WoSG member was telling me recently that the TD75 Gas Valve is currently not available for the Edrig.
Chris Cairns
Posted: Mon Mar 23, 2015 9:24 pm
by kandnwlr
MDLR:106240 wrote:It's interesting that it looks totally different to mine...............
............... which looks a litte "Welsh Highland" hauling 16mm scale stock...........
Now that looks very nice too

Posted: Mon Mar 23, 2015 9:26 pm
by kandnwlr
Thanks very much for the link.
Posted: Sun May 24, 2015 5:52 pm
by tom_tom_go
Dome and boiler bands now painted:
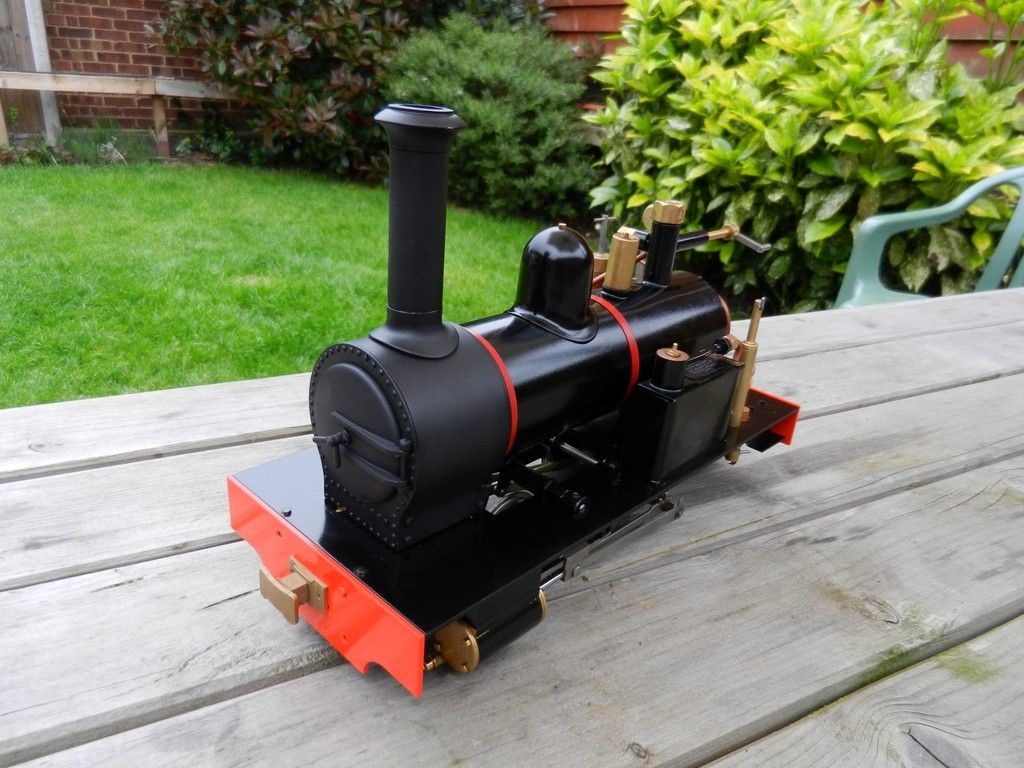
I think the body will go nicely with the red boiler bands once lined with red.
Posted: Thu May 28, 2015 6:36 pm
by tom_tom_go
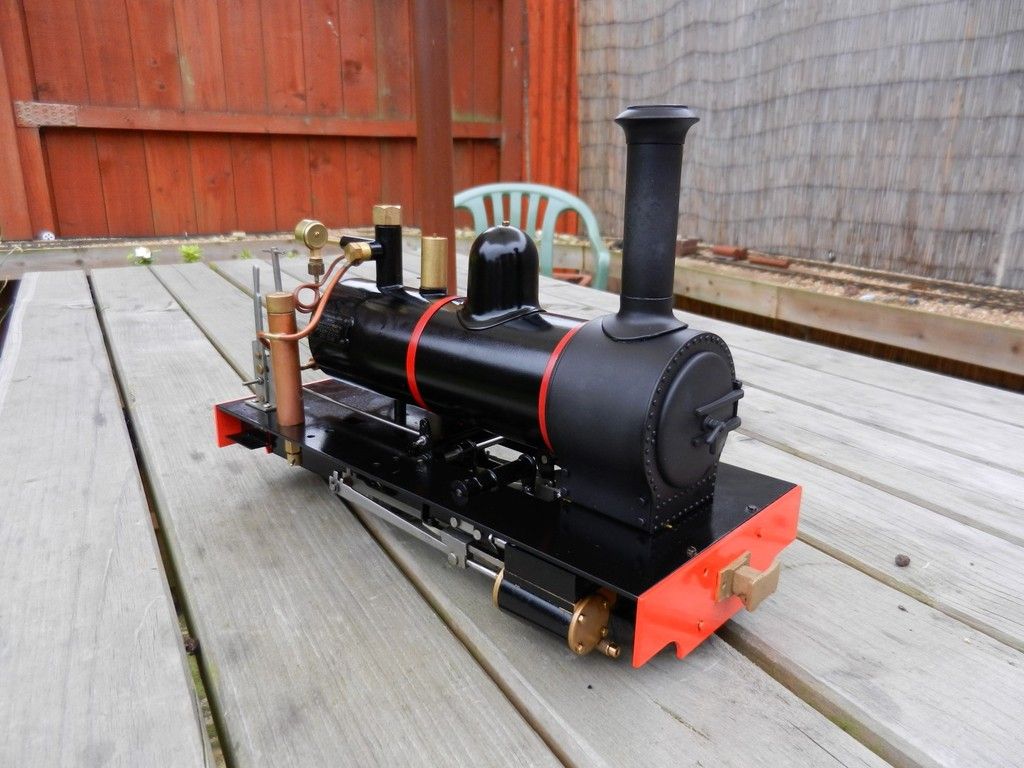
Time for R/C:

As I have replaced the regulator for one of TTD versions it should not take much effort to move it so the micro servo should be sufficient. Hopefully, I can get away with just using servo tape to attach the servo to the side of the frame.
I will drill a hole through the foot plate and modify the existing Accucraft regulator handle to take a linkage rod connector.
Giving Ripmax a go this time servo wise as this was cheaper than the Hitec equivalent and even has metal gears.
Safety valve bonnet on order from DJB as well.
Posted: Sat May 30, 2015 7:10 pm
by Chris Cairns
This is progressing well Tom.
Chris Cairns
Posted: Tue Nov 17, 2015 8:12 pm
by tom_tom_go
Posted: Sat Mar 19, 2016 5:00 pm
by tom_tom_go
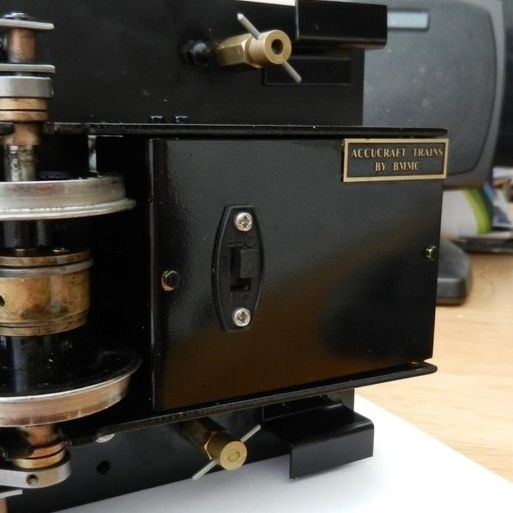
I think I am finally happy with all the R/C gear.
The charge socket is flat against the body so you cannot see it:
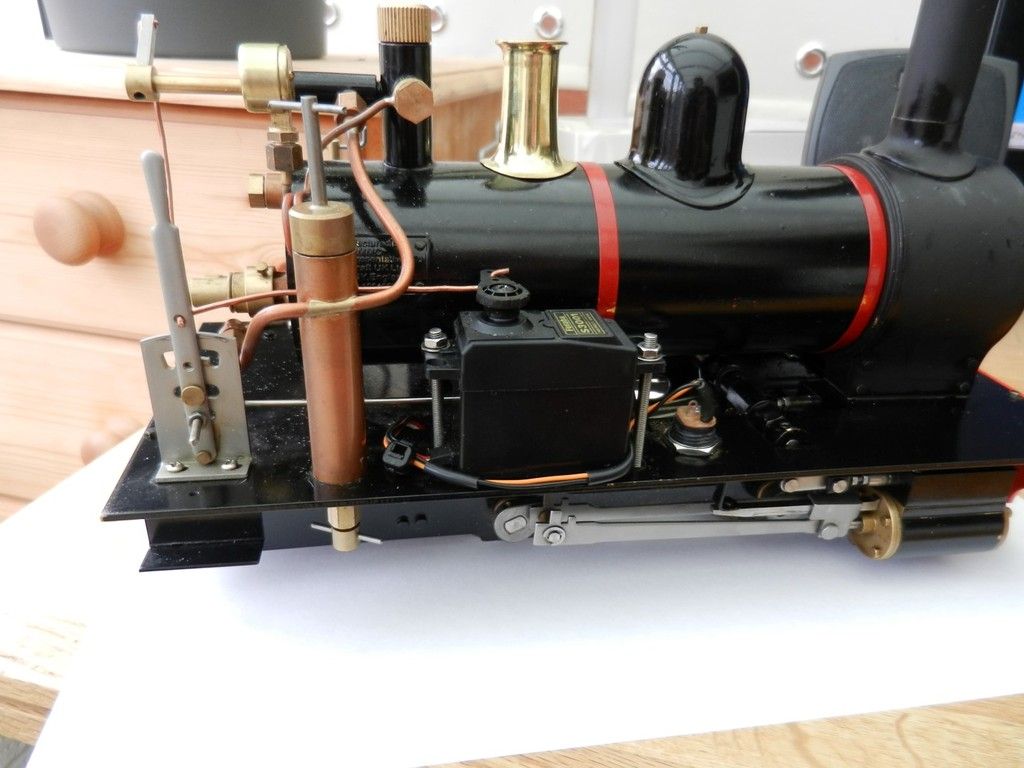
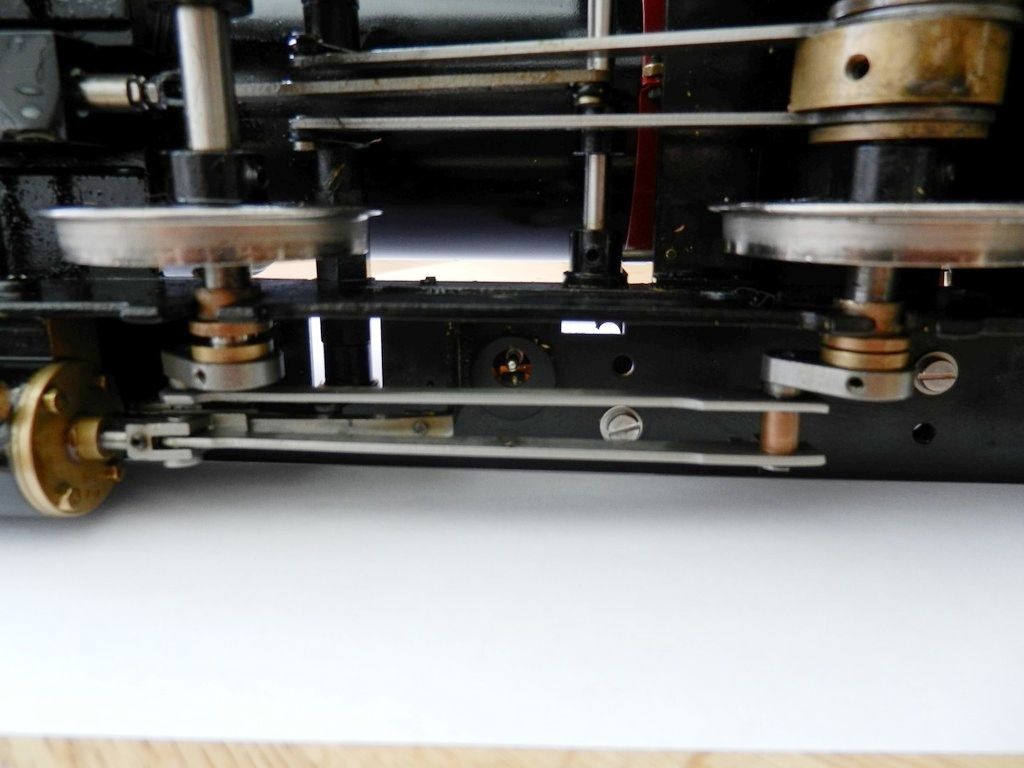
The regulator servo along with the receiver, battery pack and on/off/charge switch is all hidden below (took a while to figure out the positioning of components, however, nothing touches the loco body and it's been fine during testing with no loss of signal/overheating:

Posted: Sun Mar 20, 2016 7:09 am
by St.Michael