Page 3 of 4
Posted: Mon May 26, 2014 6:16 pm
by MDLR
Very nice indeed!
Posted: Mon May 26, 2014 6:29 pm
by Dr. Bond of the DVLR
How was the (I've got no idea what the technical name is) Top bit done? Lovely and neat - I think its the best model thatch I have seen.
Posted: Mon May 26, 2014 7:39 pm
by philipy
Thanks for the nice comments everyone
Mr. Bond of the DVLR:101032 wrote:How was the (I've got no idea what the technical name is) Top bit done? Lovely and neat - I think its the best model thatch I have seen.
Zac, this might get a bit long winded, but you did ask!
BTW, the top bit is called the ridge cap, I think.
First I cut three bits of 4mm thick pvc sheet that was laying around, 2 bits a couple of inches wide and one bit about 7ins wide, all a couple of inches longer than the ridge. The 2 narrow bits were stuck to the wide bit with double sided tape with a 2ins parallel gap in the middle.
Now for the tedious bit (the first of many!), chop the hemp into little bits, 5-10mm ish. You need enough to fill that gap in the middle! Next dilute some waterproof pva about 50/50 and add a few drops of fairy liquid. Pour it onto the chopped hemp and create a sort of Shredded Wheat in milk, effect. You need to get a more or less solid wodge in the 'mould', then leave it overnight to dry out/set. Next day, peel it out, mine was still flexible which helps. While it is flexible, cut in half lengthways to give 2x 1" wide strips. Put somewhere warm to dry completely. When it is dry, use a rough file along one edge of each piece to lose the shine of the glue and free up some slightly raggedy fibres (dont go too mad!). Glue one piece either side of the ridge, touching at the centre and with the filed edges facing down the roof each side.
When dry, cut bunches of hemp long enough to span right across the ridge and overhang on both sides. Paint glue on one of the ridge pieces (only) and stick bunches to it, not to thick but as even as you can. I did it in two goes, a thick coat of neat glue to anchor it and then a second coat of diluted glue to makes sure every strand was stuck. When dry, bend it all right across and down the other side
and glue it. You should have a few mm overhanging both edges of the understrip. Then I used a sharp pair of curved nail scissors to trim the top layer back, flush with straight edge of the under strip.
The strips of wood that you see forming a pattern on the cap ( called 'spars' ) I produced by knotting thick grey darning thread at about 12mm intervals and then glueing in two parallel lines and then threading the diagonals between them. Then flood the whole lot in more diluted PVA withwasing up liquid.
Posted: Mon May 26, 2014 10:15 pm
by Peter Butler
That looks well worth the effort, well done!
Do you think it will stand up to outside weather conditions or do you expect to go through the process each year?
Posted: Mon May 26, 2014 11:35 pm
by Andrew
Absolutely lovely, well done! Don't think there were many thatched cottages in 20's Snowdonia, from that point of view it's shame I didn't stick to my previous "rural Kent" theme, particularly when there's inspiration like this to be had!
Thanks for the photos,
Andrew.
Posted: Tue May 27, 2014 9:36 pm
by philipy
Peter Butler:101040 wrote:That looks well worth the effort, well done!
Do you think it will stand up to outside weather conditions or do you expect to go through the process each year?
Peter,
Thanks. The simple answer is, I don't know but I hope it will last outside. I certainly don't want to have to redo it annually.
The whole lot has had several coats of thinned waterproof PVA, so I'm hoping it will have penetrated right through and will last a good time. Plus the spot I have planned for it is fairly sheltered so it should be reasonably protected from the worst of things.
Fingers crossed!
Thatched Cottage - NOW PLANTED!
Posted: Sat Jun 21, 2014 12:54 pm
by philipy
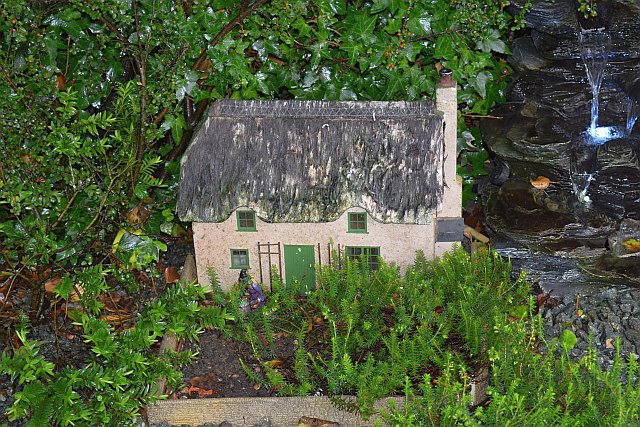
Now well and truly finished, Solstice Cottage is now in place in the garden. Its taken forever to get the last few bits done, partly because of a couple of weeks away on holiday, but I'm really quite pleased with the result.


Posted: Sat Jun 21, 2014 2:27 pm
by TonyW
That's great!
Posted: Sat Jun 21, 2014 8:15 pm
by Dr. Bond of the DVLR
Just brilliant. Really looks the part!
Posted: Sat Jun 21, 2014 9:24 pm
by Peter Butler
Superb work and a picturesque setting...... love the witch!
Posted: Sat Jun 21, 2014 9:30 pm
by MDLR
Looks very well!
Posted: Sat Jun 21, 2014 10:57 pm
by Big Jim
Nice job and nice setting.
Posted: Sun Jun 22, 2014 6:45 am
by kandnwlr
Excellent job

Re: Thatched cottage - FINISHED
Posted: Sun Aug 26, 2018 6:15 pm
by philipy
I've briefly resurrected this thread because of the brief discussion on Peter Butlers thread about taking buildings in for Winter.
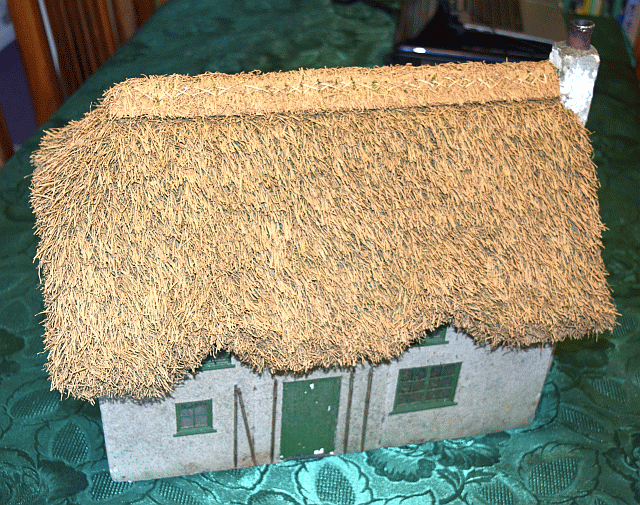
Four and a bit years ago, Peter asked me if I was planning on taking my thatched cottage in or redoing the thatch every year. Well it has been outside in the same spot, through rain, wind, frost and snow since June 2014 and this winter it will be coming in for the first time to re-do the roof. I must admit that last winter it got a bit scruffy and now it has got too bad, but apart from that, although some of the trellis round the door has disappeared it is otherwise intact. ( I think it's the result of the brew in the witches cauldron, which has been bubbling away the whole time!! )
Compare this picture with last one, above.
- DSC_0001 small.jpg (202.19 KiB) Viewed 5208 times
Re: Thatched cottage - FINISHED
Posted: Sun Aug 26, 2018 6:43 pm
by Peter Butler
The structure of the cottage itself looks to have stood up to the conditions very well, the roof less so! I haven't attempted thatch myself but Just Julie, of this Forum, has used soft sweeping broom bristles, which should stand up to wet weather longer? A picture of her cottage is shown on her thread..... 'Merlin's Castle Line' in the 'Railways and Layouts' section. This was Julie's first attempt so could possibly be adapted?
Re: Thatched cottage - FINISHED
Posted: Sun Aug 26, 2018 8:53 pm
by philipy
Thanks Peter. Actually, the roof is structurally sound as far as I can see, the foamboard itself is intact but its the plumbers hemp and glue which has taken a battering. lso, our resident sparrows, dunnocks and robins like to sit on the ridge, which hasn't helped!
I saw Julie's cottage when she posted the pictures, but it's still the glue and weather combination which needs thinking about. I'm playing with the idea of making some sort of GRP type covering - maybe broom bristles or hemp or even chop strand glass, with the GRP resin?
Re: Thatched cottage - FINISHED
Posted: Mon Aug 27, 2018 8:57 am
by Lonsdaler
Not a thread that I had seen before Philip - I've just read from the start - a really good job

I wonder if SBR would provide a better adhesive than PVA for the new thatch? The technique you finished up with seems to be a winner.
Re: Thatched cottage - FINISHED
Posted: Mon Aug 27, 2018 10:47 am
by philipy
Thanks Phil.
Yes, SBR is on my list of possible options, I used waterproof PVA first time around, but SBR is probably better. I can do it indoors ( well, garage) so no need to worry about covering it while it dries!
I'm still quite keen on the idea of a resin coating to remove the places where water can get and wreak its effect and also remove nooks and crannies which invite the birds to investigate!
Re: Thatched cottage - FINISHED
Posted: Mon Aug 27, 2018 12:53 pm
by Just Julie
HI I have only just seen this thread about your thatched cottage, brilliant, and the garden and witch what a great idea. I thought I could have trimmed the broom on the cottage I built to have the proper effect, but it didn't work so I left it as it is. I used waterproof gorilla glue so it will be interesting to see how long it will last.

Re: Thatched cottage - Re-Roofed
Posted: Mon Nov 19, 2018 2:21 pm
by philipy
A few weeks ago I posted about possible methods for re-roofing my thatched cottage. I the end I opted for something completely different to what was discussed, although in essence it's very similar.
Not sure where the idea came from but I actually ended up using artificial grass mat. Ideally I would have liked to use a 'dead grass' colour and much to my surprise I found that you can actually buy brown grass matting ( not sure who would want it?) but the smallest quantity I could get was 2 x 5 metres at an astronomical price and it was a mixture of dark reddish brown and black fibres. I did find one product which was exactly the dried grass colour I was looking for and is apparently available in smallish quantities, unfortunately it was on the website of a company in Quebec! I spent hours searching but couldn't find a similar product available anywhere else, so in the end, I had to go with green grass. Even so it is mainly available as a minimum of 1metre off the roll, but fortunately I found a fleabay seller with offcuts for a tenner.
The drawback with this stuff is that it is mostly polypropylene and as such it doesn't take paint well. Halfords do a Bumper paint which is allegedly suitable for Polypropylene car bumpers, so I degreased and prepped the grass mat as instructed and sprayed it with a dark grey Bumper paint as an undercoat. I also found in Halfords a can described as "Textured Paint Sand", which sounded like a good idea so I gave it a blast of that, and I'm really quite pleased with the result. I should add that I tried all this on a 99pence sample before commiting myself to the actual cottage!
The following pictures show the stages, starting with the wreck of the original roof:
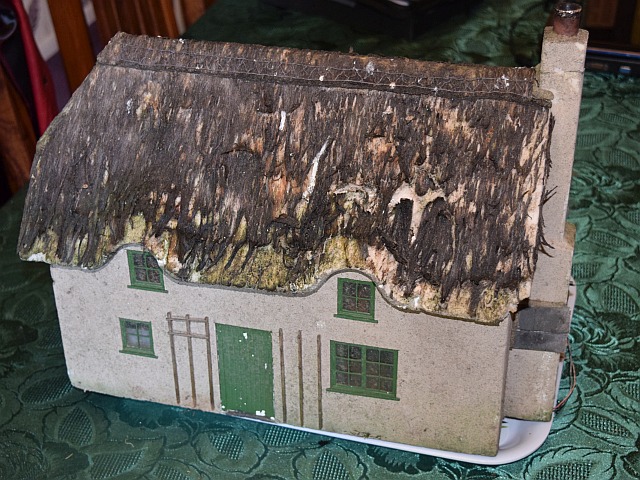
- DSC_0002 (3) small.jpg (203.59 KiB) Viewed 4881 times
Old thatch stripped off and damage under layer repaired. The rear pitch has had the grass glued on and can be seen at the edges.
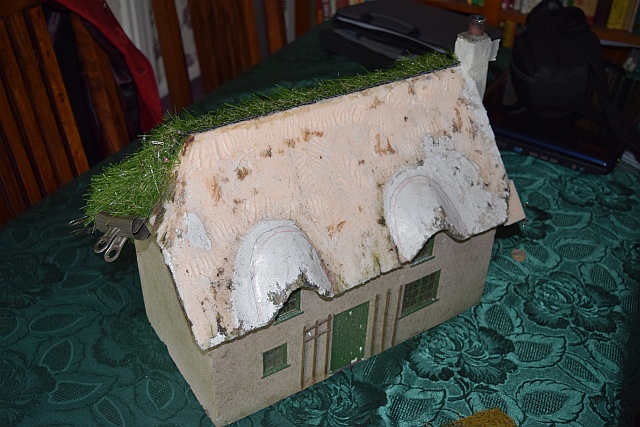
- DSC_0003 small.jpg (189.58 KiB) Viewed 4881 times
I made paper templates of the shape of the dormers and used that to cut sections of mat which were pinned and glued on.
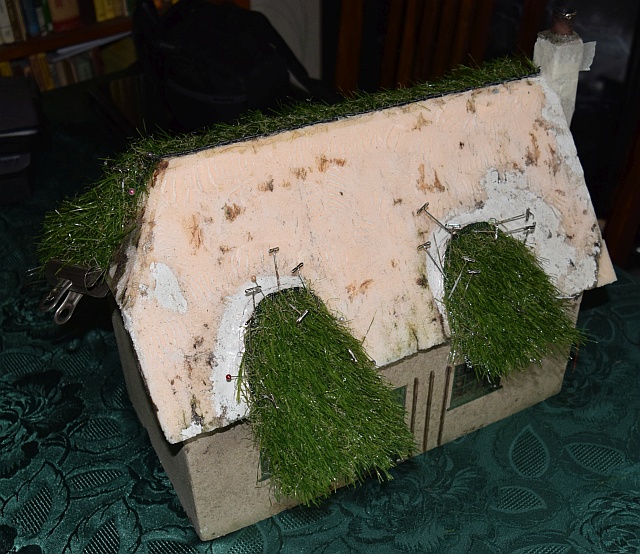
- DSC_0008 small.jpg (230.99 KiB) Viewed 4881 times
The flat shape was then cut from the mat for the main roof and the whole lot glued on. The edges were wrapped around the foamboard and held in place by big bulldog clips and pins, whilst it dried.
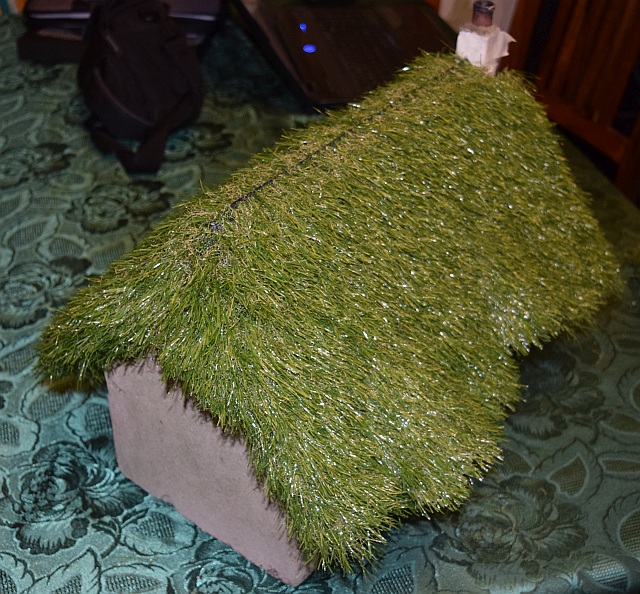
- DSC_0009 small.jpg (254.72 KiB) Viewed 4881 times
Once it had all set I used scissors to trim the edges.

- DSC_0003 (2) small.jpg (202.47 KiB) Viewed 4881 times
The whole of the body of the cottage was then masked using tape and paper and the roof given a thorough spraying of the Bumper paint.
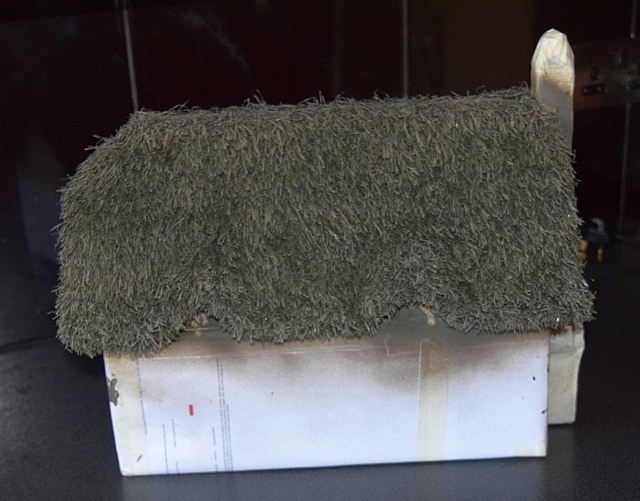
- DSC_0004 (2) small.jpg (212.43 KiB) Viewed 4881 times
The ridge piece was made from some spare foamboard and covered with grass in the same way. The spars are represented by sewing fine waxed cord in an X pattern, and then tit was sprayed to match and glued on top.
- DSC_0001 small 1.png (218.78 KiB) Viewed 4881 times
Time will tell how well the paint adheres but it should be fairly simple to re-spray when necessary.
Obviously the building need some general refurbing but I didn't want to waste time on that until was happy with the roof.