Page 2 of 4
Posted: Sun May 11, 2014 8:16 pm
by kandnwlr
philipy:100535 wrote:Thanks chaps.
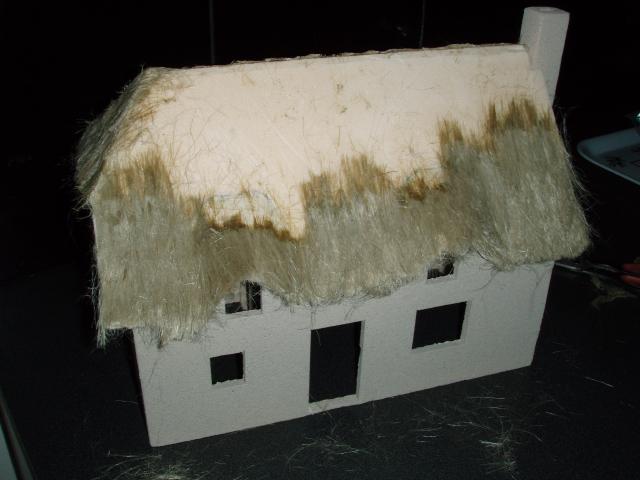
I used the same plumbers hemp but applied differently. I still used bunches/clumps but smaller to reduce the tendancy for any individual clump to have a straight edge.
Then I cut the clumps from the hank at an angle rather than straight.
Having cut it I shuffled it in my fingers to try to make sure, again, that the ends were not level.
When gluing the clumps to the roof, instead of just going from side to side in rows, after putting on one complete row at the eaves, I then went up the roof in small areas, then moved along and did anothe bit, then another, then went back and filled in a small bit, and so on. This broke up a natural tendancy to get into a subconcious neat and tidy rythym.
Finally I made sure that the vertical separation between clumps wasn't even.
I have to say it took a LOT longer this time!
And it does look more impressive this time. I´m glad the idea was helpful

Posted: Mon May 12, 2014 4:45 am
by Keith S
I think that looks just fine, especially when the edges are trimmed up, it will look very character-ful.
Posted: Tue May 13, 2014 11:27 pm
by jim@NAL
looking good very nice looking building keep up the good work
Posted: Mon May 19, 2014 8:15 am
by philipy
Update on the past weeks work.
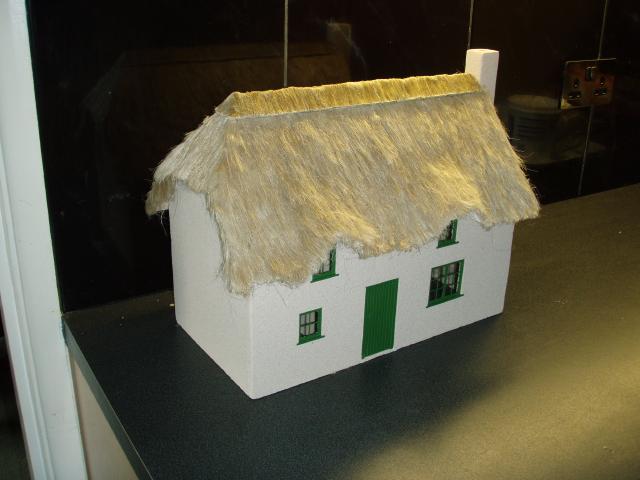
Unfortunately I was a bit busy last week and didn't make as much progress as I'd have liked, but still, the windows and doors are all made and fitted and the ridge cap is done apart from the adding the spars ( the patterned arrangement of sticks that anchor it).
Posted: Mon May 19, 2014 6:05 pm
by jim@NAL
I love it very good get some pics of in in place I love the green perfect colour for a cottage
Posted: Mon May 26, 2014 3:10 pm
by philipy
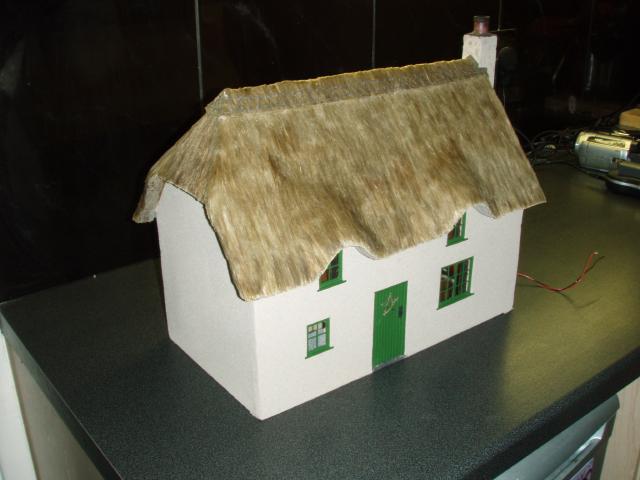
OK folks, it's done.
The cottage itself is finished and I'm just making the garden for it now, but it's been bucketing down all day and no way am I going outside!


Posted: Mon May 26, 2014 3:43 pm
by Matt
looking great.
Posted: Mon May 26, 2014 5:03 pm
by kandnwlr
Excellent result
Posted: Mon May 26, 2014 5:08 pm
by williamfj
It looks great
Posted: Mon May 26, 2014 5:28 pm
by jim@NAL
wow that brilliant well done looks bloody good
Posted: Mon May 26, 2014 6:16 pm
by MDLR
Very nice indeed!
Posted: Mon May 26, 2014 6:29 pm
by Dr. Bond of the DVLR
How was the (I've got no idea what the technical name is) Top bit done? Lovely and neat - I think its the best model thatch I have seen.
Posted: Mon May 26, 2014 7:39 pm
by philipy
Thanks for the nice comments everyone
Mr. Bond of the DVLR:101032 wrote:How was the (I've got no idea what the technical name is) Top bit done? Lovely and neat - I think its the best model thatch I have seen.
Zac, this might get a bit long winded, but you did ask!
BTW, the top bit is called the ridge cap, I think.
First I cut three bits of 4mm thick pvc sheet that was laying around, 2 bits a couple of inches wide and one bit about 7ins wide, all a couple of inches longer than the ridge. The 2 narrow bits were stuck to the wide bit with double sided tape with a 2ins parallel gap in the middle.
Now for the tedious bit (the first of many!), chop the hemp into little bits, 5-10mm ish. You need enough to fill that gap in the middle! Next dilute some waterproof pva about 50/50 and add a few drops of fairy liquid. Pour it onto the chopped hemp and create a sort of Shredded Wheat in milk, effect. You need to get a more or less solid wodge in the 'mould', then leave it overnight to dry out/set. Next day, peel it out, mine was still flexible which helps. While it is flexible, cut in half lengthways to give 2x 1" wide strips. Put somewhere warm to dry completely. When it is dry, use a rough file along one edge of each piece to lose the shine of the glue and free up some slightly raggedy fibres (dont go too mad!). Glue one piece either side of the ridge, touching at the centre and with the filed edges facing down the roof each side.
When dry, cut bunches of hemp long enough to span right across the ridge and overhang on both sides. Paint glue on one of the ridge pieces (only) and stick bunches to it, not to thick but as even as you can. I did it in two goes, a thick coat of neat glue to anchor it and then a second coat of diluted glue to makes sure every strand was stuck. When dry, bend it all right across and down the other side
and glue it. You should have a few mm overhanging both edges of the understrip. Then I used a sharp pair of curved nail scissors to trim the top layer back, flush with straight edge of the under strip.
The strips of wood that you see forming a pattern on the cap ( called 'spars' ) I produced by knotting thick grey darning thread at about 12mm intervals and then glueing in two parallel lines and then threading the diagonals between them. Then flood the whole lot in more diluted PVA withwasing up liquid.
Posted: Mon May 26, 2014 10:15 pm
by Peter Butler
That looks well worth the effort, well done!
Do you think it will stand up to outside weather conditions or do you expect to go through the process each year?
Posted: Mon May 26, 2014 11:35 pm
by Andrew
Absolutely lovely, well done! Don't think there were many thatched cottages in 20's Snowdonia, from that point of view it's shame I didn't stick to my previous "rural Kent" theme, particularly when there's inspiration like this to be had!
Thanks for the photos,
Andrew.
Posted: Tue May 27, 2014 9:36 pm
by philipy
Peter Butler:101040 wrote:That looks well worth the effort, well done!
Do you think it will stand up to outside weather conditions or do you expect to go through the process each year?
Peter,
Thanks. The simple answer is, I don't know but I hope it will last outside. I certainly don't want to have to redo it annually.
The whole lot has had several coats of thinned waterproof PVA, so I'm hoping it will have penetrated right through and will last a good time. Plus the spot I have planned for it is fairly sheltered so it should be reasonably protected from the worst of things.
Fingers crossed!
Thatched Cottage - NOW PLANTED!
Posted: Sat Jun 21, 2014 12:54 pm
by philipy
Now well and truly finished, Solstice Cottage is now in place in the garden. Its taken forever to get the last few bits done, partly because of a couple of weeks away on holiday, but I'm really quite pleased with the result.


Posted: Sat Jun 21, 2014 2:27 pm
by TonyW
That's great!
Posted: Sat Jun 21, 2014 8:15 pm
by Dr. Bond of the DVLR
Just brilliant. Really looks the part!
Posted: Sat Jun 21, 2014 9:24 pm
by Peter Butler
Superb work and a picturesque setting...... love the witch!