Page 1 of 3
My Garden Railway still to built
Posted: Thu Jul 04, 2013 11:00 pm
by McRuss
Hello,
my name is Markus and I'm from Germany. I'm a nurse in a psychiatric hospital. Last year after a house move I decided to build a garden railway. I purchased an Accucraft Ragleth with radio control.
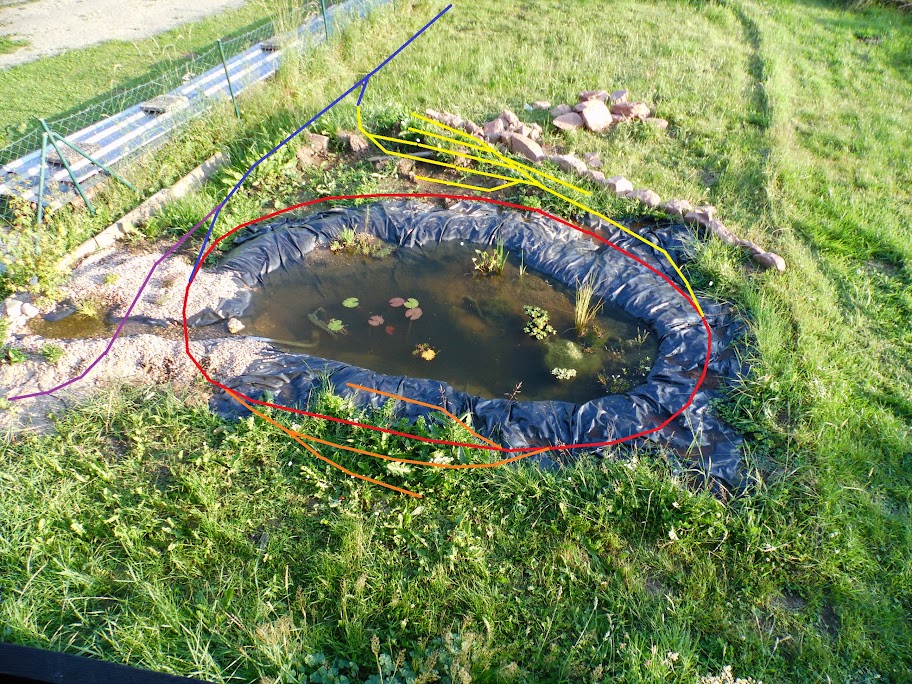
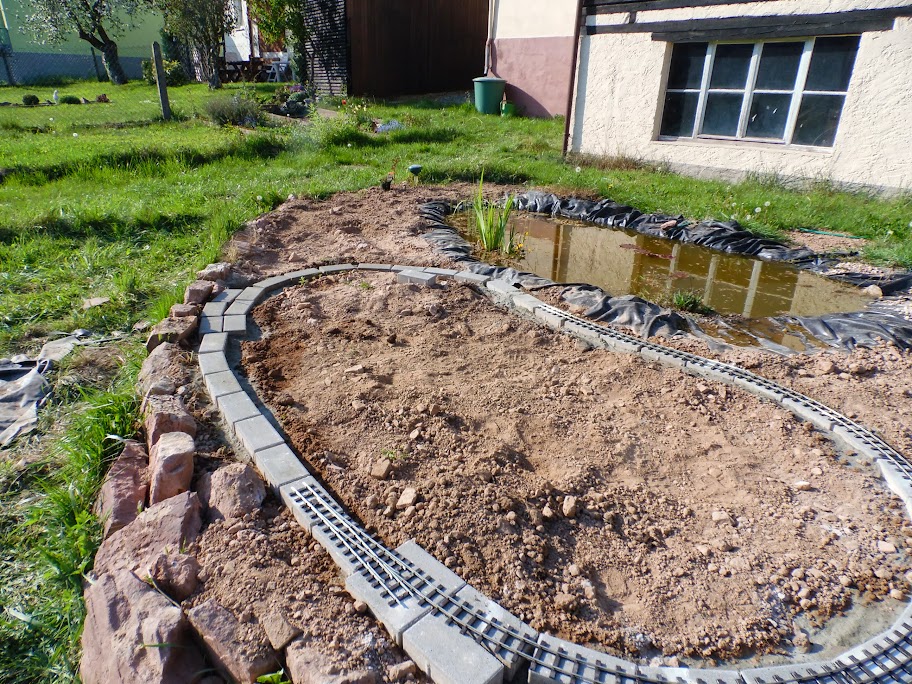
Today I will show you the area in which I plan to build the first part of my garden railway
I started with the digging of a garden pond which will be surrounded by the railway.
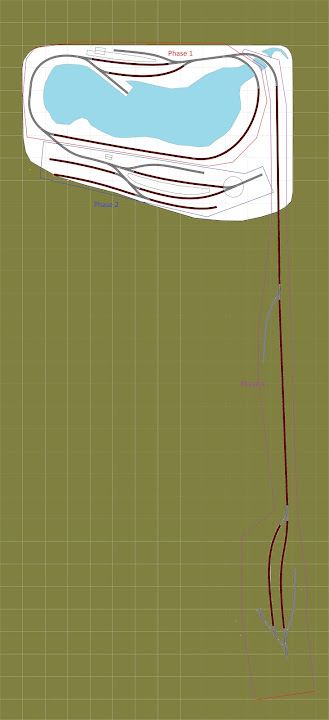
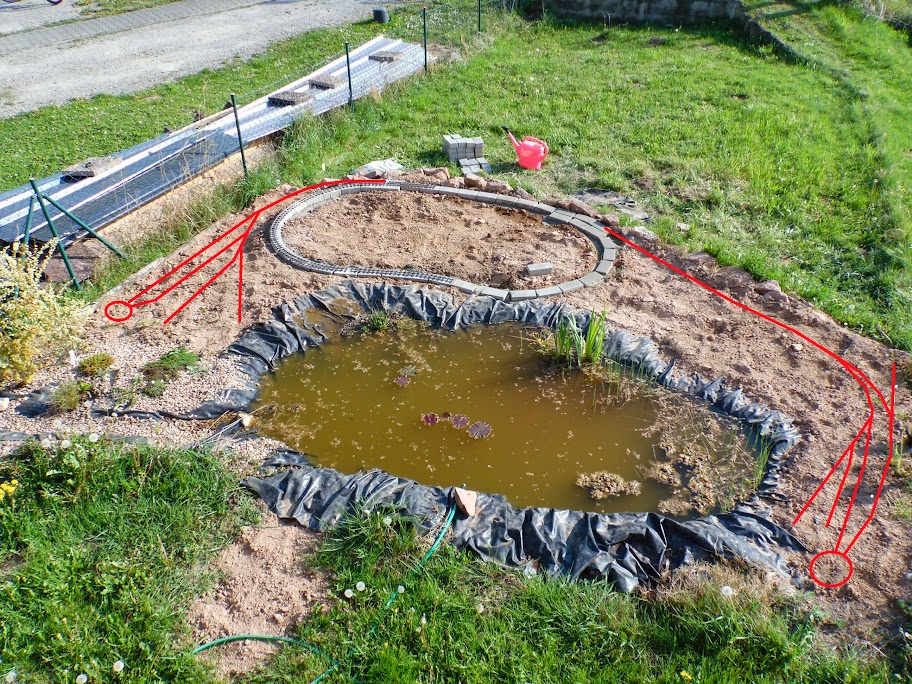
The red line shows phase 1, a simple oval of track around the pond.
Phase 2 is the orange line, which will be a small passing station with a harbour track and a goods shed track.
Phase 3 is shown by the yellow line, a second station. First a branchline terminus, but with the completition of phase 4 ist will be a through station.
Phase 4 is shown by the blue line and will lead the railway to one or two further station which will be build in the future.
Phase 5 which ist the violett line on the left, will be a short branchline, which serves a small industrie e.g. a mine or a gravel pit.
For comparison my first trackplan which show some difference to the now planned version.
Markus
Posted: Thu Jul 04, 2013 11:24 pm
by Peter Butler
That looks very ambitious ,Markus. A lot to get into the space it seems but hopefully you have it all worked out?
Posted: Fri Jul 05, 2013 12:26 am
by MDLR
It's good that you're building in phases - you'll get something running reasonably quickly and adding the next phase will increase your operating potential.
More power to your elbow, and send us the pictures as you progress!
Posted: Fri Jul 05, 2013 6:13 am
by St.Michael
Very interesting

Looking forward to follow your progress!
Regards from Michael
Posted: Fri Jul 05, 2013 7:30 am
by McRuss
Good morning.
A few weeks back I started with the construction of my first wagon.
I was inspired by Chris Birds GP wagons.
As a base I used a Faller E-train open Wagon.
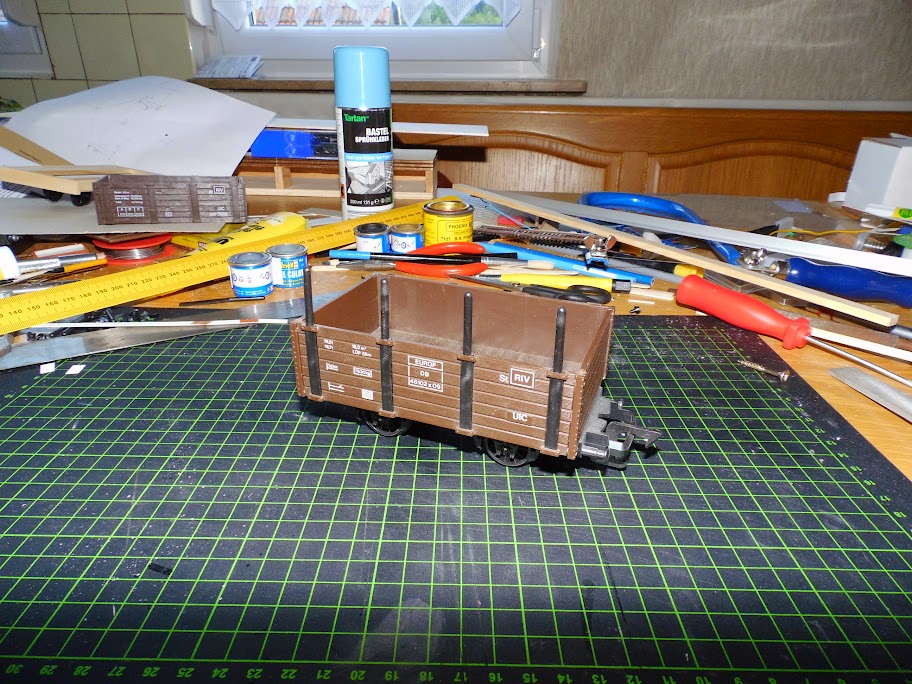
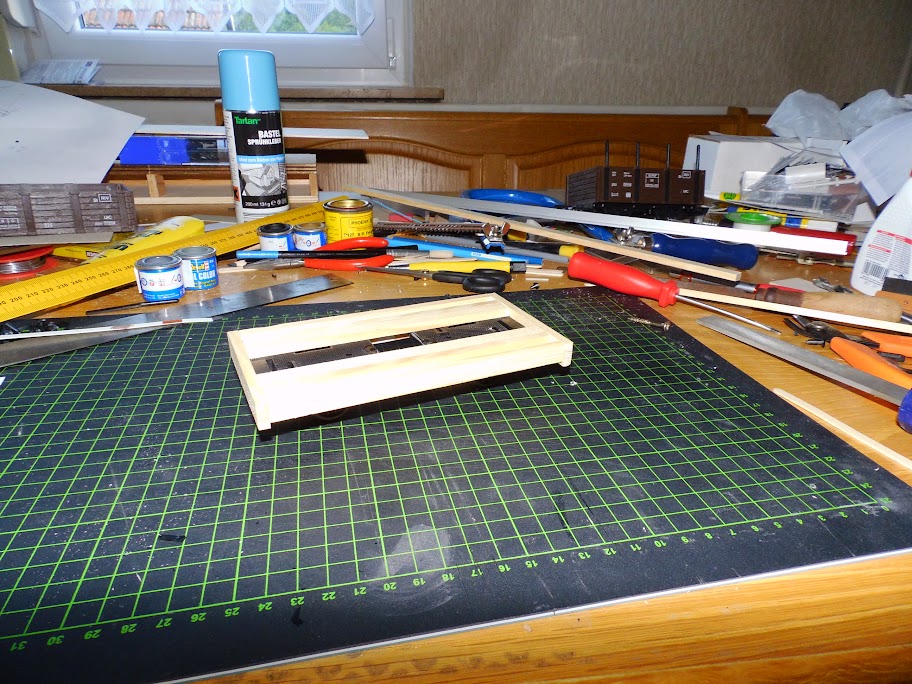
I cut the chassis in two halfes, removed the headstock and
glued the two chassis part on wooden strips.

As you could see I stretched the wheelbase, and added a outer frame so that the wagon is a bid wider than it would be.
I've got some further Faller E-train/playtrain wagons for other wagon projects, and a E-Train steam locomotive, wich I plan to
use as a chassis for a scratchbuilt locomotive.
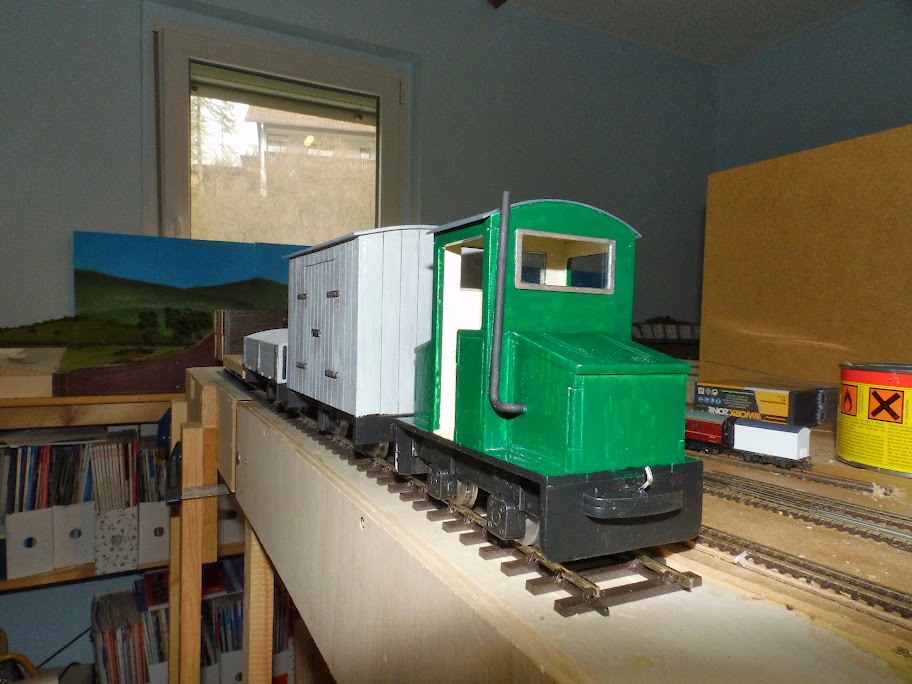
Here a picture of my Ragleth
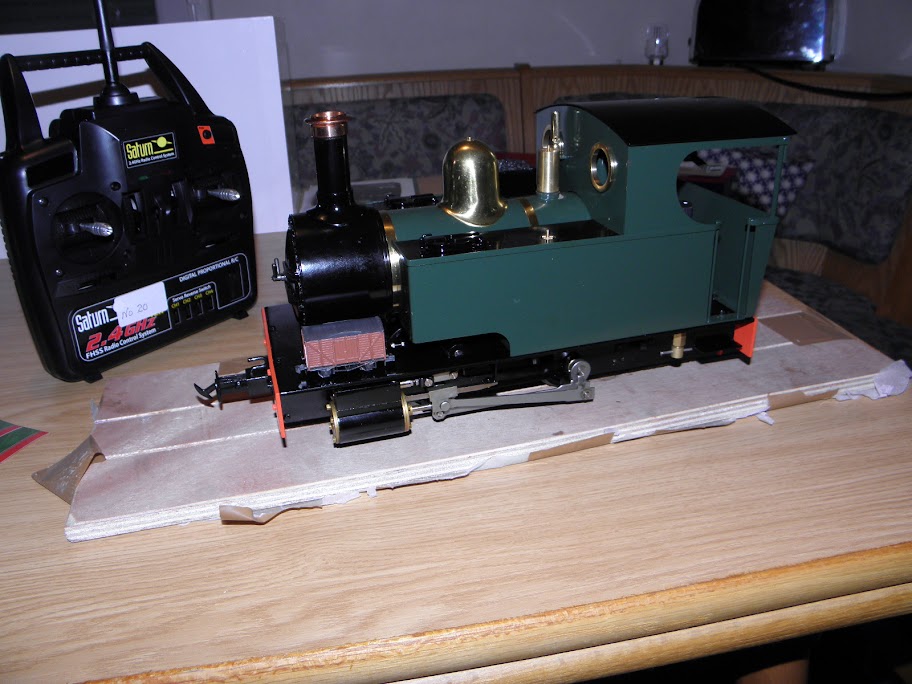
On the front plate what looks like a toolbox is a N gauge Goods Van.
N scale Railways is my other hobby.
More on my N gauge activity could you find here.
www.ios-railway.de
Markus
Posted: Fri Jul 05, 2013 7:39 am
by LnBmad
Looks like a good start

Posted: Fri Jul 05, 2013 8:00 am
by steamie1
make your bends as shallow as possible, mine are 2ft 6 inch set track and are too tight really. Well done and good luck!
Posted: Tue Nov 26, 2013 8:51 pm
by Woodfields Light Railway
Looks great! Looking forward to seeing how the line pans out.
Posted: Tue Nov 26, 2013 9:23 pm
by Keith S
I know it's a ways in the future, but I think you should plan to put a loop at the end of the blue part. It would be pleasant for you to see your train go off into the distance and come back by itself. It would also be more fun on the circle bit because it would be facing the other way when it returns from the "other town".
Posted: Fri Dec 27, 2013 10:26 am
by McRuss
Hello,
I hope everyone have got a merry christmas.
For Keith: When I build the blue line, it will contain
on or two stations with runround facilities.
Here the current state of my garden railway.
Nothing happend to the railway in the garden since last summer i'm afraid.
I had some problems with the stream. When the waterpump operates I lost a lot of water, so I will have to check these out.
For christmas my wife gave me some HGLW kit. These are the Open and the goods wagon, and the steeple cab diesel locomotive.
Today I finished the construction of the open wagon
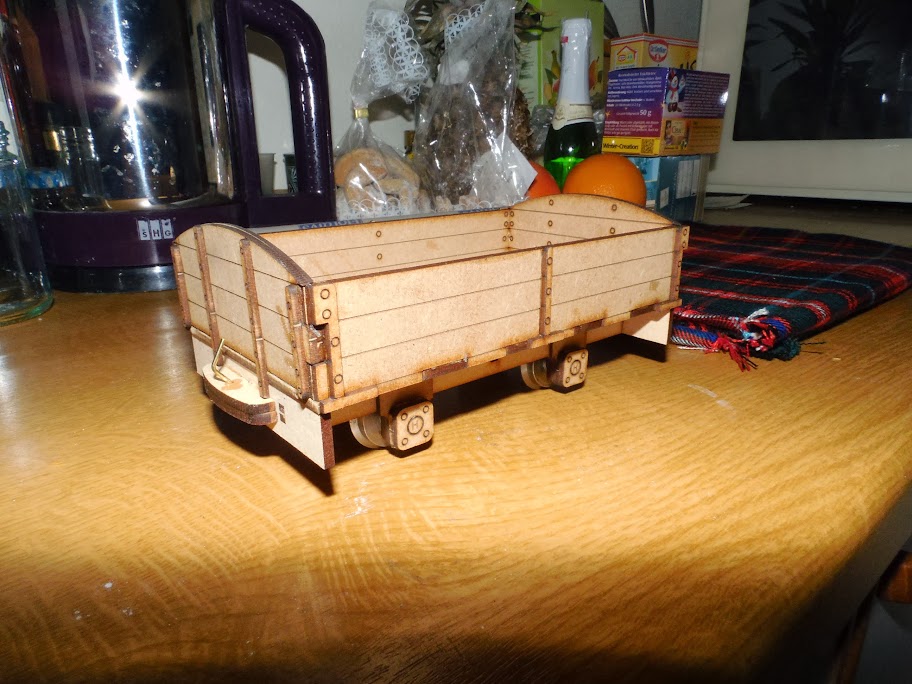
I hope to built the remaining kits in the next weeks.
Markus
Posted: Sun Dec 29, 2013 9:43 am
by dhippey
Hi McRuss,
Can I use your photo on the HGLW facebook page please.
See
www.facebook.com/hglocoworks
Posted: Sun Dec 29, 2013 5:52 pm
by McRuss
Hello David,
it would be a nice.
Markus
Posted: Mon Dec 30, 2013 7:04 pm
by McRuss
The last few days I continued with building the HGLW kits, I've got for christmas by my wife.
On the left is the covered goods van. At the moment it is sitting loosly on the chassis.
Today I built the Steeple Cab locomotive. It also sits only loosly on the chassis. When I finished the electrix I will fix the bodyshell to the chassis. In the future I will convert the loco to radio controll. For these the body would be removable.
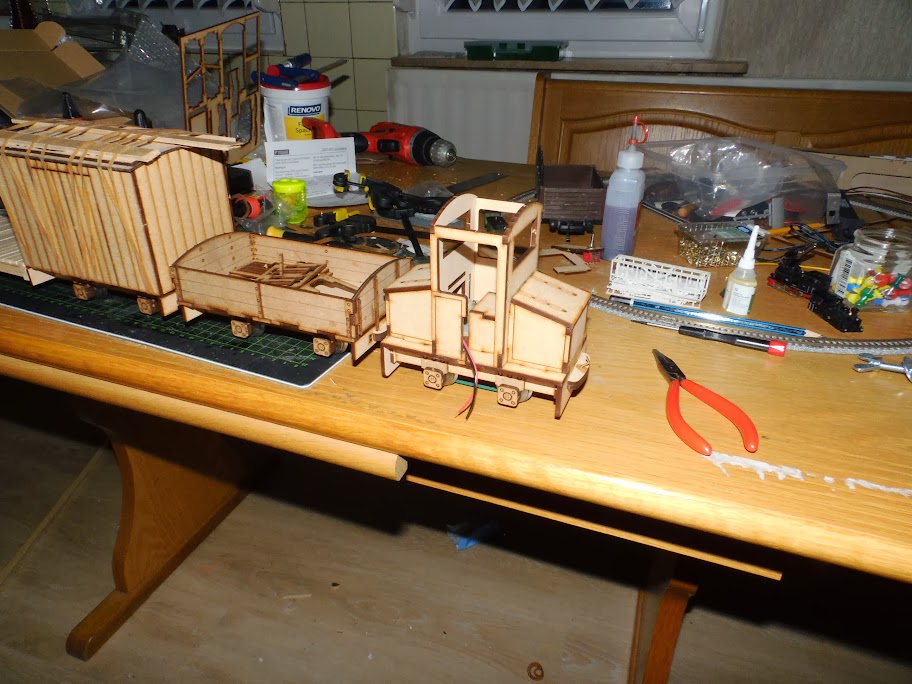
On the left side of the second picture you could see my flat wagon I began to built earlier.
Markus
Posted: Tue Dec 31, 2013 12:49 am
by dhippey
Looking good McRuss
(I'll steal these pictures too if that is okay)
I look forwards to seeing them painted.
Regards,
David H.
Posted: Tue Dec 31, 2013 10:40 am
by McRuss
Hello David,
no problem.
Markus
Posted: Wed Mar 19, 2014 3:24 pm
by McRuss
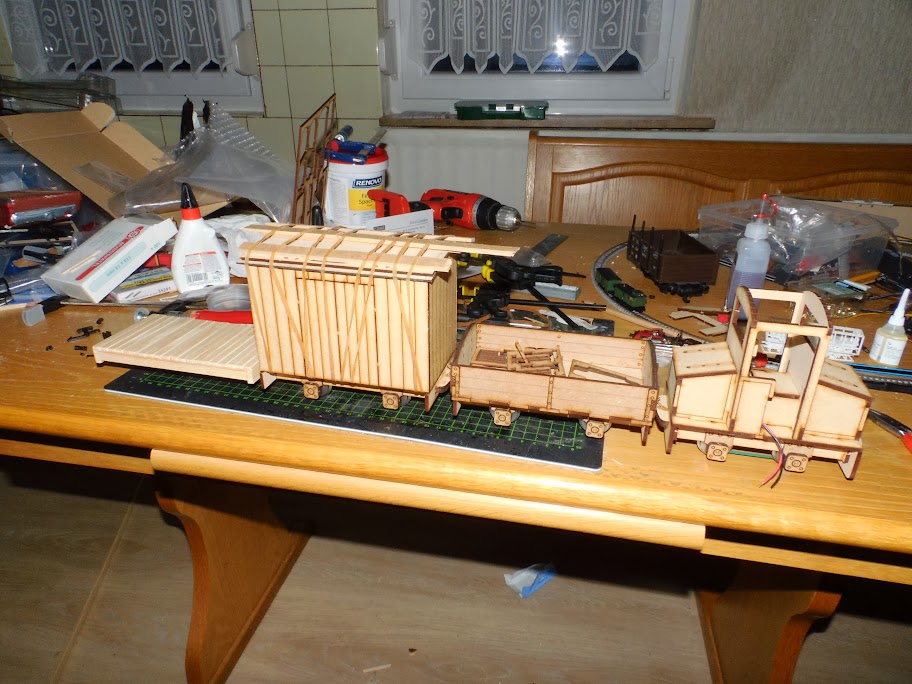
Since my last entry I continued with the work on the HGLW wagons and loco.


In the last picture you could see my firstly built flat wagon. For these I still need the couplers.
Beside it you could see my newest project. It will be a van for mail and valuable goods. The base are the wagon bodies of two Faller E/Playtrain open wagons. For the chassis I will use one of the Faller chassis.

I hope that I could fill up the area around the pond with soil in the next few weeks, and than to continue with construction of the trackbed.
Markus
Posted: Tue Apr 22, 2014 6:48 pm
by McRuss
Today I started with the foundation for my garden railway.
Some of you will recognize, that it looks different to the plan
from last year.
These is due to the decission from my wife and me to built or buy
a house within the next two years.
Today I constructed a oval, in the near future I will add to termini. So when in mood the trains can go roundy round, or from point to point


For the foundation I was inspired by Zachs foundation of his
DVLR.
And here the reworked layout scheme.
Markus
Posted: Tue Apr 22, 2014 7:18 pm
by kandnwlr
Hi Markus,
Good to see some rolling stock coming along. Good to see them painted now, too.
Gruss aus dem Elsass
Andrew
Posted: Tue Apr 22, 2014 8:27 pm
by laalratty
That looks a nice little run to get to started, and with room to expand. Trackbed looks good too.
Posted: Mon May 05, 2014 8:12 pm
by McRuss
Today I used the sunny day.
A week ago I laid the missing track of the oval and
then my little HGLW loco did its first run.
So I laid the foundation for the addition on the right side..
Then I did some greenery in the oval of track. And because it
was still sunny I decided to run my Ragleth for the first time
on proper track.
I made the preparation. To minimize the steam up time I used boiled water.
Then I lighted the burner and after a few minutes the
steam pressure was sufficent for the run.
After the first run I decided to refill the engine, but when I
tried to relight the loco the gas jet was blocked. I will
sort these out when I got some muse.
My conclusions:
1. Live Steam is fun
2. I need a Summerland Chuffer. sp that the loco will sound like
a big loco
3. I need a Goodall Valve
http://www.ebay.de/itm/Kessel-Nachspeis ... 3cd61504ab
4. exchange the gas jet
5. hopefully I could lay the track on the extension in the next days.
I hope to take some pictures in the next few days.
Markus