Dan's Rob roy rebuild
Posted: Thu Jun 20, 2013 10:46 pm
Back in Febuary I bought a slightly tired looking 3.5" gauge Rob Roy to Martin Evans popular design. The plan was to run it for a couple of years then repaint it. Unfortunatly thing didn't quite work out so I have decided to go for it. Yesterday afternoon was spent breaking it down into large lumps with a few suprises.
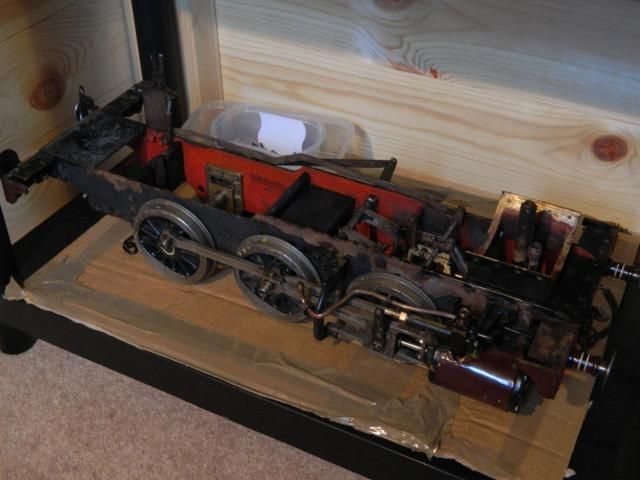
The chassis as expected is pretty tired, there isnt a huge amount of wear but there is lots of play where things have worked loose or were badly machined to begin with. This is where the problems with the running lie and will be rebuilt fully with new axle boxes for a start.
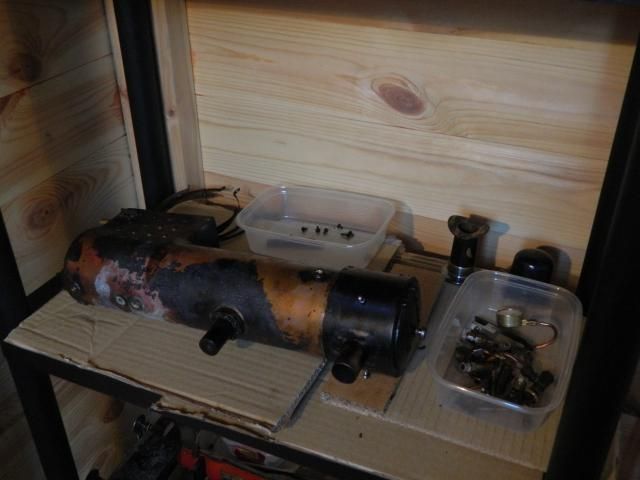
Next up is the boiler. Professionaly made to begin with this is still in really good condition if a little mucky. The boiler fittings are not that great so I am going to make or buy new ones along with making a new manifold which will give the option of adding an injector later. Incidentally, if any one knows of a boiler make with the initials TVM i would be interested.
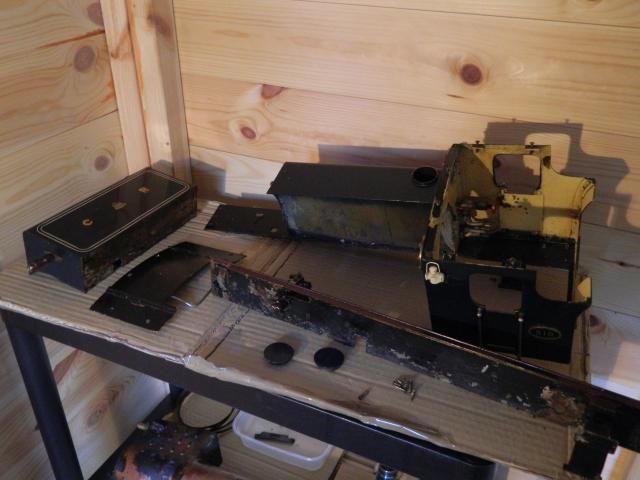
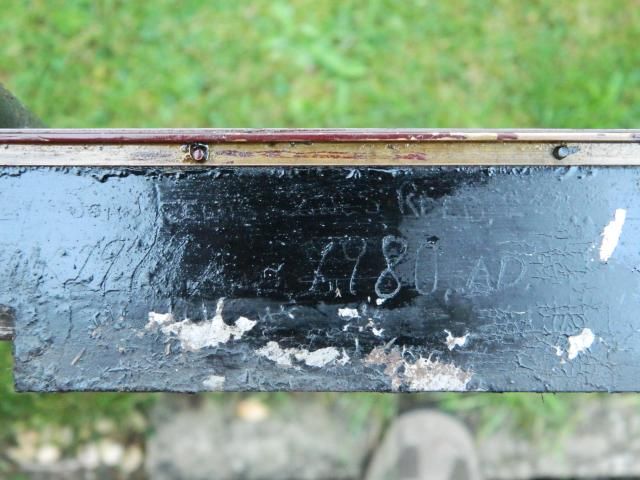
Finaly are the tanks and body work. I have not looked too closely at these just yet other to confirm a suspicion that the tank insides are infact glued in. There handpump lives in one of these tanks, while working fine it is small for the boiler so intend to replace it with something larger. The running boards have rusted to the point of non return so new ones will be made. On the under side of one though the builder has scratched his name into the paint. If you cant make it out it reads : John Lewis Jones Reed ESQ. Built between 1977 and 1980 AD.

The chassis as expected is pretty tired, there isnt a huge amount of wear but there is lots of play where things have worked loose or were badly machined to begin with. This is where the problems with the running lie and will be rebuilt fully with new axle boxes for a start.

Next up is the boiler. Professionaly made to begin with this is still in really good condition if a little mucky. The boiler fittings are not that great so I am going to make or buy new ones along with making a new manifold which will give the option of adding an injector later. Incidentally, if any one knows of a boiler make with the initials TVM i would be interested.

Finaly are the tanks and body work. I have not looked too closely at these just yet other to confirm a suspicion that the tank insides are infact glued in. There handpump lives in one of these tanks, while working fine it is small for the boiler so intend to replace it with something larger. The running boards have rusted to the point of non return so new ones will be made. On the under side of one though the builder has scratched his name into the paint. If you cant make it out it reads : John Lewis Jones Reed ESQ. Built between 1977 and 1980 AD.


