An international forum for garden railway modellers in all scales and gauges. It is free to join and is funded through voluntary contributions by its members. Many thanks to all those who keep it going. https://gardenrails.org/forum/
I just finished reading through your whole build. I am really impressed by your work in experimenting to find the right set up for the drive train. The gear cutting work looks very nice.
The end results look satisfying indeed, a good looking loco all round.
Mike
Posted: Sun Jul 12, 2015 9:16 am
by dewintondave
Thank you guys.
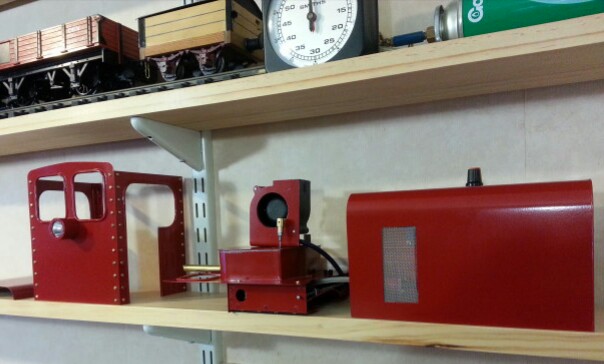
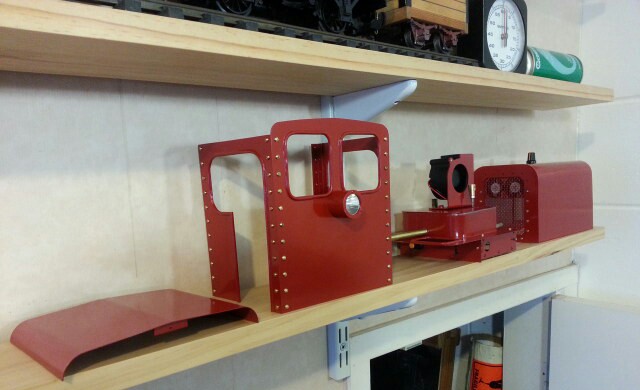
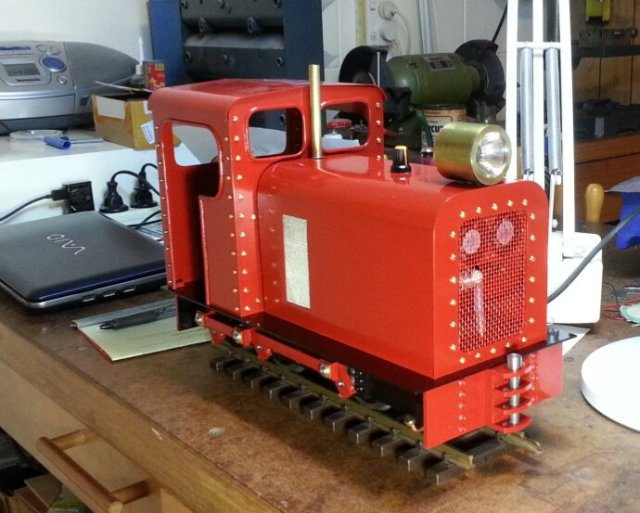
I've finished the bonnet and cab. The electrics are all reassembled. I'm putting all the various bits and pieces all over the place, I've got some shelves.
I like the brass / red contrast
I've just removed the footplate for painting, it's going to be black
Posted: Sun Jul 12, 2015 7:59 pm
by mike mott
I am looking forward to seeing it all put back together, the brass and red are a great combination.
Mike
Posted: Mon Jul 20, 2015 11:29 am
by dewintondave
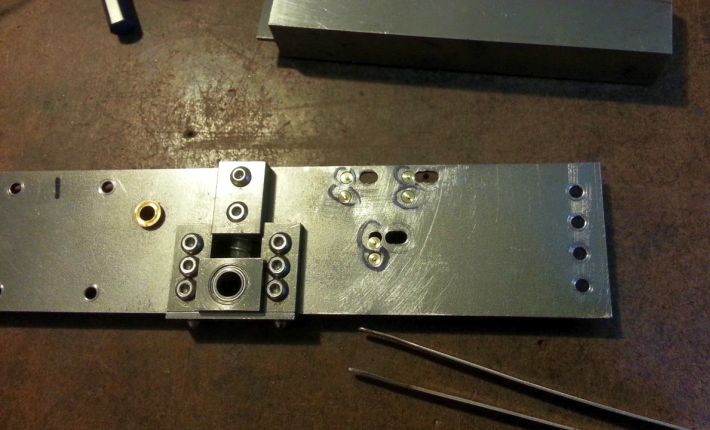
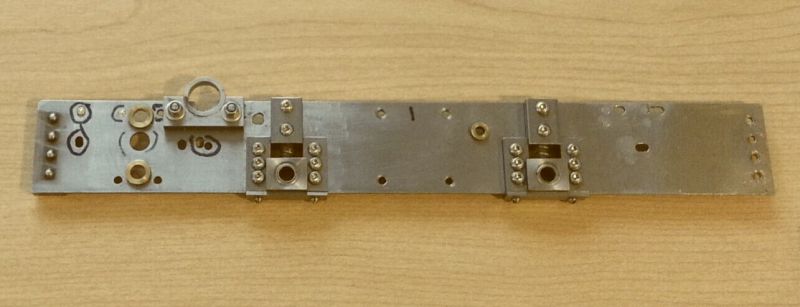
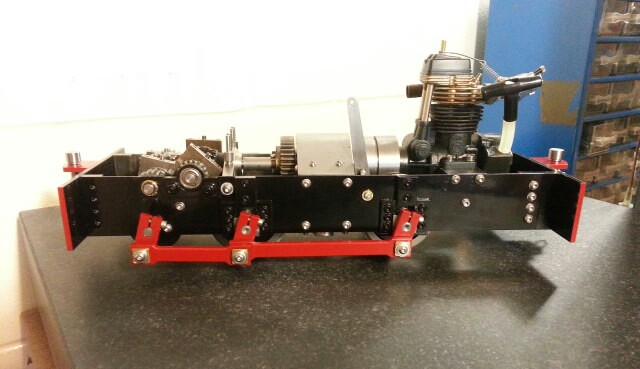
I've started to dismantle the chassis one side frame at a time so as not to disturb everything too much. I'm only going to paint the outside of the frames. First thing is to fill all those excess holes that were used in the earlier set-ups. I've used small slices of 1/8" K&S brass bar to fill the holes and slots, soft soldering over them and smoothing it off.
Posted: Sun Jul 26, 2015 4:41 am
by dewintondave
Here's the reassembled chassis on the surface plate for quartering of the cranks.
Posted: Sun Jul 26, 2015 11:11 am
by Dr. Bond of the DVLR
Everything is coming together. It looks very smart indeed!
Posted: Mon Jul 27, 2015 4:50 am
by Keith S
How long after spraying do you bake the parts? Do you wait until they are dry to the touch at room temperature?
Posted: Mon Jul 27, 2015 8:39 am
by dewintondave
Keith S:112246 wrote:How long after spraying do you bake the parts? Do you wait until they are dry to the touch at room temperature?
That's it, when it's touch dry. It's a smelly process, especially the black paint - toluene, the black paint was very fast to be touch dry. I used engine block spray paint
Posted: Sat Aug 01, 2015 9:54 am
by dewintondave
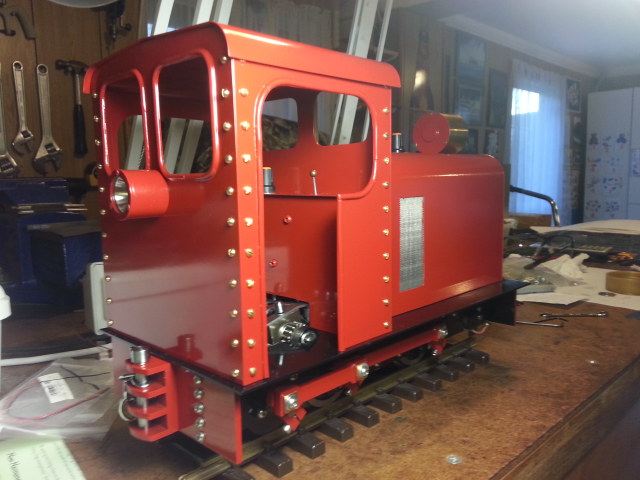
It is finished!
This project was started in the latter part of 2012. With the test chassis running in early 2013.
The basic dimensions of the loco are:
340 mm long (over the couplings) x 150 mm wide x 240 mm high from railhead to top of the exhaust stack. Weight: over 5 Kg
Posted: Sat Aug 01, 2015 10:06 am
by philipy
That looks fantastic, Dave.
Congratulations.
I'm in awe and envy of your abilities.
Posted: Sat Aug 01, 2015 12:49 pm
by robc_wa
Oh WOW! That really looks good. All that and the smell of castor oil too! Beautiful work.
Rob
Posted: Sat Aug 01, 2015 6:03 pm
by tom_tom_go
Dave this is an excellent model, well done.
Should you ever want to sell it let me know
Posted: Mon Aug 03, 2015 9:03 am
by dewintondave
Thank you guys.
My homemade locos are priceless... to me
Posted: Tue Aug 04, 2015 11:07 am
by dewintondave
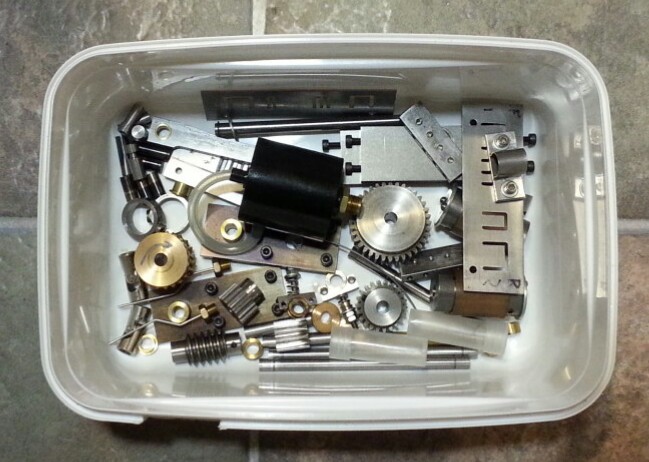
Here's the box of goodies that weren't used in the final iteration of the loco...
Posted: Sat Aug 08, 2015 12:57 pm
by KNO3
Congratulations! How about a video of the finished loco running?
Posted: Sun Aug 09, 2015 10:37 am
by dewintondave
Thank you guys. A run is a quite long way off as my railway needs a lot of repairs, it's winter over here.
In the meantime here's the loco on the shelf keeping the DeWintons company.
Posted: Sun Aug 09, 2015 11:34 am
by Peter Butler
What a magnificent collection Dave, you can feel very proud of your work, I hope you get plenty of opportunity to show it off!
Superb!!!!!
Posted: Sun Aug 09, 2015 2:10 pm
by Keith S
Congratulations! Now we are all looking forward to a video, when your line has been repaired!
Posted: Mon Nov 09, 2015 7:56 am
by dewintondave
Here we are, the first proper run, and on the new track. Plenty of smoke; the garden was bathed in the sweet aroma of castor oil. Most of the run was in first gear, but the last bit was in second