Page 1 of 2
First Building
Posted: Sat Dec 15, 2012 7:36 pm
by tegfan railway
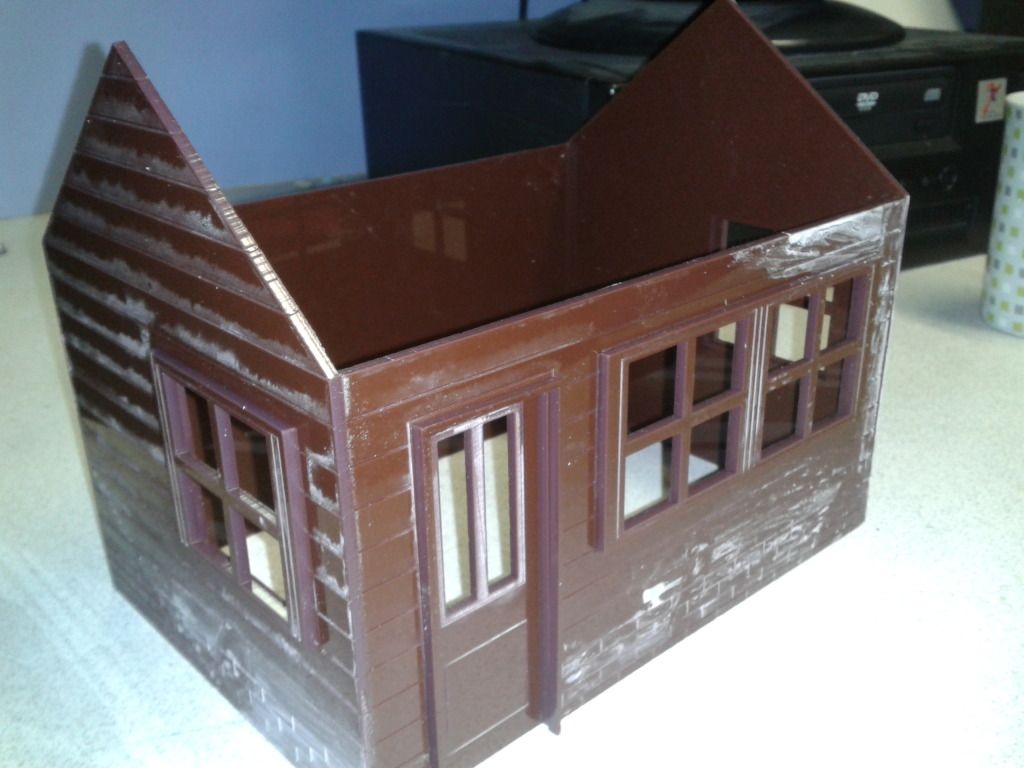
Just started my first building. A small station waiting room, drawn full size in Autosketch then cut at 16mm/Ft on a laser cutter. Material is sign writers 3mm Acrylic off cuts. Costs so far tsp of solvent cement and a sheet of 800 w&d paper. Roof will be corrugated extra planking care of a local coffee shop. Plan to paint all over grey primer then use match pots and satin varnish.
[img
][/img]
Posted: Sun Dec 16, 2012 12:53 pm
by MDLR
Looking good.................... Are you intending to instal internal lighting?
Posted: Thu Dec 20, 2012 1:52 pm
by tegfan railway
fitted roof today, acrylic underside clad with corrugated card, the card was a bargain £1.00 for a pack of 10 around A3 size. Just started to add some detail using wood coffee stirring sticks. Hope to get some rattle can primer on so that I can start painting today.

[/img]

[/img]
Posted: Thu Dec 20, 2012 1:59 pm
by Narrow Minded
Looking good!

Can you give me some pointers towards the corrugated card (make/supplier etc) please? - it sounds just the job for an "indoor project" I have on the go and at that price will stop me scouring for old corrugated cardboard boxes to scavenge

Posted: Thu Dec 20, 2012 2:19 pm
by tegfan railway
Narrow Minded:78272 wrote:Looking good!
Can you give me some pointers towards the corrugated card (make/supplier etc) please? - it sounds just the job for an "indoor project" I have on the go and at that price will stop me scouring for old corrugated cardboard boxes to scavenge

Bought the card in our local cheapy craft shop (llandudno) it came as a pack of mixed colours, I figure with a couple of coats of primer then painted with humbrol enamel and final coat of satin varnish it should stand up to the weather.
Posted: Thu Dec 20, 2012 6:07 pm
by Narrow Minded
Thanks for that - a soaking of Shellac or similar would probably be a better bet for weather protection
Posted: Thu Dec 20, 2012 8:52 pm
by Sir Clothem Cap
it looks great, well done
Blank canvas
Posted: Thu Dec 20, 2012 9:52 pm
by tegfan railway
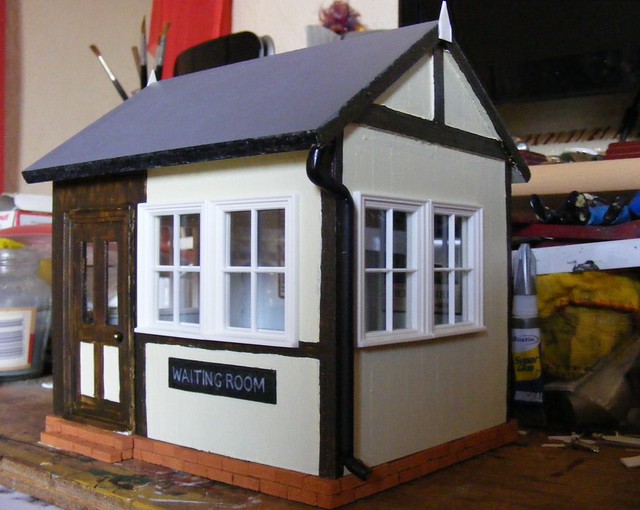
Thanks for all the positive comments, I am quite happy with the way the build is going especially as its my first. Thanks to the grotty weather might have some top coat on soon. Managed to get a couple of coats of primer on a few minutes ago. As the building is based loosely on the Castell Caereinion waiting room, colours will be cream for most of the walls, GWR chocolate for timbers and window frames in white.

[/img]
Posted: Thu Dec 20, 2012 9:55 pm
by MDLR
That's starting to look something like!
Posted: Thu Dec 20, 2012 10:02 pm
by Narrow Minded
It looks better than my look alike - "Codnor Castle"! Well done!
Posted: Thu Dec 20, 2012 11:44 pm
by DolwyddelanLightRail
That's come out well!
Posted: Fri Dec 21, 2012 10:01 am
by tegfan railway
DolwyddelanLightRail:78310 wrote:That's come out well!
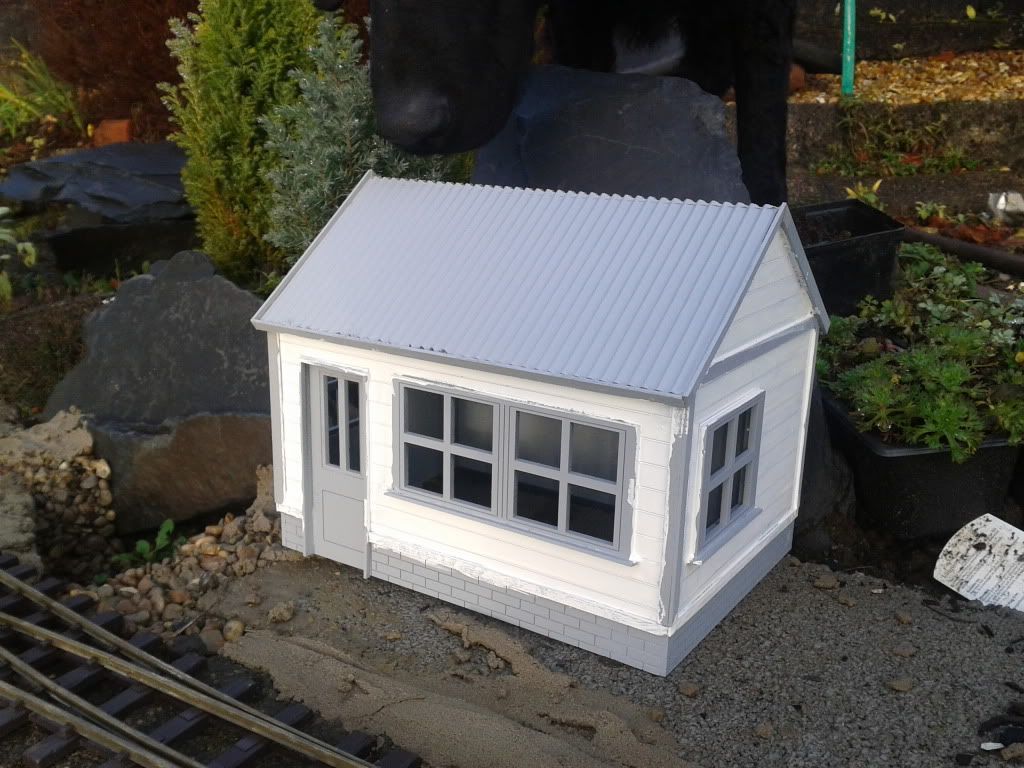
Thanks James, progress with line is a bit grasshopperish, probably should get track laid before planting and scenery, but who cares I am having fun. Weather looks better today so hopefully a bit more track will get laid. Will finish painting the shed tonight and tomorrow. Placed part painted shed in situ to see what it looks like. Puppy was impressed! Need to think about platform next.
Posted: Fri Dec 21, 2012 10:37 am
by SapperAnt
Looks fantastic!
Kit version any time soon???

Posted: Sun Dec 23, 2012 4:56 pm
by tegfan railway
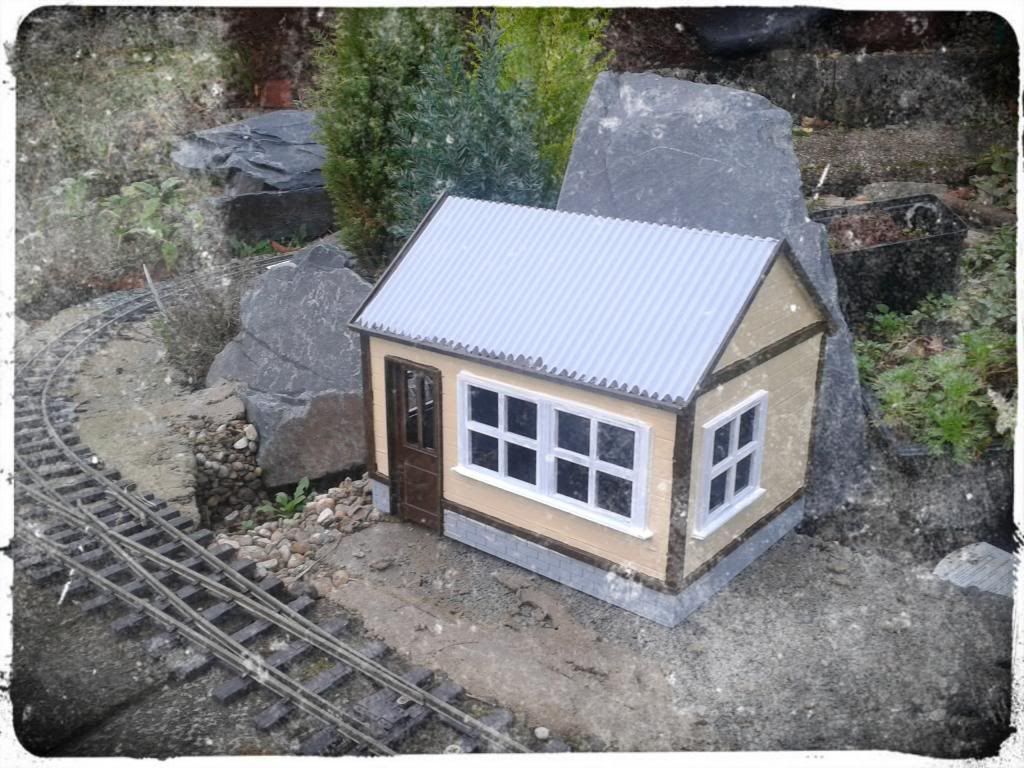
Almost there
Posted: Sun Dec 23, 2012 5:29 pm
by MDLR
Nice! A bit too "new looking" for my taste - a VERY thin wash of some black paint (on the basis that you can always add more) would help.
Posted: Sun Dec 23, 2012 5:43 pm
by tegfan railway
MDLR:78408 wrote:Nice! A bit too "new looking" for my taste - a VERY thin wash of some black paint (on the basis that you can always add more) would help.
Funny thats what my wife just said when I proudly showed her my almost complete construction. No worries there I have some Tamiya weathering powders ready for when I finish. Roof still needs painting as does the brick work.
Posted: Mon Dec 24, 2012 2:38 am
by IrishPeter
May I suggest you install a typical light railway platform:
Install edging a suitable distance from the rail - I favour some sort of stripwood well lathered in preservative - with the top 8mm above rail. Back fill with some sort of spoil - my favourite is decomposed granite as that is the local rock, and whack with a 2x4 until you have it suffciently patted down.
An alternative is concrete edging slabs, which are usually cheap enough from the local Big Tin Hardware Shed.
Whatever you do remember that full height platforms are a little rare in full size NG circles.
Peter in AZ
Posted: Mon Dec 24, 2012 8:02 am
by tegfan railway
IrishPeter:78428 wrote:
Whatever you do remember that full height platforms are a little rare in full size NG circles.
Peter in AZ
Platform coming soon, once I decide height and style - what height would you chaps suggest??
Posted: Mon Dec 24, 2012 1:00 pm
by MDLR
tegfan railway:78433 wrote:Platform coming soon, once I decide height and style - what height would you chaps suggest??
No higher than rail level - then you never have clearance problems!
Posted: Mon Dec 24, 2012 4:47 pm
by IrishPeter
Not more than 6 scale inches or 8mm above rail level, which is high enough to give your 16mm people a boost onto the bottom step, but low enough that it hopefully does not catch the foot boards of any visiting vehicles.
I do not know about you, but I always use my largest vehicle to test clearences. The Calthrop Coach that I built is 678mm over the headstocks and 128mm wide over the steps, so it is the vehicle used for checking if things clear.
Peter in AZ
