
Apologies for not commenting earlier – I was having trouble getting a video created and uploaded.
There was at least one Telford loco sold at Peterborough, because that was where I collected mine, having pre-ordered it two years previously at Stafford when it was still the fixed cylinder design.
I have finally uploaded a video to Youtube showing the loco running on an oval of Mamod track.
https://www.youtube.com/watch?v=_aCznz8ITpw
I don’t yet have a proper railway for it to run on, so it was a case of finding any flat, level spot large enough for a test track.
My loco does seem to be a bit of a Friday afternoon job, perhaps literally as they may have quickly put a few together specifically for that weekend. The cab is fractionally out of alignment, but it’s not very noticeable and in any case I intend to partially dismantle the loco to make a couple of cosmetic changes.
I did have some minor operational problems with the loco as follows.
There was a gas leak from the joint between the pipe and the jet. The olive had not compressed properly, which was allowing gas to flow backwards from the joint as a jet of flame acting on the rear buffer beam. I doubted that I would ever get the olive to form a reliable joint so the leak was sorted by unscrewing the joint and adding some PTFE tape between the olive and the nut.
There was a bit of a loss of steam from the cylinders along the piston rods. There is a packing gland on the cylinder which retains an O-ring and is supposed to prevent this, but this did not seem to be providing enough packing. This was cured by unscrewing the gland nut and adding a small twist of PTFE tape (again) around the piston rod, between the nut and the O-ring to increase the amount of packing.
Finally, the cylinder port faces were not completely parallel with the faces on the port block, creating very small gaps through which steam could escape. Therefore, I removed the cylinders and port blocks and lapped all of the faces to ensure that they were all parallel and flat.
Once reassembled there were no further steam leaks from the cylinders.
The gas leak was the only serious problem; the minor steam leaks would just have been the difference between a loco that performs well and one that doesn’t.
As Mike’s photos show, the cab is not very high. The doorway is 73mm high and the cab roof is 82mm above the footplate at about driver/fireman position. I am hoping to cut the bottom of the doorway down to the footstep, which will make it 87mm high. I would then also drop part of the footplate down to the same level either side of the frames, which will give the driving/firing positions about 96mm headroom. This will leave a high-point in the middle of the cab floor, but recently viewed pictures of Sir Haydn/Corris No.3 seem to show a similar arrangement on that full-sized loco. The doorway may also need to be widened very slightly, so that it looks right with the new height - I think I need to do some Photoshopping to try it out before risking cutting any metal.
- Richard
Thomas Telford Locomotive - Take Two
-
Chris Cairns

- Driver

- Posts: 2366
- Joined: Mon Oct 29, 2007 7:25 pm
- Location: Glasgow, Scotland
Hi Richard,
Firstly Welcome to the Forums, and congratulations on being the first to post a video of an oscillating Thomas Telford in live steam. Thank You.
To answer your points: -
1. Gas Leak I've found the tolerances used between the gas jet diameter and the burner holder means it is a loose fit. You can see the gas leaking result of this on the 2nd hand Diamond Jubilee locomotive I obtained here - http://gardenrails.myfreeforum.org/about6858.html I now wrap the jet exterior with PTFE tape before fitting it back into the holder. Most of my Mamod's came with the plastic/nylon gas pipe fitted which are slowly being replaced with copper tubing. I solder an olive onto the gas pipe going into the jet making sure the protruding end of the pipe is short enough so it does not hit the back of the jet when tightened up.
2. Piston Gland Totally agree with your observations. They appear to have got their measurements wrong (unless they expect the 'O' ring to roll like it does on the piston) as the gland nut does not compress the 'O' ring at all. On my Brunel & William II the leak was causing a significant drop in performance so I fitted a second 'O' ring (just sliced open to fit over the piston rod) and do up the gland nut finger tight. Not needed to do it on my oscillators so far, but I always coat the extended piston rod with steam oil prior to a run.
3. Cylinder/Backplate Honing Always a problem when running in oscillators but a simple process to fix prior to running in. I did this on one of my locos (Mark I or II) prior to running in which certainly helped.
As they used a solid fuel burner the original Mamod SL1 had a dropped cab floor so you could get the burner tray under the boiler. Thus you can just get some of the 16mm scale figures to fit. Be interested to see your cab floor conversion in due course.
Chris Cairns
-
mikewakefielduk@btinterne

- Fireman

- Posts: 309
- Joined: Wed Nov 28, 2012 1:43 pm
- Location: Shropshire
Thanks for you detailed comments and video Richard.
Since my euphoria on Friday at actually getting my hands on a Telford and posting my first comments (like you I had originally ordered it at the NEC back in 2012) I've been test running the loco off and on throughout yesterday. Because my outside track is being rebuilt I'm limited to a rolling road but I regret to say the euphoria is wearing off rapidly as I too am having issues. I'd given Mamod a couple of weeks warning as to when I was collecting the loco so it wasn't a "Friday Afternoon" rush job. Indeed the date of manufacture under the cab roof is in April and I received it on May 9th.
The good news is my loco's cab seems square and there certainly isn't a gas leak.
However I am experiencing problems, namely:
1. When I first tried running the loco I couldn't get it to run at all on the rolling road and instead had to support it on two blocks. After two or three runs this improved and it now runs on the rolling road, so I put that initial problem down to it being new and needing running in.
2. The wheels are wobbly and there's sometimes a knocking noise, particularly in reverse. I can't see what's causing this. Also, with the piston rods taken off the cranks, you can feel a rough point when you rotate the wheels, but again I couldn't trace the cause.
3. The loco keeps running out of steam and stopping. I fitted the pressure gauge from my Brunel into the water filler hole on the boiler so I could monitor what's happening. From cold it takes about 5 minutes for the pressure gauge to move. At about 15 psi the wheels will start to rotate but within a few seconds the pressure drops down to below 10psi and they stop again. I closed the regulator and pressure rises and the cycle can be repeated. I then turned the gas up until the flames were nearly coming out of the side tank tops . The paint gets very hot but so far so good, it hasn't bubbled. Glad I didn't have the decals fixed on the sides though. Pressure quickly climbs but it now takes 20 psi before the wheels will turn and then they race into life. Again pressure slowly drops until they stop again around the 15 psi mark, so clearly as its getting hot there's an increase in friction somewhere. There was still steam oil being ejected so it wasn't that.
So, to summarise, wobbly wheels, rough spot, running out of steam. Interestingly watching your video on YouTube, I noticed your loco slow down after a few circuits and then speed up again. Mine also leaks some steam along the piston rods
This really shouldn't be happening. The wheels and cylinders are basically the same as the Mk11, and Mamod must have made hundreds of these. I've owned two, and both ran fine pretty well out of the box.
I'm going over to see Mamod tomorrow (they gave me some incorrect parts to re-gear my Brunel, so I need to change them) so, instead of investigating further myself I'm taking the Telford back to them for it to be fixed. I'm expecting a non-wobbly wheels set that rotate without roughness. I'll also get them to run it for a while to see the losing steam pressure. I'm hoping the fix will be a set of cylinders that don't leak so much but am worried it might be something else. My Mk11's used to leak a bit in the same place and they didn't keep slowing down and speeding up. Watch this space to see how Mamod respond.
Mike
Last edited by mikewakefielduk@btinterne on Tue May 13, 2014 10:56 pm, edited 1 time in total.
-
mikewakefielduk@btinterne
- Fireman
- Posts: 309
- Joined: Wed Nov 28, 2012 1:43 pm
- Location: Shropshire
OK, all issues are pretty well sorted. and I'm feeling good about the loco again.
1) Wobbly wheels were replaced with a new wheel set. Examination of the wobbly ones, once removed from the loco, showed the wobble was very slight, certainly not like the MSS problem posted on the forum recently.
2) The rough spot was found to be a tiny bit of metal in one hole of a coupling rod. It was catching on the inside of the circlip that retains the rods onto the crank pin and impossible to see once the circlip was in place. As it only caught the circlip when the wheel was to one side of its travel, you couldn't always feel it catching when you rotated the wheel. Peter carefully removed the errant bit of metal with a cutting broach and all was well.
3) The lack of steam, which was my main concern, was traced to the burner. The burner was alight with a band of blue flame which I thought was OK. Peter took one look at it and immediately said it wasn't right. Removed the gas jet and it was totally clear. Replaced it and lit the burner again and this time it burnt with a totally different flame pattern. What you should have is a series of incandescent cone shapes.

As to why I was having this problem, what the cause was and how it was fixed, remains a mystery. All we could think was a piece of something had partly blocked the gas pipe inlet and by taking it off (to look through the gas jet) had removed it.
So, main problems solved and they turned out to be very minor indeed. It certainly helps to know what you're looking for especially when it comes to the burner's flame pattern.
The loco now runs and maintains steam pressure. Yes, it still does leak a bit of steam down the piston rods but I can live with that, its no different to how my Mk11's behaved. I may attempt to reduce this by either a bit of PTFE tape or an extra O ring, but it can wait.
A few snippet of info from while I was at Mamod:
* The burner of the Telford is some 30% more efficient than the Mk11. The extra heat was sufficient to damage the steam pipe from the lubricator when it was routed through the burner flame. The pipe now runs along the edge of the heat shield.
* The wheels of the Telford are identical to the MK11 but have different axles.
* The Telford's lubricator should be filled with 5mls of steam oil (the user manual isn't available yet).
Mike
1) Wobbly wheels were replaced with a new wheel set. Examination of the wobbly ones, once removed from the loco, showed the wobble was very slight, certainly not like the MSS problem posted on the forum recently.
2) The rough spot was found to be a tiny bit of metal in one hole of a coupling rod. It was catching on the inside of the circlip that retains the rods onto the crank pin and impossible to see once the circlip was in place. As it only caught the circlip when the wheel was to one side of its travel, you couldn't always feel it catching when you rotated the wheel. Peter carefully removed the errant bit of metal with a cutting broach and all was well.
3) The lack of steam, which was my main concern, was traced to the burner. The burner was alight with a band of blue flame which I thought was OK. Peter took one look at it and immediately said it wasn't right. Removed the gas jet and it was totally clear. Replaced it and lit the burner again and this time it burnt with a totally different flame pattern. What you should have is a series of incandescent cone shapes.
As to why I was having this problem, what the cause was and how it was fixed, remains a mystery. All we could think was a piece of something had partly blocked the gas pipe inlet and by taking it off (to look through the gas jet) had removed it.
So, main problems solved and they turned out to be very minor indeed. It certainly helps to know what you're looking for especially when it comes to the burner's flame pattern.
The loco now runs and maintains steam pressure. Yes, it still does leak a bit of steam down the piston rods but I can live with that, its no different to how my Mk11's behaved. I may attempt to reduce this by either a bit of PTFE tape or an extra O ring, but it can wait.
A few snippet of info from while I was at Mamod:
* The burner of the Telford is some 30% more efficient than the Mk11. The extra heat was sufficient to damage the steam pipe from the lubricator when it was routed through the burner flame. The pipe now runs along the edge of the heat shield.
* The wheels of the Telford are identical to the MK11 but have different axles.
* The Telford's lubricator should be filled with 5mls of steam oil (the user manual isn't available yet).
Mike

-
mikewakefielduk@btinterne
- Fireman
- Posts: 309
- Joined: Wed Nov 28, 2012 1:43 pm
- Location: Shropshire
The rectangular part of burner is some 9 cm long. I'm assuming this is all topped by ceramic but haven't personally taken it out to check - Peter at Mamod did that today. The part containing the jet is about another 2cm, so the whole thing is roughly 11cm long with the gas pipe going into one end.
About 1 cm wide.
Hope this helps
Mike
About 1 cm wide.
Hope this helps
Mike
-
mikewakefielduk@btinterne
- Fireman
- Posts: 309
- Joined: Wed Nov 28, 2012 1:43 pm
- Location: Shropshire

-
Chris Cairns
- Driver
- Posts: 2366
- Joined: Mon Oct 29, 2007 7:25 pm
- Location: Glasgow, Scotland
Mike,
Great to hear that your problems have been easily resolved, and it is certainly advantageous that you can visit the factory direct (a walk-on return rail fare for me would likely cost as much as the loco!).
Coupling Rods - As you will be aware the old Mamod SL & current MSS brass coupling rods are fitted with a washer either side. The IP Eng coupling rods are thicker and were not supplied with washers. The same applies to the current RWM Steam upgrade coupling rods. When I was having problems with my William & William II I ended up fitting washers to their coupling rods. I've just ordered a new supply so may consider fitting them to the rest of my oscillator fleet.
Ceramic Burners - We have had this discussion before. The Cheddar Models, PPS Steam & Bix ceramic burners were/are supplied with instructions explaining how to set up the correct gas/air mix (adjustable jet holder) and to get those cones on the top of the ceramic material. The Mamod burner effectively has no adjustment of the gas/air mix so the jet is held in a fixed position. My personal view is the jet holder is too loose a fit into the burner and the air leaking around the jet can cause problems - whilst I've had some serious blowbacks fortunately I have not melted the plastic/nylon gas pipe which has happened to others with the subsequent worrying fireball. So I wrap the jet with PTFE tape around the outside so it is a nice tight fit into the burner. I adopted the same method with my Regner Lumber Jack after having problems lighting it's burner.
Chris Cairns
Great to hear that your problems have been easily resolved, and it is certainly advantageous that you can visit the factory direct (a walk-on return rail fare for me would likely cost as much as the loco!).
Coupling Rods - As you will be aware the old Mamod SL & current MSS brass coupling rods are fitted with a washer either side. The IP Eng coupling rods are thicker and were not supplied with washers. The same applies to the current RWM Steam upgrade coupling rods. When I was having problems with my William & William II I ended up fitting washers to their coupling rods. I've just ordered a new supply so may consider fitting them to the rest of my oscillator fleet.
Ceramic Burners - We have had this discussion before. The Cheddar Models, PPS Steam & Bix ceramic burners were/are supplied with instructions explaining how to set up the correct gas/air mix (adjustable jet holder) and to get those cones on the top of the ceramic material. The Mamod burner effectively has no adjustment of the gas/air mix so the jet is held in a fixed position. My personal view is the jet holder is too loose a fit into the burner and the air leaking around the jet can cause problems - whilst I've had some serious blowbacks fortunately I have not melted the plastic/nylon gas pipe which has happened to others with the subsequent worrying fireball. So I wrap the jet with PTFE tape around the outside so it is a nice tight fit into the burner. I adopted the same method with my Regner Lumber Jack after having problems lighting it's burner.
I'm sure they will Doug (they sell 2 round burners & the scuttle burner on their website). I'll be able to get some proper measurements when my Thomas Telford arrives. Problem you may have is getting the correct spacing for the Mamod SL/MSS/RWM Janet chassis frames (the burners on the Mark I, II & Diamond Jubilee are fitted with spacing washers on their mounting screws), and your PPS (or whatever) jet holder may not fit properly into the Mamod burner venturi.dougrail wrote:Wonder if they'll sell'em separately...
Chris Cairns
Hi Mike
I'm glad you managed to get your loco sorted.
Thanks for the extra info, particularly the pictures of the burner.
I think mine is almost right, but some of the cones towards the front aren't very stable, so I might be able to get it to burn better. Part of the challenge is ensuring that there is no flame coming out of the slots at the side. There is only a small amount of movement on the valve betwen too low and too high, which takes some getting used to. The better it burns, the less the temptation to turn it up too high.
I'm still puzzled about why my loco had fast and slow phases when I videoed it, because it seems to run consistently when it is on the rolling road.
The variations may have been caused by the wind - it was very windy when I made the video so that might have been affecting the burner.
I will need to do some more runs outside when good weather and free time coincide.
- Richard
-
mikewakefielduk@btinterne
- Fireman
- Posts: 309
- Joined: Wed Nov 28, 2012 1:43 pm
- Location: Shropshire
Hi Richard
Mike
As you say, it could be the wind. That's the biggest downside to pot boilers. Our garden can be quite exposed so now I won't even try to run either of the Mamods unless its pretty still otherwise the burners just get blown out completely.The variations may have been caused by the wind - it was very windy when I made the video so that might have been affecting the burner.
There was quite a bit of discussion about Mamod burners a while back which I'm sure you've read (a lot of it on this thread back in late 2012/early 2013). Some concern about the copious used steam oil being ejected and getting back onto the front of the ceramic burner. At best causing spitting and flaring and at worst damaging the ceramic itself.but some of the cones towards the front aren't very stable
and not just Mamods. I fitted an aftermarket gas control to my Edrig, which improved matters a bit.only a small amount of movement on the valve betwen too low and too high, which takes some getting used to.
Mike


-
mikewakefielduk@btinterne
- Fireman
- Posts: 309
- Joined: Wed Nov 28, 2012 1:43 pm
- Location: Shropshire
I can't help feeling the loco will be too small to appeal the the general Garden Rail buying community.
The length and width aren't too bad but the height is way too low. In my opinion Mamod would have been better to simply fit a spectacle plate instead of a full cab. That way it wouldn't look too out of place. For example the Regner Vincent next to the Telford originally had an open cab but has now been fitted with a roof (by the previous owner, not me)
Of course the dedicated kit bashers will soon make a host of changes, but the majority of loco purchasers seem to keep their locos very much as they cam out of the factory.
What do other people think?
Mike
-
mikewakefielduk@btinterne
- Fireman
- Posts: 309
- Joined: Wed Nov 28, 2012 1:43 pm
- Location: Shropshire
Run time is fine (15+ minutes) but I can't stop it racing away. Have tried a heavy(ish) load but then it stalls on the gradient unless I constantly alter the regulator. I think it would be far better on a totally level track.
Fitting radio control to the regulator isn't going to help as the regulator thread is so fine it needs well over a full turn to get moving. Chris Cairns has suggested fitting a sailing winch type servo connected via a chain or cogs. There's also the possibility of radio controlling the reverser but where to mount the servo, the gas tank and lubricator are in the way? No doubt somebody will think of a way but in the meantime the Telford has been consigned to the display case.
Mike
-
mikewakefielduk@btinterne
- Fireman
- Posts: 309
- Joined: Wed Nov 28, 2012 1:43 pm
- Location: Shropshire
I had to fit Radio Control to my Mk11 as well, but at least its regulator thread was coarse enough for a 180 degree rotation to open it from closed to sufficient steam to climb the steepest gradient on my track, even pulling a few trucks. The regulator on the Telford has a much finer thread.
Here's a photo of the two threads side by side so you can see what I mean.
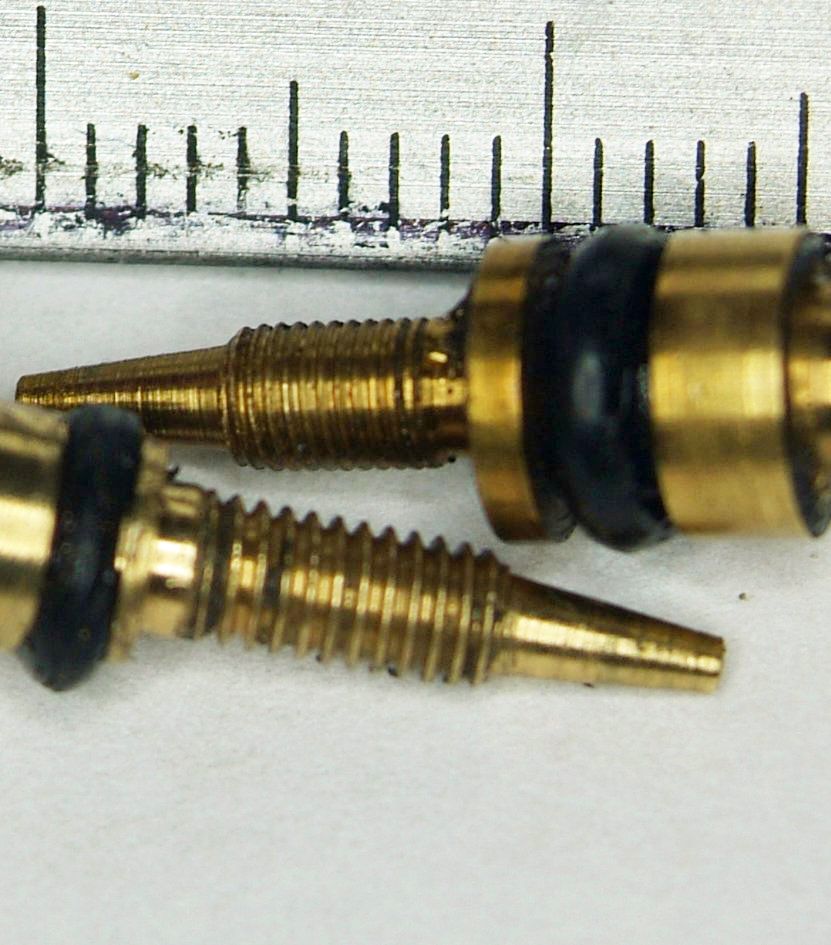
The top thread is from the Telford regulator, you can see how much finer it is. The ruler is in millimetres.
Mike
Here's a photo of the two threads side by side so you can see what I mean.
The top thread is from the Telford regulator, you can see how much finer it is. The ruler is in millimetres.
Mike
Last edited by mikewakefielduk@btinterne on Tue Jun 10, 2014 5:24 pm, edited 1 time in total.
-
mikewakefielduk@btinterne
- Fireman
- Posts: 309
- Joined: Wed Nov 28, 2012 1:43 pm
- Location: Shropshire
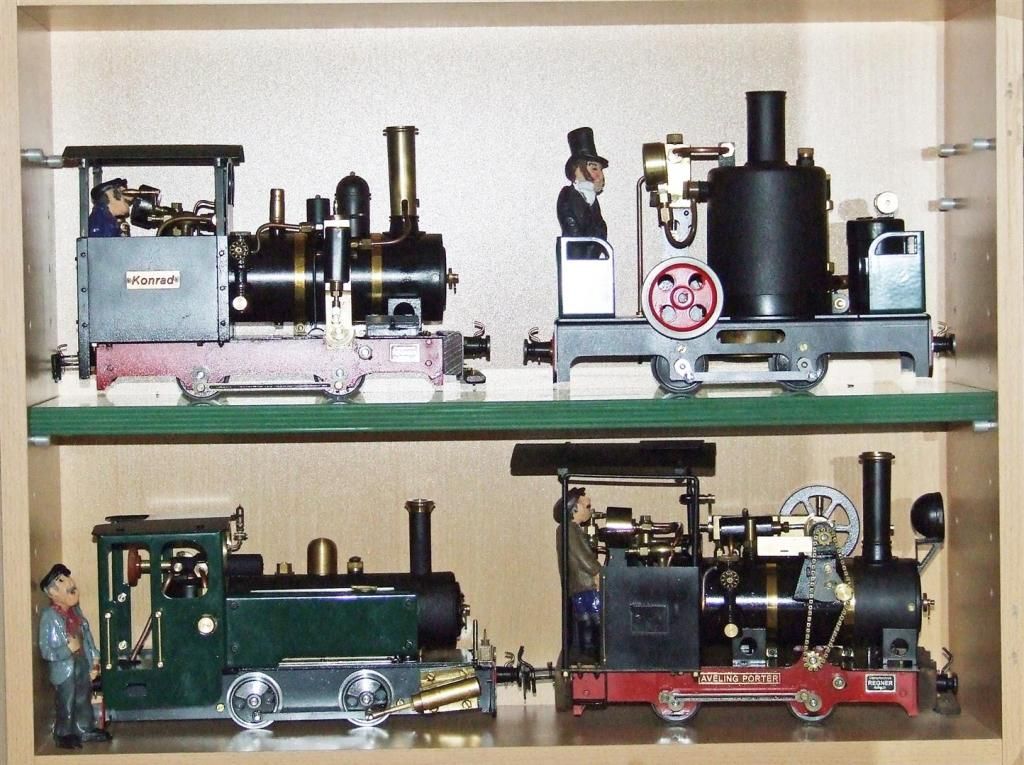
The Brunel is one of my favourite locos. Its currently awaiting the arrival of its new nameplates "Isambard" as the great man himself has been nominated as the driver, complete with stove-pipe hat. Prior to that the Brunel was named "Earwig", a name which has been transferred to an elderly battery powered Swift Sixteen loco, much to my grandchildren's annoyance.
You'll have noticed the locos in the cabinet, with the exception of the Telford, are all geared and so can cope with my track without intervention on my part.
Mike
You'll have noticed the locos in the cabinet, with the exception of the Telford, are all geared and so can cope with my track without intervention on my part.
Mike
Last edited by mikewakefielduk@btinterne on Tue Jun 10, 2014 8:35 am, edited 1 time in total.
Who is online
Users browsing this forum: No registered users and 2 guests