(WH)WHR Rolling Stock


Thanks anyway, hope you get it working soon!TTHLRMatt:106114 wrote:Who are you getting to cut them? I would offer but we cant get ours to work atm :oops:
I've talked to a couple of people who may be able to help, but I've also popped into our local "hackspace", where a whole load of blokes called Dave pull things apart and put them together again in a different order using a huge array of exciting kit - to give you an idea I talked to one chap who was talking about the possibility of creating an edible version of his own brain using a cat-scan and a 3D printer modified to extrude cake mix. Among their arsenal is a laser-cutter, owned by a member and available to hire pretty cheaply after an induction, and once you've joined the collective and are paying the monthly sub. So I may give that a go - they seem like an interesting crew, and it's only a 10 minute walk from my house.
I've nearly finished the drawings now, then I'll need to duplicate those I need more than one of and rearrange them on suitable sheets according to the thickness of ply required. The advice seems to be to convert the drawings so that all lines, arcs etc are joined into continuous polylines for speed and accuracy of cutting, so I'd better do that too.
I've yet to purchase any wood, so if anyone can recommend a supplier of laser-grade ply I'd be grateful. I'll need 0.8mm, 1.5mm and 3mm thicknesses...
Cheers,
Andrew.
Using Snaps (draftsight must surely do that) will create polylines very easily. Ebay is a good source of any of the thicker stuff though a good model shop will do the 0.8mm though, from anyone, that one will be more expensive. Standard grade should be fine though I would recommend getting some MDF (its cheaper) to cut an initial one in so if there are any mistakes, you wont waste material.
Hello!
An enforced break from the CAD stuff over Christmas (I hope I can remember all I'd learned!) has seen me make some progress with the interior of my model of WHR Van 4 instead.
Like the original it's based on the FR quarryman's coach, so I needed to add a representation of braking equipment. There are only 4 known photos of the van, and all only show the outside, so this was always going to be something of a stab in the dark! I reckon that the handbrake can only really have gone roughly where I've put it, but the controls for the air and vacuum brakes were a complete guess - I've based them on pictures of a vacuum brake "setter" and knocked them up out of old felt pens!
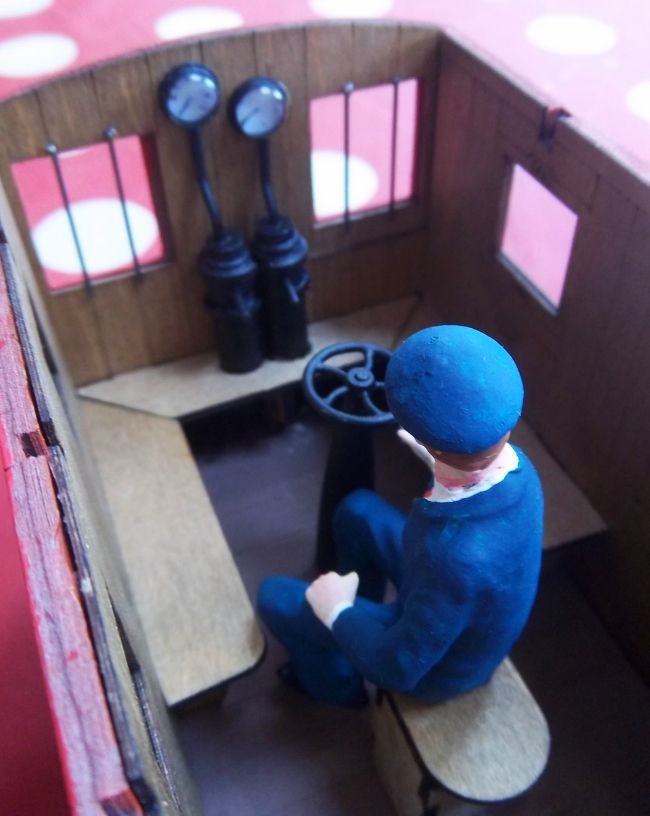
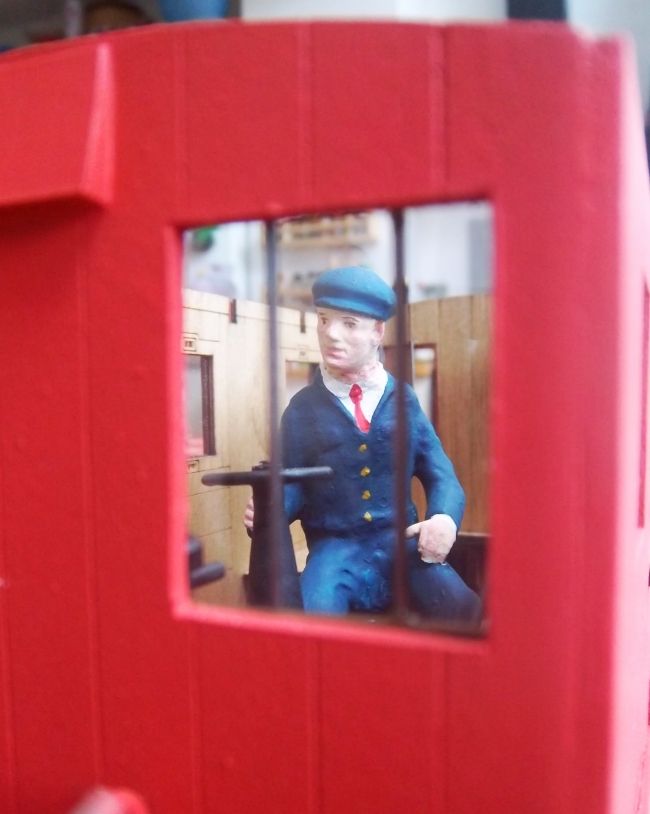
The guard figure was one I purchased with a batch of secondhand figures - the poor chap was in a terrible state. He looked like he'd been re-modelled several times, losing lots of his nice crisp detail and becoming quite oddly-shaped in the process. He'd clearly lost his head at some point (and again whilst in my "care"!) and to top it all he'd been decked out in a horrendous turquoise and yellow uniform. I thought he could do with a quiet time in the guard's van, and I think he looks quite relieved to be there...
I may get the roof on this weekend which will get this little van finished...
All the best,
Andrew.
An enforced break from the CAD stuff over Christmas (I hope I can remember all I'd learned!) has seen me make some progress with the interior of my model of WHR Van 4 instead.
Like the original it's based on the FR quarryman's coach, so I needed to add a representation of braking equipment. There are only 4 known photos of the van, and all only show the outside, so this was always going to be something of a stab in the dark! I reckon that the handbrake can only really have gone roughly where I've put it, but the controls for the air and vacuum brakes were a complete guess - I've based them on pictures of a vacuum brake "setter" and knocked them up out of old felt pens!
The guard figure was one I purchased with a batch of secondhand figures - the poor chap was in a terrible state. He looked like he'd been re-modelled several times, losing lots of his nice crisp detail and becoming quite oddly-shaped in the process. He'd clearly lost his head at some point (and again whilst in my "care"!) and to top it all he'd been decked out in a horrendous turquoise and yellow uniform. I thought he could do with a quiet time in the guard's van, and I think he looks quite relieved to be there...
I may get the roof on this weekend which will get this little van finished...
All the best,
Andrew.
I have drawings of Quarrymans Van 2/6/5 (whatever the blooming things call, the single balcony van...) and the handbrake was indeed in the middle. The Vacuum cylinder was offset to the left of the handbrake, and I'm unsure but I think the controls were on the one side as well.
Anyways I'm most envious of all your carriages 😃 I will need to build some when Moel Tryfan is finished...
Anyways I'm most envious of all your carriages 😃 I will need to build some when Moel Tryfan is finished...
And I shall be even more envious of your Moel Tryfan!!!JMORG:107346 wrote:I have drawings of Quarrymans Van 2/6/5 (whatever the blooming things call, the single balcony van...) and the handbrake was indeed in the middle. The Vacuum cylinder was offset to the left of the handbrake, and I'm unsure but I think the controls were on the one side as well.
Anyways I'm most envious of all your carriages 😃 I will need to build some when Moel Tryfan is finished...
Interesting info re Van 2/5/6, thanks - it is confusing, isn't it? I think I worked out that it should've been No 5 that worked on the WHR, but I may well have got it wrong. Interior-wise I didn't add anything other than a handbrake to that despite it also being dual-braked in its WHR period - with the all round windows on the current van I thought I'd better add a little more detail, although it's still very dark inside with the roof on.
All the best,
Andrew.
Hello again,
With the roof finished and firmly in place WHR Van 4 entered service this afternoon:

It does have planking scribed on the ends too, just not quite as deep as the Brandbright laser-etched ones on the sides, so they don't shpw up quite so well in this light.
For now the van's allocated to the winter works train, but in the spring it will see passenger use too. It was a dull and drippy day today and so I only had a brief test run, but No 4's vermilion livery certainly brightened things up:
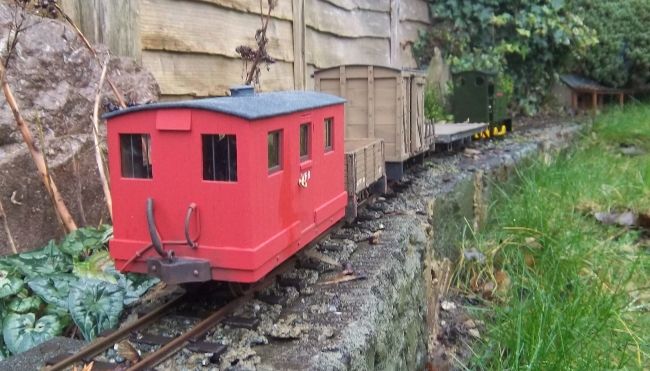
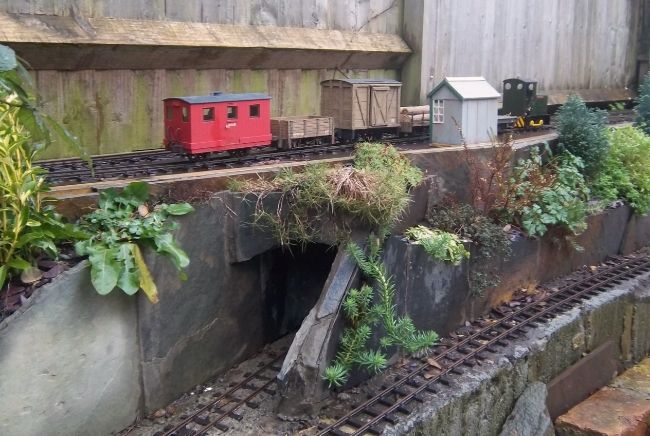
That smear down the side isn't dodgy paintwork, it's where the van took a direct hit from a dripping branch...
So, that's that one finished - on with the summer car and drawing up the NWNGR 4-wheeler...
Cheers,
Andrew.
With the roof finished and firmly in place WHR Van 4 entered service this afternoon:
It does have planking scribed on the ends too, just not quite as deep as the Brandbright laser-etched ones on the sides, so they don't shpw up quite so well in this light.
For now the van's allocated to the winter works train, but in the spring it will see passenger use too. It was a dull and drippy day today and so I only had a brief test run, but No 4's vermilion livery certainly brightened things up:
That smear down the side isn't dodgy paintwork, it's where the van took a direct hit from a dripping branch...
So, that's that one finished - on with the summer car and drawing up the NWNGR 4-wheeler...
Cheers,
Andrew.
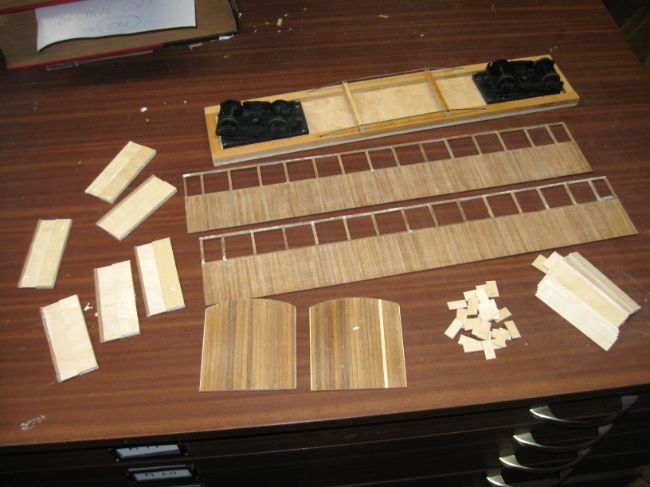
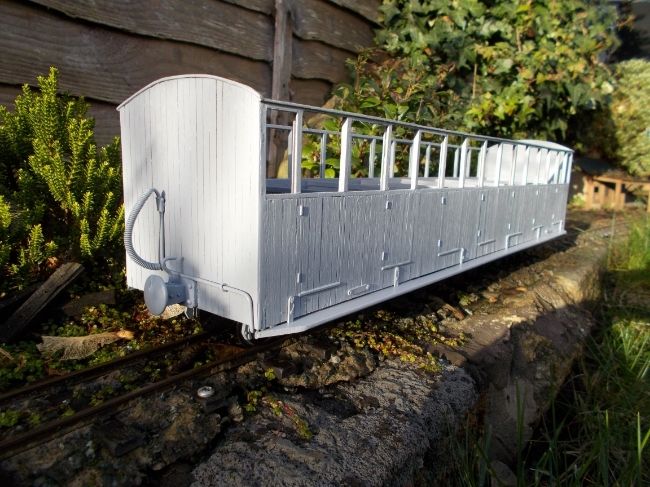
A flurry of lunchtime activity (in my "work workshop") has seen significant progress on my Welsh Highland Ashbury semi-open "Summer Car".
By the beginning of this week I had finished most of the parts:
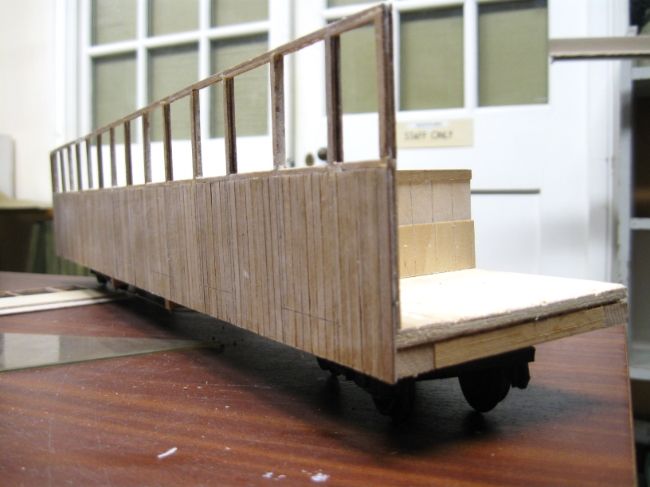
By Wednesday it had started going together:
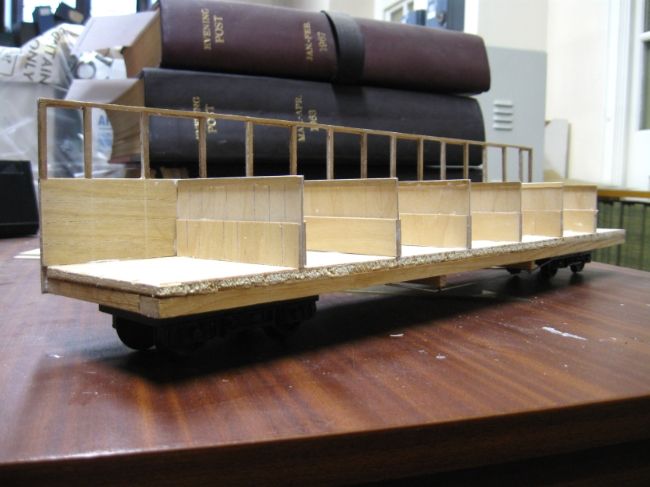
And yesterday I stuck the other side and ends on:

Yes, it's a bit of a wonky mess for now, but nothing a coat or three of paint shouldn't (more or less) cure... It's off home with it now for detailing and painting... You never know, after goodness-knows-how-long, the thing might actually be ready for the summer season...
Cheers,
Andrew.
By the beginning of this week I had finished most of the parts:
By Wednesday it had started going together:
And yesterday I stuck the other side and ends on:
Yes, it's a bit of a wonky mess for now, but nothing a coat or three of paint shouldn't (more or less) cure... It's off home with it now for detailing and painting... You never know, after goodness-knows-how-long, the thing might actually be ready for the summer season...
Cheers,
Andrew.
-
Soar Valley Light

- Driver

- Posts: 1451
- Joined: Sun Dec 08, 2013 5:18 pm
- Location: North West Leicestershire
You are indeed correct.
The summer carriages especially were very varied. Number 26 was sky blue, 23 (the cut down Ffestiniog Summer carriage) was yellow, and 27(?) was a great shade of shocking pink!
The ffestiniog stock were the most varied, the WHR stock mainly stayed green (except for the 3 above, a Pickering brake and the Gladstone carriage).
-
tom_tom_go

- Driver
- Posts: 4824
- Joined: Wed Feb 23, 2011 3:08 am
- Location: Kent, UK
- Contact:
Glad you like it - the combination of the grey finish and the bright sunlight makes for an unforgiving photo, so don't look too closely! Having spent months on the thing I could tell you exactly WHERE not to look too closely!Big Jim:108752 wrote:That looks spot on there Buddy.
Weren't some of the WHR coaches of the 1930's painted in a rather garish selection of colours in an attempt to entice tourists?
When I first started heading down the Welsh Highland path I had grand plans for two rakes of WHR carriages, one in mid/late 20s green and another in the rainbow colour scheme. Apparently it quickly faded to pastel shades because they used household paint obtained on Porthmadog High Street - I thought that would be an interesting effect to model...
Anyway, the bloomin' things take so long to make (and take up so much space!) that I've abandoned that idea for now in favour of a single all green train. Apart from anything else, my Russell's still in un-chopped form, so I can just about claim that my line represents the brief period in 1924 before Russell was cut-down but after the carriages had been - which I believe is when they were painted green. The buffet car throws a spanner in the works, 'cos that didn't appear until '27... Don't tell anyone...
Cheers,
Andrew.
Hi Tom,tom_tom_go:108762 wrote:Hi Andrew,
What bogies are you using on that coach please?
Like all my WHR carriages it uses bogies from a Big Big Train Mk2. I bought 4 of those cheaply back before they were collectable and have simply chopped out the relevant bits of underframe and screwed them to the carriage floor, bogies and all.
They have the same wheelbase and diameter as the WHR carriages, and although all the detail is wrong that doesn't really notice underneath the vehicle.
Probably not much use to you because the prices have really gone up on the Big Big stuff (I might see if I can flog the 4 unused carriage bodies to the "collectors"!) so it's not a cheap option any more. I think I might try some Swift Sixteen bogies next time around, although I'd prefer it if they had a longer wheelbase which would be better suited to larger/longer passenger carriages...
Cheers,
Andrew.
Who is online
Users browsing this forum: No registered users and 2 guests