

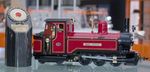
Looking really good - especially like the fittings which enhance the overall appearance.
Rik
(WH)WHR Rolling Stock

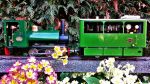
Stuff the rivet counters!Anyway, the bloomin' things take so long to make (and take up so much space!) that I've abandoned that idea for now in favour of a single all green train. Apart from anything else, my Russell's still in un-chopped form, so I can just about claim that my line represents the brief period in 1924 before Russell was cut-down but after the carriages had been - which I believe is when they were painted green. The buffet car throws a spanner in the works, 'cos that didn't appear until '27... Don't tell anyone
It's your railway.
I am also surprised that there was enough sunlight in Snowdonia to bleach the lurid colours on the coaches, or did the rain wash it all off?
If at first you don't succeed, use a bigger hammer!

Those ones are Brandbright's RSA41 fake choppers - I use those where the real thing had round choppers and RSA40s when the originals were square. £5 each, not bad...TTHLRMatt:108798 wrote:What couplings do you use Andrew?
Actually, the coupling height came out a bit higher than I'd anticipated, but I'm hoping I'll get away with it... I need to make myself a gizmo to get it more consistent...
Cheers,
Andrew.
The problem is I've discovered I actually like counting rivets!!! Help!Big Jim:108801 wrote:Stuff the rivet counters!
Luckily for me, when I've worn myself out with all that counting I'm equally happy relaxing with a freelance battery engine and a pair of Faller carriages filled with Playmobile figures...
Hello!
I thought I'd written about my cheapo brake pipes somewhere in this thread, and I've just found it...
The other issue that crops up is that they seem to be a bit prone to having the paint chipped off, I guess because standard primer doesn't do a proper job on the galvanised wire. Next time I make some I'll spray 'em with etch primer instead. And if that doesn't work I'll maybe look for another brand of wire...
Cheers,
Andrew.
PS more (WH)WHR rollling stock updates shortly-ish - I'm currently finishing off my Momentum Vehicle, then it's back to the Summer Car...
I thought I'd written about my cheapo brake pipes somewhere in this thread, and I've just found it...
It's still the method I use, although I really ought to make a jig to make sure they all come out roughly the same size!Andrew:82366 wrote:the vacuum pipes and standards use my usual method of Wilkinsons garden wire for the pipe and a length of curtain wire (the springy stuff for net curtains) for the hose. Mine don't connect and the garden wire runs right through the sprung bit, but I pinched the idea from working (well, not in the DVLR sense) ones featured in SMT about 20 years ago.
I generally add a little ring of biro inner near the top of the standard to give the impression of a bit more detail and add just a little chunkiness. The garden wire is slightly underscale I think, should be a little thicker, but it bends to shape beautifully enabling me to recreate prototypical pipe-runs. It's difficult to make it completely straight, but to me that's a good thing as real pipework often seems to feature little kinks here and there. There seem to be varying thicknessess of curtain wire available, not all will fit over the garden wire... Where necessary I fix the whole thing to the carriage body with little split pins (mine came from Screwfix) - you can see one near the bottom of the bufferbeam doing a reasonable job of looking like it's supposed to be there. The best bit about all of this is the cost - with this method you could do an entire carriage fleet for roughly the cost of a single pair of ready made pipes.
The other issue that crops up is that they seem to be a bit prone to having the paint chipped off, I guess because standard primer doesn't do a proper job on the galvanised wire. Next time I make some I'll spray 'em with etch primer instead. And if that doesn't work I'll maybe look for another brand of wire...
Cheers,
Andrew.
PS more (WH)WHR rollling stock updates shortly-ish - I'm currently finishing off my Momentum Vehicle, then it's back to the Summer Car...
Hello again,
A couple of new items of rolling stock have entered service today, although neither has anything to do with the Welsh Highland - both are lettered for my old West Kent Light Railway, which (it seems) continues to exist to justify any urges I get to engage in freelance modelling...
The first is a Swift Sixteen tanker, in grotty green livery:

This was to have been a paraffin-dribbling track cleaner, but my dribbling mechanism wasn't up to much so in the end it just went together in the regular way.
The other new wagon isn't really new at all - it first entered service a few years ago in the livery of Datson's brewery, but the computer transfer paper I used didn't like the undulating body so I stripped that off and gave it a coat of dull old grey. It still carries Datson's fine Kentish ale though...
With those and the momentum vehicle out of the way, and summer approaching, I really must get on with my WHR semi-open carriage now...
Cheers,
Andrew.
A couple of new items of rolling stock have entered service today, although neither has anything to do with the Welsh Highland - both are lettered for my old West Kent Light Railway, which (it seems) continues to exist to justify any urges I get to engage in freelance modelling...
The first is a Swift Sixteen tanker, in grotty green livery:
This was to have been a paraffin-dribbling track cleaner, but my dribbling mechanism wasn't up to much so in the end it just went together in the regular way.
The other new wagon isn't really new at all - it first entered service a few years ago in the livery of Datson's brewery, but the computer transfer paper I used didn't like the undulating body so I stripped that off and gave it a coat of dull old grey. It still carries Datson's fine Kentish ale though...
With those and the momentum vehicle out of the way, and summer approaching, I really must get on with my WHR semi-open carriage now...
Cheers,
Andrew.

Brilliant weathering on yon tank wagon!
The Hollycross Railway Company!
https://gardenrails.org/forum/viewtopic ... 41&t=10467
https://www.flickr.com/photos/pipps_trains/
https://gardenrails.org/forum/viewtopic ... 41&t=10467
https://www.flickr.com/photos/pipps_trains/
-
Soar Valley Light

- Driver

- Posts: 1451
- Joined: Sun Dec 08, 2013 5:18 pm
- Location: North West Leicestershire
Morning all,
Building my little Momentum Vehicle got me enthused about grotty little trucks, so I've been working on a rake of three NWNGR/WHR 2 ton open wagons, based on a photo of one sitting at Dinas. There are no drawings (that I know of) of this type, so it's all guesswork.
Here's where I'm up to so far:
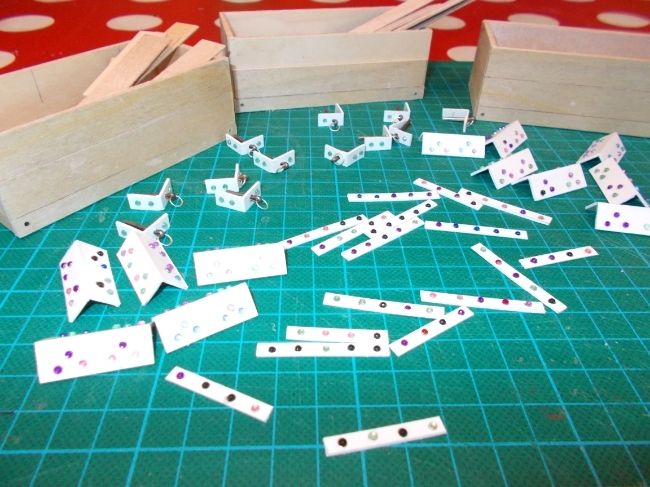
The wooden bodies are in the background, with the "ironwork" cut from plastic section) in the foreground. The multi-coloured rivets are nail-jewels, my favourite 16mm discovery for ages - the plus-side of tidying up after teenage daughters!
I got 3000 of 'em (jewels, not daughters) in a fantastic little multi-compartment container for £1.20 - including postage! See http://www.amazon.co.uk/3000-Nail-Mixed ... l+art+gems
There's no fiddly cutting them off sprues, they adhere to plastic with Liquid Poly, seem to take paint well - and they're considerably cheaper than chips... Brilliant!
Enough lavishing praise on sparkly beauty products, back to the (rough, rugged and manly) wagons. The next step is to give the bodies a coat of paint, then to prepare the Binnie running gear and give that and the ironwork some paint too. They should go together relatively quickly I think...
Cheers all,
Andrew.
Building my little Momentum Vehicle got me enthused about grotty little trucks, so I've been working on a rake of three NWNGR/WHR 2 ton open wagons, based on a photo of one sitting at Dinas. There are no drawings (that I know of) of this type, so it's all guesswork.
Here's where I'm up to so far:
The wooden bodies are in the background, with the "ironwork" cut from plastic section) in the foreground. The multi-coloured rivets are nail-jewels, my favourite 16mm discovery for ages - the plus-side of tidying up after teenage daughters!
I got 3000 of 'em (jewels, not daughters) in a fantastic little multi-compartment container for £1.20 - including postage! See http://www.amazon.co.uk/3000-Nail-Mixed ... l+art+gems
There's no fiddly cutting them off sprues, they adhere to plastic with Liquid Poly, seem to take paint well - and they're considerably cheaper than chips... Brilliant!
Enough lavishing praise on sparkly beauty products, back to the (rough, rugged and manly) wagons. The next step is to give the bodies a coat of paint, then to prepare the Binnie running gear and give that and the ironwork some paint too. They should go together relatively quickly I think...
Cheers all,
Andrew.
-
Dannypenguin
- Trainee Driver

- Posts: 632
- Joined: Tue Feb 26, 2013 9:57 am
- Location: Forest of Dean, UK
- Contact:
Now those nail jewels are a good idea!  Will be stealing that one of you don't mind
Dan
Visit the PFLR website - http://poultonfarmlightrailway.webs.com/
Dean Forest Railway Society website - http://dfrsociety.org/
Visit the PFLR website - http://poultonfarmlightrailway.webs.com/
Dean Forest Railway Society website - http://dfrsociety.org/

Hello again,
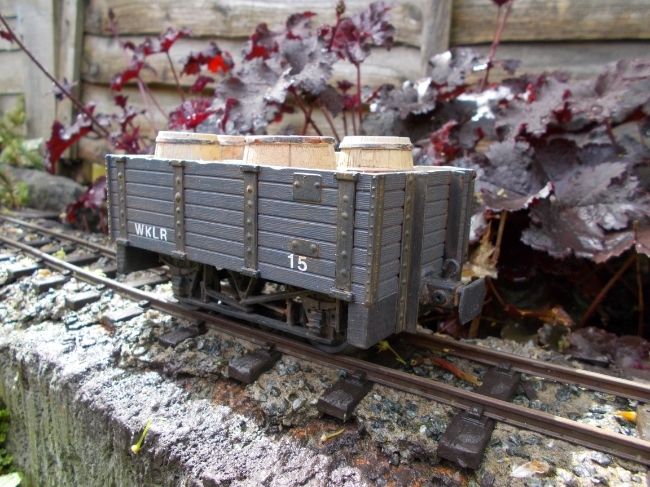
I got round to finishing my little WHR 2 ton wagons yesterday, took 'em out into the garden for a few photos this morning:
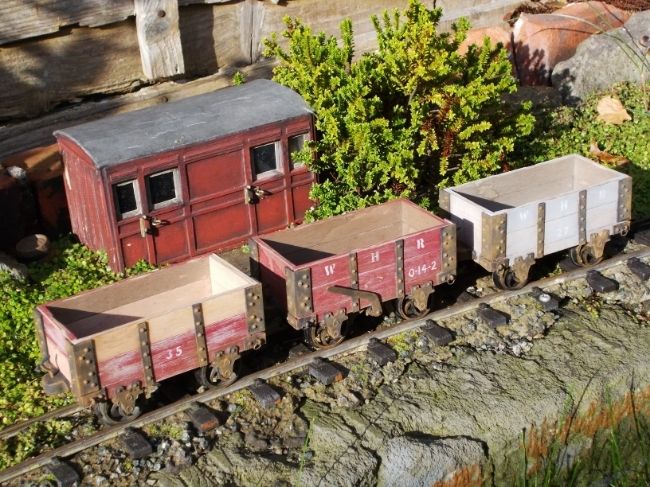
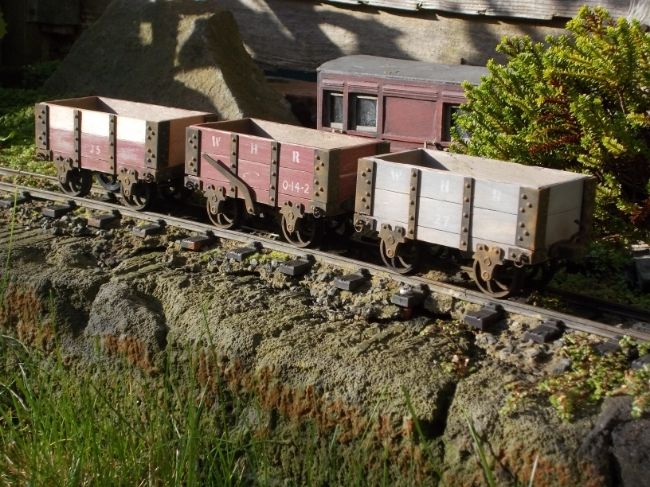
As far as I know there's only one decent photo of this type of wagon - the braked one with the tare number but no running number is based on that one. The one with all the unpainted planks was inspired by a photo of Russell with a goods train standing at Dinas - lots of the wagons have replacement planks which have remained unpainted.
I should've spent a little more time on creating drawings before I got stuck in because I've not got the wagon proportions quite right, but they'll do - I'm looking forward to adding them to my slate train for a run, maybe at the weekend.
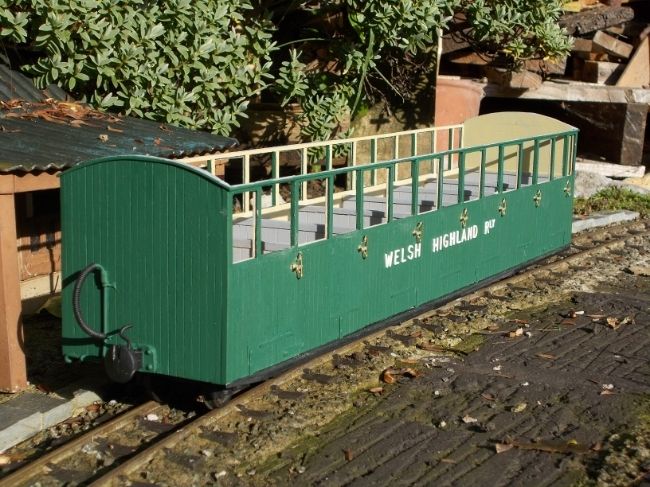
I've also been working away on my Summer Car which now has its green paint, lettering and door furniture. The latter is a little blingie really, I think the grab rails are black on the real thing, but they brighten up the plain livery. I need to turn my attention to the inside now...
Cheers all,
Andrew.
I got round to finishing my little WHR 2 ton wagons yesterday, took 'em out into the garden for a few photos this morning:
As far as I know there's only one decent photo of this type of wagon - the braked one with the tare number but no running number is based on that one. The one with all the unpainted planks was inspired by a photo of Russell with a goods train standing at Dinas - lots of the wagons have replacement planks which have remained unpainted.
I should've spent a little more time on creating drawings before I got stuck in because I've not got the wagon proportions quite right, but they'll do - I'm looking forward to adding them to my slate train for a run, maybe at the weekend.
I've also been working away on my Summer Car which now has its green paint, lettering and door furniture. The latter is a little blingie really, I think the grab rails are black on the real thing, but they brighten up the plain livery. I need to turn my attention to the inside now...
Cheers all,
Andrew.
-
Soar Valley Light
- Driver
- Posts: 1451
- Joined: Sun Dec 08, 2013 5:18 pm
- Location: North West Leicestershire
-
tom_tom_go

- Driver
- Posts: 4824
- Joined: Wed Feb 23, 2011 3:08 am
- Location: Kent, UK
- Contact:
Hello! Yes, they seem to be - although they're "jewels" they don't seem to be faceted. They're perhaps just a little more domed than real rivets - I shall have a close look at some on the bridges I cross on my way to work this morning!tom_tom_go:112339 wrote:The 'riveting jewels' is a great find Andrew! Are they rivet shaped though?
Cheers,
Andrew.
Who is online
Users browsing this forum: No registered users and 2 guests