Building the Fairfield Railway

A place for the discussion of garden railways and any garden style/scale portable and/or indoor layouts
User avatar
bungle80a
Trainee Driver
Trainee Driver
Posts: 516
Joined: Sun Jan 20, 2008 12:01 am
Location: Fife, Scotland
Contact:

Post by bungle80a » Thu May 15, 2008 9:59 pm

Day 15: One big Jigsaw puzzle!

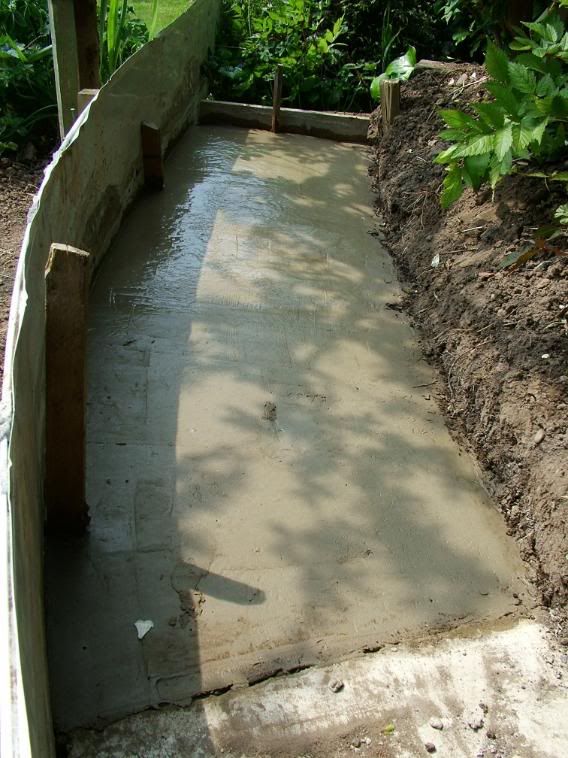
Another scorcher on the Fairfield Railway. That being said, with a gazebo for shade and plenty of cold drinks I managed to get quite a bit done.

Started the day by laying blocks onto the area that I concreted yesterday. In total, this took 5 blocks to take me round a curve and onto the short straight that will be the point for the temporary loop.
Image
Image

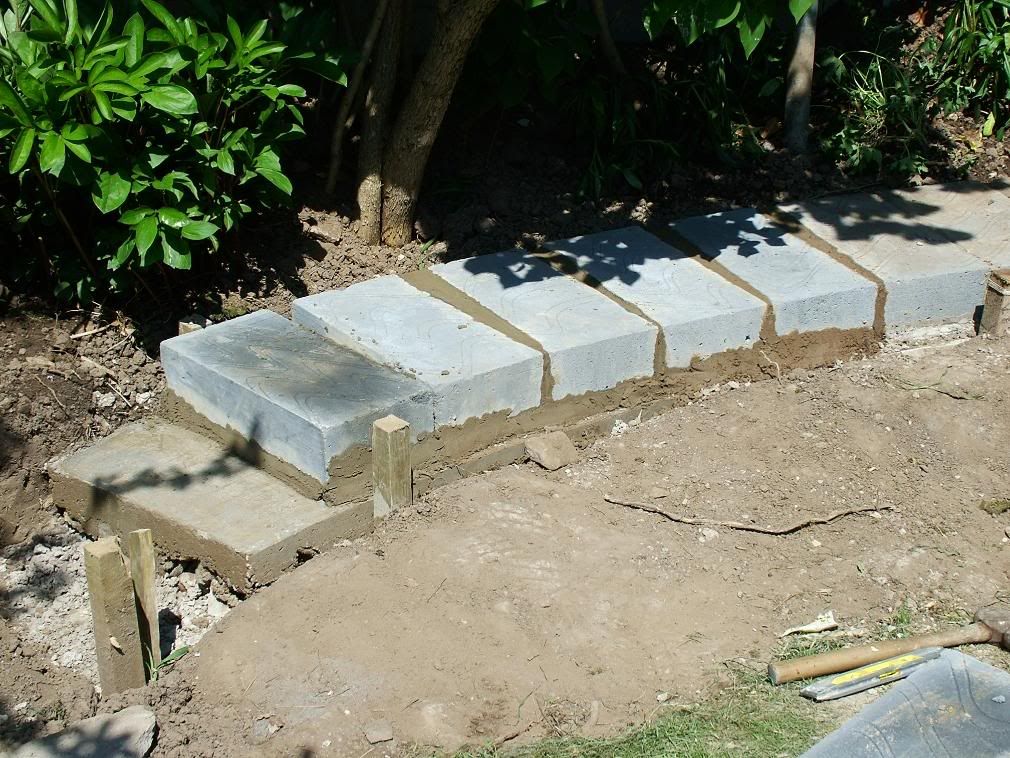
Next it was onto laying blocks to go behind the manline for the main passing loop. This took a bit more work as I had to start chopping blocks, which took a bit of doing. Lets just say a few blocks didn't make it! (RIP Mr Thermalite block!) But with a little bit of persavierance (sp?) this was the result...
Image

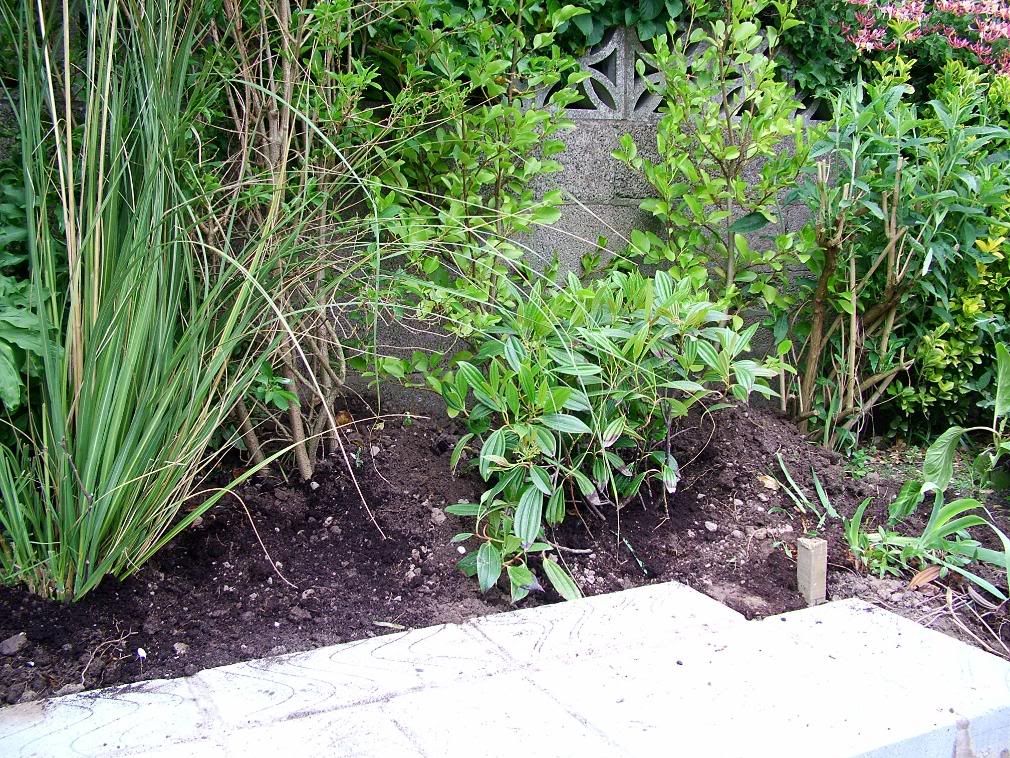
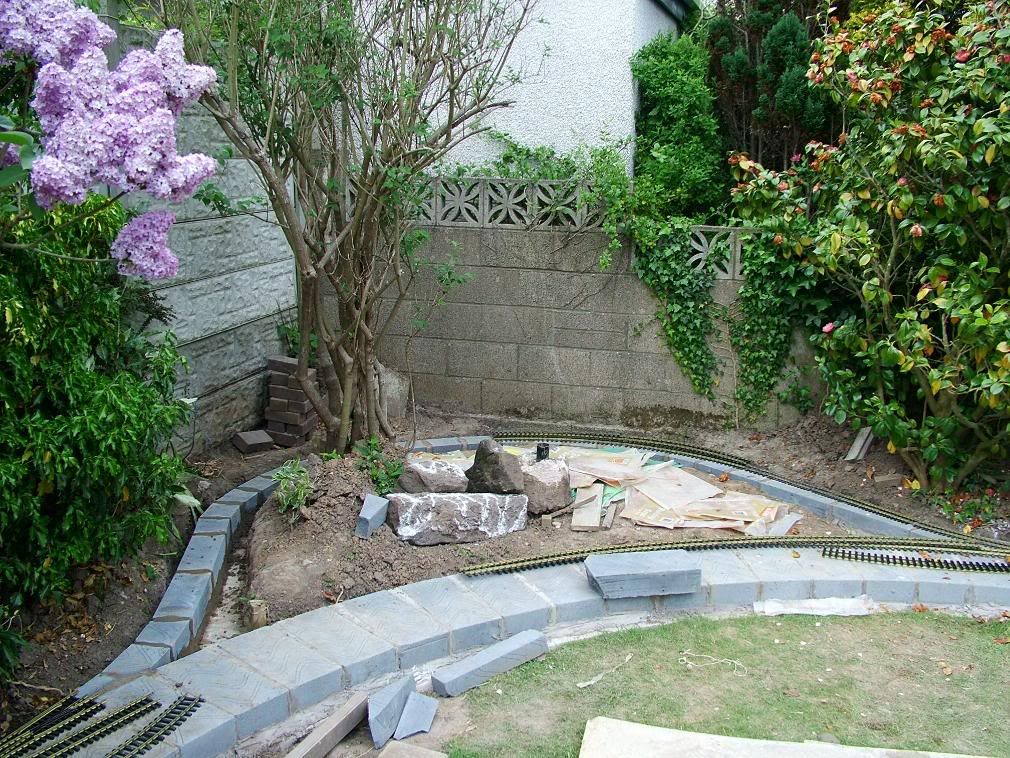
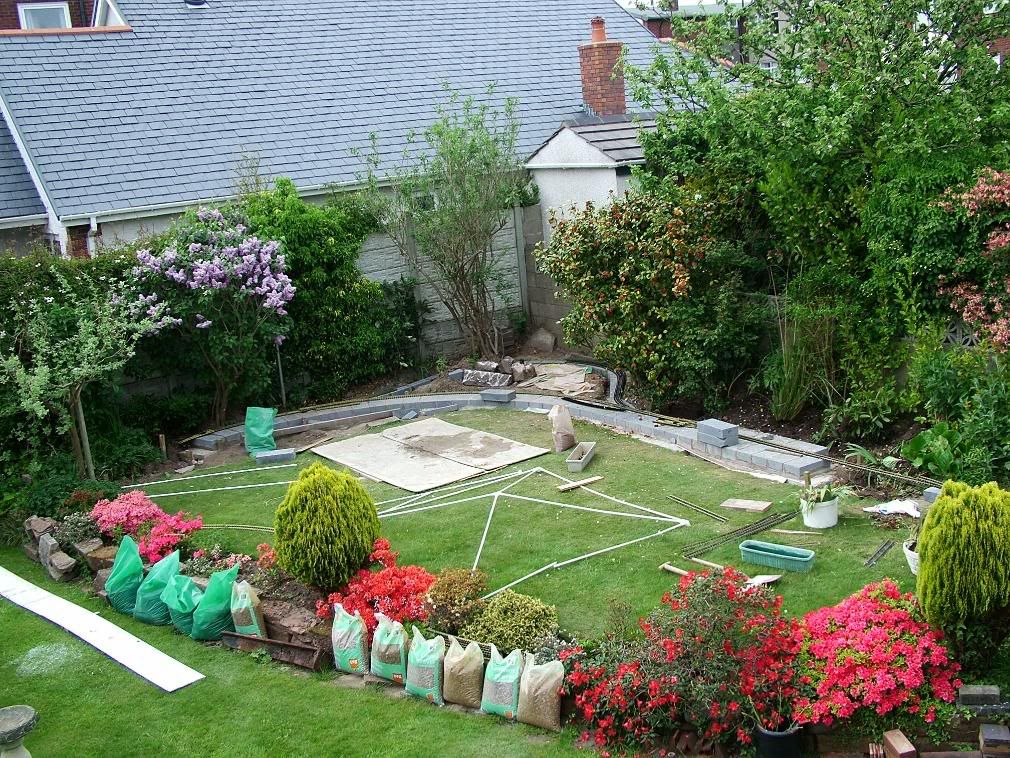
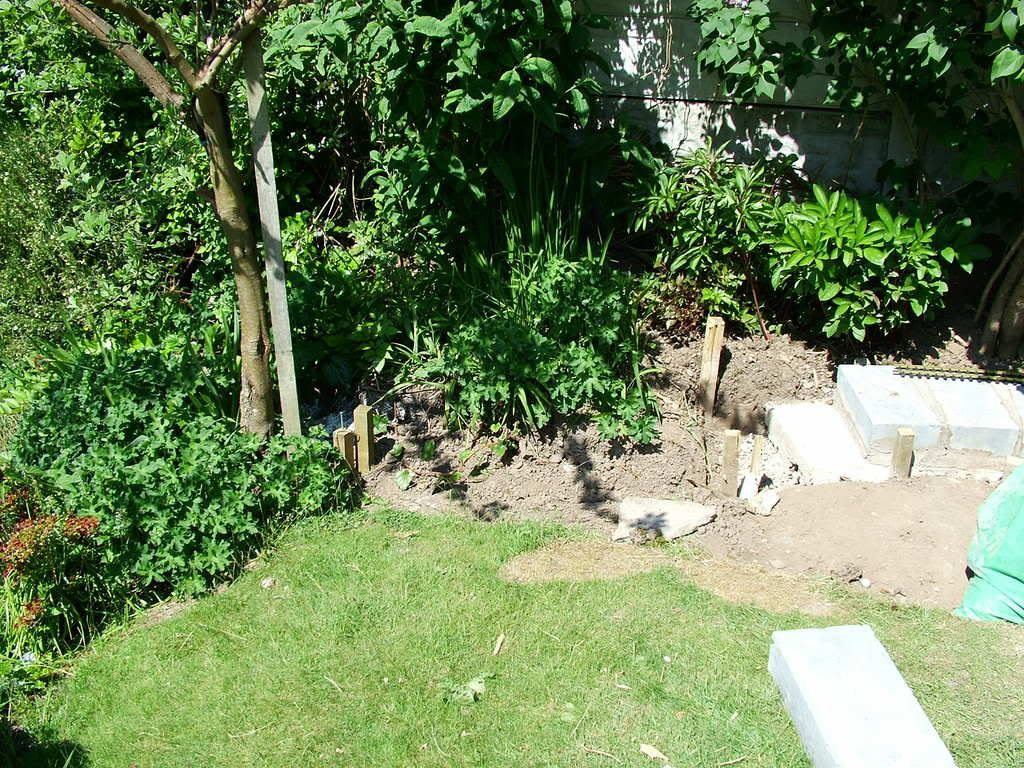
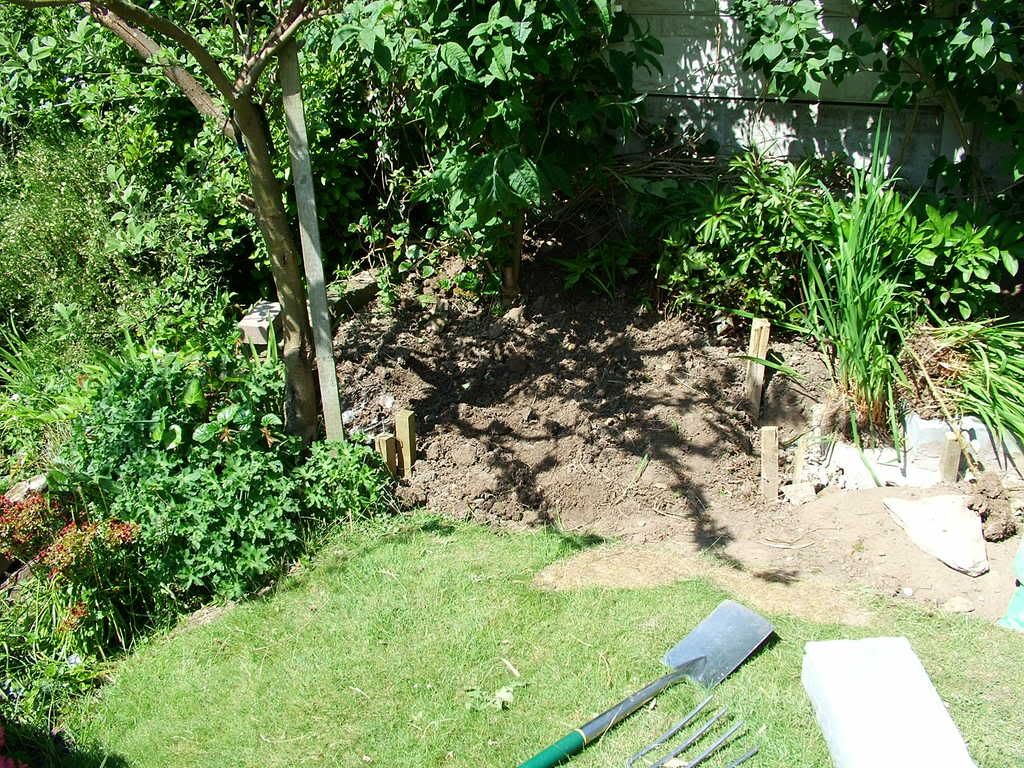
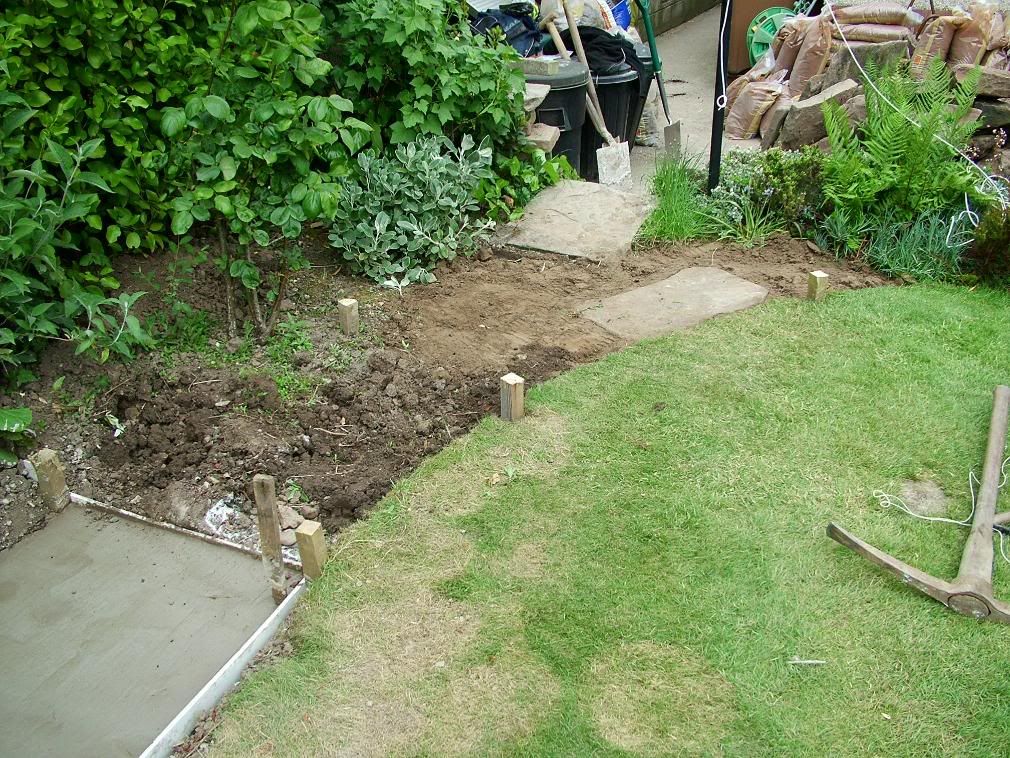
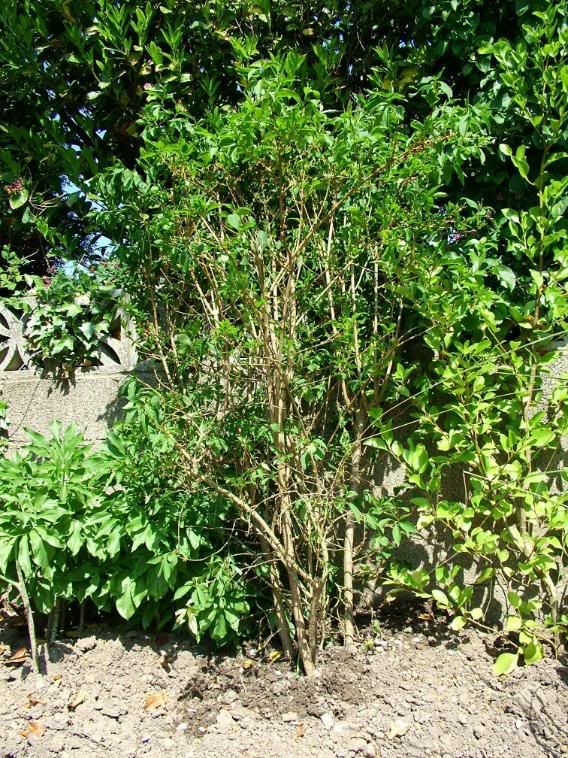
Some of the plants rehomed yesterday still look a bit ill, but the bush I moved on Day 10 is now looking much healthier...
Image

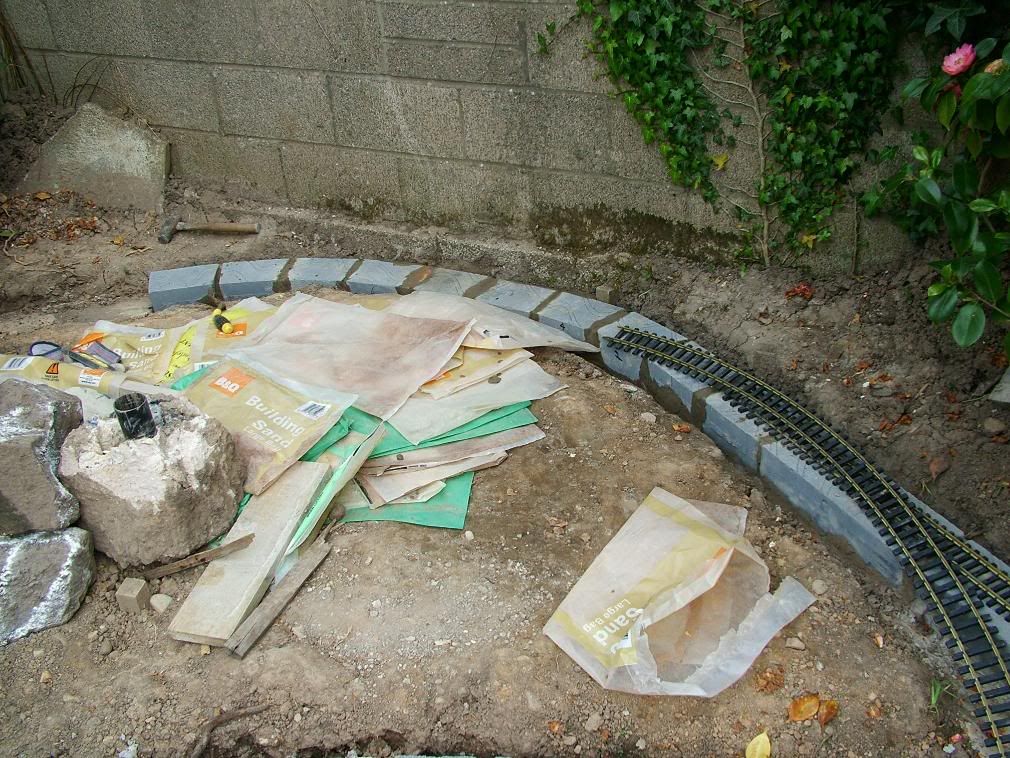
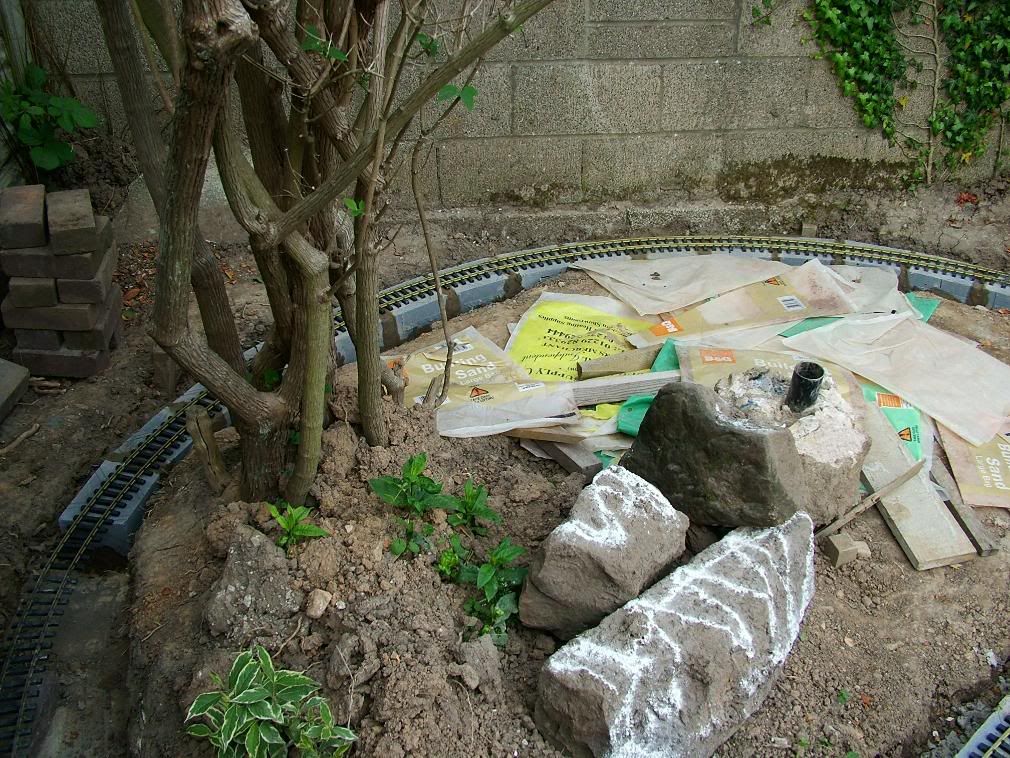
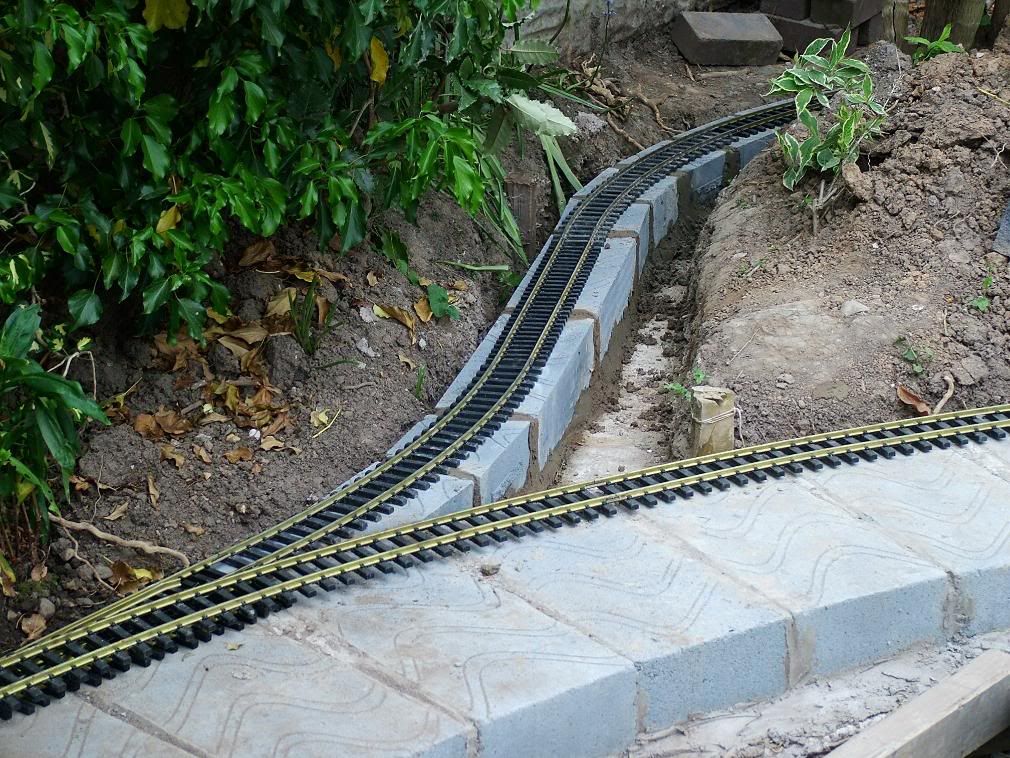
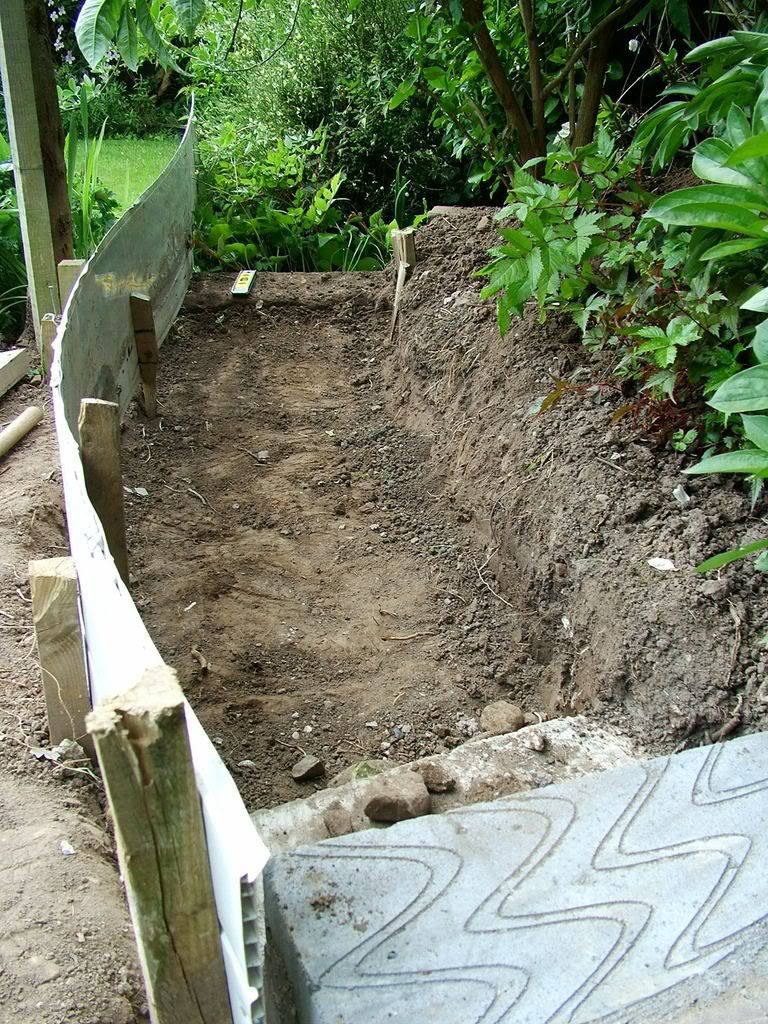
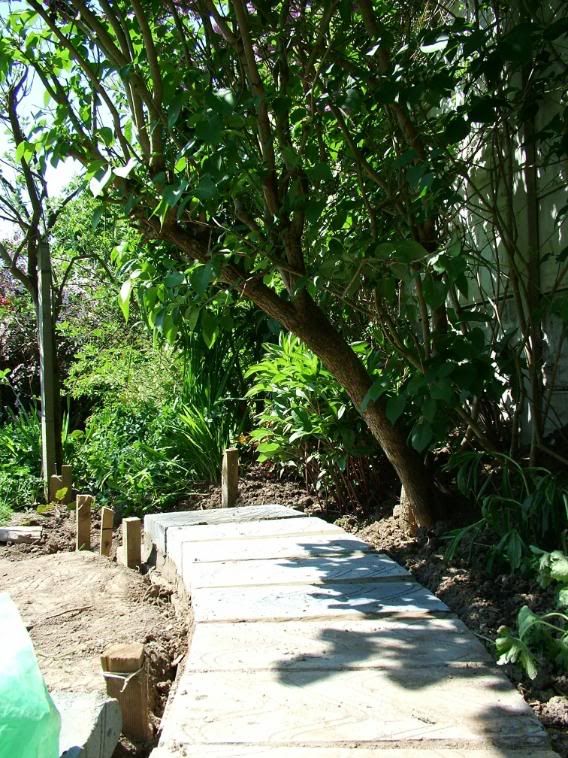
The last block laying for the day was conducted round the back loop.
Image

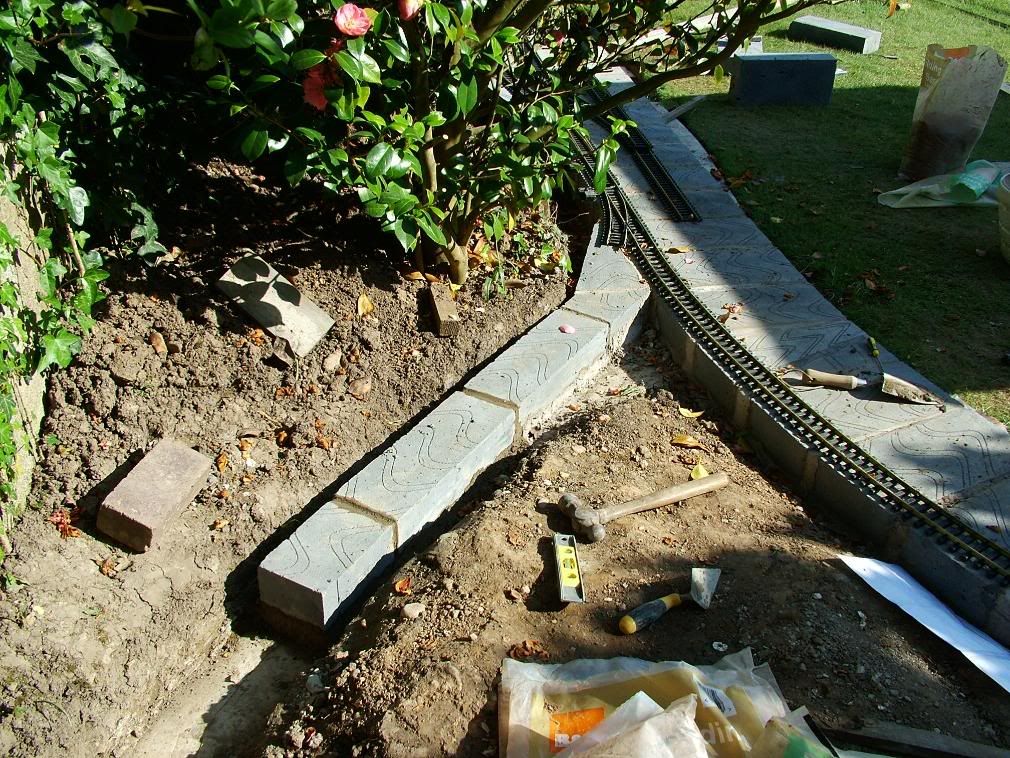
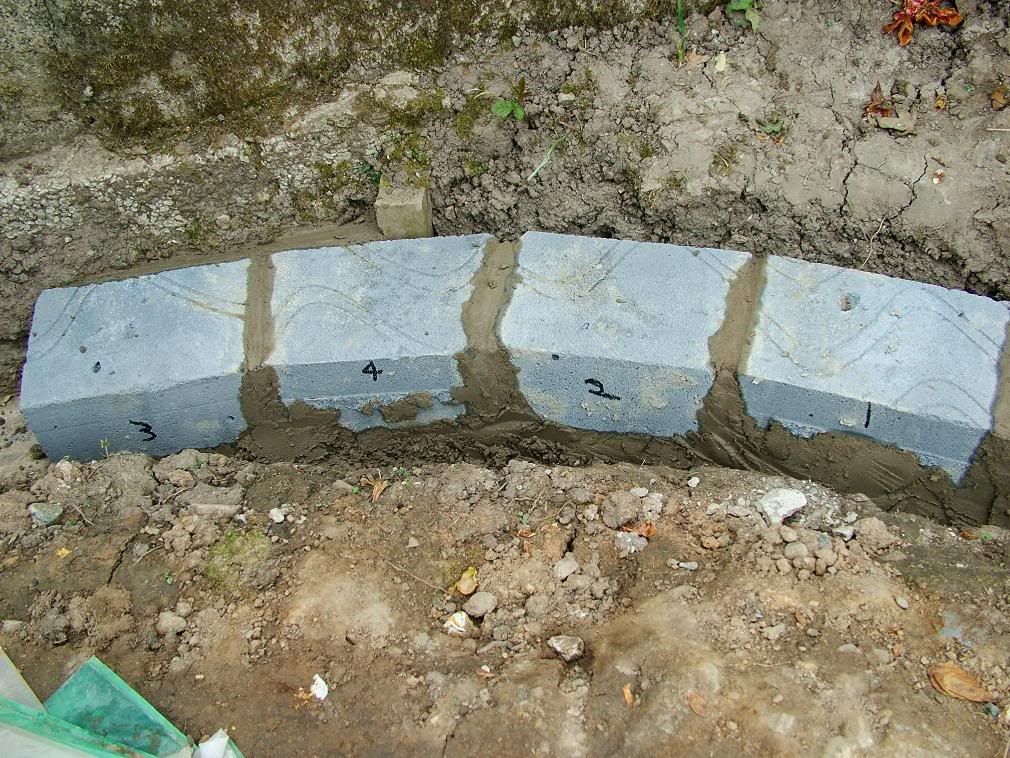
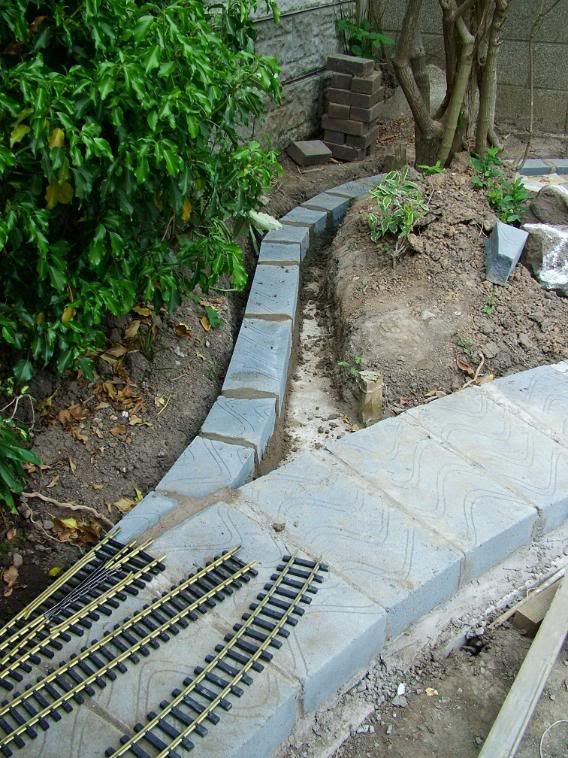
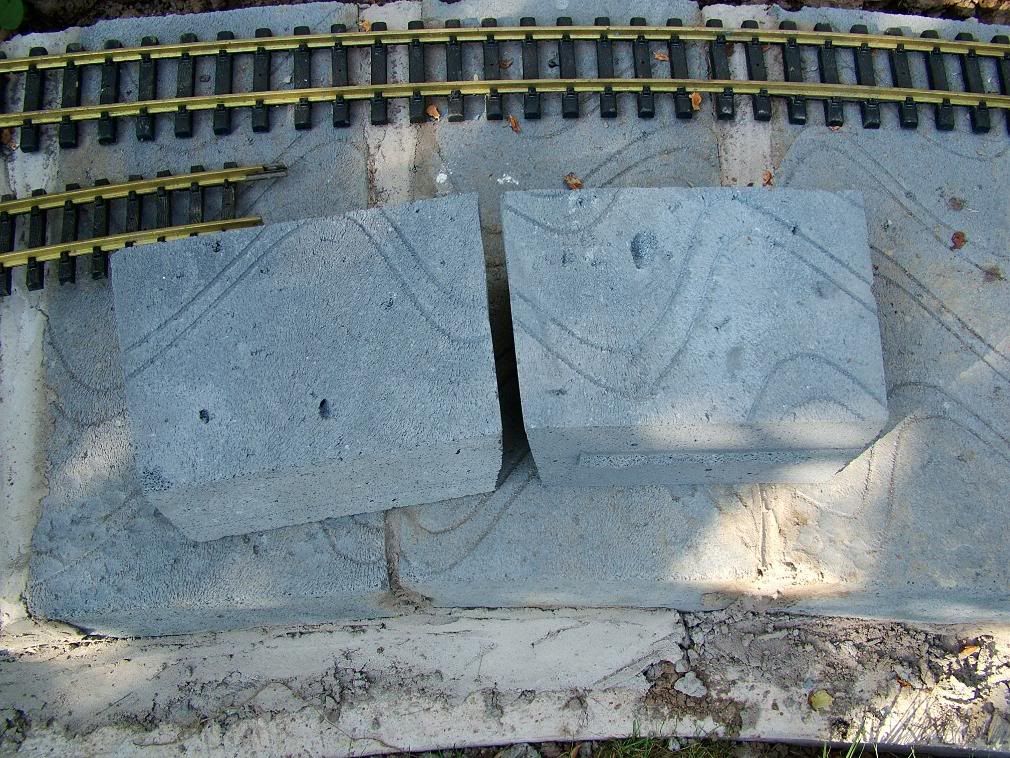
I finished off the day by cutting some of my mini-blocks slightly to allow for the 5ft radius curve at the back of the loop. As you can see, the blocks are slightly angled at each end for better fitting.
Image

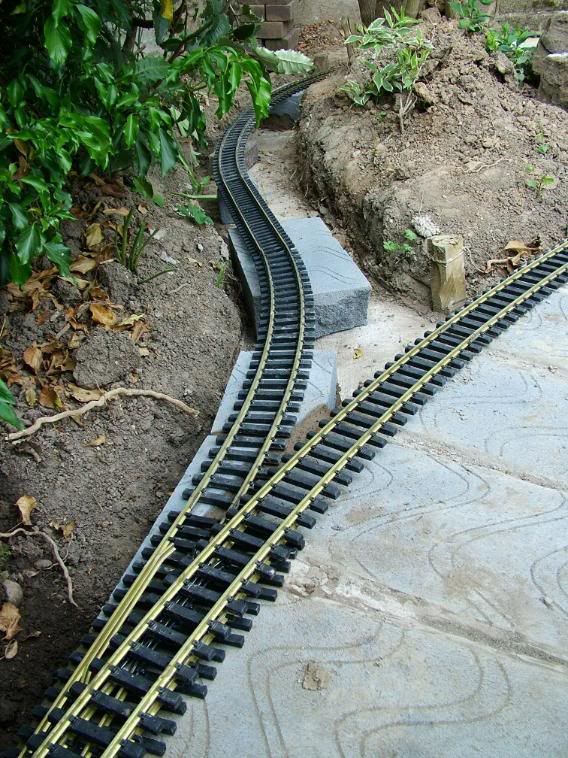
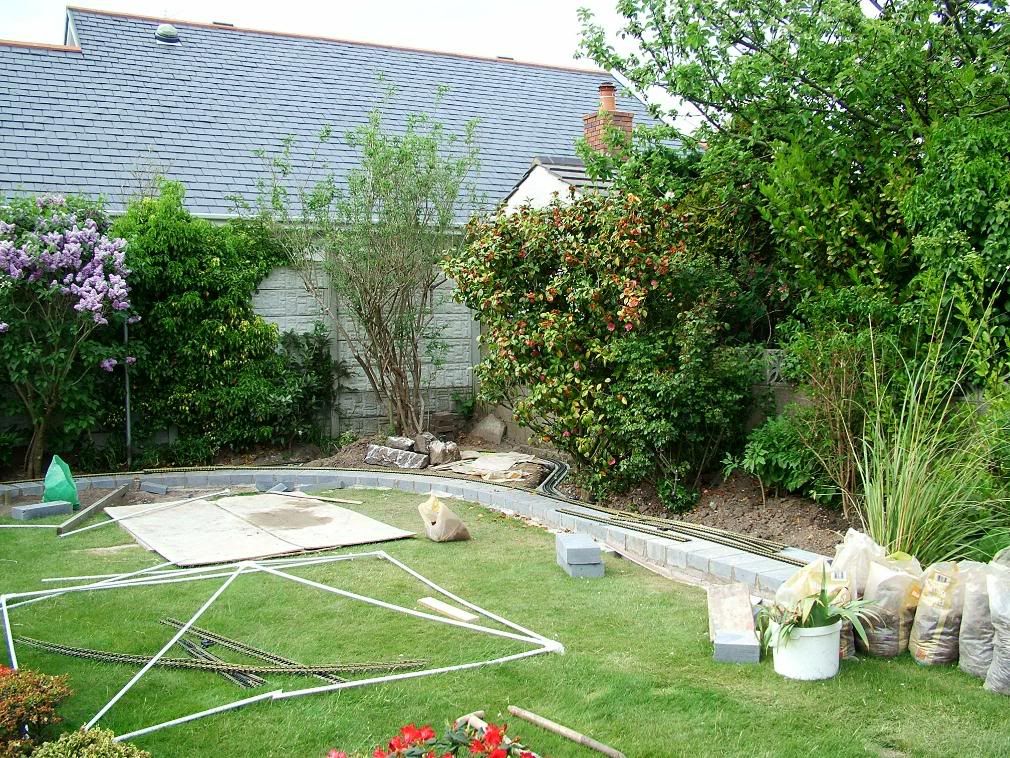
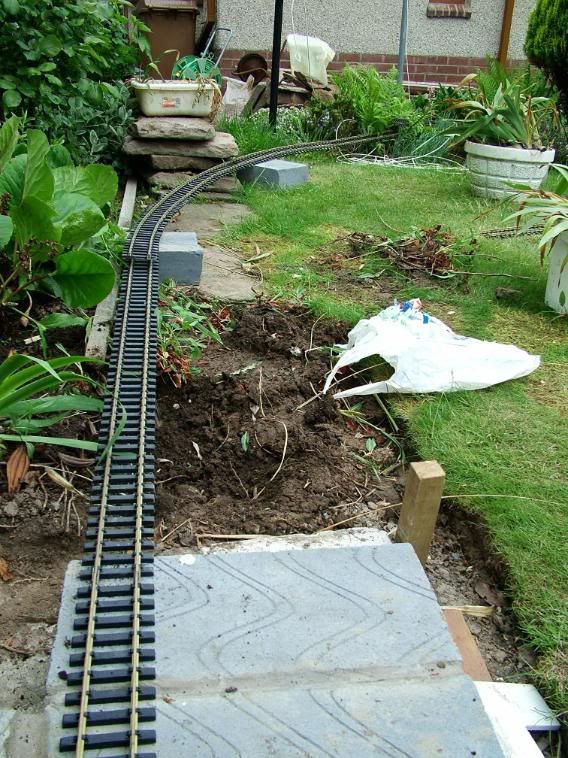
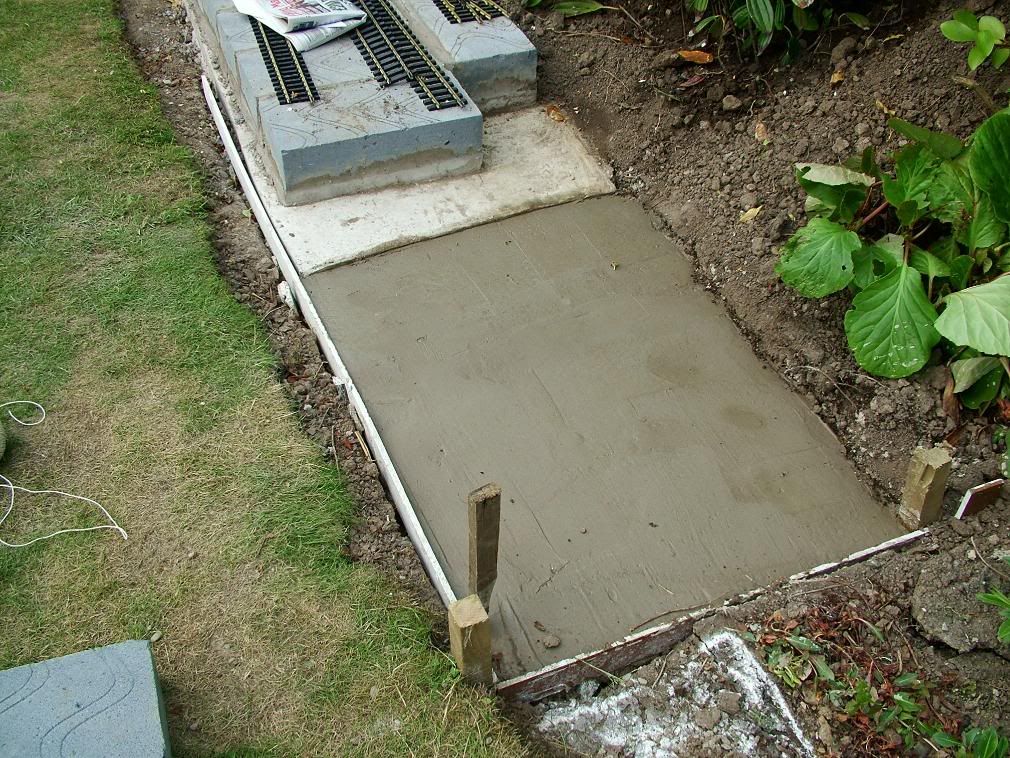
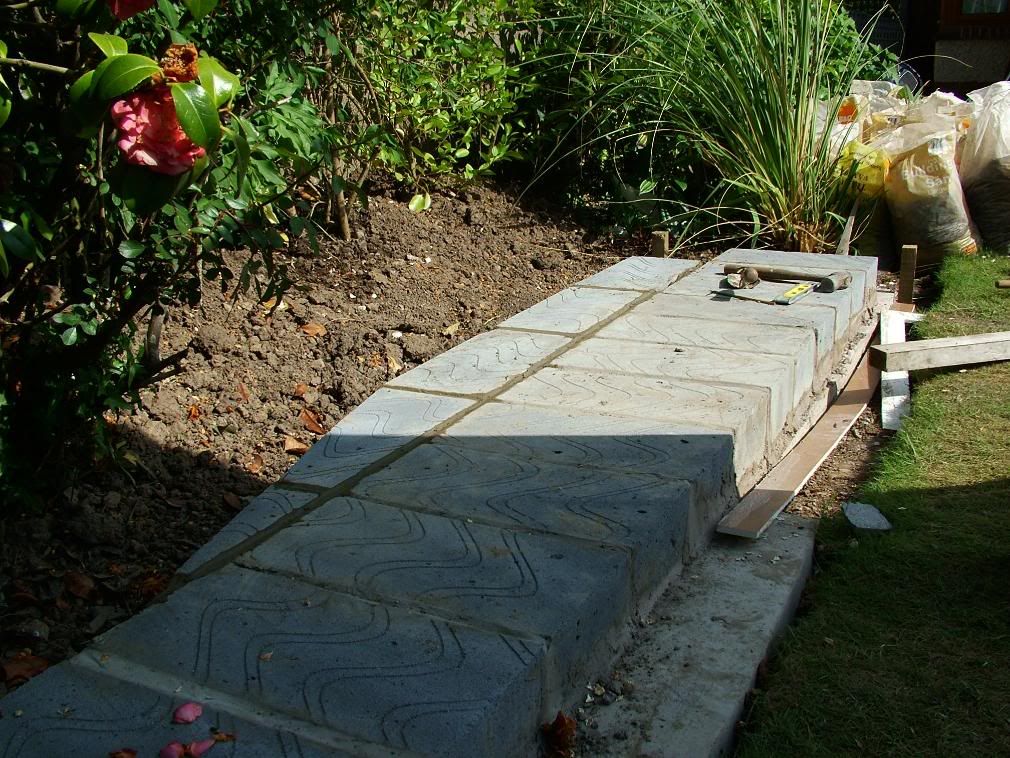
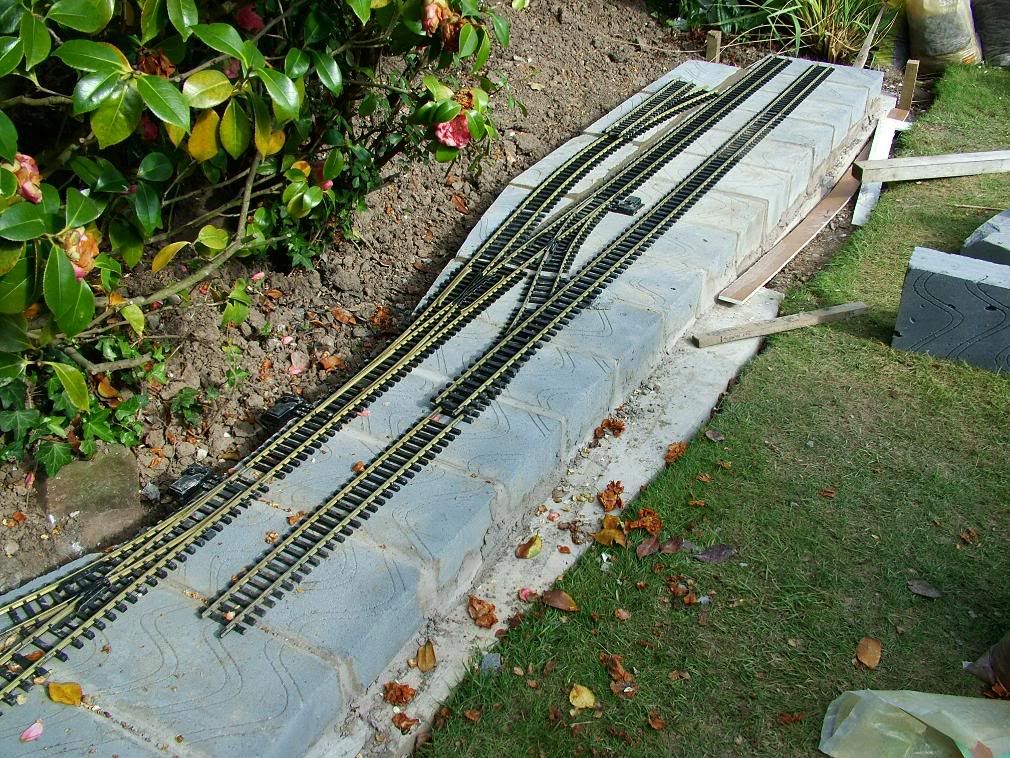
Before going home, the track was laid out to make checks. This shot shows the approx layout in the main passing loop/steaming bay area. (It is going to involve some track cutting, and I didn't have 1 of the points handy to put it in which is why there is some overlapping track!)
Image

Tomorrows job is to continue cutting and laying blocks round the back loop
Bungle80a

"Who has stolen the 3 link coupling off the end of my train?!?!

.....[a few minutes pass hunting down replacements].....

"So, which comedian has uncoupled my entire train?!?!"

User avatar
bungle80a
Trainee Driver
Trainee Driver
Posts: 516
Joined: Sun Jan 20, 2008 12:01 am
Location: Fife, Scotland
Contact:

Post by bungle80a » Thu May 15, 2008 10:05 pm

Matt wrote:Looking very good :D !  Who did you learn your skills off?
Learn my skills, erm?!?! I've had advice from PTLRsam, and the 'boss' has an idea what to do, but most of what i'm doing i'm learning along the way! Most of it is common sense. And the maths you learn at school that you think you'll never need is finally coming into use!

When we get to the end of the concrete track beds, we will have launch points to go onto boards at one end, and a lift out bridge at the other. These will most likely be cast out of concrete. PTLRsam has some experience of building out of concrete (11 arches worth of viaduct to prove it!) and he will be guiding me throught the neccessaries when it gets to that stage.
Bungle80a

"Who has stolen the 3 link coupling off the end of my train?!?!

.....[a few minutes pass hunting down replacements].....

"So, which comedian has uncoupled my entire train?!?!"

User avatar
bungle80a
Trainee Driver
Trainee Driver
Posts: 516
Joined: Sun Jan 20, 2008 12:01 am
Location: Fife, Scotland
Contact:

Post by bungle80a » Fri May 16, 2008 9:58 pm

Day 16: Schoolboy error!

More block laying today round the back loop. Started by placing the 7 mini-blocks i'd cut yesterday round the curve, laid the track over them and got them in position before marking the concrete foundation with a black marker. As each block was marked, I numbered them to put them in the right order when actually laying them. Can you spot my mistake...
Image
Oops! After commenting to Matt about using Maths skills I learnt at school thought i'd never need, I seem to have forgotten the fundamentals! Luckily, it didn't make much difference. So I continued to lay the rest of the blocks i'd cut yesterday...
Image

To take a break from the big curve, I cut the blocks to join the back loop back in at the other end. These were then laid before continuing with the curve (the big block is just sat there to support the track)...
Image

With more block cutting done, and the blocks laid, I could just get a straight line between the last block and the blocks i'd laid for the end of the loop in order to check levels. There is a slight difference, but if I make it an even gradient between the last block I laid and the mainline, it'll come out no steeper than 1 in 150.

Here's a pic of the loop after all of todays block laying...
Image

And here the view of the top of the garden now the railway is really beginning to take shape..
Image

When I get chance, I am going to try and produce a track diagram for the railway, but at the moment i'm very busy actually building it!
Bungle80a

"Who has stolen the 3 link coupling off the end of my train?!?!

.....[a few minutes pass hunting down replacements].....

"So, which comedian has uncoupled my entire train?!?!"

User avatar
ACLR
Retired Director
Retired Director
Posts: 1592
Joined: Wed Oct 17, 2007 6:22 am
Location: Brisbane
Contact:

Post by ACLR » Fri May 16, 2008 10:11 pm

looking better every day mate :D

User avatar
bungle80a
Trainee Driver
Trainee Driver
Posts: 516
Joined: Sun Jan 20, 2008 12:01 am
Location: Fife, Scotland
Contact:

Post by bungle80a » Fri May 16, 2008 11:37 pm

Thanks Graham. I just hope i'm not boring everyone!

Well, I've got 2 and a half days left of work before the first track laying session is planned, and in that time I need to finish laying blocks in the back loop (hopefully get that done 2moro), then dig, concrete and lay blocks on the next 6-8 ft on the top end to create a temp headshunt for the temp loop! Fingers Crossed!
Bungle80a

"Who has stolen the 3 link coupling off the end of my train?!?!

.....[a few minutes pass hunting down replacements].....

"So, which comedian has uncoupled my entire train?!?!"

User avatar
ACLR
Retired Director
Retired Director
Posts: 1592
Joined: Wed Oct 17, 2007 6:22 am
Location: Brisbane
Contact:

Post by ACLR » Fri May 16, 2008 11:40 pm

not boring me mate i am keenly watching this thread
will give me a great reference when or if I rebuild the ACLR :D

SillyBilly
Retired Director
Retired Director
Posts: 3536
Joined: Sat Aug 18, 2007 11:00 pm

Post by SillyBilly » Fri May 16, 2008 11:58 pm

I thoroughly enjoy every update you provide Bungle!

steamyjim
Retired Director
Retired Director
Posts: 1210
Joined: Tue Oct 16, 2007 9:19 pm

Post by steamyjim » Sat May 17, 2008 12:56 pm

Looking great mate!

It's certainly not boring :D

User avatar
bungle80a
Trainee Driver
Trainee Driver
Posts: 516
Joined: Sun Jan 20, 2008 12:01 am
Location: Fife, Scotland
Contact:

Post by bungle80a » Sat May 17, 2008 10:26 pm

Day 17: The loop is blocked!

Well, to finish the week i've done half a day today, which actually became nearer a full day!

As the boss was off we spent a good half hour discussing the next couple of stages of work to be done. This was followed by a bit of gardening to prepare for it! The end of the wide section was blocked by a tall grassy thing (Which gives a nasty paper cut if your not careful. I'm covered in them from the last week or so!!) This was removed and rehomed along with another plant behind some of the completed block work. Some compost was added and the first back filling to the blocks was completed...
Image

This was followed by a few return trips to B&Q to get 40 bags of sand and 12 bags of gravel to make sure we had enough materials to keep me going for the next couple of weeks.

So having spent over half my days work doing almost nothing on construction, I thought it was bout time I got the back loop finished, and I wasnt going home til it was done!

Image
As you can see, the rest of the blocks got laid, and as far as possible I tried to make the gradient I found I was stuck with yesterday, as smooth as possible. Unfortunately, try as hard as I could, I still managed to end up with one block (the long one nearest the mainline) with a steeper gradient than the others! Still dont think it comes in any steeper than 1 in 100. So here is a shot of the completed back loop.
Image
The boss decided it would be interesting to have a high level view, so took my camera upstairs to get this shot.
Image

It is interesting to compare this shot to this one from earlier on in the project.
Image

The track was relaid, and it turns out my blocks today were slightly misaligned, but this isnt a problem as the track can be played around with a bit to make it fit!
Image

As mentioned, we discussed the next stages to be completed earlier in the day. The first thing to do next week is the next 6-8 ft of track bed at the top end of the garden, almost up to the launch point where the ground level changes. Following on from that, the trench towards the house will continue to extend towards where a step will be built (roughly where the block is directly in front of the black washing line pole). We laid out some lengths of track to work out where it will run and how much straight we can get in before we need to curve...
Image


Its all going well with the project, but i'm cutting down on the number of hours each week i'm doing it as I really need to spend some time concentrating on getting a real job!
Bungle80a

"Who has stolen the 3 link coupling off the end of my train?!?!

.....[a few minutes pass hunting down replacements].....

"So, which comedian has uncoupled my entire train?!?!"

User avatar
ACLR
Retired Director
Retired Director
Posts: 1592
Joined: Wed Oct 17, 2007 6:22 am
Location: Brisbane
Contact:

Post by ACLR » Sat May 17, 2008 10:50 pm

looking great mate what brand of track are you using :?:

User avatar
bungle80a
Trainee Driver
Trainee Driver
Posts: 516
Joined: Sun Jan 20, 2008 12:01 am
Location: Fife, Scotland
Contact:

Post by bungle80a » Sat May 17, 2008 10:58 pm

Its Aristocraft 45mm. Theres a mix of American and European style track, but when laying we are gonna do our best to keep each style together. I think the back loop will be built all from 1 style, while the mainline is in the other. Not sure which is which!

One thing I do know is that this stuff is expensive! The shorter points (5ft rad curve) are almost £50 each, and the big (10ft rad curve) ones are nearly £100! In the first section we lay, which is almost blocked now there are 2 of the lrg points and 4 of the shorter ones. I'll let you do the maths! And that doesnt include any of the straight or curved sections of track!

Current plans indicate that the blocks will fit 3 full circuits round the garden. 1x45mm line, which is going in first, 1xfinescale 0 gauge, which may go in at the same time or just after the 45mm, then a third loop which will be either 32mm, 45mm or dual gauge 32/45mm which will not be going in til at least next year!
Bungle80a

"Who has stolen the 3 link coupling off the end of my train?!?!

.....[a few minutes pass hunting down replacements].....

"So, which comedian has uncoupled my entire train?!?!"

steamyjim
Retired Director
Retired Director
Posts: 1210
Joined: Tue Oct 16, 2007 9:19 pm

Post by steamyjim » Sat May 17, 2008 11:04 pm

Looking good mate!

User avatar
ACLR
Retired Director
Retired Director
Posts: 1592
Joined: Wed Oct 17, 2007 6:22 am
Location: Brisbane
Contact:

Post by ACLR » Sat May 17, 2008 11:07 pm

thanks bungle I found this site http://www.svrronline.com/TrackandRail.html
and its available in Aus so have been thinking I might use it in the future when I win the lotto that is :D :roll: :lol:

User avatar
bungle80a
Trainee Driver
Trainee Driver
Posts: 516
Joined: Sun Jan 20, 2008 12:01 am
Location: Fife, Scotland
Contact:

Post by bungle80a » Sat May 17, 2008 11:13 pm

Just had a quick look. Its interesting to look how the dual gauge points work. They are extremely complex for full dual gauge switching! Do you have any idea of the exchange rate £'s to AUS $?
Bungle80a

"Who has stolen the 3 link coupling off the end of my train?!?!

.....[a few minutes pass hunting down replacements].....

"So, which comedian has uncoupled my entire train?!?!"

User avatar
ACLR
Retired Director
Retired Director
Posts: 1592
Joined: Wed Oct 17, 2007 6:22 am
Location: Brisbane
Contact:

Post by ACLR » Sat May 17, 2008 11:17 pm

last night it was about £0.482 = AUD$1.00 highest it has been for years

User avatar
bungle80a
Trainee Driver
Trainee Driver
Posts: 516
Joined: Sun Jan 20, 2008 12:01 am
Location: Fife, Scotland
Contact:

Post by bungle80a » Sat May 17, 2008 11:20 pm

so a full dual gauge point that costs AUS $225 actually works out at 108.45. Thats not bad considering. Thought it'd be more than that! I suppose though there would be import charges at this end though!
Bungle80a

"Who has stolen the 3 link coupling off the end of my train?!?!

.....[a few minutes pass hunting down replacements].....

"So, which comedian has uncoupled my entire train?!?!"

User avatar
ACLR
Retired Director
Retired Director
Posts: 1592
Joined: Wed Oct 17, 2007 6:22 am
Location: Brisbane
Contact:

Post by ACLR » Sat May 17, 2008 11:24 pm

the site I put up is A US site so its in US$
but its pretty close to Aussie dollars at the moment.
yes good prices there is a company here in Aus importing them have emailed them for a price list but no answer as yet

User avatar
bungle80a
Trainee Driver
Trainee Driver
Posts: 516
Joined: Sun Jan 20, 2008 12:01 am
Location: Fife, Scotland
Contact:

Post by bungle80a » Mon May 19, 2008 10:37 pm

Day 18: Can you Dig it, Suckaaaaaaaa!

Not quite a full day, but got enough done to be happy. Started by working the top left of the site...
Image

Here, a trench needed digging to take it across to the end of the raised bit of garden where it will launch off onto boards. Once again plants needed rehoming/removing. This shot shows how different a patch can look after its had its vegetation removed (compare with 1st pic).
Image

As usual, I used pegs for alignment and the trench was dug. It was then filled with hardcore. (Having problems as we've run out of the old pebble dashing, so its a matter of scavenging the garden for anything suitable!)
Image
Image

Once that was done, I wasnt sure how much longher i'd be working today, so set about digging another 4ish foot of trench at the other end...
Image

Once dug it was shuttered to stop concrete escaping and filled with yet more scavanged hardcore.
Image
Image

Once the boss got home we discussed the possibility of laying a spur off the back loop to take to a steaming bay while we were in the area it needs to go, as it could cause problems digging and laying concrete and blocks at a later stage once we've laid the track (as a point will need fitting in) and the soil has been backfilled to the blocksl! A final decision wasnt made today, but I think we should!
Bungle80a

"Who has stolen the 3 link coupling off the end of my train?!?!

.....[a few minutes pass hunting down replacements].....

"So, which comedian has uncoupled my entire train?!?!"

mhlr
Retired Director
Retired Director
Posts: 4336
Joined: Sun Oct 21, 2007 8:16 pm
Location: Shropshire, England

Post by mhlr » Tue May 20, 2008 1:07 am

                                          (@@)     (@@@@@@@)        (@@@@@@@)
                        (@@@@@@@)   (@@@@@)       (@@@@@@@@@@@)
                   (@@@)     (@@@@@@@)   (@@@@@@)             (@@@)
              (@@@@@@)    (@@@@@@)                (@)
          (@@@)  (@@@@)           (@@)
       (@@)              (@@@)
           
      ] [      .-.        _    .-----.
    ."   """"   """"" """"| .--`
   (:--:--:--:--:--:---| [___             .---------------------.
    |GRF   :  :  :  :  :  : [_1_]|'=='|---------GRF---------|
   /|.______________|___|'------l_________________|
  / ||_.--.____.--.____.--._ |-----\-.-/=\-.-/=\-.-/-'/--
 /__;(==)==(==)==(==)^~^(-)  ^ (-)  ^  (-)  ^^
**********************************************


CHOO CHOO!!!!!!!!!!

Great work bungle! Looking fantastic there, soon hav em running! :D
Image

User avatar
bungle80a
Trainee Driver
Trainee Driver
Posts: 516
Joined: Sun Jan 20, 2008 12:01 am
Location: Fife, Scotland
Contact:

Post by bungle80a » Thu May 22, 2008 11:08 pm

Day 19: Time flies when your having fun!

I intended to work for 8 hours today. I arrived about 10:30 and didn't leave til nearly 9 o'clock!

Once again, a very productive day. Popping to the local Waste Management Centre (aka The Tip) to dispose of hedge trimmings this morning turned out to be quite useful. Whilst there, an old gent had a trailer with quite a few bags of rubble for disposal. A few minutes later, I was en route to the Fairfield Railway with more hardcore for trenches!

So that was a bonus start to the day. My main tasks for today were to fill the 2 trenches dug on Monday with concrete.
Image
Image

This took surprisingly less time than anticipated and I was left thinking 'So what shall I do now?' The next thing I wanted to do was lay blocks, but as i'd only just poured the concrete, that wasn't an option, so I decided to get ready for digging the NEXT trench, which involved lifting the last of the paving stones. No real surprise that I found more of these little critters...
Image

I then moved a few bits of greenery, surveyed the area and hit in a few levelling posts. This was followed by removal of more of the lawn where the line will be...
Image

As this area is used for access to the raised section of garden, I have temporarily put one of the old pavings in so as not to get muddy everytime i'm on and off the lawn.

Although I have made a start on that section, I haven't actually dug the trench as there were a few issues about it to discuss with the boss and he wasnt yet home from work. So instead of digging the trench, I moved my attention to the area of soil in the corner behind the top loop. This was pretty poor quality, and 4 or 5 bags worth were removed. The rest was turned and then some good soil and peat were mixed in and that area has now been back filled to the blocks.
Image

If I get a spare hour or 2 in the next week or so, I have a few plants to put in round there, including another move for the tall grassy thing that gives killer paper cuts!

Next time, on Building the FR...
Block Laying,
More Block Laying,
Gardening.
Bungle80a

"Who has stolen the 3 link coupling off the end of my train?!?!

.....[a few minutes pass hunting down replacements].....

"So, which comedian has uncoupled my entire train?!?!"

Post Reply

Who is online

Users browsing this forum: No registered users and 5 guests