Page 3 of 7
Posted: Sun Nov 04, 2012 4:31 pm
by TonyW
GTB:75769 wrote:Loco and train brake are independent of each other. A vacuum brake fitted loco would have a steam brake on the loco, which had a smaller cylinder than the rolling stock, as it worked on steam pressure.
While that is generally true, there are a lot of locos that used vacuum on the loco and had no steam brake. This arrangement was used on the standard gauge by some GWR (all?) and LNER locos, and is also used on NGG16 Garratts.
On an NGG16 no vacuum means no brakes (other than the hard-to-use handbrake). The loco brakes can be applied independently of the train brake, i.e. a train can stand in a station with the carriage brakes off and the loco brakes on.
Posted: Sun Nov 04, 2012 7:34 pm
by plewsy2105
While that is generally true, there are a lot of locos that used vacuum on the loco and had no steam brake. This arrangement was used on the standard gauge by some GWR (all?) and LNER locos, and is also used on NGG16 Garratts.
and some southern locos i.e the Lord Nelson class and the schools class
Posted: Mon Nov 05, 2012 12:07 am
by Annie
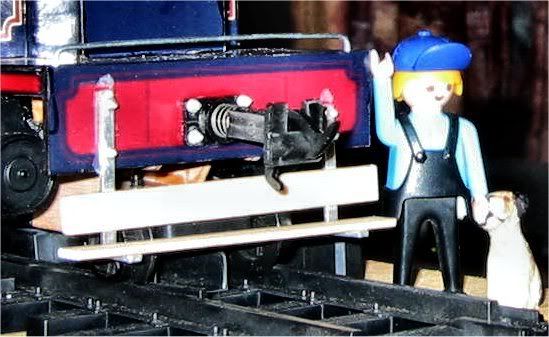
Very clever and nicely done too. I like these couplings as well, but they do stick out a bit far which can look odd on some rolling stock.
Posted: Mon Nov 05, 2012 12:23 am
by IrishPeter
The Isle of Man Railway's locomotives had handbakes only until the 1920s when vacuum brakes were added. No.16 had steam brakes when new which was probably a good thing as she used for the heavy Port Erin Boat Trains. In practice, the vacuum brakes were little used, there being no Island rule about using them.
When I first got acquainted with the IMR the usual practice was to use five or six (occasionally seven) car sets and to control them with handbrakes. This was satisfactory as the regular guards knew when to apply the brake - for example, all the way from Keristal/Oakhill bridge to Douglas, and the last mile or so southbound into Ballasalla. Otherwise, the usual drill was for the driver to whistle for brakes and for the guard to wind them down before the loco brakes were applied. This prevented the train bunching behind the loco, and then snatching when the brakes came off. The non-funtioning vacuum brake tended to perpetuate the Manx habit of creeping into stations and accelerating smartly away. Also with the dependence on handbrakes for stopping power the carriage handbrakes were maintained in fairly good condition, with those with the best brakes getting the most use. The same usually went for the locomotives
However...
Towards the end of her time in service No.5 Mona had a suspect handbrake. It took about five turns before anything happened, and even when wound all the way on it was not fully applied. Her regular driver liked to "run them" which was perfectly OK when she was paired with one of the brake carriages with good brakes - F40-44, F45/46 or F49 - but if she was paired with F19/20 (the Peel line regulars) or any of the other wooden framed brake coaches it could result in some 'knicker gripping moments.' I'll leave the rest to your imagination.
These ays they usually run with four or five carriages on the hook and always with the vacuum brakes coupled up. The vacuum ejector basically knocks one carriage off the load an IMR can handle, so they will usually bank 6 coach trains out of Douglas, because if the loco is not steaming well the brakes will start and leak on if the pressure falls below 100psi. In former times they would take 6 or 7 single handed, up the bank, though exceptionally (dry day and a good loco) they would take 8.
One other thing to remember about IMR locomotives is not all of them had steam heating gear. This was fitted in the 1930s, but only those locomotives in regular use through the winter were ever fitted. In phots from the 1950s I have only ever seen photos of the gear fitted to Nos. 1, 3, 5, 6, 11, 13 and 14. I have gotten the general impression for the photographic record that it was fitted only to those locomotives in regular winter service. In the early 1950 this would have been 4/5 locomotives, but by the mid-1960s this would have been one - two at the most as the railcars had taken over the winter skeleton service. The old joke was 'you could have continuous brake or warm feet, or neither if the engine were not steaming well.' The thing to look for is an extra narrow diameter copper pipe running along the left side of the boiler. It is usually a bit mprovized looking!
Peter in AZ
Posted: Mon Nov 05, 2012 11:50 am
by GTB
tom_tom_go:76453 wrote:here are the pics of the modified coupler you wanted (sorry it took so long!)
Thanks Tom,
Interesting, the W&L couplers have less metal around the pivot than the L&B type.
I shortened the couplers on my locos last week, but only managed to reduce the overall length by 1/8". I ended up fitting side control springs, made out of phos bronze sheet, to keep the shank centred. The spring is the W shaped bit in the photo.

Graeme
Posted: Fri Nov 30, 2012 6:05 pm
by tom_tom_go
Apologies, just caught up with all your interesting replies!
Your mod looks good Graeme. I think Accucraft could shorten all their chopper type couplers as even my version works perfectly on 2ft 6" radius curves and anything tighter than that just does not work!
Posted: Mon Mar 04, 2013 1:36 pm
by tom_tom_go
I think the phrase rhymes with clicking bell...
Don't use Wickes Heat Shield Spray paint as it is complete rubbish for locos as it does not cure until it reaches at least 315°C. I only found this out after spending ages spraying the smoke box for my SL and now every time I touch it just starts to rub off depsite being in the oven for a hour! I did degrease and key the surface first so I can only assume it is the curing that is at fault.
I have ordered some gel paint stripper to remove it all and then will spray with Hotspot Stove and Fireplace paint instead which cures at 250°C which is a temperature my oven can reach.
Hopefully, I will have some pictures of a success soon!
Posted: Mon Mar 11, 2013 1:19 pm
by tom_tom_go
Da dah!
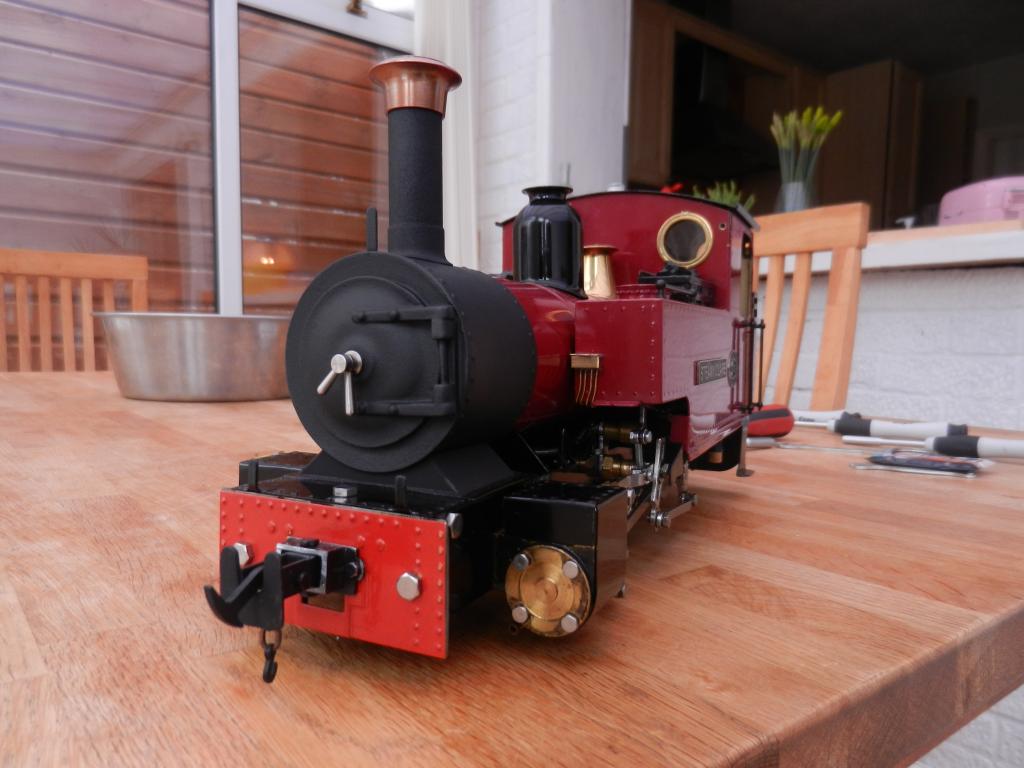
(Thanks to Chris Bird for his advice along with his paint guide!)
I am going to paint the roof the same colour and mod it as shown as I do not like the imitation sliding roof vent that RH use and the big hole that is drilled for the aerial to poke out of (the front roof vent covers this now as in the picture):
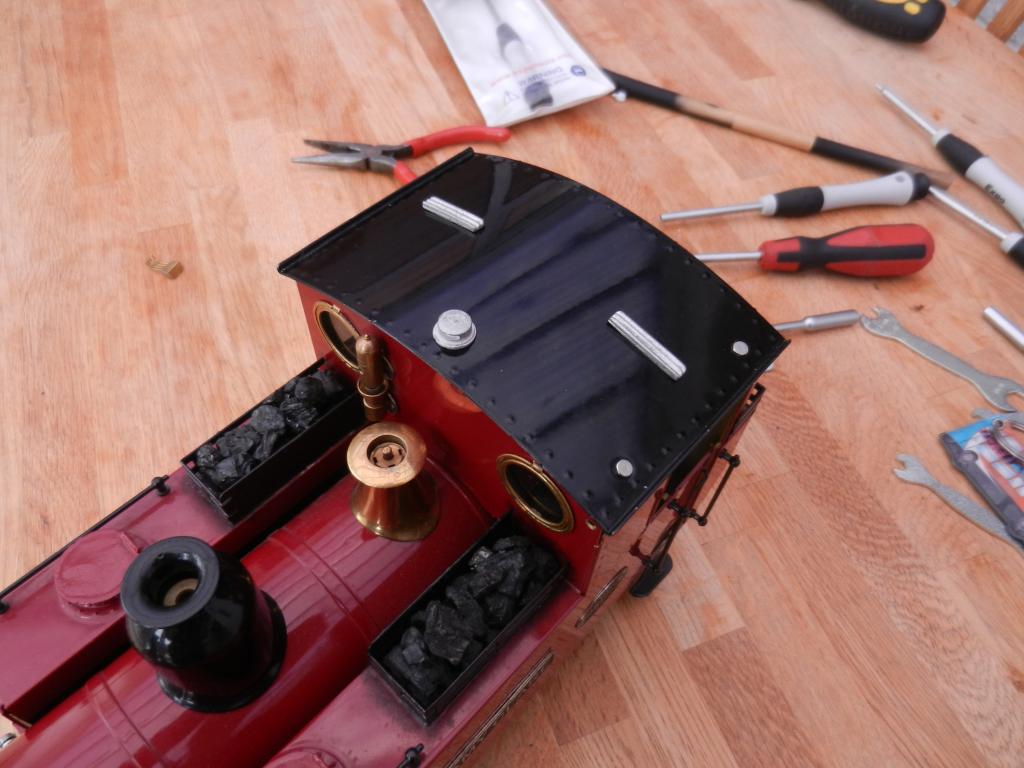
The little vents you see cover the holes where the original battery box use to be fitted (mine is now a smaller battery pack in the bunker).
I have tested the aerial fitted under the roof and it works fine from a fair distance so I don't think this will be a problem.
What do people think?
Posted: Mon Mar 11, 2013 2:03 pm
by Chris Bird
That looks the business Tom - worth all the effort!
And we all now know to avoid the Wickes paint - I will make a note on my painting page - every cloud, as they say

Cheers
Chris
Posted: Thu Mar 14, 2013 10:40 am
by tom_tom_go
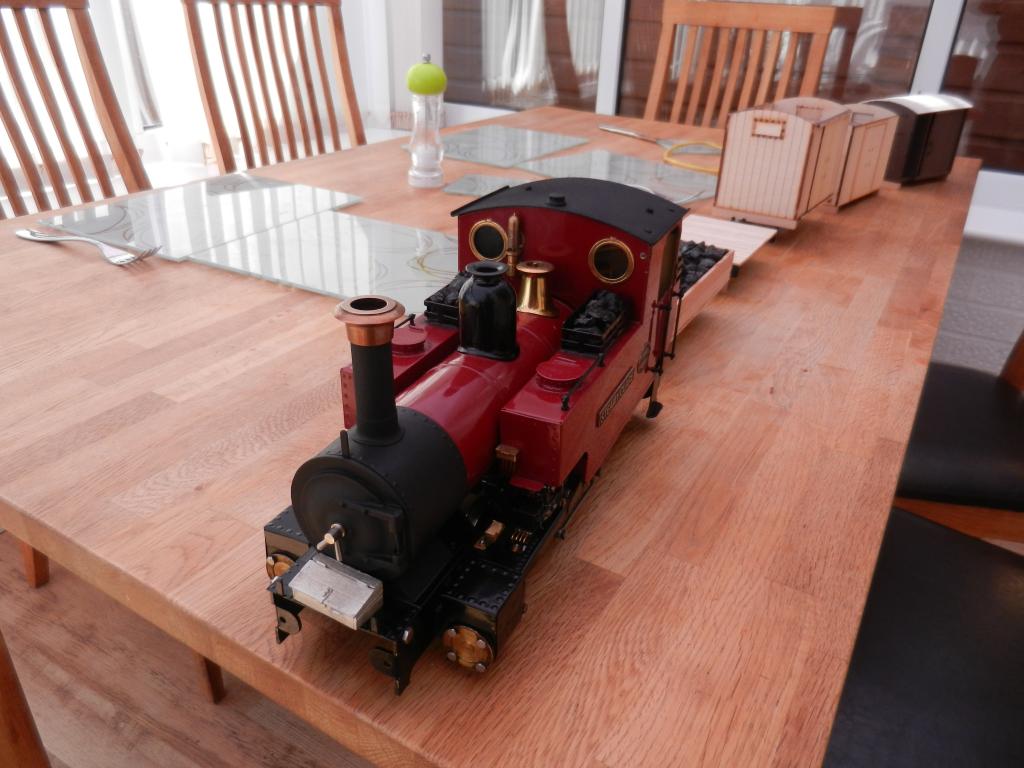
Here is the roof done:
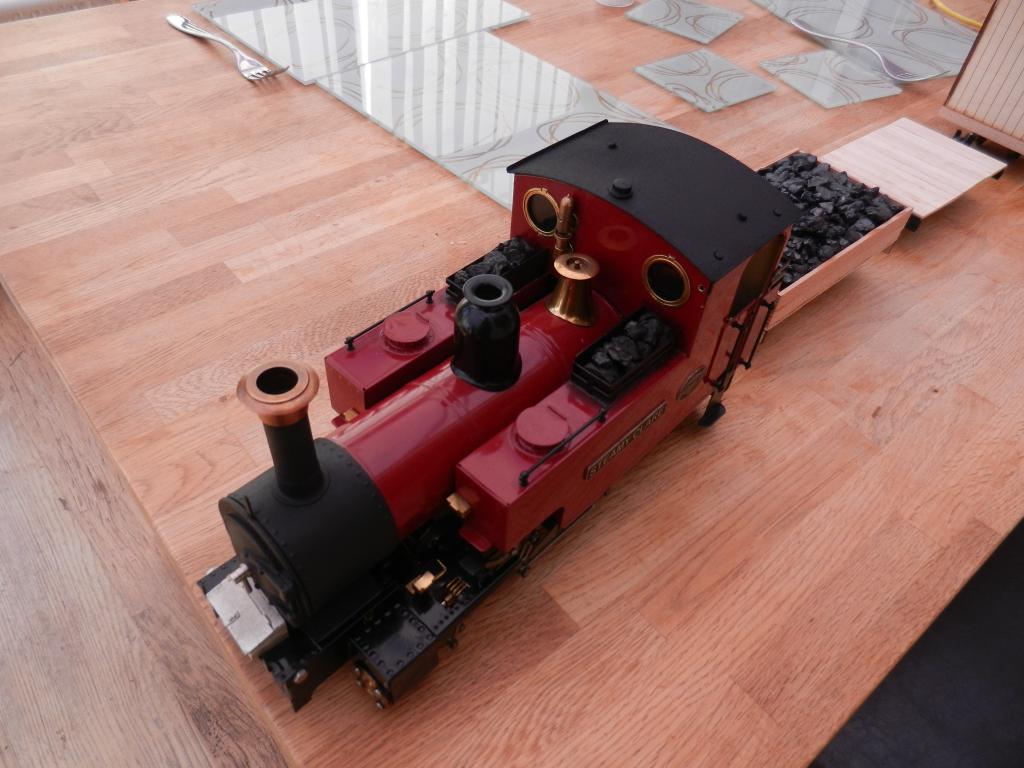
The bolts look better than the vents

And here is the whole train nearly ready for summer:
Posted: Thu Mar 14, 2013 11:42 am
by Keith S
...better build some more wagons. Steamy Clare will take no notice of those few. She could probably pull 50 of them!
Nice looking loco.
Posted: Thu Mar 14, 2013 1:16 pm
by DolwyddelanLightRail
Keith S:81220 wrote:...better build some more wagons. Steamy Clare will take no notice of those few. She could probably pull 50 of them!
Either that or shove a load of lead in them and run it up a 1:40 gradient

Posted: Thu Mar 14, 2013 5:19 pm
by tom_tom_go
50 wagons? This ain't BR steam mate

All my wagons are heavily weighted. For example, the 2 plank wagon is hiding loads of weights attached to a piece of wood under the coal load.
I try and make each piece of rolling stock between 1kg and 2kg in weight.
Posted: Thu Mar 14, 2013 7:36 pm
by GardenSteamer
The matt black just finishes off the loco well.
I just wish Roundhouse wouldn't paint their smokeboxes gloss black!
Posted: Thu Mar 14, 2013 7:48 pm
by tom_tom_go
RH now do use a satin finish for both smoke box and cab roofs. You have to remember that RH are in business of making durable outdoor locos for `Joe public` so it is up to the individual to then modify their loco to their taste...
Posted: Fri Mar 15, 2013 10:01 pm
by Lner fan Sam
Have you considered fitting the running boards from locoworks Tom?
Posted: Fri Mar 15, 2013 10:29 pm
by tom_tom_go
Hi Sam,
Yes I have these fitted (sorry about the poor quality of the pictures as the lighting in this room is rubbish at night):
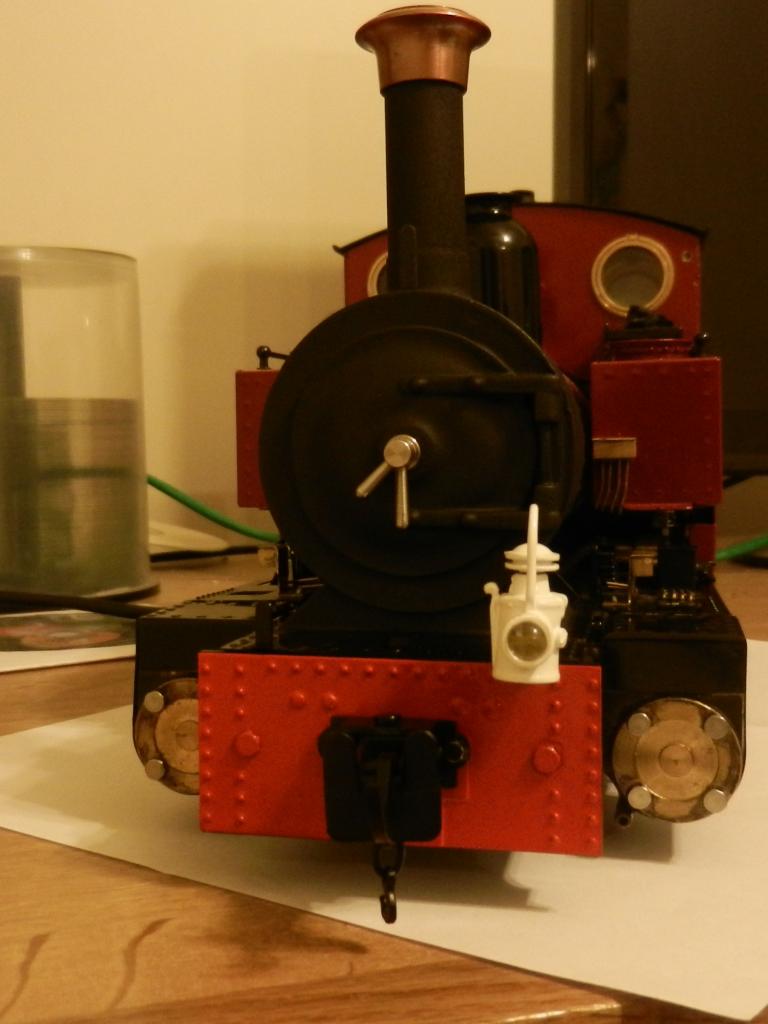
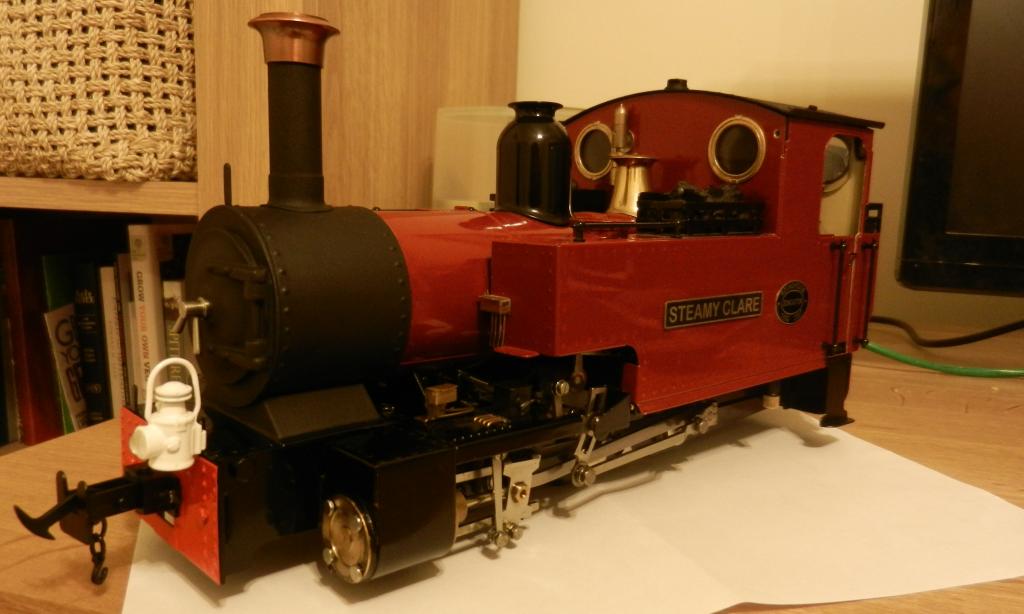
Tom (Locoworks Tom that is!) sold me at a reduced price just the back pieces of the running boards as I have shortened my buffer beam. Nice guy to deal with and clearly has a passion for what he does so good luck to him.
I had a go at respraying the front buffer beam with a different shade of red and with smaller hex bolts as well. The grab rails and door handle on the cab doors (also from Locoworks) have also now been painted black.
Posted: Thu Feb 13, 2014 1:43 pm
by tom_tom_go
Been a while since I have managed to get outside with a loco due to the weather.
Here she is with her new Lady Anne dome (so to match the Riverdale 'Amy' once finished):
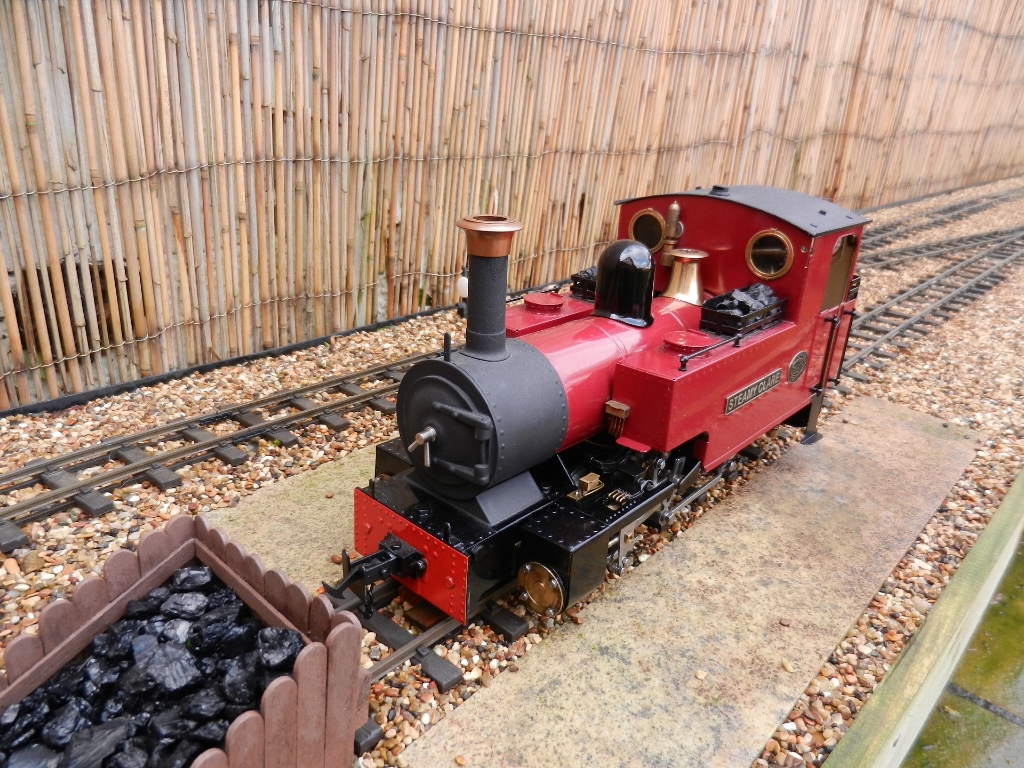
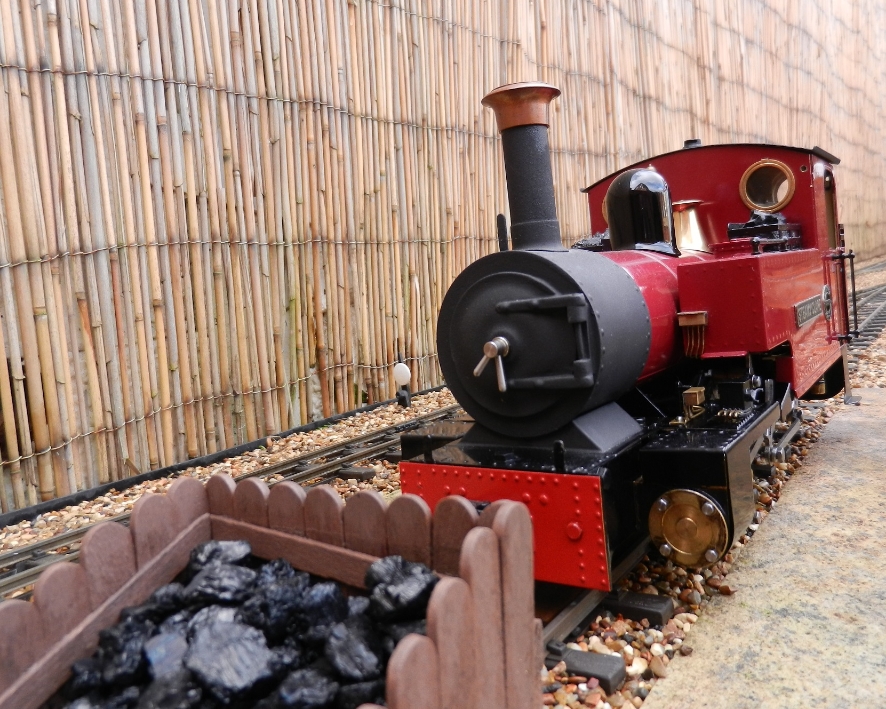
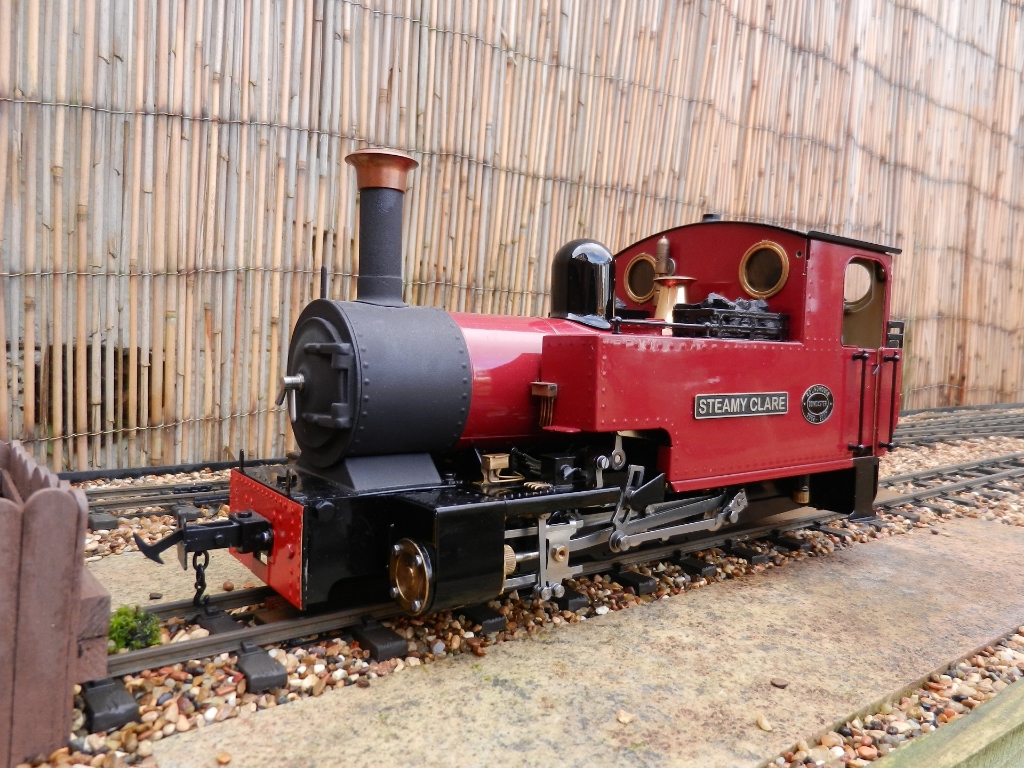
I prefer this one to the original that comes with the SL as it has a hole in it which although makes topping up water easier looks looks wrong (to me anyway!)
Posted: Fri Feb 14, 2014 11:45 pm
by Big Al
That's looking nice Tom, Is the Dome a standard Lady Ann one and have you fitted a pop safety valve or is it still the Roundhouse one.
Posted: Sat Feb 15, 2014 8:37 am
by Gremlin
I think I prefer this new dome, great looking engine.


