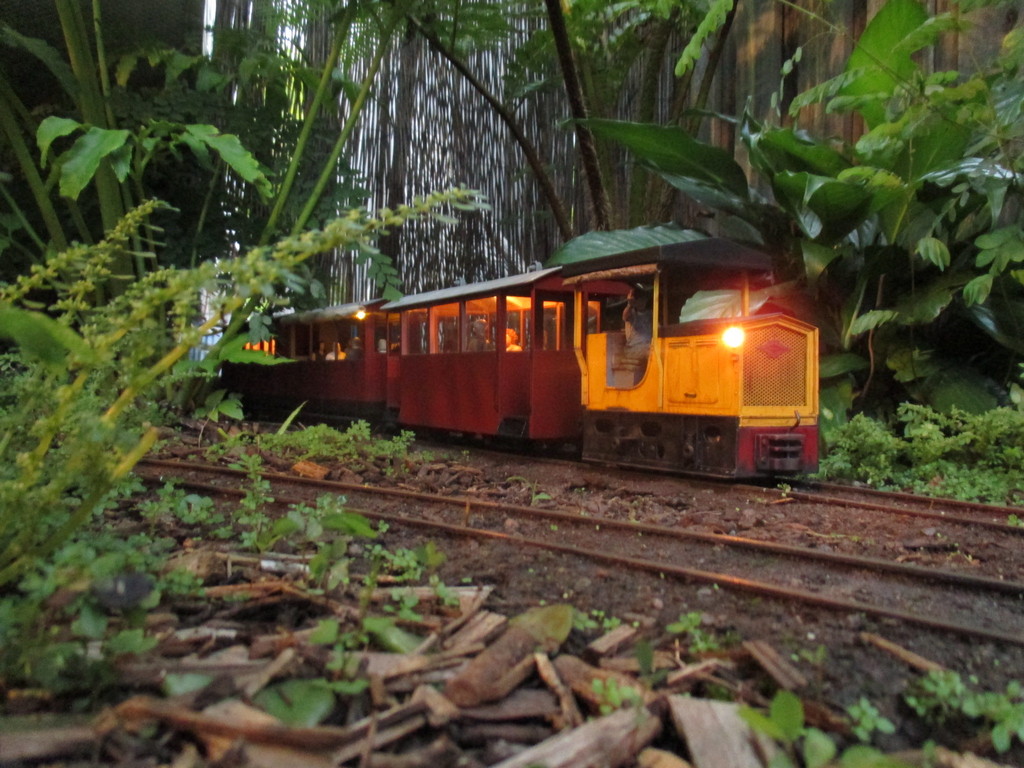
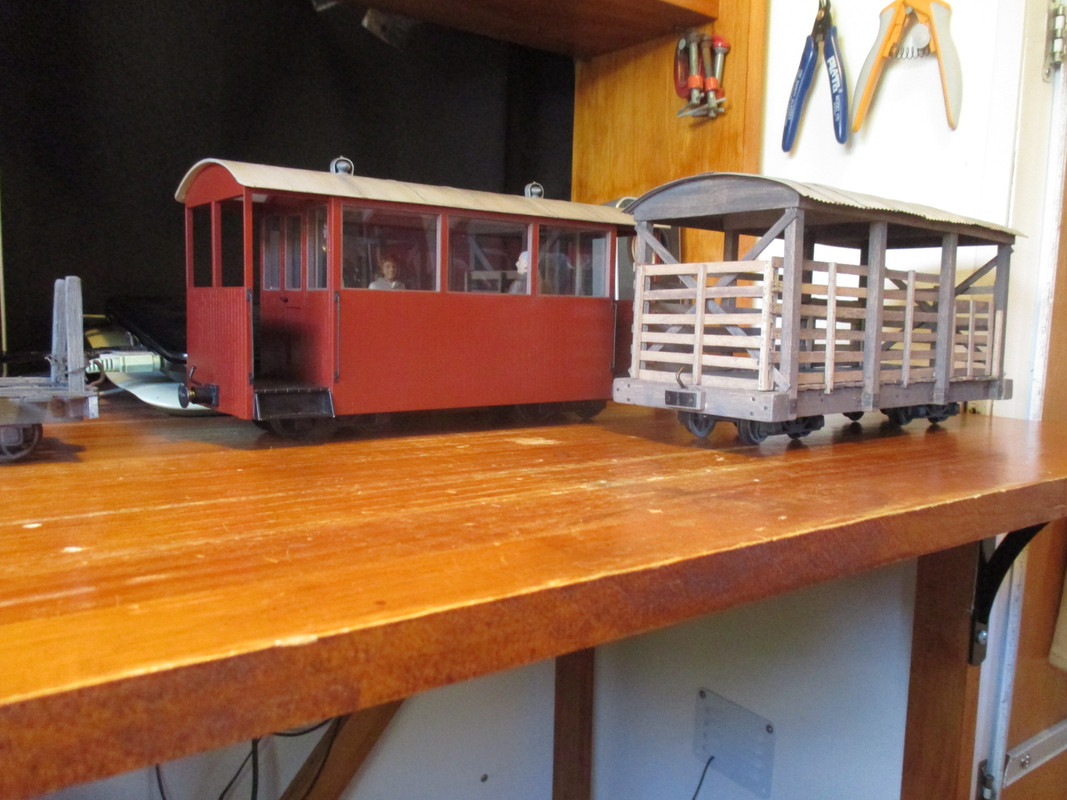
Gladstone Coach to Bush Tram Carriage

Discussion of Rolling Stock related topics should go here
Post Reply
User avatar
Old Man Aaron
Trainee Driver
Trainee Driver
Posts: 808
Joined: Wed Oct 19, 2016 11:08 am
Location: Sunshine Coast QLD, Australia

Gladstone Coach to Bush Tram Carriage

Post by Old Man Aaron » Fri Jan 12, 2024 7:16 am

A "little" :lol: project from my defunct blog, that I've been meaning to contribute to the forum for quite a while..

Back in early 2019...
I wanted an end-platform carriage, reminiscent of the various carriages found on the 2ft gauge sugar tramways of Queensland. Several of these were built by sugar mills running a local passenger service in the slack season, (Dec - June) or by Shire Councils for year-round services on their own tramways.
I wanted a break from scratchbuilding. However, the few end-platform kits available in 16mm were either too big, or not quite the style I needed.
Eventually, I decided on cutting down an IP Eng. Gladstone Coach kit.


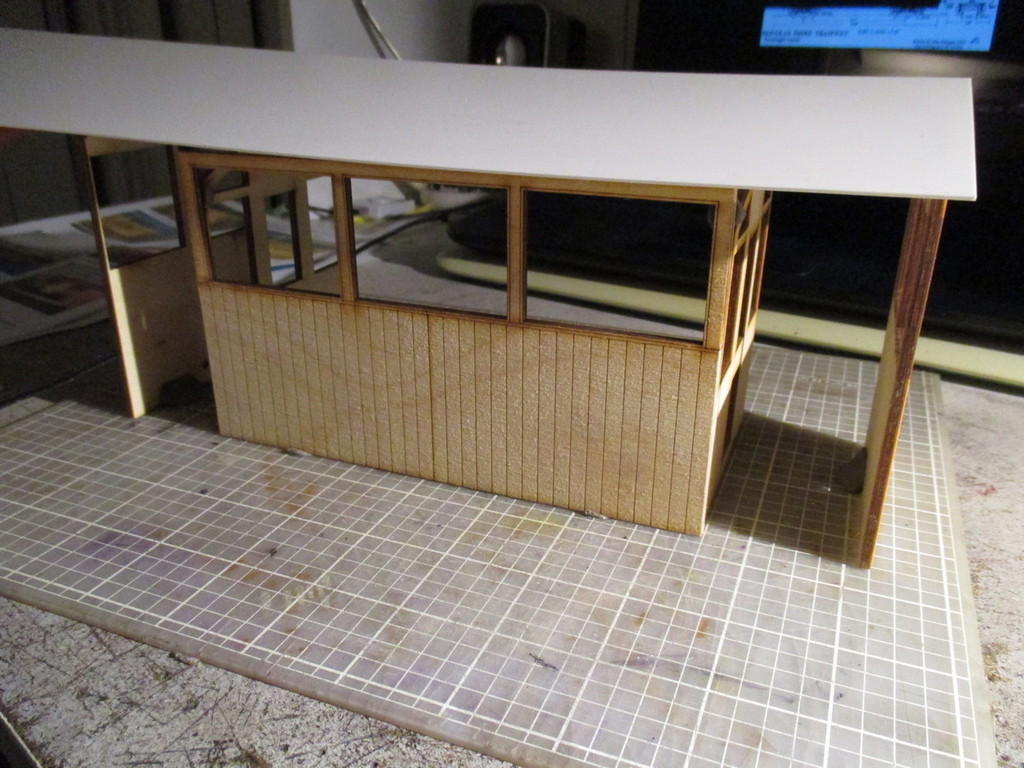
21/01/2019
The open-sided ends were cut away, leaving only the glazed saloon.
Image


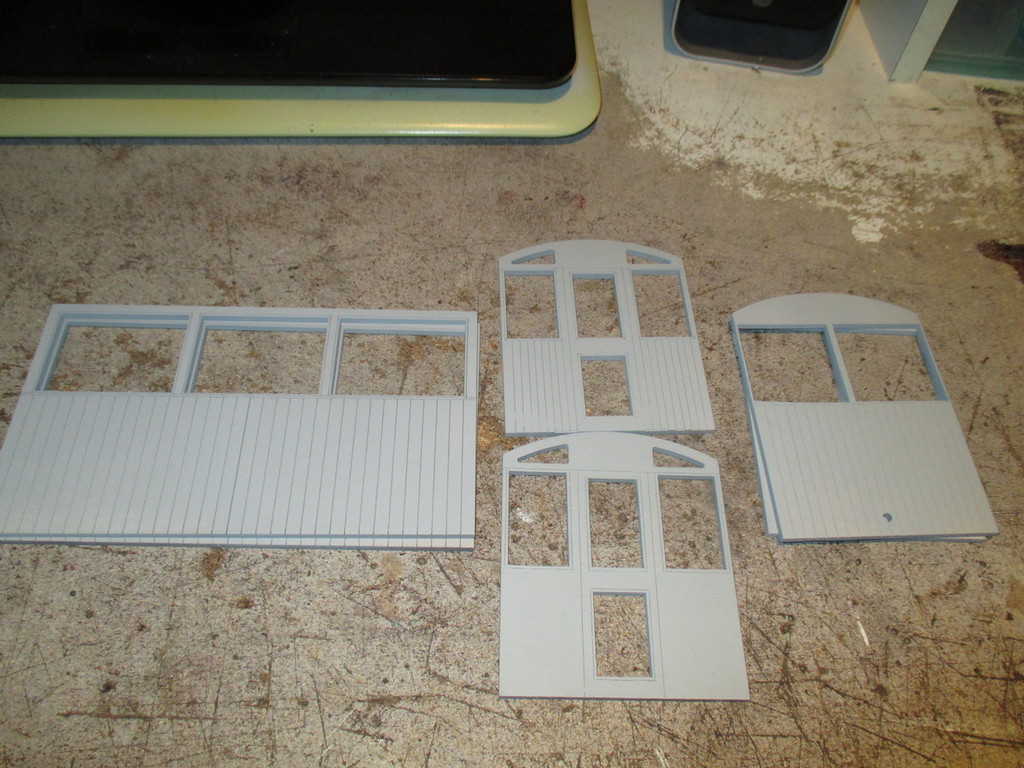
23/01/19
The end walls were scribed on both sides as needed, to match the side walls before filling the plywood's grain.
The grain was filled with spray putty. Each coat was sanded, the dust brushed away, then re-cut the scribed lines with a knife because the filler obscures them.
Very laborious. I prefer MDF over ply - it doesn't have a coarse, often wrong-way grain to fill, and I can't say I've ever had it warp.
For the latter reason, a replacement floor was made from 3mm foamboard.
Image


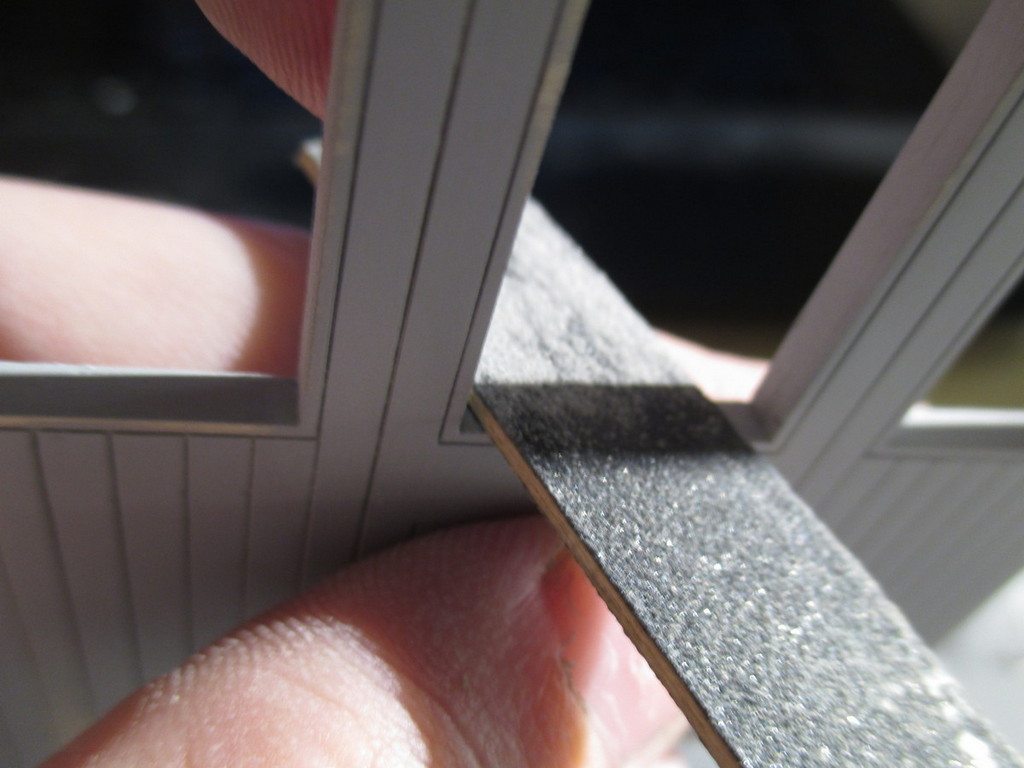
Emery boards (nail files from the cheap shop) are great for smoothing out window openings.
Image


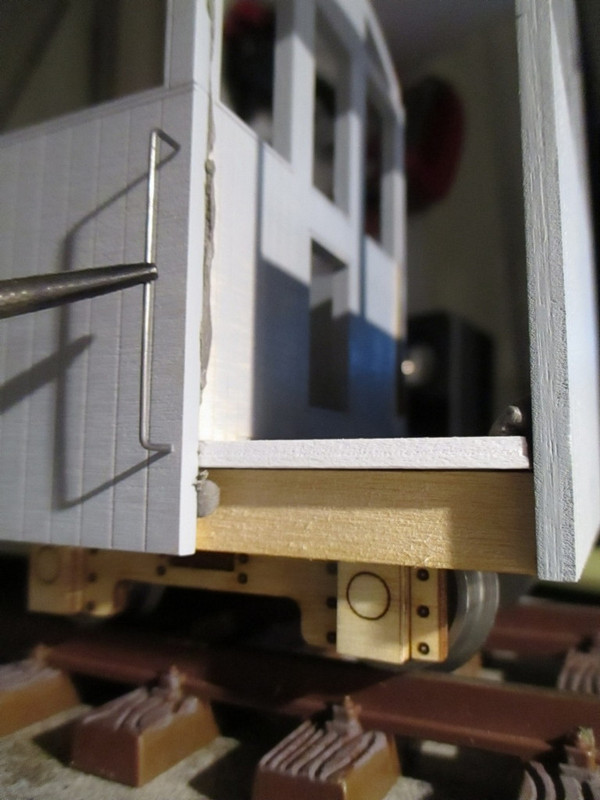
Handrails were bent from music wire, on a jig. A drilling jig with precisely-located guide holes was made from a length of styrene angle.
The kit's solebars were cut down to suit the shortened frame. The wagon here is mocked up with blu-tac, and sits on temp. bogeys.
Image


05/05/19
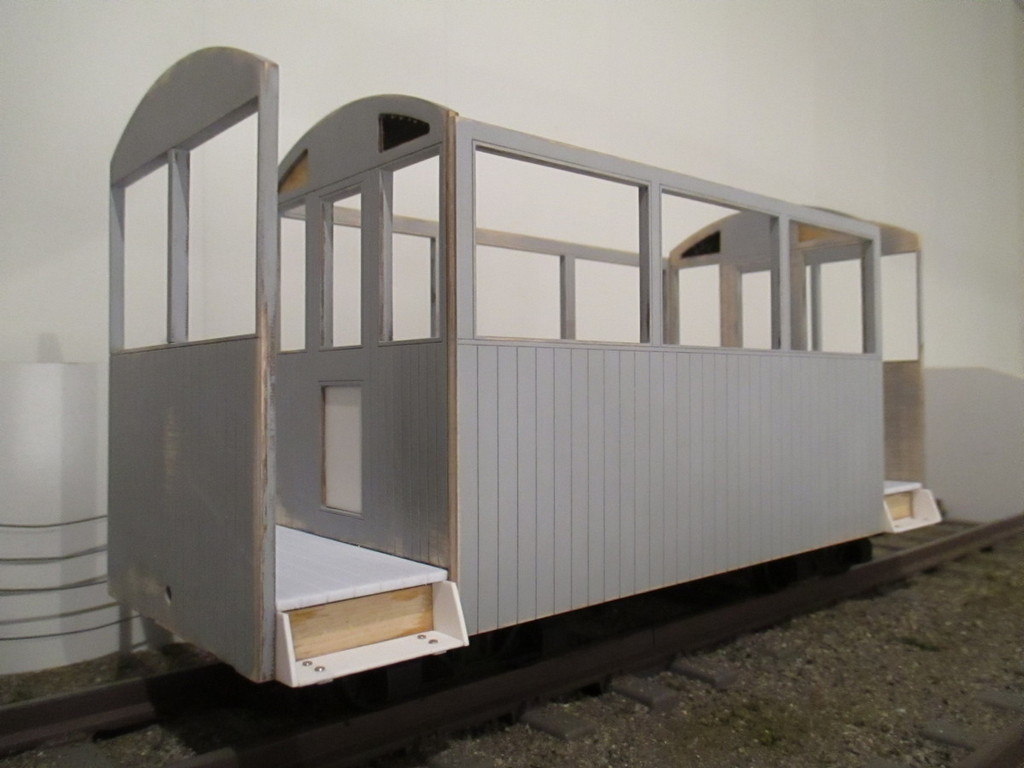
I wanted the steps to be simple and robust. They resemble those fitted to tram trailers - fitting, given the carriage is built like one. It now rides on a pair of IP Eng. whitemetal archbar bogeys with Binnie 20mm wheels. As you may have noticed, this was at the time built to 45mm gauge.
Image


06/06/19
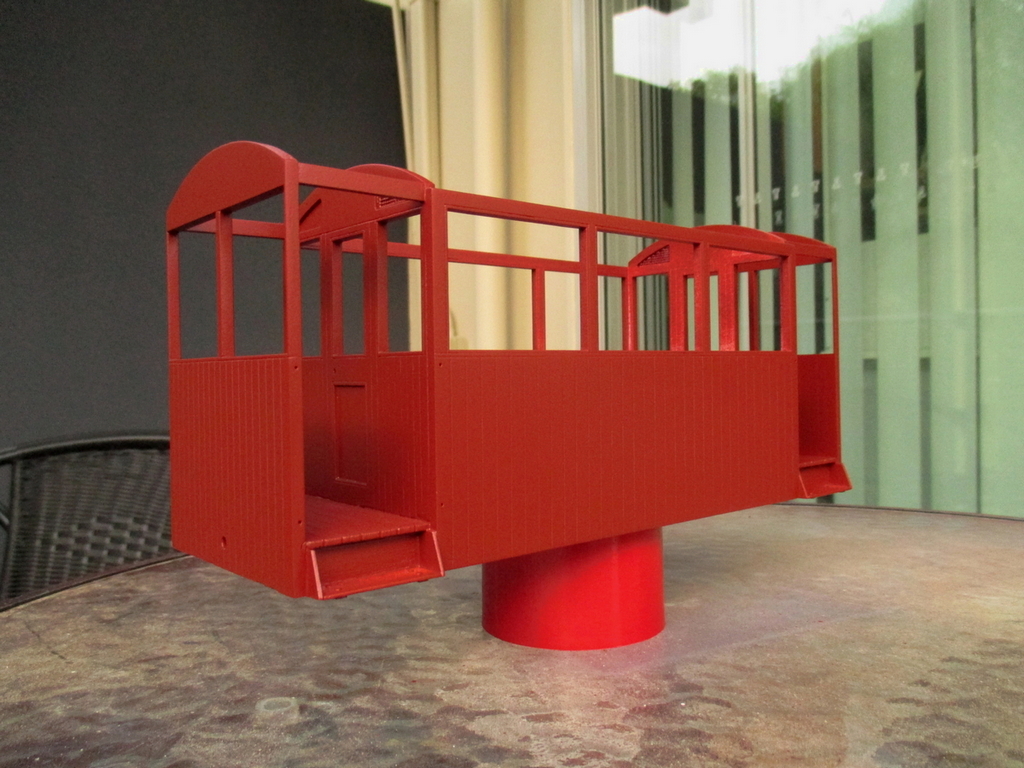
After a light base-coat of white, followed by red oxide primer, I dug out an aerosol can of Tamiya's TS-33 Dull Red.
A satin clearcoat gave the appearance of a more recent addition to the wagon roster, as opposed to the flat finish of the older coaches I had at the time.
Image


05/07/19
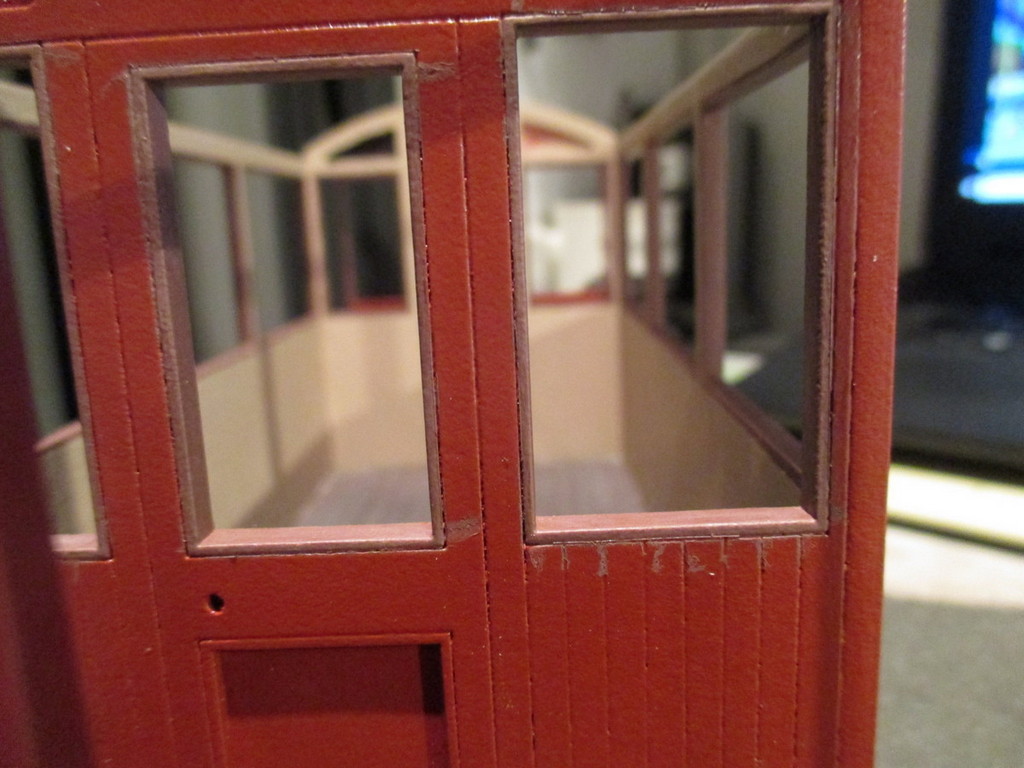
Again to match the existing stock, the window frames were painted brown. To save some tedium, Tamiya 3mm wide tape (the repackaged strips of electrical tape for masking curves) was used to mask off. That stuff is too thick to burnish down properly at the corners, and I should've bought the 3mm wide version of their excellent 10mm paper masking tape I had on hand. Much retouching ensued...
Image


12/07/19
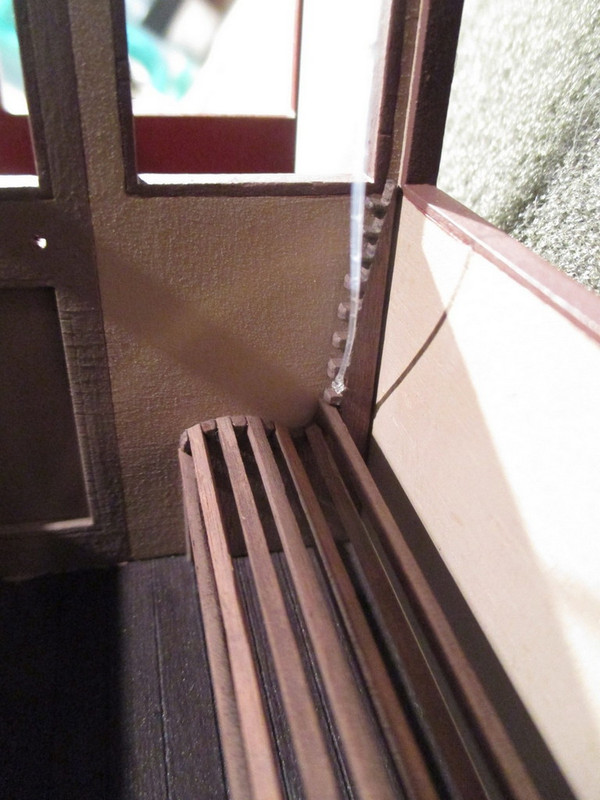
A fine-tip superglue applicator made a nice job of fitting the delicate but beautiful seat slats.
Image


30/07/19
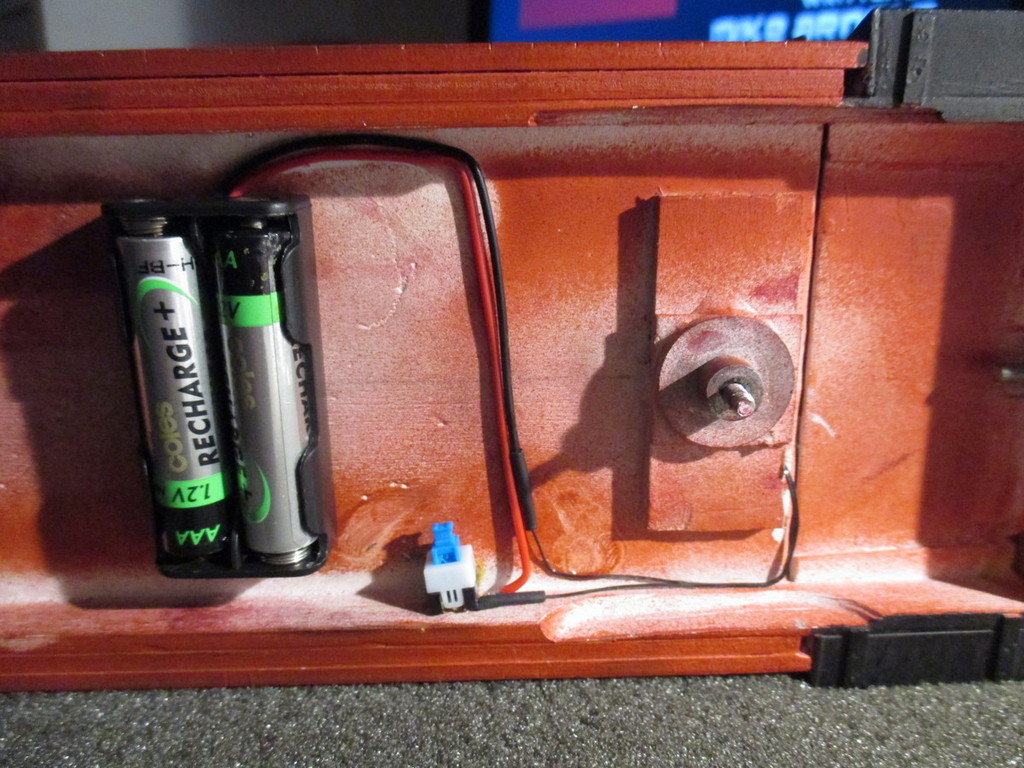
Night excursions became popular in the 1920s, so interior lighting is a must. A pair of AAA cells will go under the floor. Some tube from the scrap box makes an ideal conduit.
Image


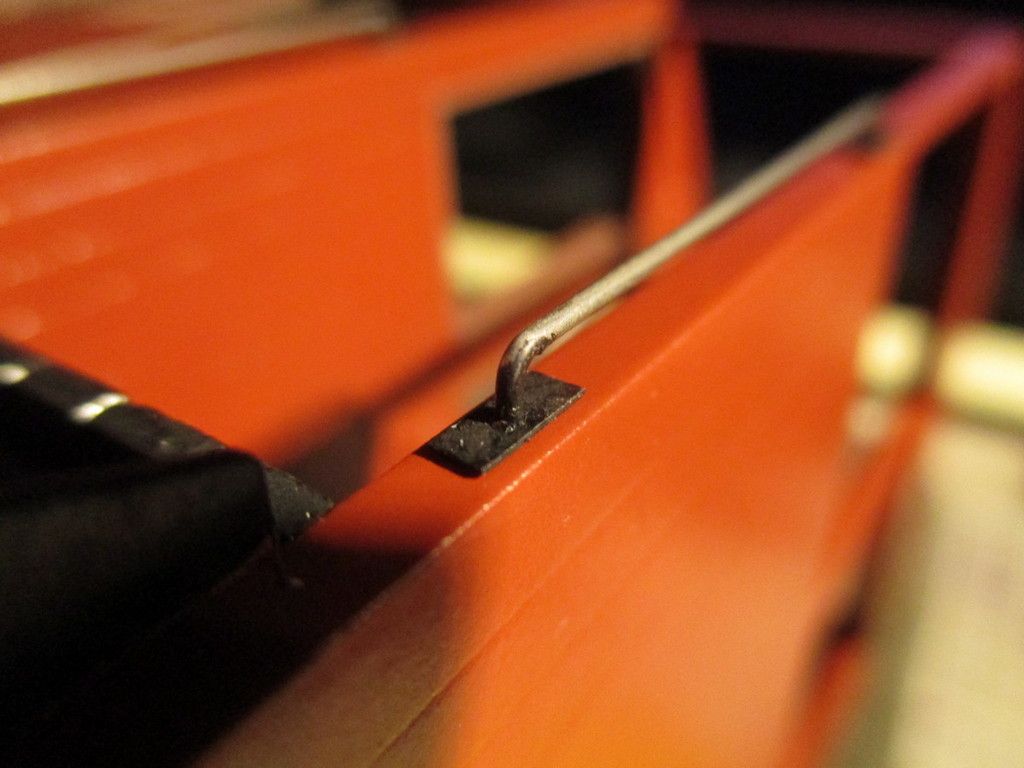
Tiny "feet" were cut from styrene strip for the handrail landings. Loosely based on those fitted to North-East Dundas Tramway coach "A-1", now running on the Redwater Creek Tramway in Tasmania.
Image


25/09/19
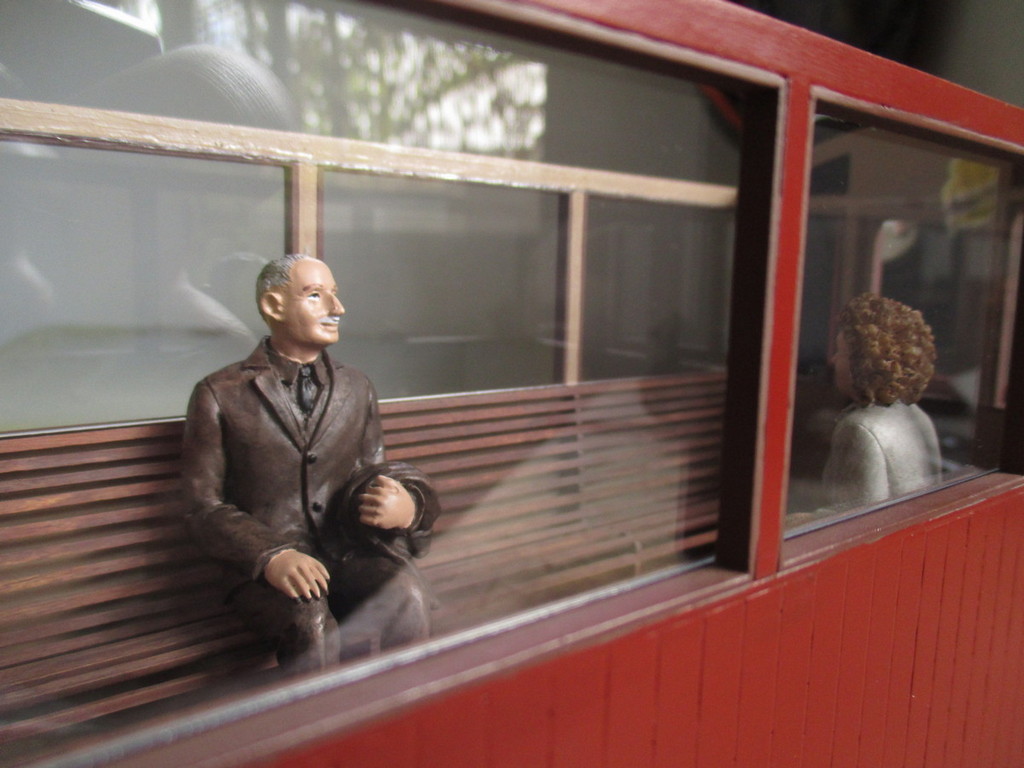
Glazing from the kit was trimmed to fit the modified saloon, and installed with canopy cement, sparingly applied with a screwdriver.
The large, revealing windows meant I needed something better than the cheap and under-scale 1:24 figures already to hand.
The bullet was bitten, and $50 was spent on a pair of Bachmann's Scenecraft 16mm scale figures. I think you'll agree, it was worth the expense.
Image


More to come soon.
Last edited by Old Man Aaron on Sat Jan 13, 2024 3:18 am, edited 5 times in total.
Regards,
Aaron - Scum Class Works

User avatar
Old Man Aaron
Trainee Driver
Trainee Driver
Posts: 808
Joined: Wed Oct 19, 2016 11:08 am
Location: Sunshine Coast QLD, Australia

Re: Gladstone Coach to Bush Tram Carriage

Post by Old Man Aaron » Fri Jan 12, 2024 8:43 am

25/09/19
The 1mm styrene sheet from the kit was cut to length, and scribed as needed.
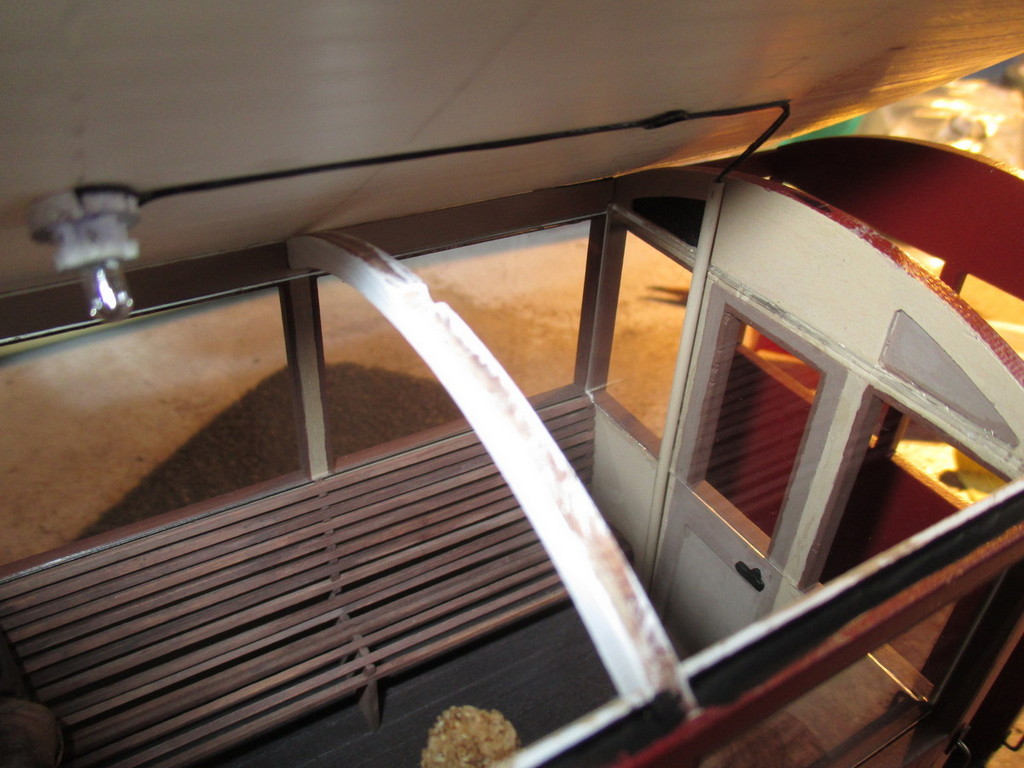
A bulb mount (I believe salvaged from a car instrument panel many yeas ago) was fitted with a 3V bulb.
Superglue and a ruler made for a tidy visible wiring run, though I did get carried away - the wires need only go little further than the vent hole in the roof.
They lifted away cleanly with a razor blade.
Image

Image


25/12/19
After learning first-hand why many people don't like 1mm styrene for roofs, I decided to use two layers of 0.4mm instead.
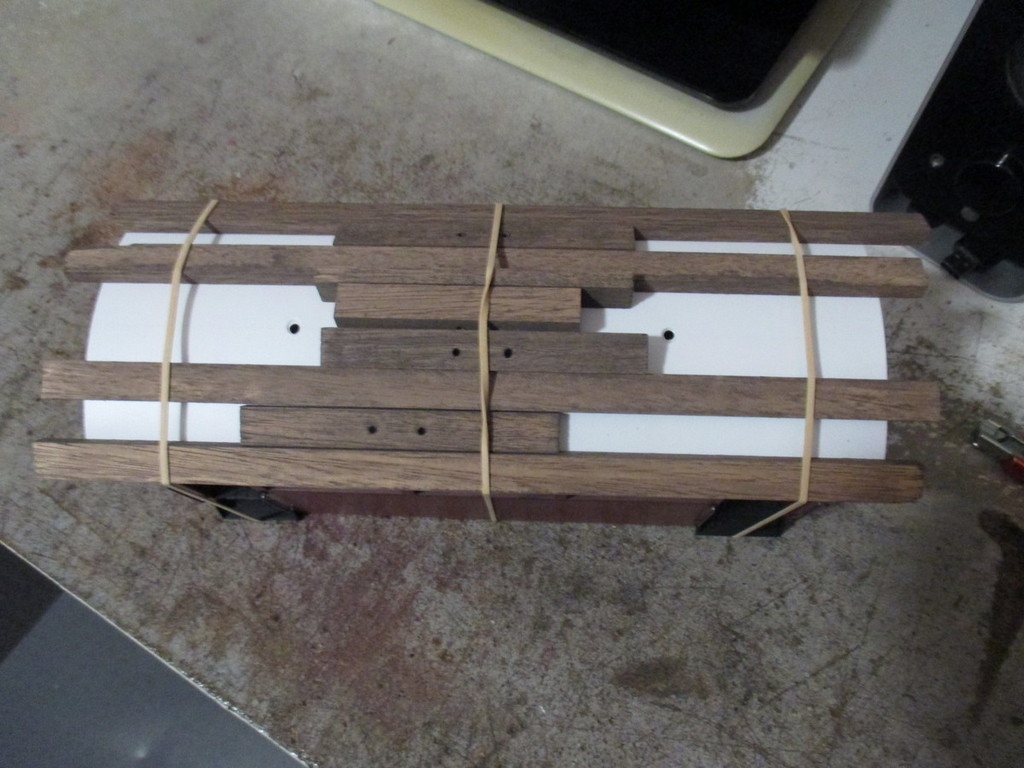
The first layer was scribed and distressed as before, then fitted without issue using epoxy; held with rubber bands and pieces of timber, (the frames of another wagon build) to spread the bands' pressure more evenly as the epoxy set.
After a few days' curing, the top surface was slightly roughened up with emery tape to help the second layer stick, and the process repeated.
Image


04/01/2020
A new decade! Apparently.

Not even finished, but I'm well pleased - It already looks at home in the tropics. 8)
Image

16/01/20
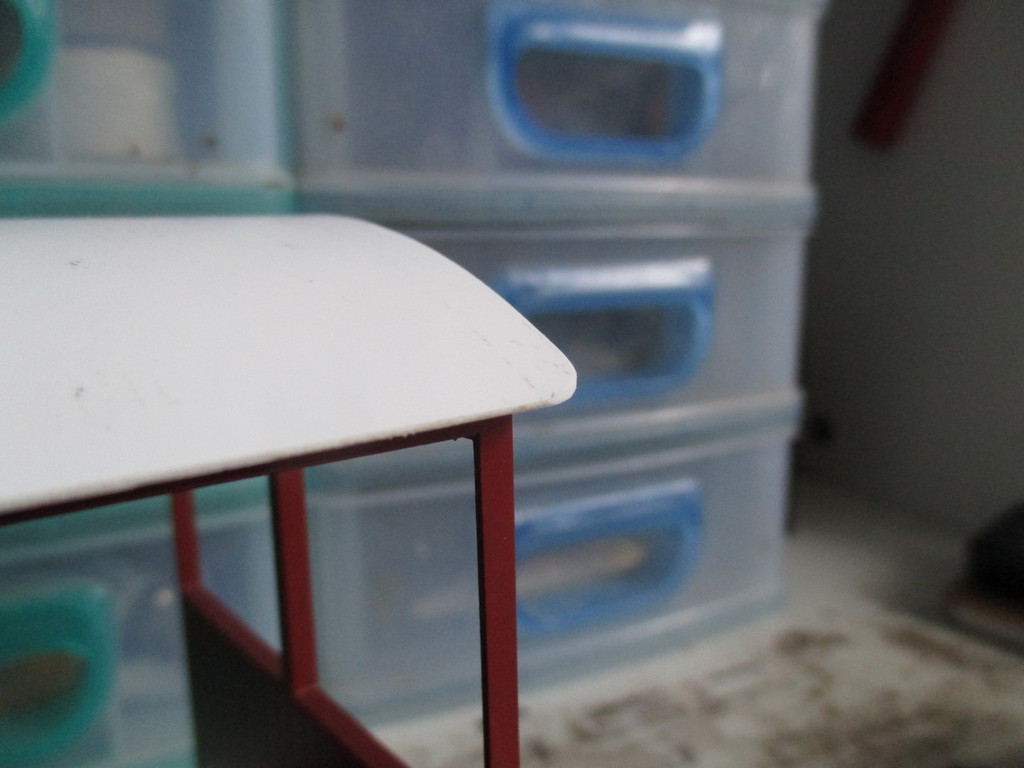
At this point, I decided curved corners would be far nicer.
Image


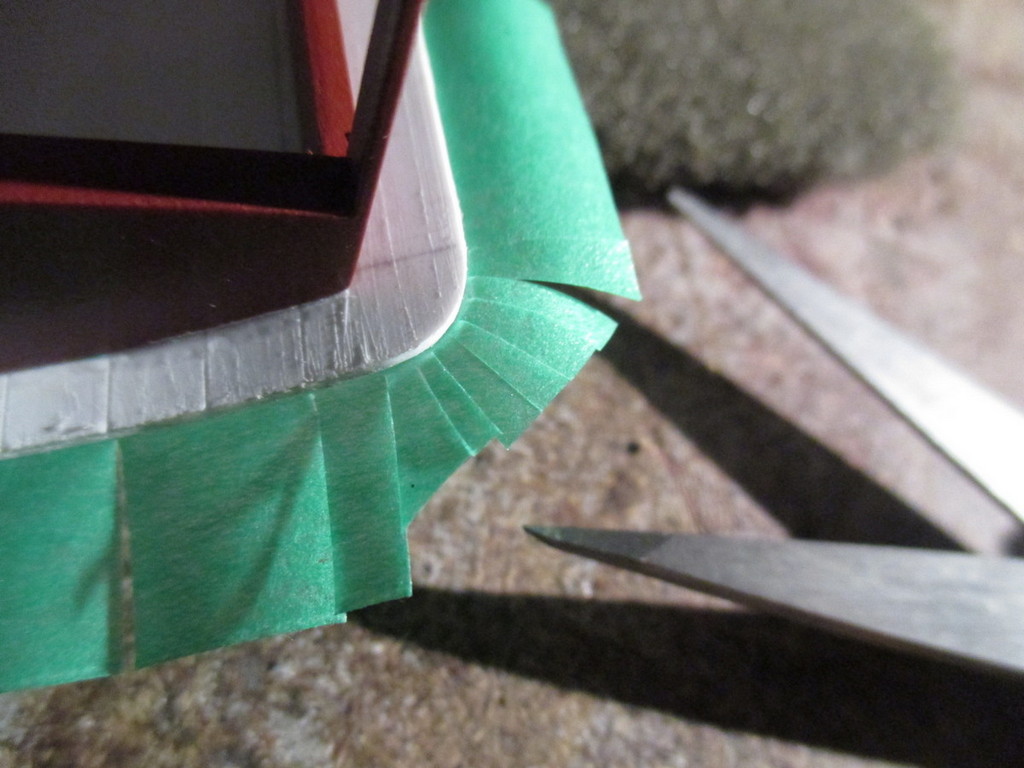
For a finer-scale canvas roof effect, I thought I'd try covering the roof with strips of masking tape. It wrinkled very badly when test painted with acrylics.
This would be perfect for a decrepit wagon, but not a carriage in good nick.
I found the low-tack variety to be much smoother and less wrinkle-happy when painted, so I proceeded with that.
Image


25/01/20
After wiping the rooftop with alcohol, the alignment for the first strip of tape was marked out. As the tape was laid down, a pencil eraser was used to smooth the tape into the roof, and push out any trapped air. Curving the corners made things more complicated, though still doable. A little superglue was needed under here to keep the low-tack tape stuck. After burnishing down, the excess was carefully trimmed away with a fresh razor blade.
Image


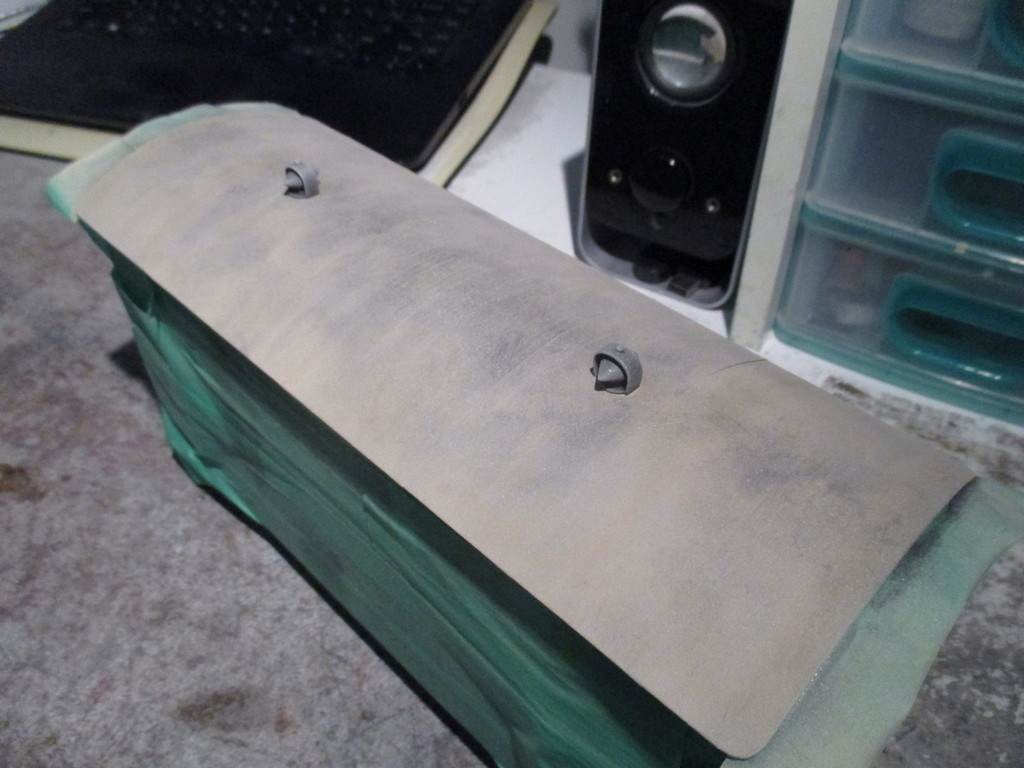
Three coats of black (using enamel this time prevented wrinkling) to block the interior light from bleeding through, was followed by a pair of Brandbright ventilators.
Then, a dusting of tan, black and grey for a grubby canvas effect. A flat clearcoat had it sealed.
Image


08/04/20
My wiring isn't as nice as I'd like, but it'll work. The batteries and their holder were brushed flat black, along with the steel hand-rails. Bogeys refitted and the bearings oiled.
Image


After entering the coach into the loco/wagon records, I can call this one finished.
It's only taken me fifteen months to complete. :lol:
Image


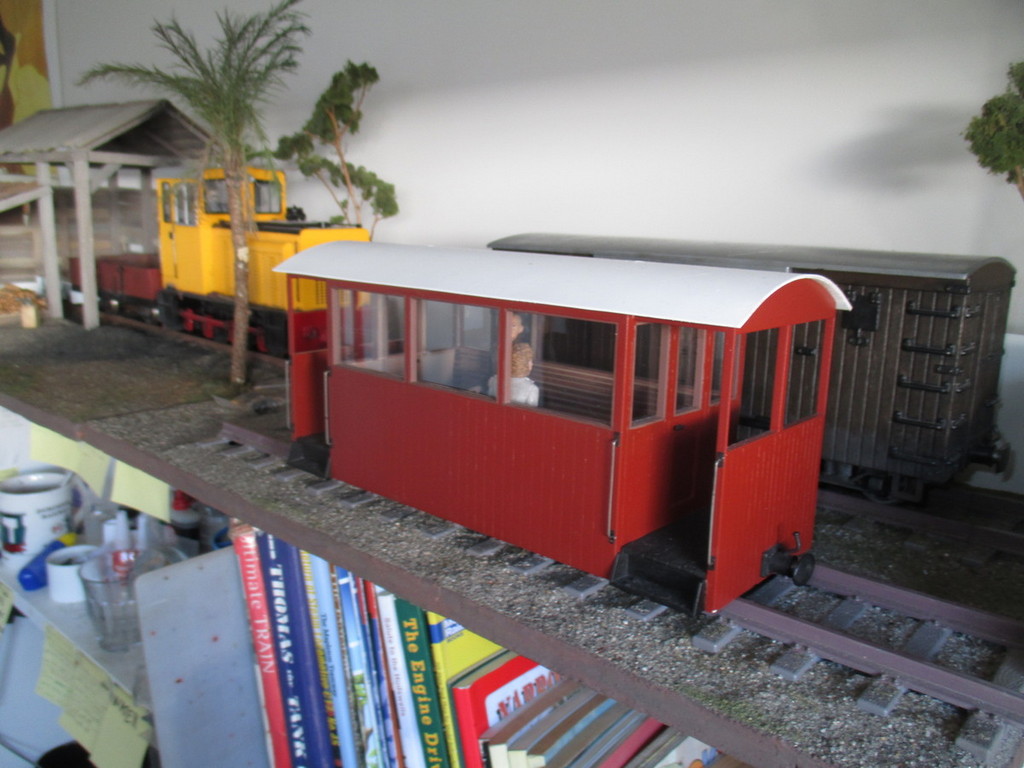
Goes well with the existing pair of IP VOR coaches, though different enough to be interesting.
Image


31/05/2023
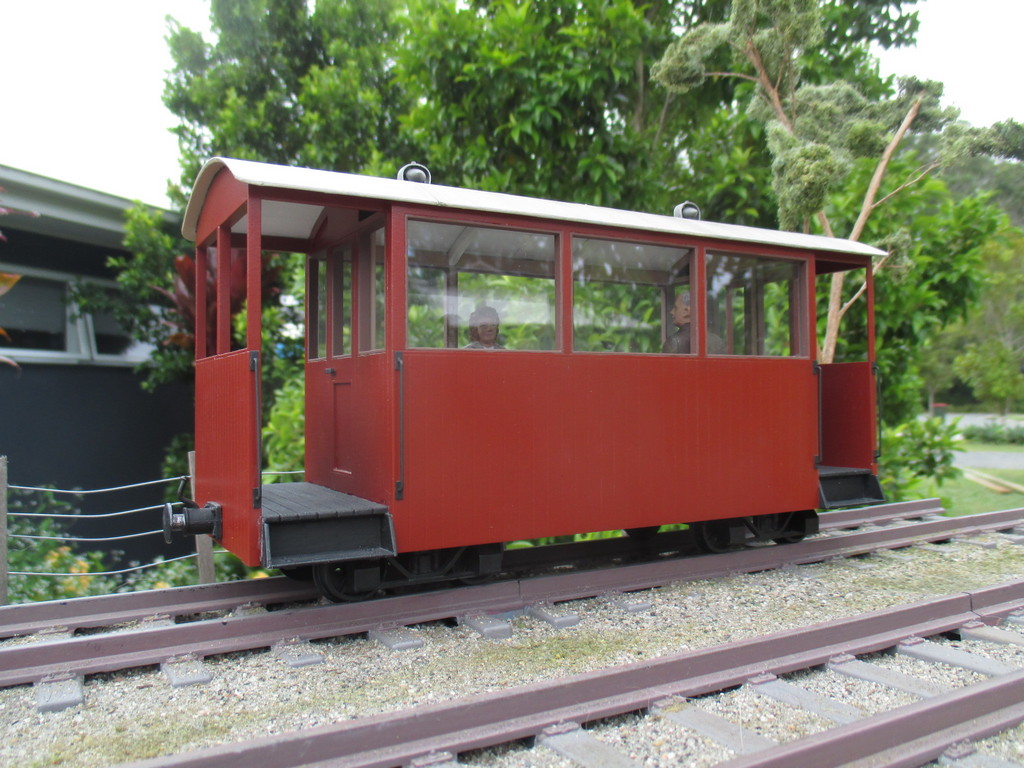
During its' conversion to 32mm gauge, the ride height was dropped by removing some of the packing above the bogey pivots. I really like how low-slung it looks now.


I found the paper masking tape strips shrank in width slightly, due to high humidity, leaving the bright green unpainted overlaps visible. It seems to have settled down since sealing off with superglue and repainting, but I wouldn't recommend using it for a roof. Even fixed now, I'm still not quite happy with the result, but I'll leave it be. A light weathering wash over the entire coach is somewhere on the "to-do" list..
Image


The VOR coaches have since been sold on, leaving only the balcony carriage on the roster. Looking back through old photos, I'm now thinking of building it a new, more eccentric running mate..

Thanks for reading.
Last edited by Old Man Aaron on Sat Jan 13, 2024 3:32 am, edited 1 time in total.
Regards,
Aaron - Scum Class Works

User avatar
Andrew
Moderator
Moderator
Posts: 3276
Joined: Tue Jul 03, 2012 1:33 pm
Location: Bristol, UK
Contact:

Re: Gladstone Coach to Bush Tram Carriage

Post by Andrew » Fri Jan 12, 2024 9:51 am

I love this! The detail and the finish are just perfect.

Funnily enough though, despite having spent way too long at WHR photos, and having built a model of the Gladstone Car myself, I didn't immediately spot its origins - it looks "right", just as it is. Don't tell anyone I said so, but I think I actually prefer your version to the original...

Looking forward to seeing its new companion in due course... If you want "eccentric", maybe just stick some seats in that cattle van?!!

Cheers,

Andrew.

User avatar
StuartJ
Cleaner
Cleaner
Posts: 63
Joined: Tue Aug 09, 2022 3:39 pm
Location: Bristol

Re: Gladstone Coach to Bush Tram Carriage

Post by StuartJ » Fri Jan 12, 2024 9:54 am

Very nice. An ingenious conversion too!

User avatar
Scrat
Trainee Fireman
Trainee Fireman
Posts: 186
Joined: Mon Jun 08, 2020 7:24 am

Re: Gladstone Coach to Bush Tram Carriage

Post by Scrat » Fri Jan 12, 2024 10:20 am

Great work.
The rounded roof corners are a good choice.

User avatar
Old Man Aaron
Trainee Driver
Trainee Driver
Posts: 808
Joined: Wed Oct 19, 2016 11:08 am
Location: Sunshine Coast QLD, Australia

Re: Gladstone Coach to Bush Tram Carriage

Post by Old Man Aaron » Sat Jan 13, 2024 8:38 am

Andrew wrote: Fri Jan 12, 2024 9:51 am If you want "eccentric", maybe just stick some seats in that cattle van?!!
I'll call it "In-Laws Class". :lol: :lol:

Not far from the truth, though. The local Moreton/Mapleton tramways were known to add longitudinal bench seats to cane trucks and flat wagons, for special excursions. Sometimes even with lengthened stanchions and temporary canvas roofs. Now that's 1st class.. :lol:

Thanks again fellas. High praise from you lot. :salute:
Last edited by Old Man Aaron on Sat Jan 13, 2024 11:23 am, edited 1 time in total.
Regards,
Aaron - Scum Class Works

User avatar
BertieB
Fireman
Fireman
Posts: 369
Joined: Mon Nov 13, 2017 12:13 am
Location: London
Contact:

Re: Gladstone Coach to Bush Tram Carriage

Post by BertieB » Sat Jan 13, 2024 10:12 am

I’m well impressed with the fastidiously organised, methodical manner you go about your builds — which always look terrific. A lesson for us all. Well, particularly me.

User avatar
Dr. Bond of the DVLR
Retired Director
Retired Director
Posts: 4485
Joined: Tue Jun 09, 2009 9:43 pm
Location: Suffolk
Contact:

Re: Gladstone Coach to Bush Tram Carriage

Post by Dr. Bond of the DVLR » Mon Jan 15, 2024 2:14 pm

Fantastic - a brilliant conversion, I wouldn't have spotted its origins if it wasn't in the title!
Image
The railway which people forgot
(to build)

Post Reply

Who is online

Users browsing this forum: No registered users and 9 guests