Page 1 of 2
Constructing an Embankment
Posted: Sat Jan 21, 2023 9:09 pm
by GAP
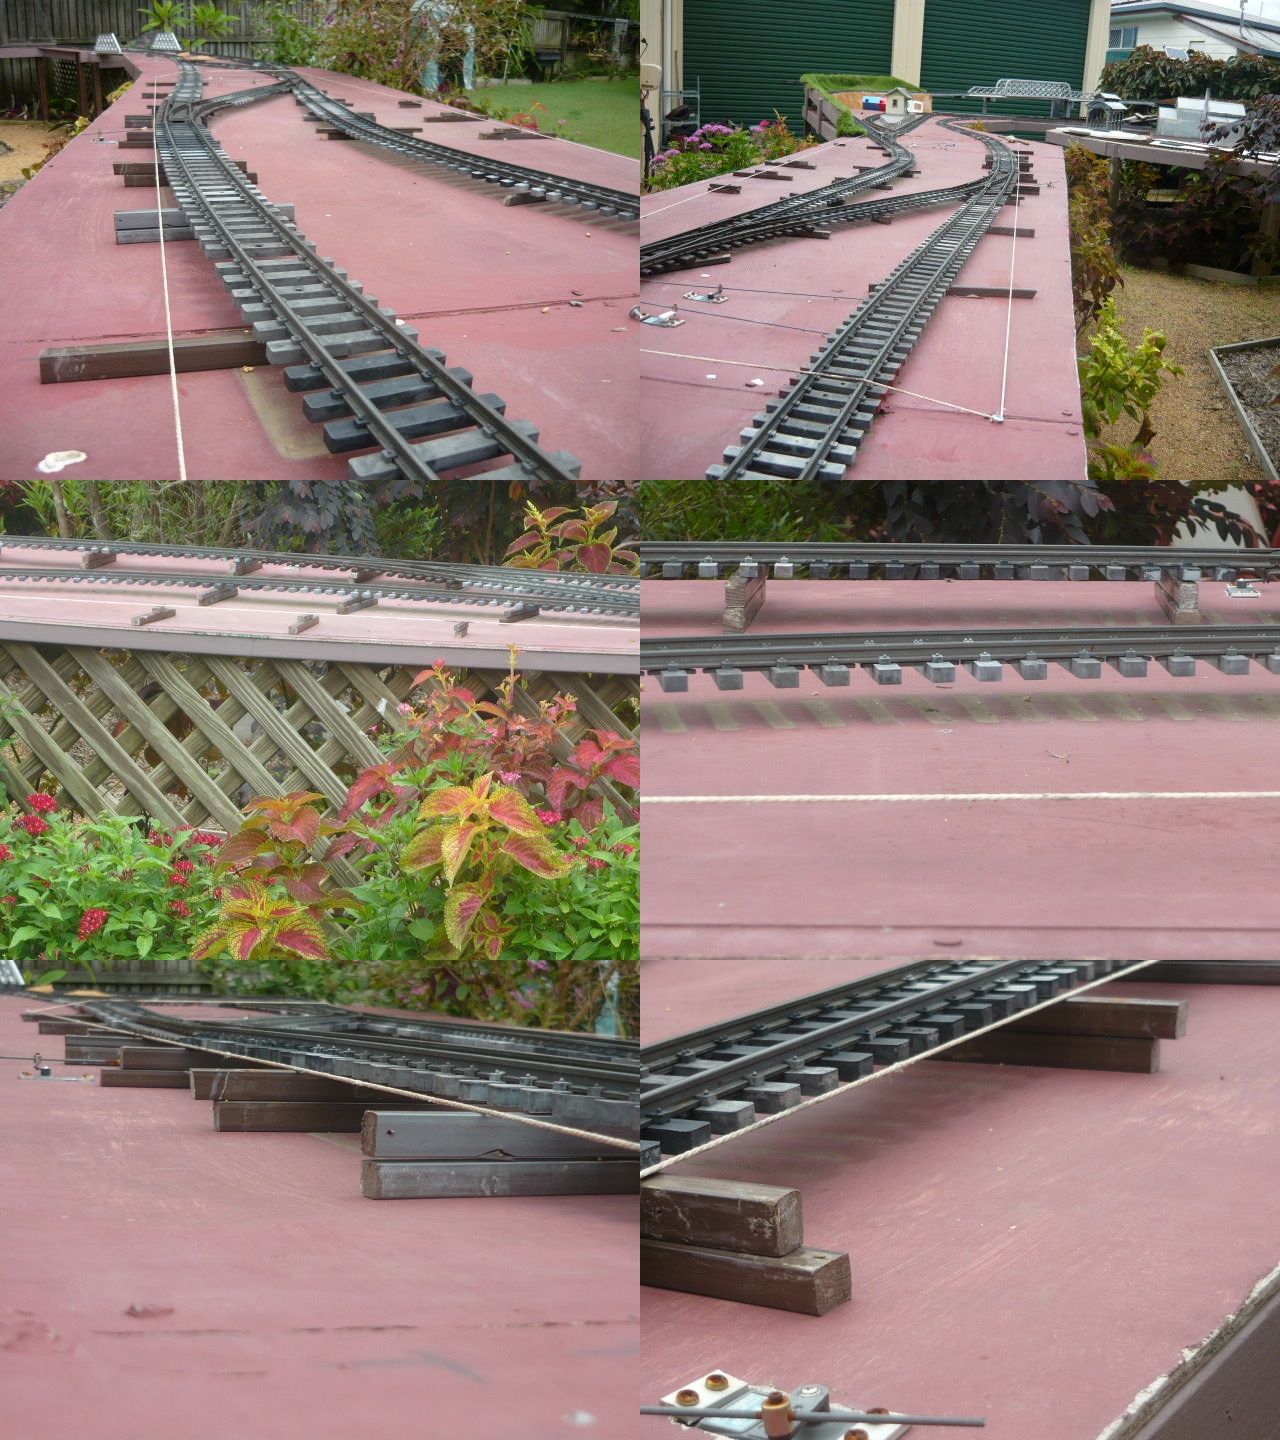
Due to ground subsidence (possibly where a tree was removed 3 years ago) an area of my baseboard sagged by about 30mm or more, this led to a large dip in the track with wagons uncoupling as the passed over the high points at either end and rainwater ponding in the low points in the centre.
Initially I thought I was faced with the prospect of digging up the centre supporting posts and raising the base board to level it off.
Further inspection revealed that the lattice frame supporting the area had bowed in the middle due to the centre supports sinking so the whole section would require replacement. This looked like turning into a major bit of work.
After a bit of thinking I came up with the idea of leaving everything in place and building an embankment using concrete render across the area which would raise the track and make the it level.
To save the amount of render needed and to reduce the weight I am putting in a couple of low bridges, this will allow the water to run under the track and into drainage hole drilled through the baseboard. In these holes I'm putting in some wicks to break up the water surface tension at the side of the holes and allow the water to flow down them into the garden below.
I will update my blog to show how it happened when it is complete.
- Merged_document(9).jpg (921.98 KiB) Viewed 4220 times
Re: Constructing an Embankment
Posted: Sun Jan 22, 2023 4:37 pm
by ge_rik
Hi Graeme
Sounds similar to the way I deal with subsidence in my concrete breeze blocks.
https://riksrailway.blogspot.com/2009/0 ... -loop.html
Rik
Re: Constructing an Embankment
Posted: Mon Jan 23, 2023 8:28 pm
by GAP
More progress on the embankment area.
I roughly painted areas where there will be a dry river bed a light brown, the embankment areas are in the red colour while the bright green is where artificial turf is in the plan.
Bridges are indicated by pieces of wood.
All the points will be on embankments.

- Merged_document(9).jpg (622.96 KiB) Viewed 4161 times
Re: Constructing an Embankment
Posted: Wed Jan 25, 2023 9:18 am
by GAP
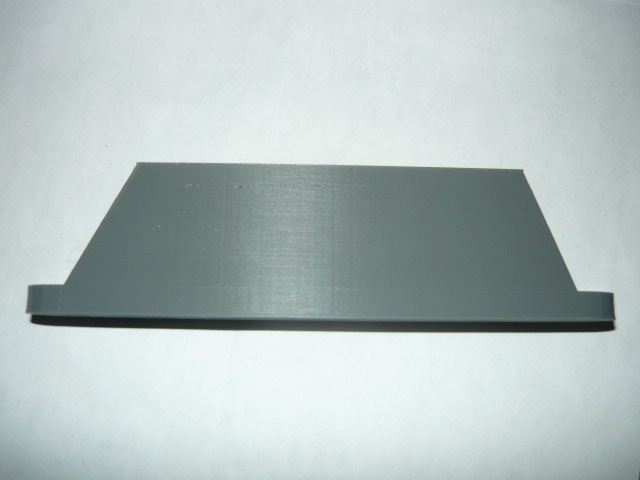
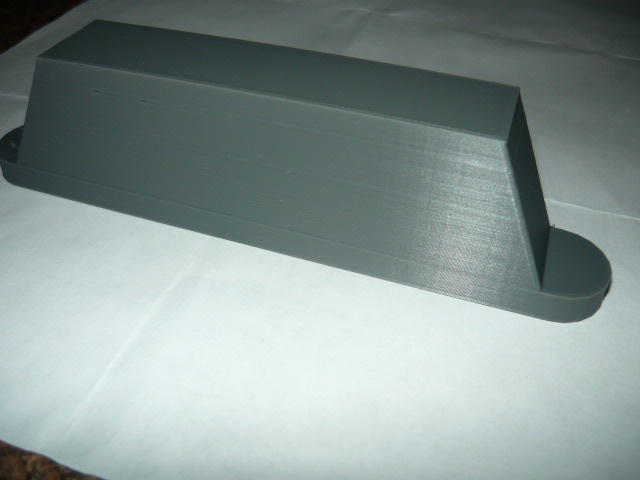
I 3D print some bridge piers for the embankment area bridges to see how they would turn out.
I designed them using Tinkercad and its my 1st project using it and am a bit chuffed with how well I did.
I now have another 6 to print, I can custom build them to a height that fits under the track by manipulating 1 object in Tinkercad and saving them in another project for export to use with the printer.
After all my messing around with Tinkercad without a result; I discovered a few controls that I did not know about and I am gaining confidence with using and making simple things with it thoughI did manage to crash Tinkercad yesterday by trying to do to much to quick.
I have some Tinkercad tutorials to watch on YouTube on how to make brick walls to watch and experiment with, I will also experiment on how to make random stone shapes for use on walls and bridge abutments.
A big learning curve is approaching rapidly I feel.
- Bridge Pier.JPG (66.38 KiB) Viewed 4131 times
- Bridge Pier 1.JPG (72.14 KiB) Viewed 4131 times
Re: Constructing an Embankment
Posted: Thu Feb 02, 2023 5:13 am
by GAP
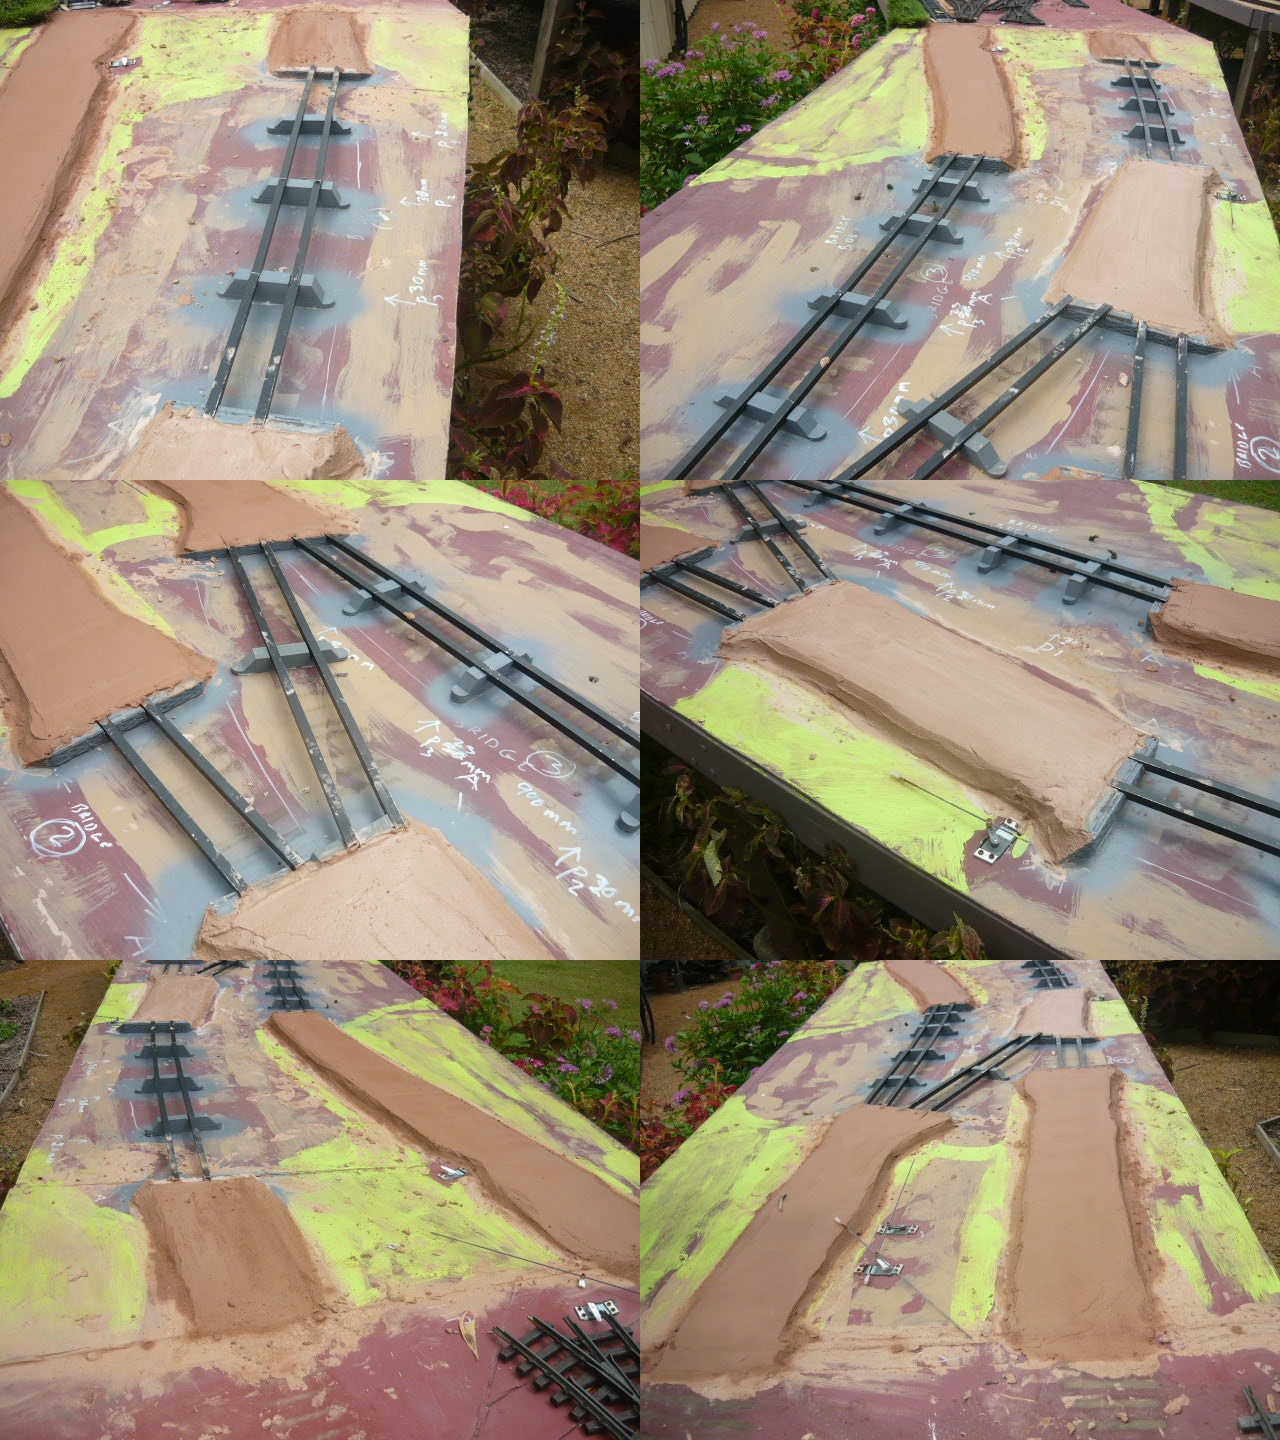
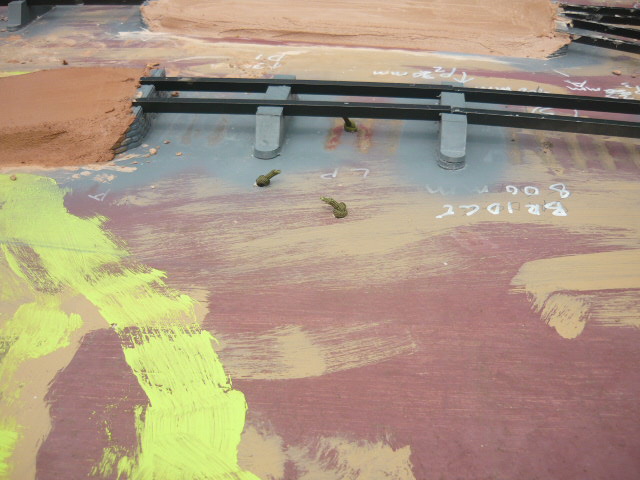
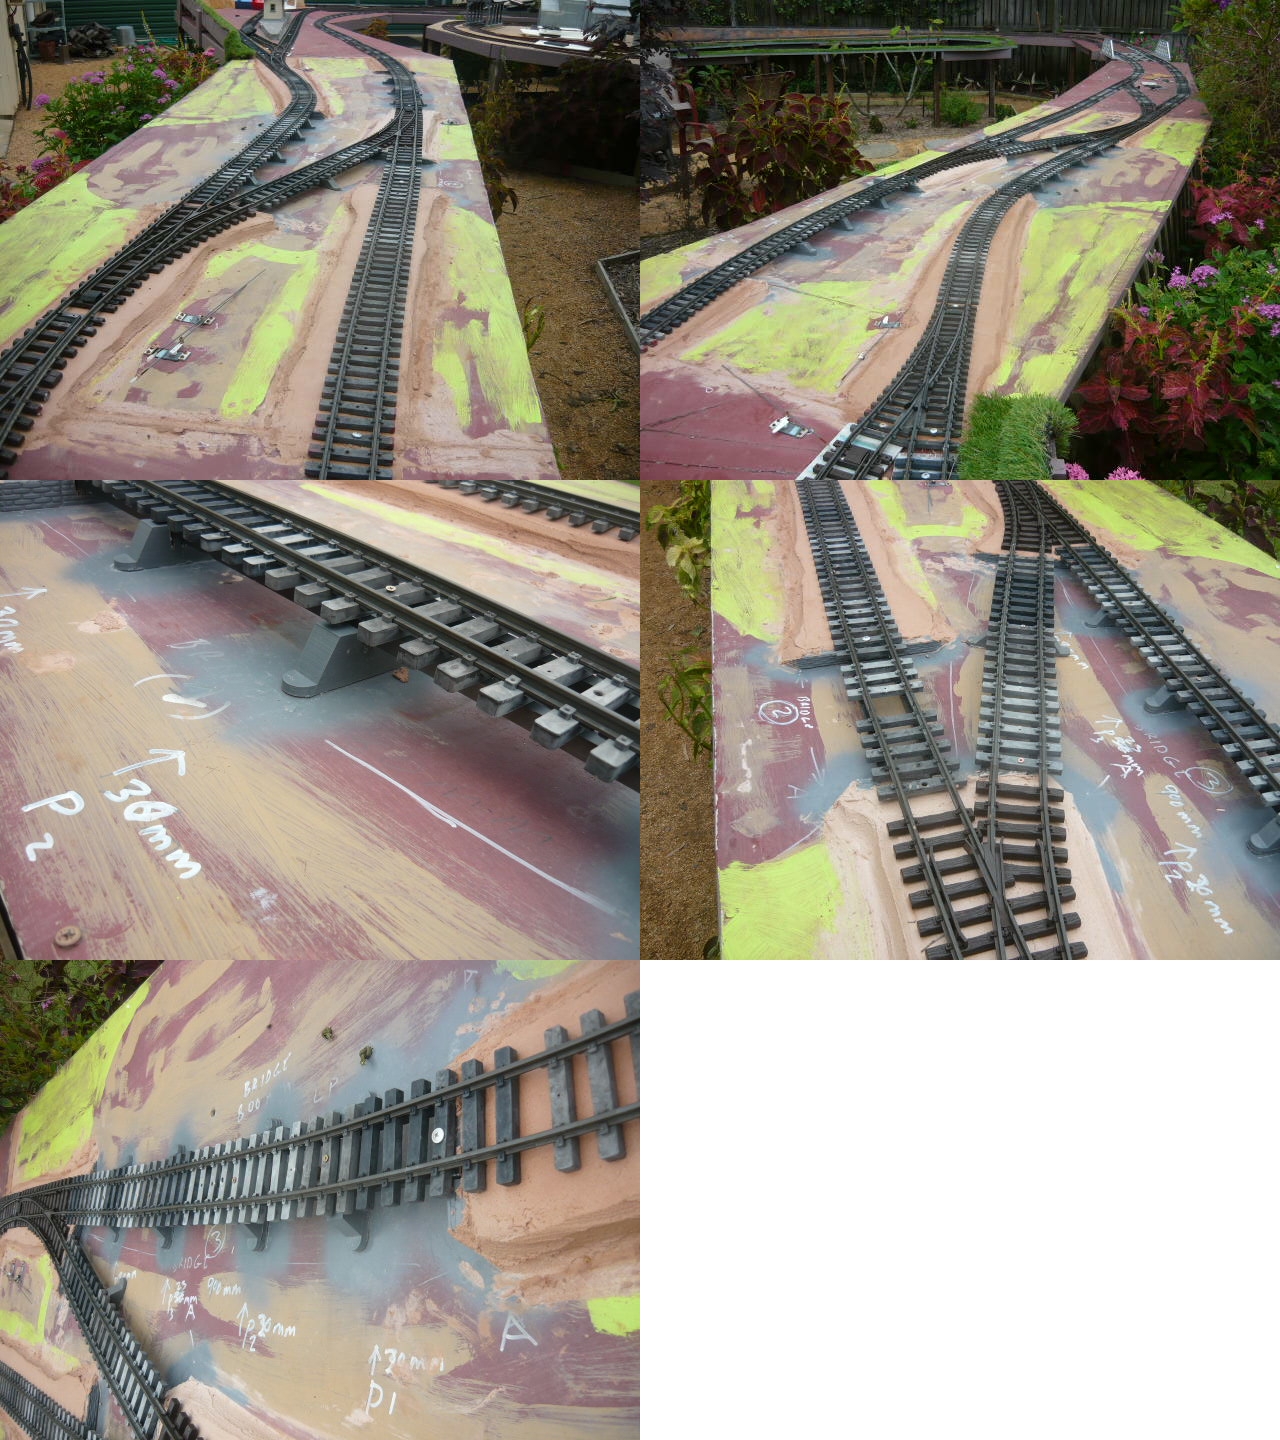
I have made some real progress in the embankments area.
Bridge abutments and piers have been installed, rail supports fitted and embankments have been made out of acrylic render.
After the track is relaid, I will finish the scene with artificial turf and gravel to give the impression of the line crossing over a dried up swamp and creek bed.
- Merged_document(11).jpg (905.45 KiB) Viewed 4099 times
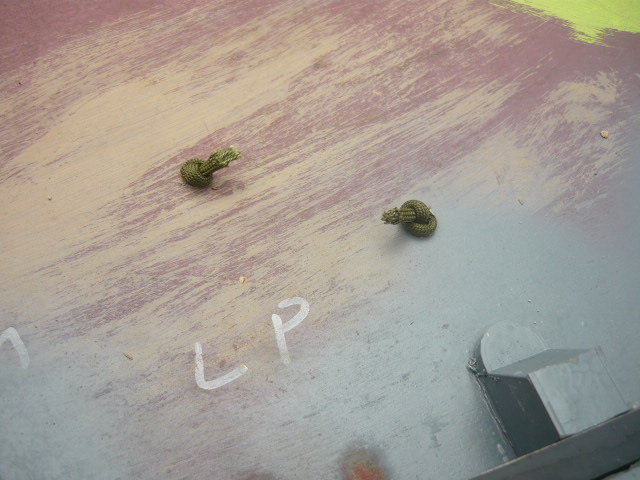
To carry water down through the baseboard at the low point (LP) holes were drilled through the baseboard and wicks put into them. These allow the water drain away quickly to prevent ponding.
- Wicks 1.JPG (100.14 KiB) Viewed 4097 times
- Wicks.JPG (102.09 KiB) Viewed 4097 times
Re: Constructing an Embankment
Posted: Fri Feb 03, 2023 8:03 am
by GAP
Today I re-laid all the track in the embankment area so next step is to run a train to test it out.
Then it will be complete the scenery (turf, gravel etc) and it should all be done.
- Merged_document(12).jpg (790.25 KiB) Viewed 4051 times
Re: Constructing an Embankment
Posted: Fri Feb 03, 2023 8:46 am
by philipy
GAP wrote: ↑Fri Feb 03, 2023 8:03 am
next step is to run a train to test it out.
Any excuse!!

Re: Constructing an Embankment
Posted: Fri Feb 03, 2023 9:10 am
by Andrew
It'll look great when you've added the scenery, but for now I'm enjoying the "abstract expressionist" look you've achieved with your paintwork!
Overall, this looks like a neat solution to your problem that will enhance the railway, perfect!
Re: Constructing an Embankment
Posted: Sat Feb 04, 2023 7:28 am
by GAP
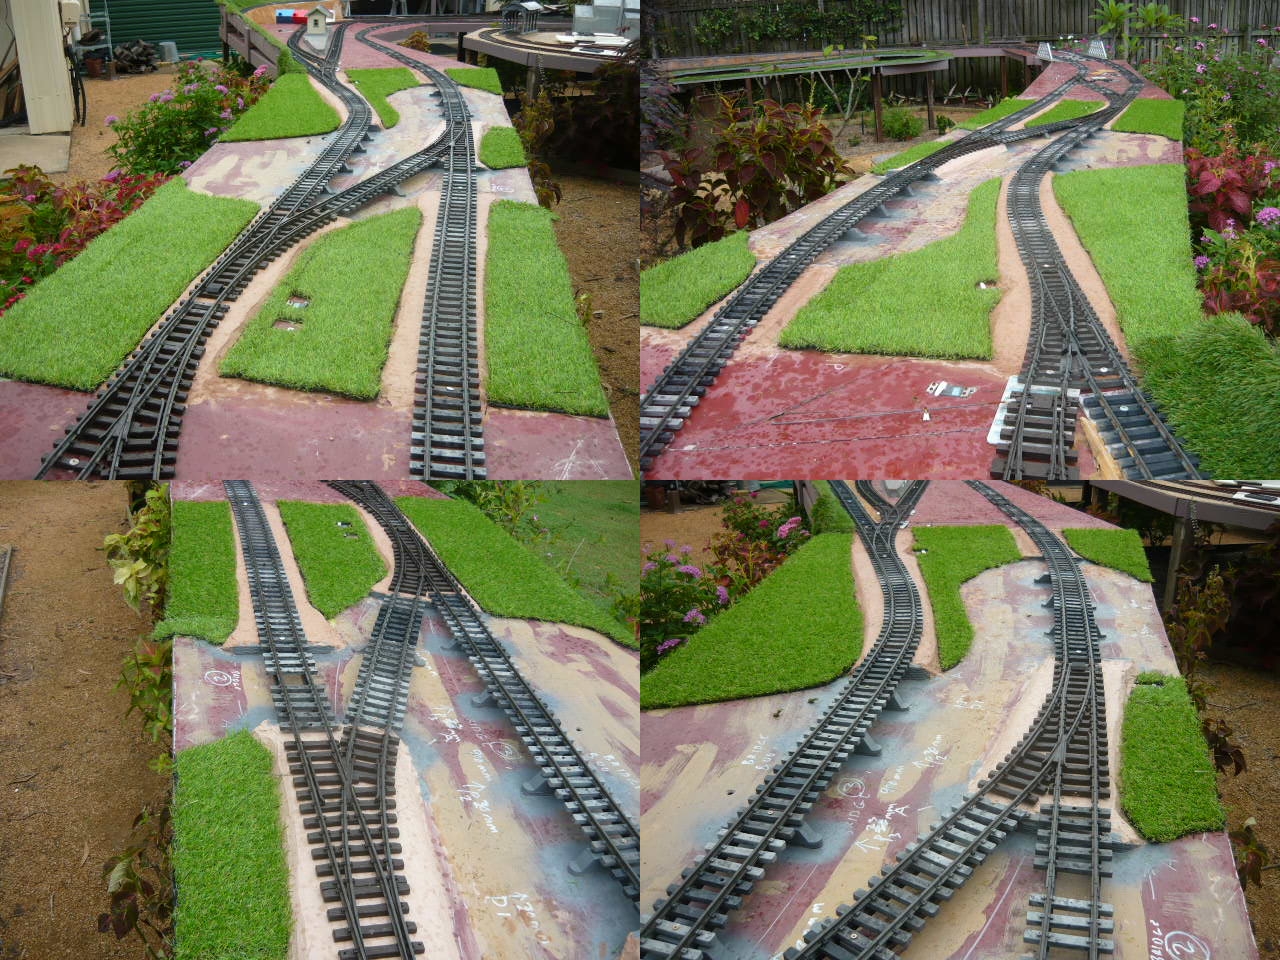
I laid the turf today.
Now all is left is to paint the "swamp/river" area and add some gravel for the rocks.
After some train playin.....um testing tomorrow, to verify alignments etc, I will ballast the track and it should be finished.
- Merged_document(13).jpg (651.96 KiB) Viewed 4020 times
After this it will be back to finishing the backdrop along the fence scenery.
Re: Constructing an Embankment
Posted: Mon Feb 06, 2023 6:54 am
by GAP
Testing revealed no issue with the track but highlighted some issues with the 3D printed knuckle couplers
Some will not spring closed when the force applied to them changes from compression to tension ie after coming downhill due to the pivot having burrs on it and there are height differences between wagons.
Wagons were uncoupling at the area which is how I noticed the sag so now its back into the workshop for some wagons for adjustments.
Re: Constructing an Embankment
Posted: Tue Feb 07, 2023 5:33 am
by GAP
Laid the ballast and gravel on the embankments, all that is left to do is put gravel across the creek bed area.
As I have a gravel train I'm considering putting in a siding for a gravel pit probably on the garden side.
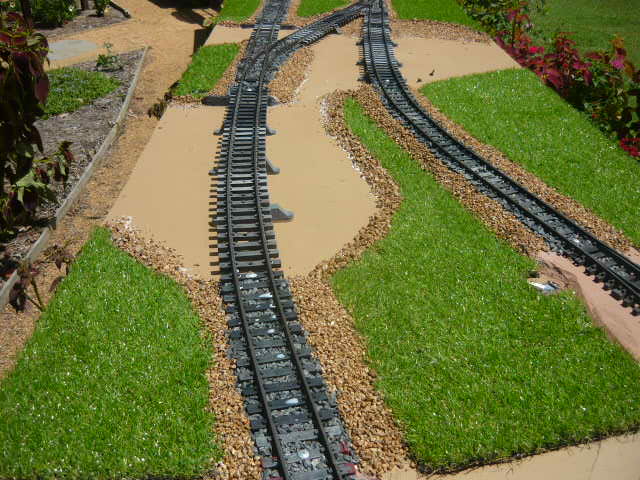
- Ballast and Gravel laid 1.JPG (87.45 KiB) Viewed 3935 times
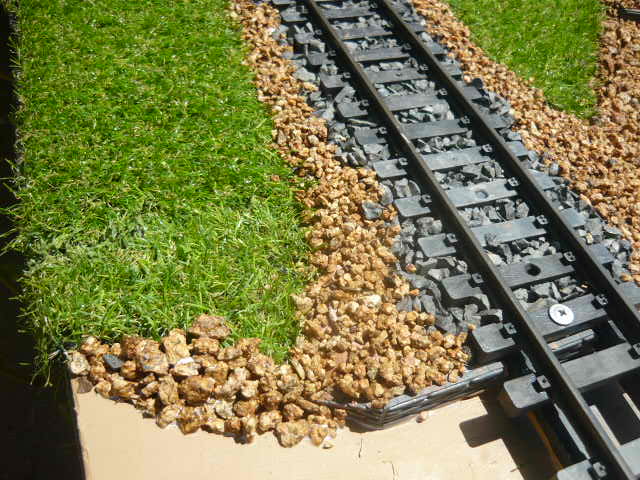
- Abutment close up.JPG (89.8 KiB) Viewed 3935 times
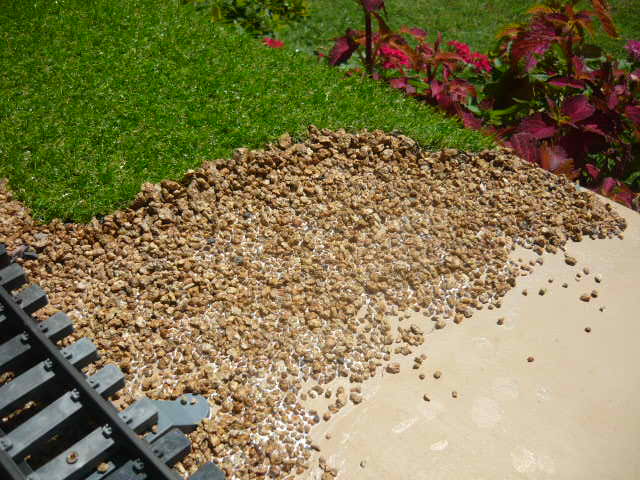
- Creek Bank and Bed close up.JPG (87.44 KiB) Viewed 3935 times
Thinking about putting in a siding to a gravel pit which justify having a Gravel Train, probably on the garden side.
Blog being updated and will be published shortly.
Re: Constructing an Embankment
Posted: Tue Feb 07, 2023 6:19 am
by philipy
That does all look extremely good and believable.
Re: Constructing an Embankment
Posted: Wed Feb 08, 2023 6:29 am
by FWLR
I have replied before, but the forum server didn't load it.
Anyway, what a brilliant job your'e doing with your superb line, it will be exceptional when it's finished I am sure. The way you are constructing the embankment shows us what attention to detail you have. Looking forward to seeing more of this brilliant construction.

Re: Constructing an Embankment
Posted: Wed Feb 08, 2023 7:40 am
by GAP
Re: Constructing an Embankment
Posted: Wed Feb 08, 2023 8:43 am
by Andrew
Looking good!
I'm looking forward to seeing pictures of trains trundling over those bridges...
Re: Constructing an Embankment
Posted: Wed Feb 08, 2023 9:19 am
by philipy
Glad you are happy with it and it does look fine, but to my mind it actually looked better yesterday with the 'dirty yellow water' showing between the gravel banks.
Re: Constructing an Embankment
Posted: Wed Feb 08, 2023 8:33 pm
by GAP
Andrew wrote: ↑Wed Feb 08, 2023 8:43 am
Looking good!
I'm looking forward to seeing pictures of trains trundling over those bridges...
Well OK just because you asked I'll force myself to run some trains to get a picture.
The line I'll use to SWMBO will be "they asked to see pictures of trains on the bridge so I can't let them down".

Re: Constructing an Embankment
Posted: Wed Feb 08, 2023 8:38 pm
by GAP
philipy wrote: ↑Wed Feb 08, 2023 9:19 am
Glad you are happy with it and it does look fine, but to my mind it actually looked better yesterday with the 'dirty yellow water' showing between the gravel banks.
Thanks Philip; now you have started me thinking about taking up some of the gravel, shouldn't be hard to do just wet it with warm water and use a paint scraper.
Re: Constructing an Embankment
Posted: Fri Feb 10, 2023 8:19 am
by gregh
I think it looks GREAT. Maybe a few plastic 'bushes' or some reeds?
Re: Constructing an Embankment
Posted: Fri Feb 10, 2023 10:09 am
by GAP
gregh wrote: ↑Fri Feb 10, 2023 8:19 am
I think it looks GREAT. Maybe a few plastic 'bushes' or some reeds?
Thinking of a few bits of turf offcuts as long grass growing in the dry creek bed.
Also thinking of putting in a line to a gravel pit, non operational points similar to what I did in the back corner to suggest a line into the bush, when the plants grow a bit more they will hide the fact the line is a dead end.
The 2 lines will provide justification for my log train and the gravel train.
https://ringbalin-light-railway.blogspo ... train.html