PATRICA ANNE TENDER BUILD
Posted: Wed Jun 23, 2021 3:17 pm
Well it has taken a few weeks, about 10 or so to be precise, but I have finally finished the build to some extent. I hope it has the members approval with their vastly superior knowledge, it has been a real labour of love. I wanted to build a tender for "Patrice Anne" for some time now. Pretty much about 6 months after buying her from Peter Butler. She is a brilliant loco and I am so proud of her, but she lacked something and for me it was a tender.
So since I got my 3d printer, I wanted to try and print all of it, except for the wheels. After a couple of attempts, well more than a couple, it was about 10 or so, at printing a chassis that would look right for the tender.
This is the first attempt. Don't forget it was also a build to use a momentum wagon of some sort.
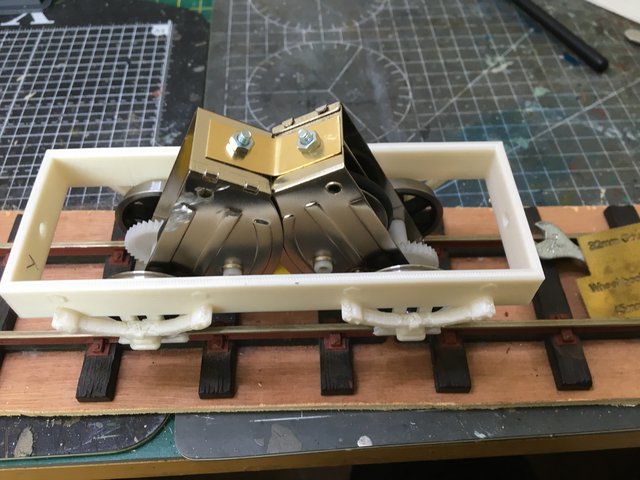
After printing the chassis and fitting the two ZECAR units, I felt that the chassis didn't look right, so I went about planing and printing separate parts for a chassis. This is what I came up with.


Looking at the parts you will see that the buffers are a lot thinner for about 10mm or so. That's because I had already printed the body, with the floor cutout for the ZECAR units and because of the length of time it took to print the two side's of the chassis, it was quicker just to print two buffers with the slightly thinner ends.

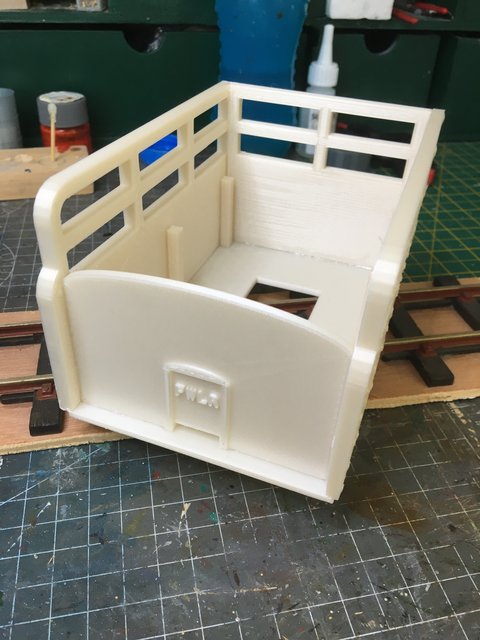
Now I know that the thickness of the body seem a bit wide, well a lot wide if truth was told, again after I printed the first side and the second one was already being printed, I decided to carry on with the rest of them.
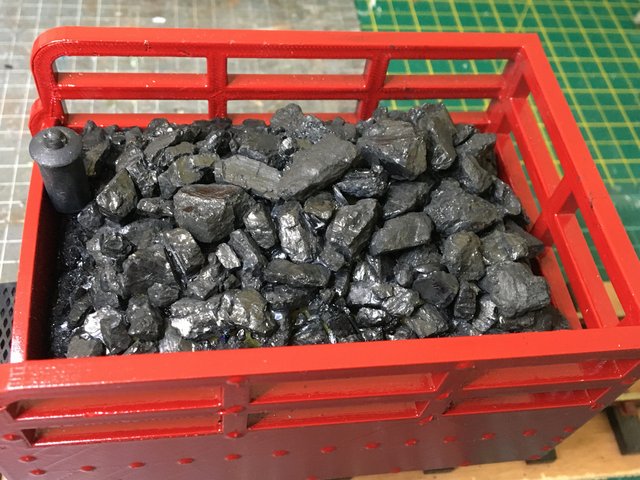
Next was the removable coal load. I like to use real coal and I think it works. There is also a water filler because after reading up on tenders online, I found that quite a few had two tanks to hold water. This is removable and not stuck to the load, so if you think it shouldn't be there I will comply with it's removal. This is it fitted onto the body.
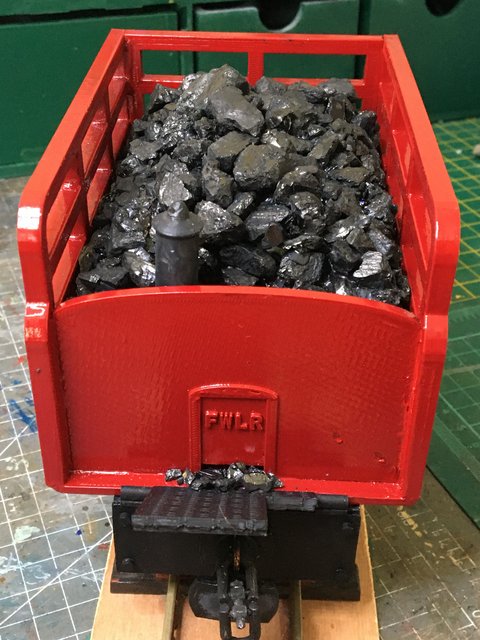
The colour is the same has "Patrica Anne" Ral 3004, it was the same colour that Peter sent back to me when he and his mate looked at the loco for me with some repairs and Peter's repainting of the loco. So luckily there was still quite a bit left and with the recent hot weather and hardly any wind, I decided it was going to be the same colour, all be it slightly lighter because of the primer colour I used. At first I used a grey primer, but after giving the body it's first coat it came out more of a deep Burgundy. So I used the same primer Peter recommended for PLA parts and it was a lot better, but after two more coats, I finally ran out of the paint, so it's now slightly lighter, but I think after I have given it a bit of weathering, hopefully it will darker to more or less the same as the loco.
Next was the Checker Plate, which thanks to the members input on another thread, I decided on this checker plate.

Now for the coupling. I did put the usual 3 link chain on, it somehow didn't work for me with how it was, so again I thought about doing a fixed coupler, the ones that are screw tightened and this is what a came up with on my printer.
A turn buckle type.
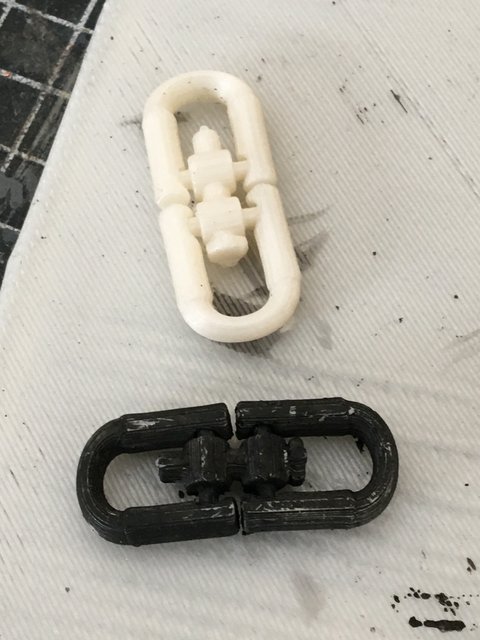

They may seem a bit rough, but I printed them with the least parameters that my slicer would allow and when they are on the buffers you can't see those lines, not unless you have eyes of an ant you won't.
These photos you will be glad to hear, are the of the tender and loco.


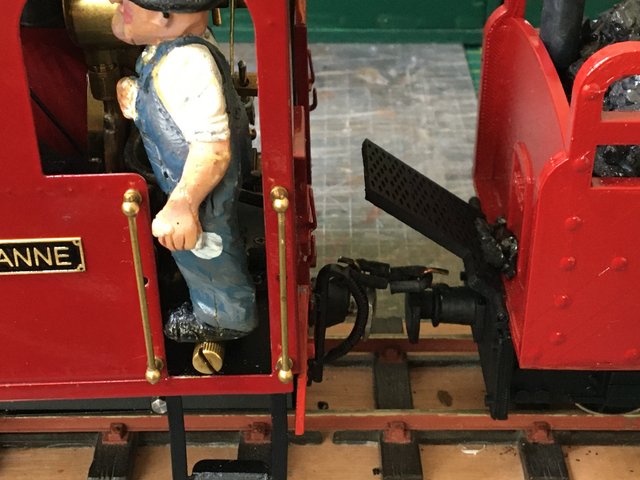


I have tried the tender on my test track and yes it does make some noise, but it is really an experiment with the ZECARS to see if they did anything to the lightness of driving "Patrice Anne" I was going to give them a run today, but the rain has finally made an appearance, so it my be a few days before I can take a short video of it.
I will post an update of any updates on the tender, like weathering etc.
Thank you for your time and enjoy our hobby with fun and enjoyment. I do..
So since I got my 3d printer, I wanted to try and print all of it, except for the wheels. After a couple of attempts, well more than a couple, it was about 10 or so, at printing a chassis that would look right for the tender.
This is the first attempt. Don't forget it was also a build to use a momentum wagon of some sort.
After printing the chassis and fitting the two ZECAR units, I felt that the chassis didn't look right, so I went about planing and printing separate parts for a chassis. This is what I came up with.
Looking at the parts you will see that the buffers are a lot thinner for about 10mm or so. That's because I had already printed the body, with the floor cutout for the ZECAR units and because of the length of time it took to print the two side's of the chassis, it was quicker just to print two buffers with the slightly thinner ends.
Now I know that the thickness of the body seem a bit wide, well a lot wide if truth was told, again after I printed the first side and the second one was already being printed, I decided to carry on with the rest of them.
Next was the removable coal load. I like to use real coal and I think it works. There is also a water filler because after reading up on tenders online, I found that quite a few had two tanks to hold water. This is removable and not stuck to the load, so if you think it shouldn't be there I will comply with it's removal. This is it fitted onto the body.
The colour is the same has "Patrica Anne" Ral 3004, it was the same colour that Peter sent back to me when he and his mate looked at the loco for me with some repairs and Peter's repainting of the loco. So luckily there was still quite a bit left and with the recent hot weather and hardly any wind, I decided it was going to be the same colour, all be it slightly lighter because of the primer colour I used. At first I used a grey primer, but after giving the body it's first coat it came out more of a deep Burgundy. So I used the same primer Peter recommended for PLA parts and it was a lot better, but after two more coats, I finally ran out of the paint, so it's now slightly lighter, but I think after I have given it a bit of weathering, hopefully it will darker to more or less the same as the loco.
Next was the Checker Plate, which thanks to the members input on another thread, I decided on this checker plate.
Now for the coupling. I did put the usual 3 link chain on, it somehow didn't work for me with how it was, so again I thought about doing a fixed coupler, the ones that are screw tightened and this is what a came up with on my printer.
A turn buckle type.
They may seem a bit rough, but I printed them with the least parameters that my slicer would allow and when they are on the buffers you can't see those lines, not unless you have eyes of an ant you won't.
These photos you will be glad to hear, are the of the tender and loco.
I have tried the tender on my test track and yes it does make some noise, but it is really an experiment with the ZECARS to see if they did anything to the lightness of driving "Patrice Anne" I was going to give them a run today, but the rain has finally made an appearance, so it my be a few days before I can take a short video of it.
I will post an update of any updates on the tender, like weathering etc.
Thank you for your time and enjoy our hobby with fun and enjoyment. I do..