Developing South Yard at Rylston
Posted: Sun Jun 20, 2021 4:41 pm
Developing South Yard at Rylston Running Shed
As previously alluded to, development of the garden is beyond my current health resource. This hasn't stopped me planning, and progressing some lighter jobs. In fact Rylston Light Railway (tag-line: The Line that Forgot to Be Built) is in danger of being history most over-planned and over-thought garden railway. HS2 has had a shorter planning programme to date.
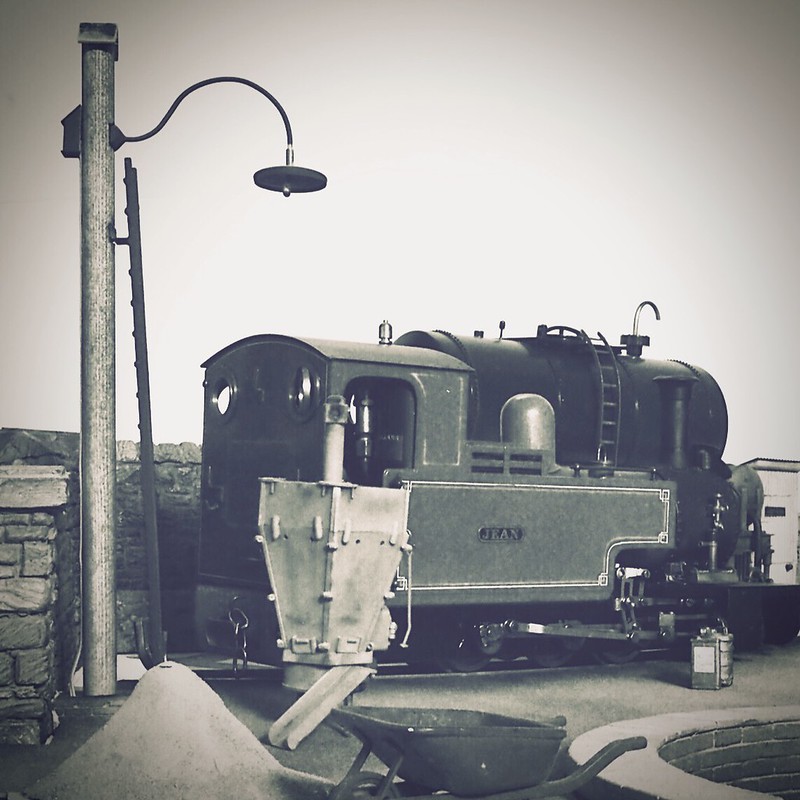
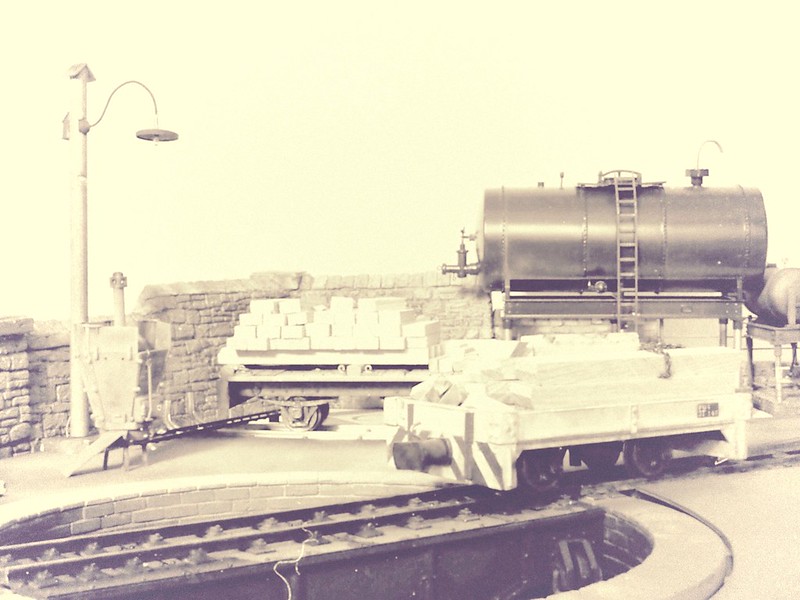
There are a number of pinch-points in the design, and to gain confidence, I have mocked up 1:1 (or is it 1:19) layouts on very temporary foamboard to make sure it looks "right". Some buildings already in existence allow certain areas to look promisingly realistic. One such area is the South Yard at Rylston Running Sheds so one Friday I set up two sheets of foamboard to check clearances.
I wanted the feel of a cramped enclosed yard (think pre-1960s Boston Lodge), but it couldn't be so cramped that 1:1 scale fingers couldn't service the 1:19 locos. The running shed is designed to jut out from the mainline route so that the Dales' giant-folk can service the a loco on either side of the peninsular. South Yard is one of those two points.
Space compromise meant that the distance from the running line was limited. A highish wall helped give the yard a constrained feeling but I wanted to develop the limited space along the wall with highish structures to emphasize a claustrophobic feel. Oil storage tanks and a lamp hut (Pendle Valley) are aimed to achieve this. Temporary dressings such as wheel barrow and a Kelbus sand-drier help give depth effects.
This is an example of the effect sought.
 South Yard, Rylston by Andrew S, on Flickr
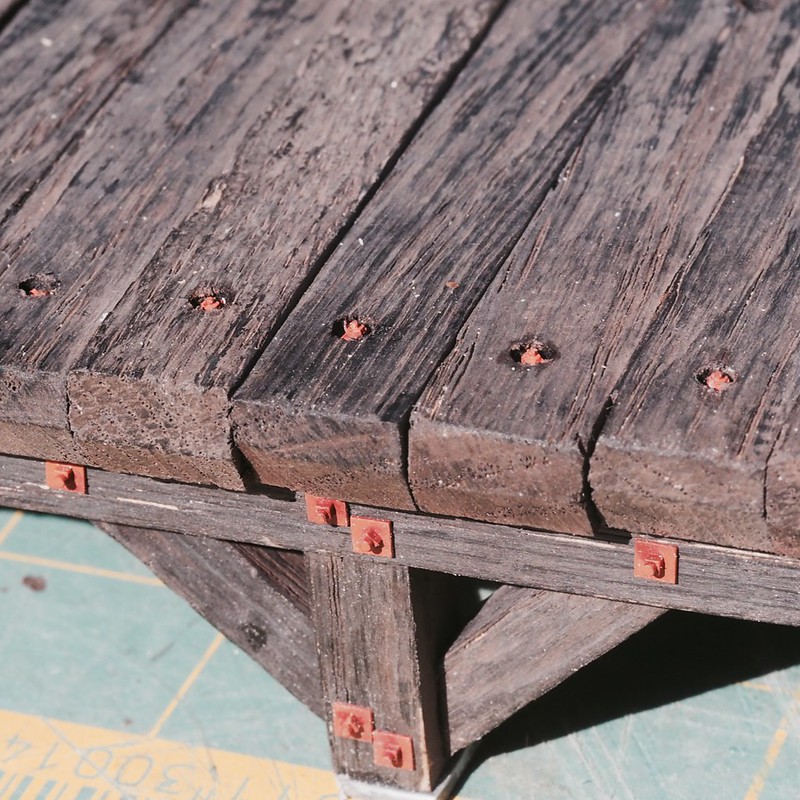
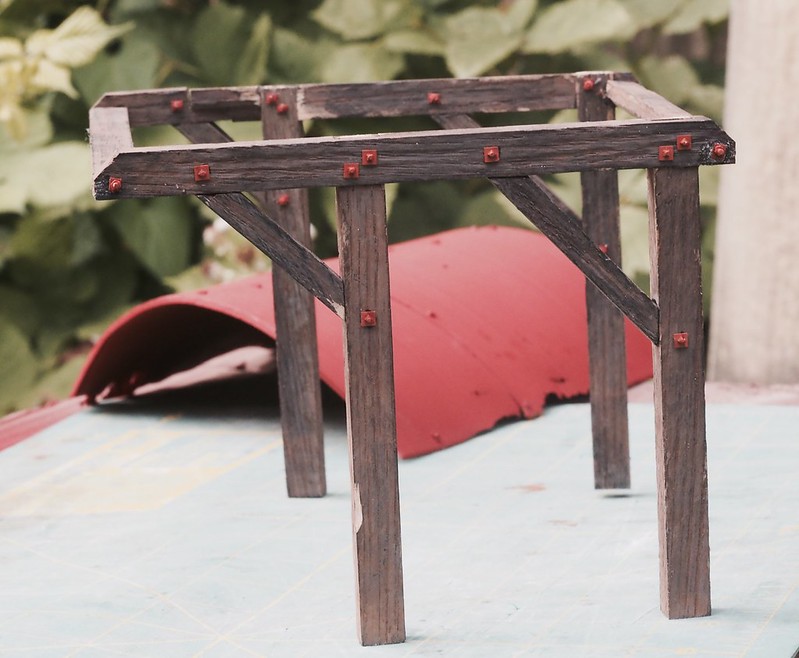
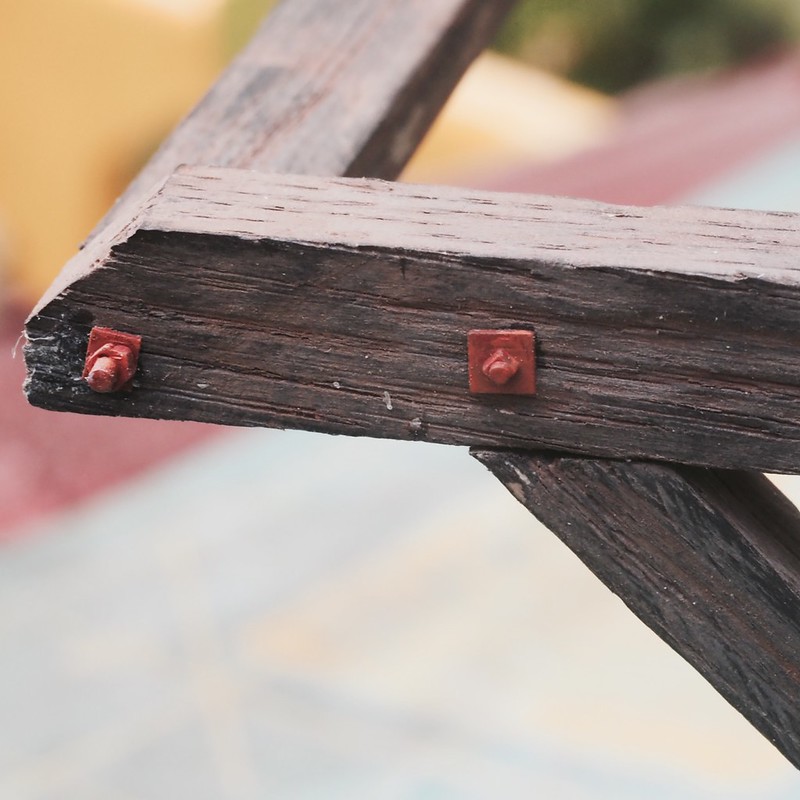
The locomotive is carefully positioned and hides the current lack of a coal-stage. I decided that whilst the foamboard is setup I could quickly build (!) a coaling stage to fit in the corner. I wanted a wooden bucolic affair. I needed real-world images to guide me on the cross-bracing of the staging. Most Google Image hits were of models, but amongst the others was this wonderful affair.
<r><URL url="https://www.warwickshirerailways.com/lm ... s>[url]</s> https://www.warwickshirerailways.com/lms/mrred418.htm<e>[/url]</e></URL></r>
I wondered if it would look right in a narrow-gauge setting. If built in stages (pun noted), it wouldn't require much extra work to trial the wriggly-tin affair but still have a simple stage to fall back on. The decision seemed to already be made after two loaded waggons appeared in the yard.
 South Yard, Rylston by Andrew S, on Flickr
To be continued if nothing doth occur to prevent . . .
Andy S.
As previously alluded to, development of the garden is beyond my current health resource. This hasn't stopped me planning, and progressing some lighter jobs. In fact Rylston Light Railway (tag-line: The Line that Forgot to Be Built) is in danger of being history most over-planned and over-thought garden railway. HS2 has had a shorter planning programme to date.
There are a number of pinch-points in the design, and to gain confidence, I have mocked up 1:1 (or is it 1:19) layouts on very temporary foamboard to make sure it looks "right". Some buildings already in existence allow certain areas to look promisingly realistic. One such area is the South Yard at Rylston Running Sheds so one Friday I set up two sheets of foamboard to check clearances.
I wanted the feel of a cramped enclosed yard (think pre-1960s Boston Lodge), but it couldn't be so cramped that 1:1 scale fingers couldn't service the 1:19 locos. The running shed is designed to jut out from the mainline route so that the Dales' giant-folk can service the a loco on either side of the peninsular. South Yard is one of those two points.
Space compromise meant that the distance from the running line was limited. A highish wall helped give the yard a constrained feeling but I wanted to develop the limited space along the wall with highish structures to emphasize a claustrophobic feel. Oil storage tanks and a lamp hut (Pendle Valley) are aimed to achieve this. Temporary dressings such as wheel barrow and a Kelbus sand-drier help give depth effects.
This is an example of the effect sought.
South Yard, Rylston by Andrew S, on FlickrThe locomotive is carefully positioned and hides the current lack of a coal-stage. I decided that whilst the foamboard is setup I could quickly build (!) a coaling stage to fit in the corner. I wanted a wooden bucolic affair. I needed real-world images to guide me on the cross-bracing of the staging. Most Google Image hits were of models, but amongst the others was this wonderful affair.
<r><URL url="https://www.warwickshirerailways.com/lm ... s>[url]</s> https://www.warwickshirerailways.com/lms/mrred418.htm<e>[/url]</e></URL></r>
- 011D3C5A-8296-4D50-9167-37F0B727E866.jpeg (78.6 KiB) Viewed 4334 times
South Yard, Rylston by Andrew S, on FlickrTo be continued if nothing doth occur to prevent . . .
Andy S.