Thanks, Grant. This being a freelance industrial loco, I figure I could get away with any old injectors. But looking at the Bundy Foundry book now, shows they were all fitted with Auto Positives similar (possibly identical) to those on the NAs. Quoting the book: "Only specialised items such as gauges, lubricators, electrical fittings, injectors, safety valves and roller bearings were bought in".
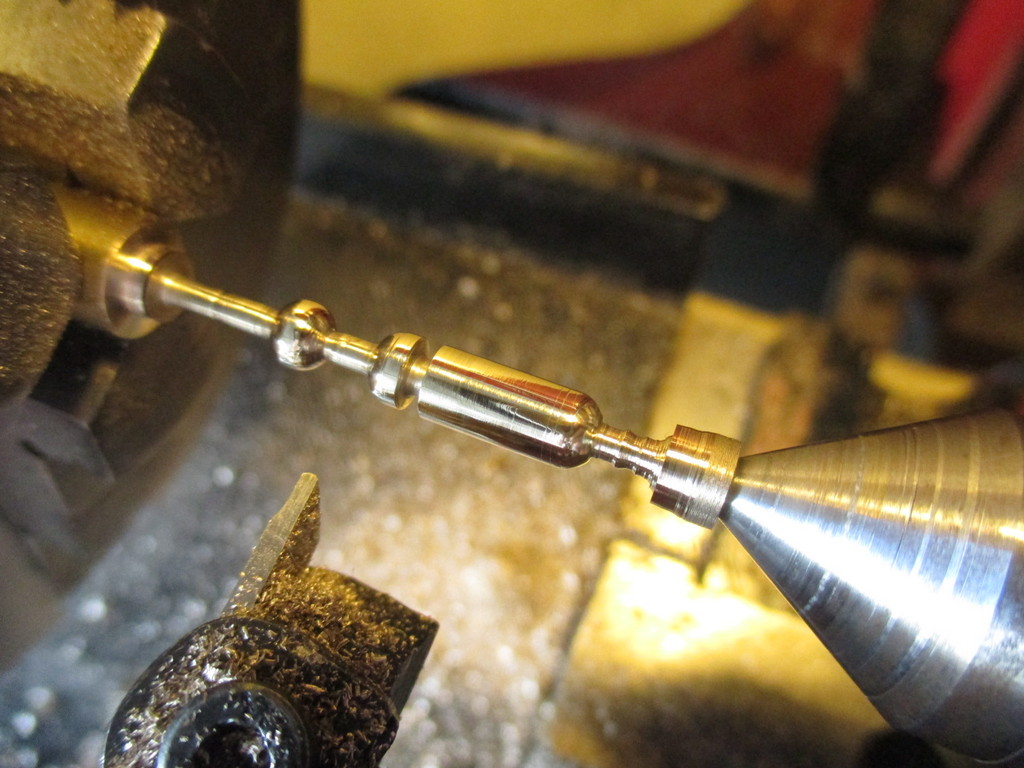
I did briefly consider fabricating injectors as you have, (beautiful work by the way, you too, Keith) but dismissed it as I couldn't think of a way to hold the parts together for soldering. But nails in a block of wood, I didn't think of that.

Will have a go.. Failing that, I'll try DJB, GRS and Roundhouse. Cheers, fellas, it's hard to remember all the suppliers we have in 16mm.
I'm surprised to see
Airdmillan had a feedwater pump as-built. Not aware of any other cane loco ever having been fitted with one. Although it now (like our Bundy 5) carries a pair of Auto Positives, I suspect it may have been built with backhead-mounted "cross-head" injectors, as the earlier Innisfail B9½s seemed to have. Though looking at the same photo, Graeme, I think you're right about it being in the cab and draining through the footplate.
Looking at Airdmillan's reverser today, it's your typical Fowler assembly.
Re: drill bits, the funny thing is they were the same bits, in the same pin-vice, in the same drill press as last time - all being el-cheapo. Incidentally, I've also once had the spiral reverse. Looking back, I'd think the pin vice just happened to be positioned more "truly" this time. Planning on finding a quality drill press when I build the new workshop, maybe even one with a miniature chuck for bits under 1.5mm.
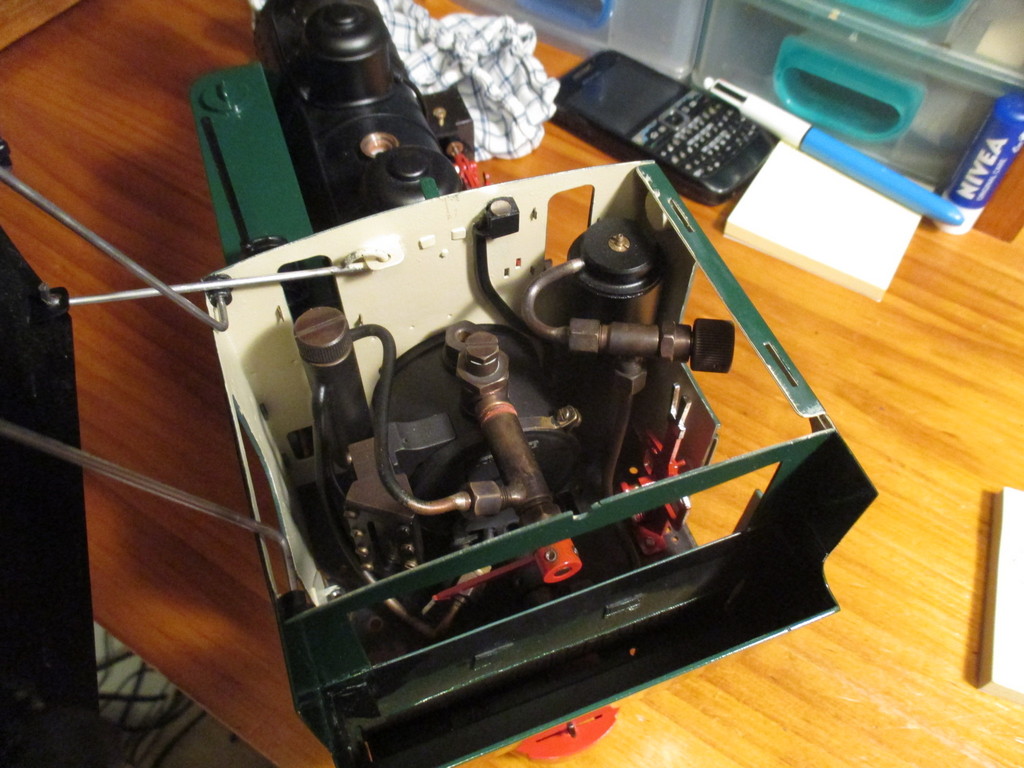
The mechanical lubricator linkage is surprisingly robust. Outside the QLD Govt. mainline, which mostly stayed with hydrostatic lubricators to the end, many of our narrow gauge locos over time, had their hydrostatics replaced with mechanical lubricators. Nearly all the locos at Woodford have 'em. Thanks for the offer Graeme, but the photos here will be enough for me.
Thanks for the helpful input, gents. It's appreciated.
19/10/21
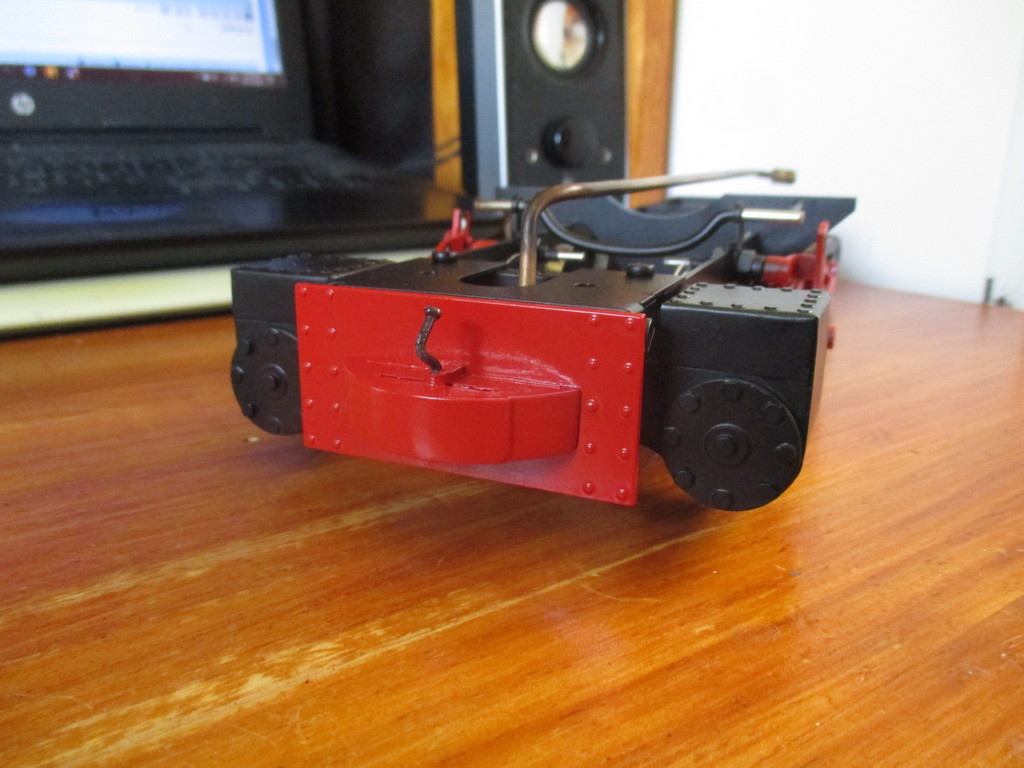
The rain slowed things up a bit, but the chassis is now mostly done. The motion was left assembled like last time on
"Victoria", and painted in one piece, masking off to spray the cylinders. Blue-tac was used to mask around the ends of the gland nuts. Again as last time, the clip-on cylinder covers needed a few spots of shockproof (hi-temp) superglue to keep them tightly in place.
I'd like to have detailed the pony wheel frame, but due to the way the prototype is made, the way the model is made, and the lack of space behind the frame when set for 45mm gauge, I can't really do much. I may yet drill it and put a couple of sewing pins in the frame, but it's almost not worth it. I'll see how it looks once the cab and steps are fitted..

IP Eng. appears to now use a 3D-printed master for their Darj. couplings. I was impressed with the quality of the castings, but the 3D-printed master really needs to be cleaned up. Why leave print lines on every surface and a deeply sunken (heat-deformed) corner for everyone to fix? Though if it's just a temporary stop-gap for a batch or two, fair enough.. I used JB Weld to build up the missing corner, and fitted with a pair of M3 bolts.
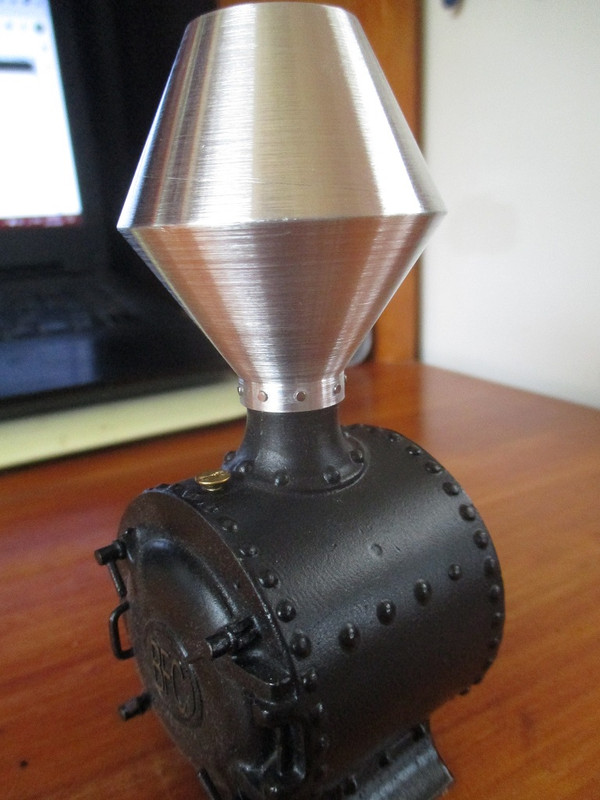
The surface of the headstocks isn't perfectly flawless, but quite good enough for me. The round "knub" in the center of each cylinder head is an M2 cheesehead screw, the slot filled in with soft solder and cleaned up on the lathe. Some Permatex hi-temp thread sealant was applied before gently tightening home with pliers. The protruding thread on the inside was cut away with the dremel. No oil was used in the cylinders' assembly.