Page 1 of 3
N&BLR Ongoing Projects thread
Posted: Wed Mar 03, 2021 9:47 pm
by Seb_N&BLR
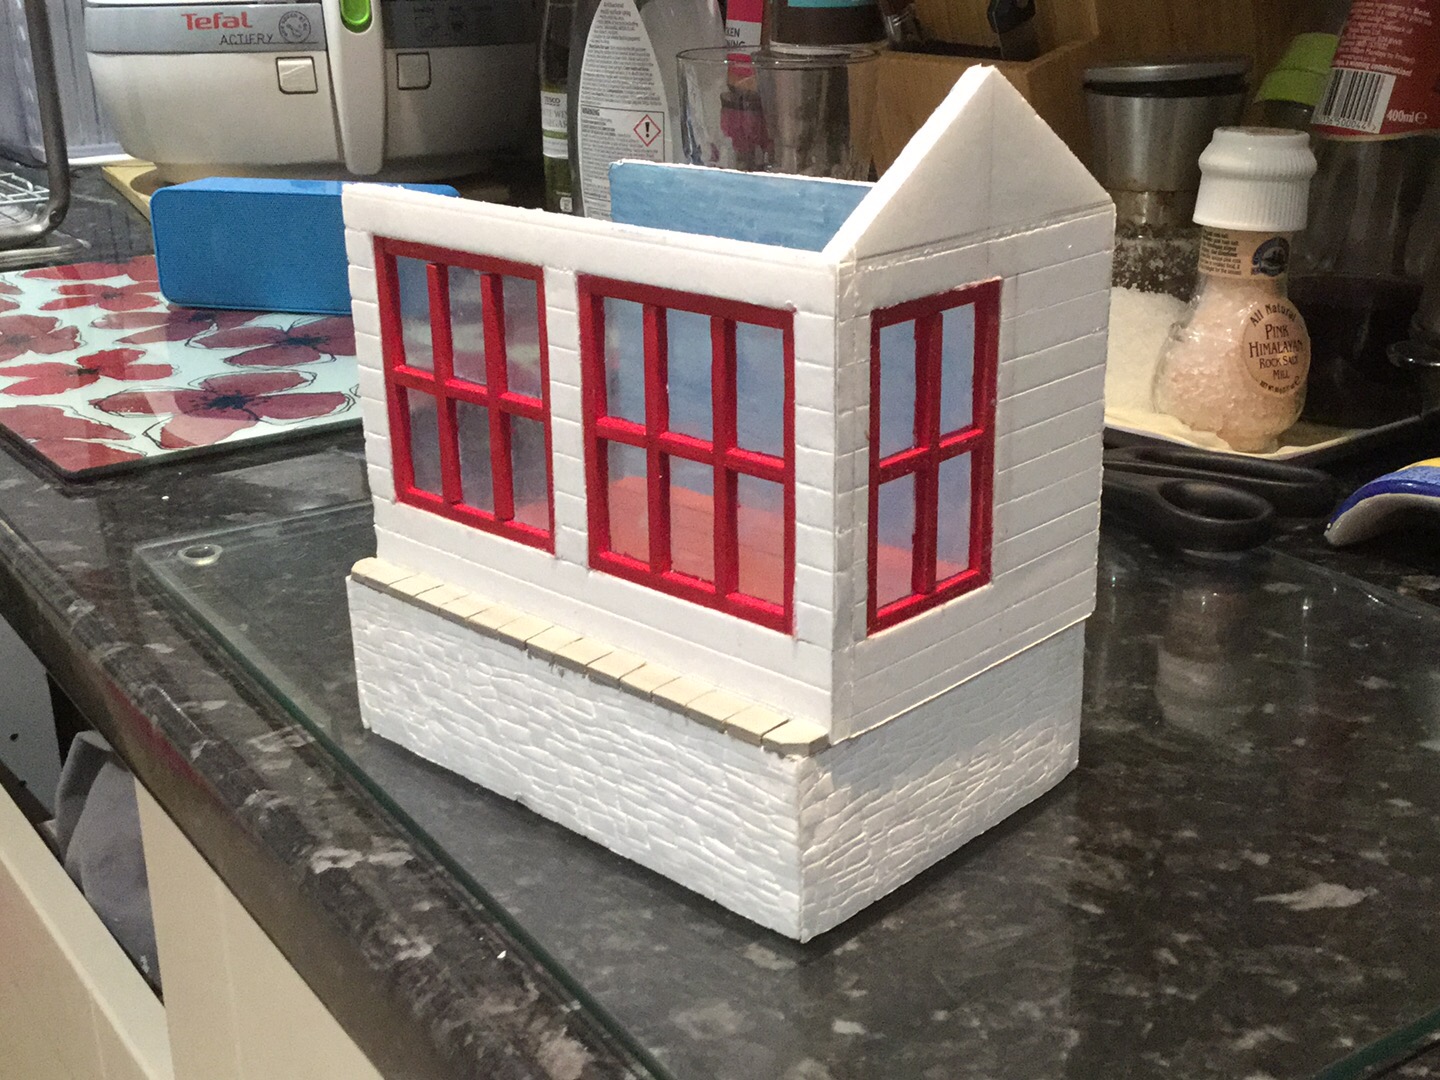
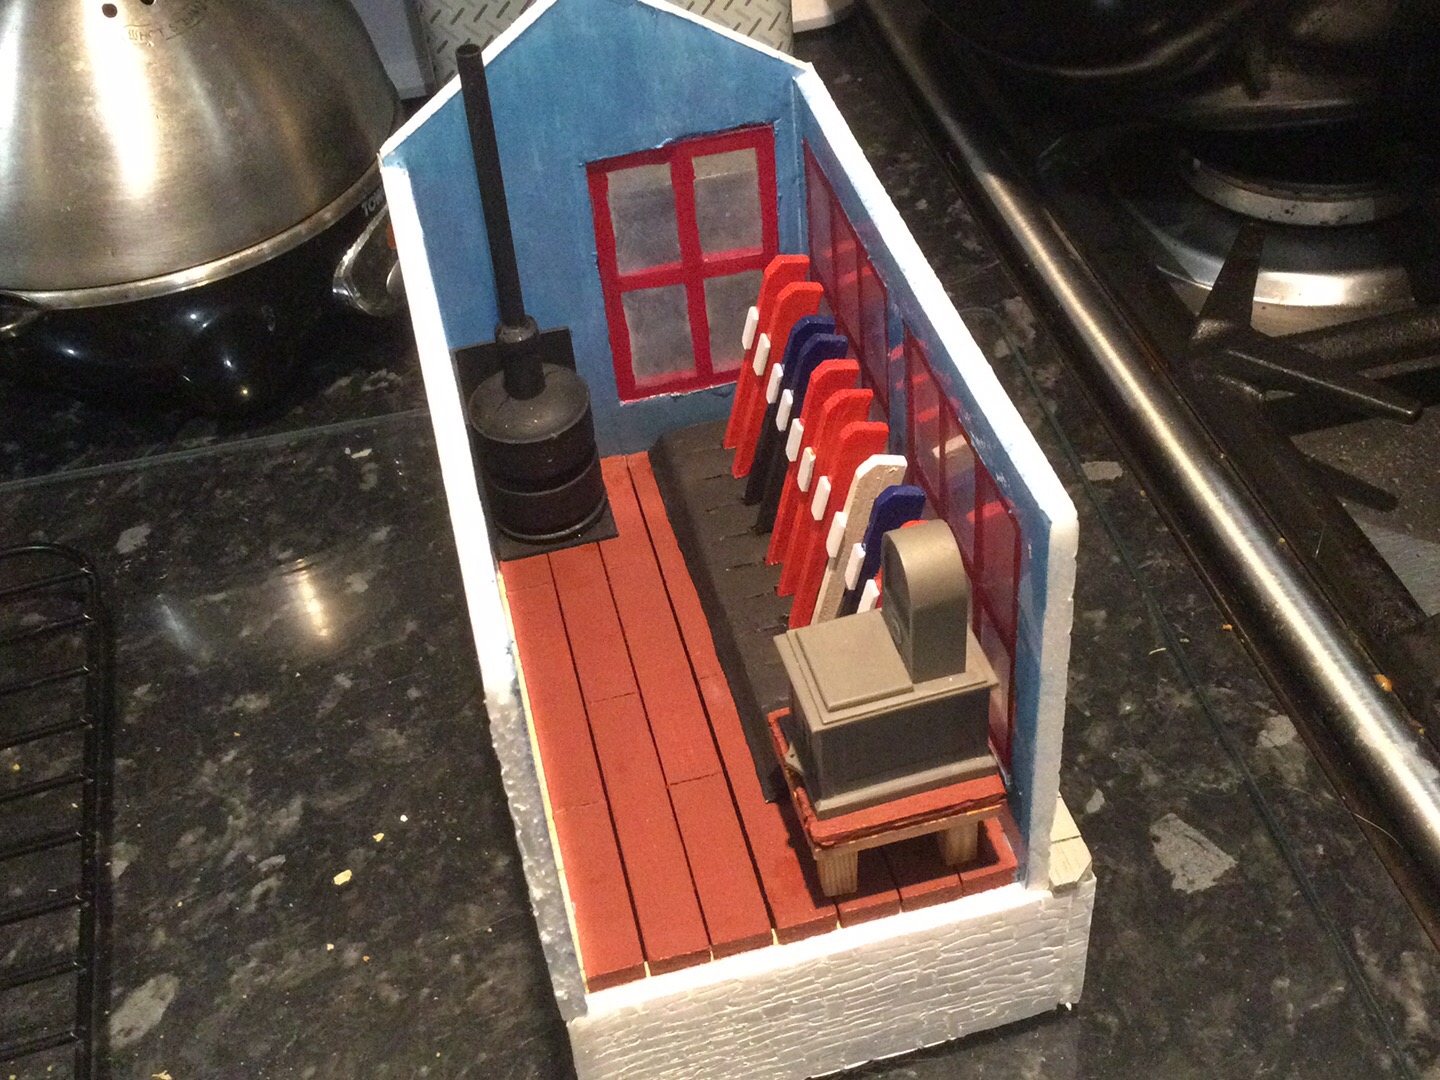
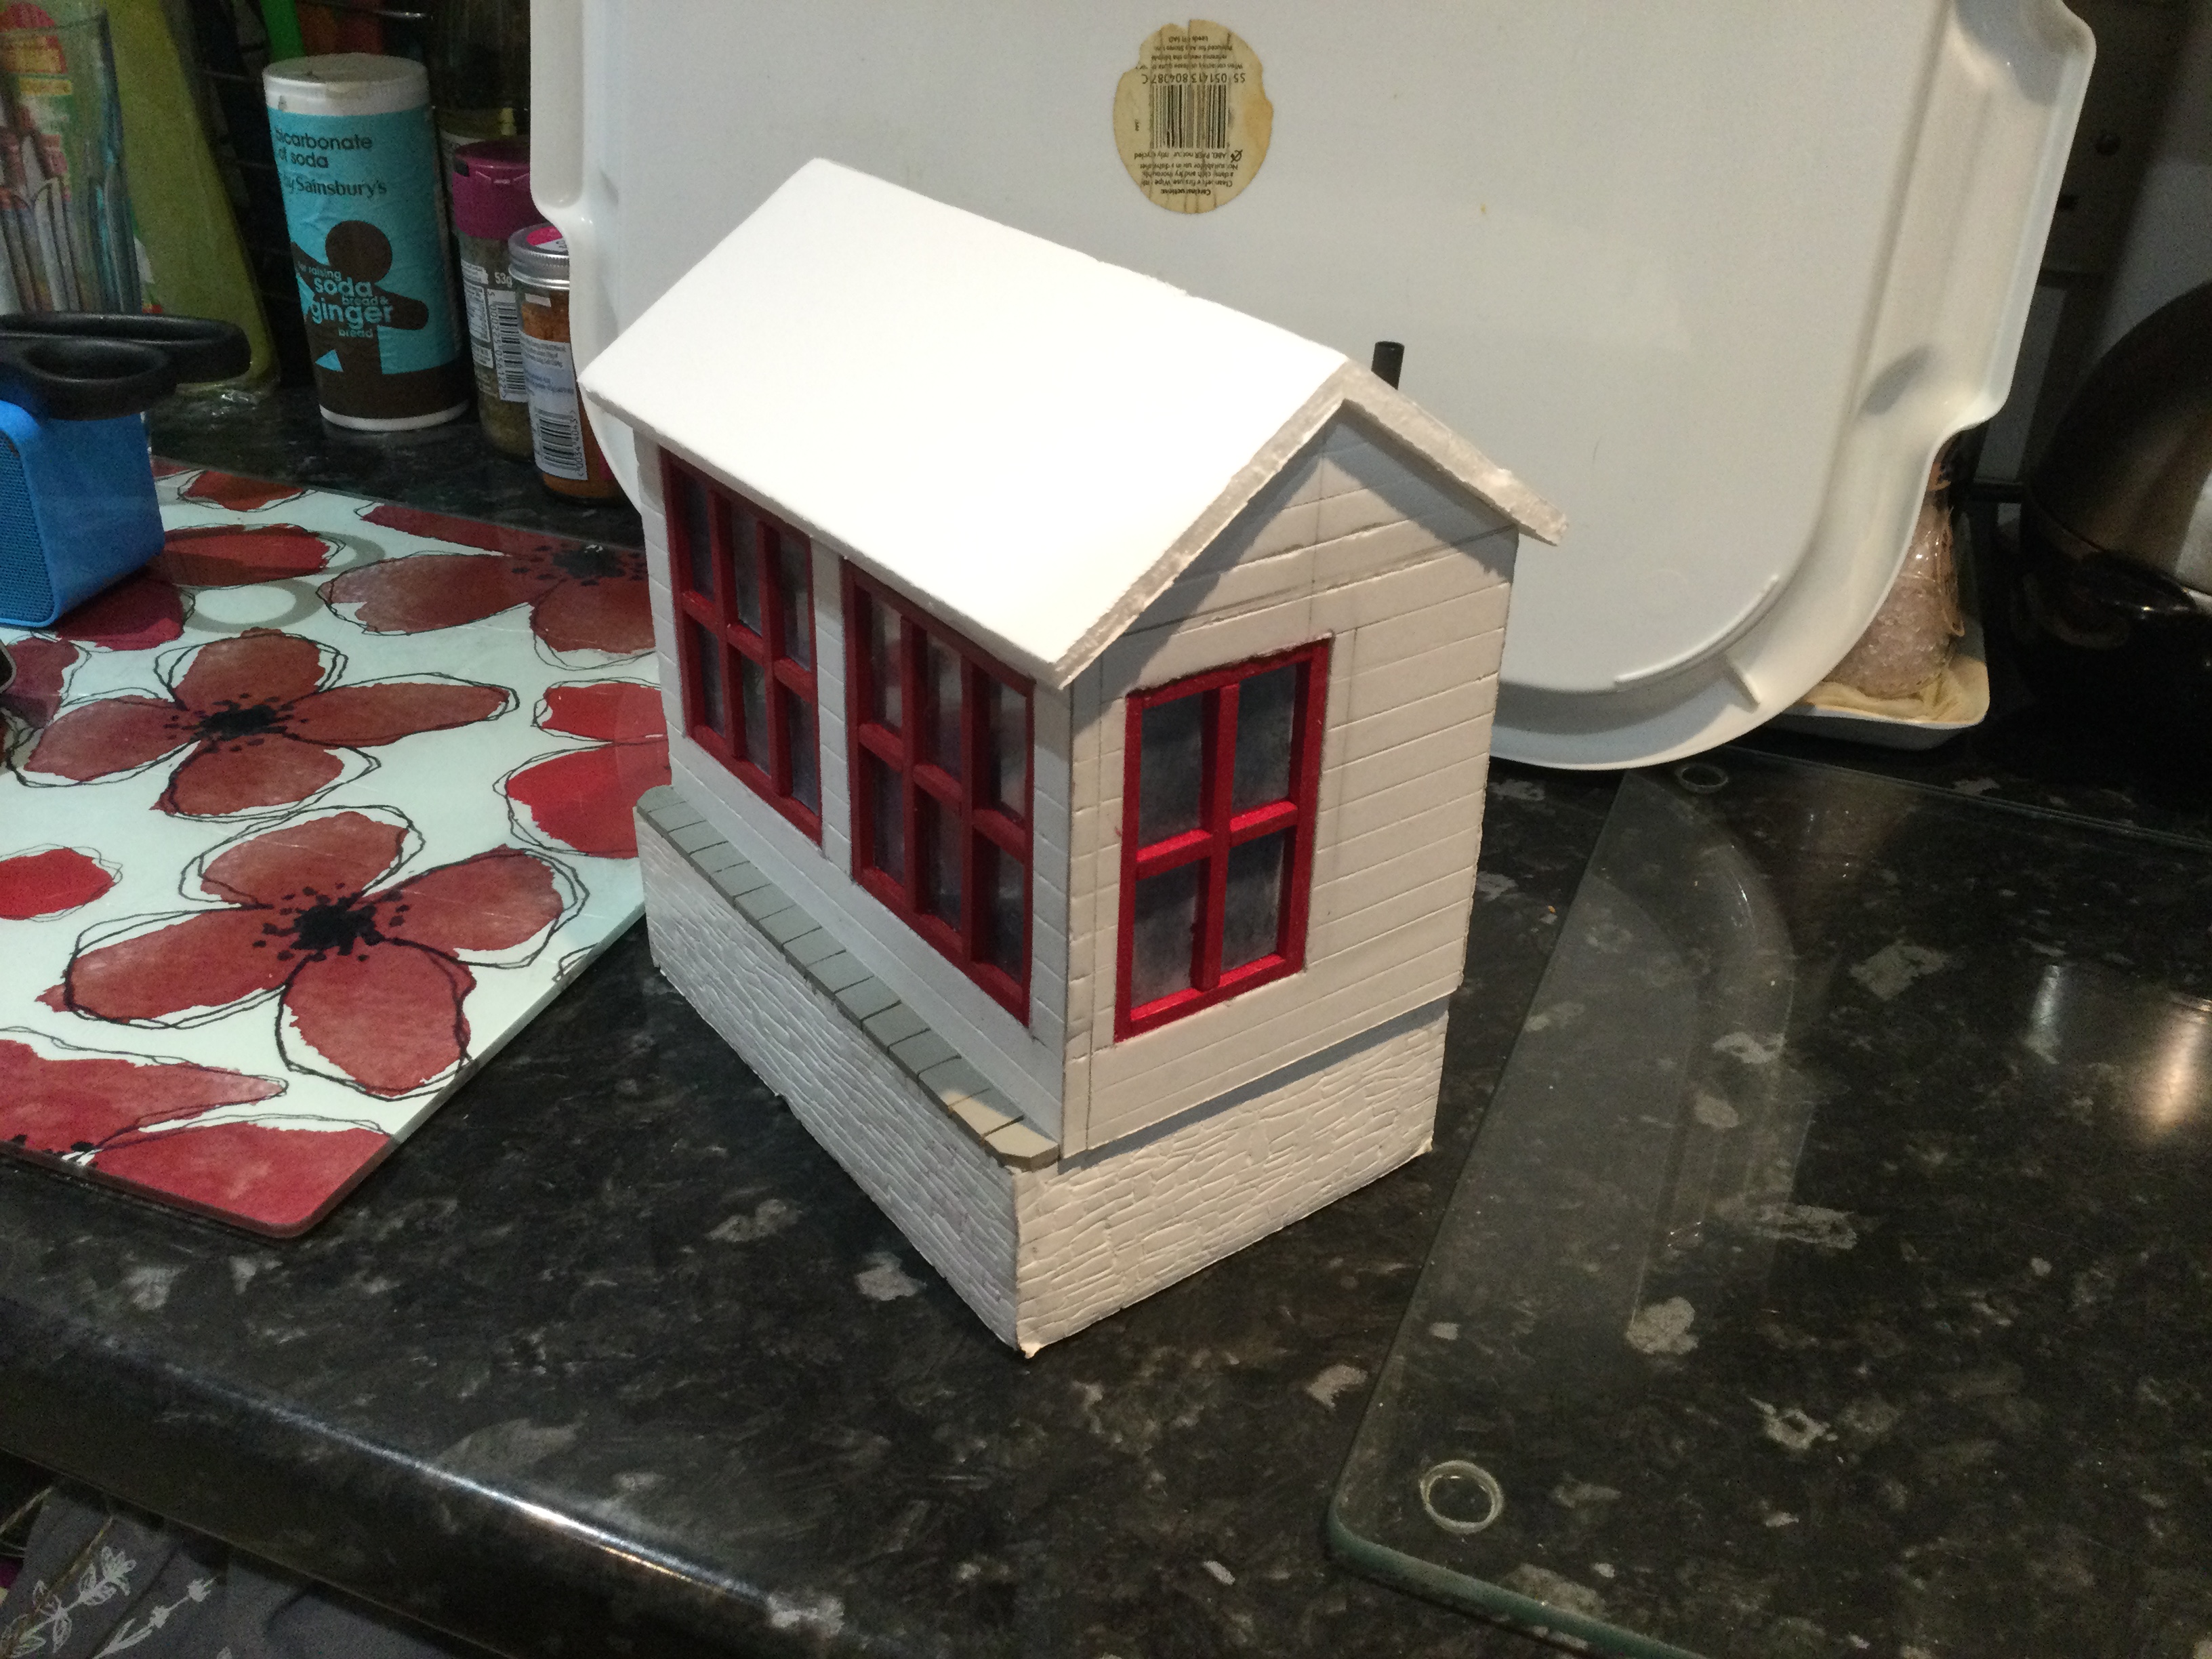
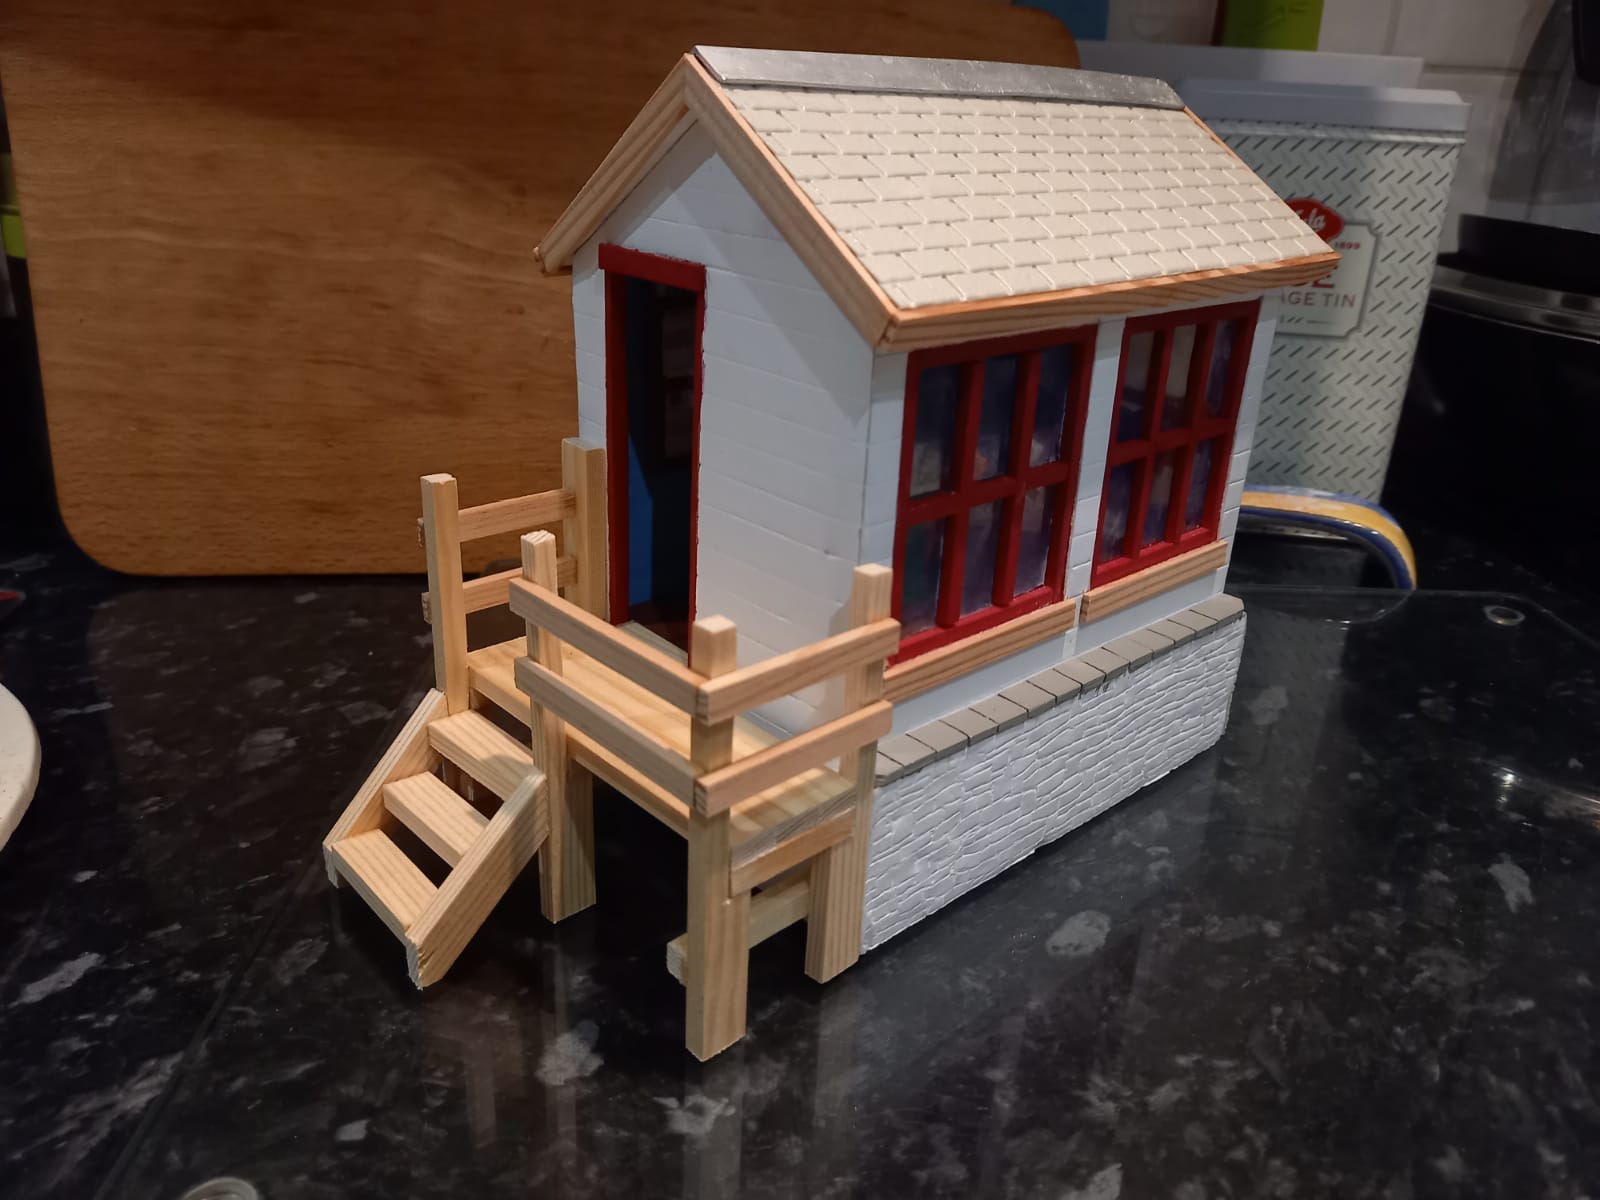
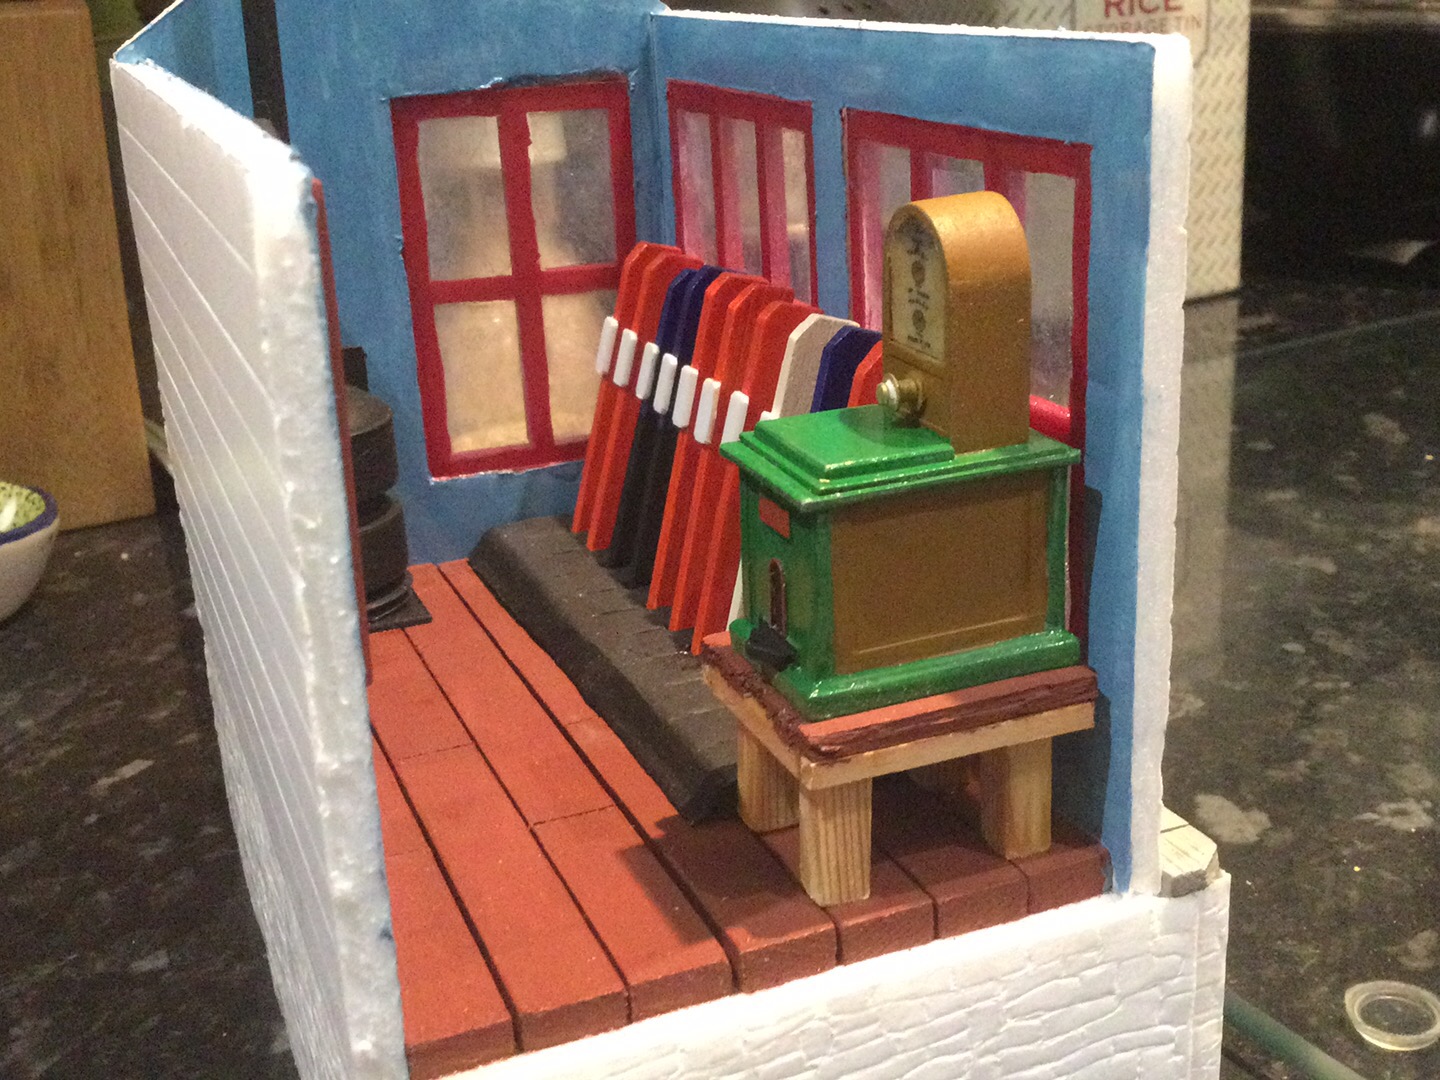
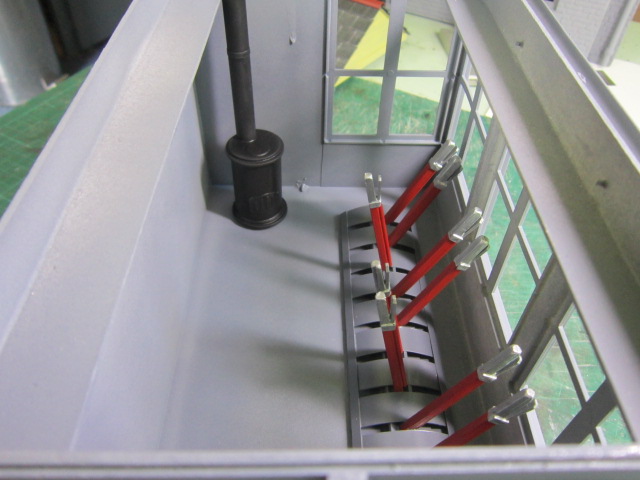
I’m currently mid way through my first attempt at a scratch build, possibly one of the slowest building projects of all time as it’s been gradually ongoing since last summer. The signal box will control the environs of my main station, and is constructed out of a combination of laminated foam-board, various strip woods, plasticards and aluminium angle (for the roofline.) The lever frame is made out of trimmed barbecue skewers and the lever frame is appropriate for the layout it controls. The token machine, notice board and clock are from Trenarren Models, the stove is a (discharged!) party popper painted black, with a length of aluminium tube affixed. Getting it neatly through the roof without snapping it off was challenging. The roof tiles are moulded plastic sheet from Jackson’s Miniatures.
I’m interested to hear suggestions of how people waterproof their outdoor buildings. I will be making a front door (with glass window so you can see inside) to keep the rain out. Is there a recommended varnish for wood and foam board for example?
- D2A950B1-74B6-42DB-B9D8-52F170E4CC1A.jpeg (441.33 KiB) Viewed 8240 times
- 8ED36991-9FC3-4ED0-A028-6ECADAFF9E10.jpeg (460.89 KiB) Viewed 8240 times
Re: First scratch-build - signal box
Posted: Wed Mar 03, 2021 9:48 pm
by Seb_N&BLR
- 5FAC4CBF-CA02-45DD-87D8-AE38ABDD5E42.jpeg (2.06 MiB) Viewed 8239 times

- 97A0973B-DDE3-43E9-A7C5-1FA720C6FD88.jpeg (1.57 MiB) Viewed 8239 times
Re: First scratch-build - signal box
Posted: Wed Mar 03, 2021 9:49 pm
by Seb_N&BLR
- 649EA361-FB0B-44C7-988C-CB7C23736EBA.jpeg (425.17 KiB) Viewed 8238 times
- EFBC75EE-200D-4D82-9F0A-A44C7B39B447.jpeg (146.64 KiB) Viewed 8238 times
Re: First scratch-build - signal box
Posted: Wed Mar 03, 2021 9:50 pm
by Seb_N&BLR
- 6DA6155A-0C48-485A-B289-C65AC0996C3C.jpeg (449.07 KiB) Viewed 8238 times

- 694B0685-9297-4341-8D17-7979A84C7177.jpeg (430.45 KiB) Viewed 8236 times
Re: First scratch-build - signal box
Posted: Wed Mar 03, 2021 10:45 pm
by ge_rik
That's a beauty! Certainly a lot more accomplished than any of my first efforts.
I've used ordinary acrylic paints on my buildings - even the ones which stay outside all the time - but they do fade. I've had more success with exterior house paint, but it can be a bit thick for the finer details. Not sure about varnishes though, but I'm sure there will be some on here who could advise.
Rik
Re: First scratch-build - signal box
Posted: Wed Mar 03, 2021 11:20 pm
by Peter Butler
Hi Seb and well done on tackling your first scratch-built structure. It looks very good and the exterior should withstand a certain amount of outside weather conditions, BUT..... if you expect to be able to leave it outside all year round I would strongly recommend you remove all organic materials completely. It isn't just rain falling on the outside which causes damage but condensation and humidity, which will form inside, causing you problems in the future. There are no sealants or varnishes available to prevent this occurring.
From my own experience I use only HIP (plasticard) for the main body and interior fittings of resin or white-metal etc, no wood anywhere!
Despite these precautions I still remove my structures indoors for the winter, but regular inspections show no deterioration of the materials I use.
- IMG_3860.JPG (93.63 KiB) Viewed 8224 times

- IMG_3965.JPG (149.36 KiB) Viewed 8224 times
Re: First scratch-build - signal box
Posted: Thu Mar 04, 2021 6:16 am
by philipy
Hi Seb
That is a very impressive first build, well done.
For buildings and other structures, as Peter said, there is nothing that I know of that will keep wood of any species from absorbing moisture sooner or later. That in turn will lead to swelling/contraction, and for ply, delamination. Again, Peter is right that condensation inside the building will be an issue if it's left outside permanently ( I leave mine out and they are always dripping inside).
Having said all that, foamboard is perfectly fine outside without any protection more than reasonably good quality acrylic paint, as long as it is NOT the type of foamboard with paper clad external faces. If you have used that type, then I wouldn't even consider leaving it outside at all because the paper layers will peel off.
Re: First scratch-build - signal box
Posted: Thu Mar 04, 2021 9:36 am
by Seb_N&BLR
Folks thanks for your kind and helpful comments.
My intention is to leave my buildings outside during the warmer months of the year but to store inside during the winter. The foam board is of the paper-covered type; some trials I undertook beforehand suggested it actually becomes a stronger material when wet... ! However if the outer skin peels then I’ll cross that bridge when I come to it. A friend has built a station building out of this and it has successfully remained outside over the winter we’ve just had without issue, so it’ll be interesting to see how this one fares.
I’m a big fan of modelling with wood for the enjoyment of doing it - must say I personally find plasticard a bit soulless at times and more suited to rolling stock.
Seb
Re: First scratch-build - signal box
Posted: Thu Mar 04, 2021 10:16 am
by Andrew
Looking good - and the party popper stove is genius!
My buildings don't stay out in the winter, although I did leave bringing them in a little late this year. Apart from anything else it's a good opportunity to clean overscale muck off them. I've found acrylic paint does the job well too - I hope it keeps your wood well-protected, but if you're a keen woodworker (and your steps are very nice!) maybe giving them a little tlc every now and then won't be too much of a chore...
I've only made a few buildings so far, but a tip from me would be to make sure roofs are well-braced - mine aren't, and they've warped a little, I guess from heat...
Looking forward to seeing it progress,
Andrew
Re: First scratch-build - signal box
Posted: Thu Mar 04, 2021 10:20 am
by ge_rik
Seb_N&BLR wrote: ↑Thu Mar 04, 2021 9:36 am
Folks thanks for your kind and helpful comments.
My intention is to leave my buildings outside during the warmer months of the year but to store inside during the winter. The foam board is of the paper-covered type; some trials I undertook beforehand suggested it actually becomes a stronger material when wet... ! However if the outer skin peels then I’ll cross that bridge when I come to it. A friend has built a station building out of this and it has successfully remained outside over the winter we’ve just had without issue, so it’ll be interesting to see how this one fares.
I’m a big fan of modelling with wood for the enjoyment of doing it - must say I personally find plasticard a bit soulless at times and more suited to rolling stock.
Seb
It's not only the weather any paper or card based model needs to be protected from. I've discovered that, for reasons best known to them, slugs and snails really love munching on paper.
I only deploy the majority of my buildings when I have running sessions. I might leave them out for a week or so if I know the weather is going to be good enough to run trains over several days. It only takes a few minutes to put them out and take them back in again. The station buildings stay out all year but as a consequence, they have to be repainted every two or three years.
Rik
Re: First scratch-build - signal box
Posted: Thu Mar 04, 2021 4:08 pm
by Seb_N&BLR
Andrew wrote: ↑Thu Mar 04, 2021 10:16 am
Looking good - and the party popper stove is genius!
My buildings don't stay out in the winter, although I did leave bringing them in a little late this year. Apart from anything else it's a good opportunity to clean overscale muck off them. I've found acrylic paint does the job well too - I hope it keeps your wood well-protected, but if you're a keen woodworker (and your steps
are very nice!) maybe giving them a little tlc every now and then won't be too much of a chore...
I've only made a few buildings so far, but a tip from me would be to make sure roofs are well-braced - mine aren't, and they've warped a little, I guess from heat...
Looking forward to seeing it progress,
Andrew
Thanks Andrew, I can’t claim credit for the party popper idea, that one came from my friend. It is surprisingly effective though!
I will have to remember about roof bracing. Probably something I should have considered - will be interesting to see how it fares over the next couple of years.
ge_rik wrote: ↑Thu Mar 04, 2021 10:20 am
It's not only the weather any paper or card based model needs to be protected from. I've discovered that, for reasons best known to them, slugs and snails really love munching on paper.
I only deploy the majority of my buildings when I have running sessions. I might leave them out for a week or so if I know the weather is going to be good enough to run trains over several days. It only takes a few minutes to put them out and take them back in again. The station buildings stay out all year but as a consequence, they have to be repainted every two or three years.
Rik
Rik - thanks. I will definitely keep an eye on the slug & snail situation (that sounds like a good name for a 1:19 pub

) although we seem to have permanent armies of blackbirds and wood pigeons who may assist on that count! Incidentally I have really enjoyed reading your Peckforton Railway website, some excellent stuff on there to assist newcomers.
Re: First scratch-build - signal box
Posted: Sat Aug 14, 2021 10:44 pm
by Seb_N&BLR
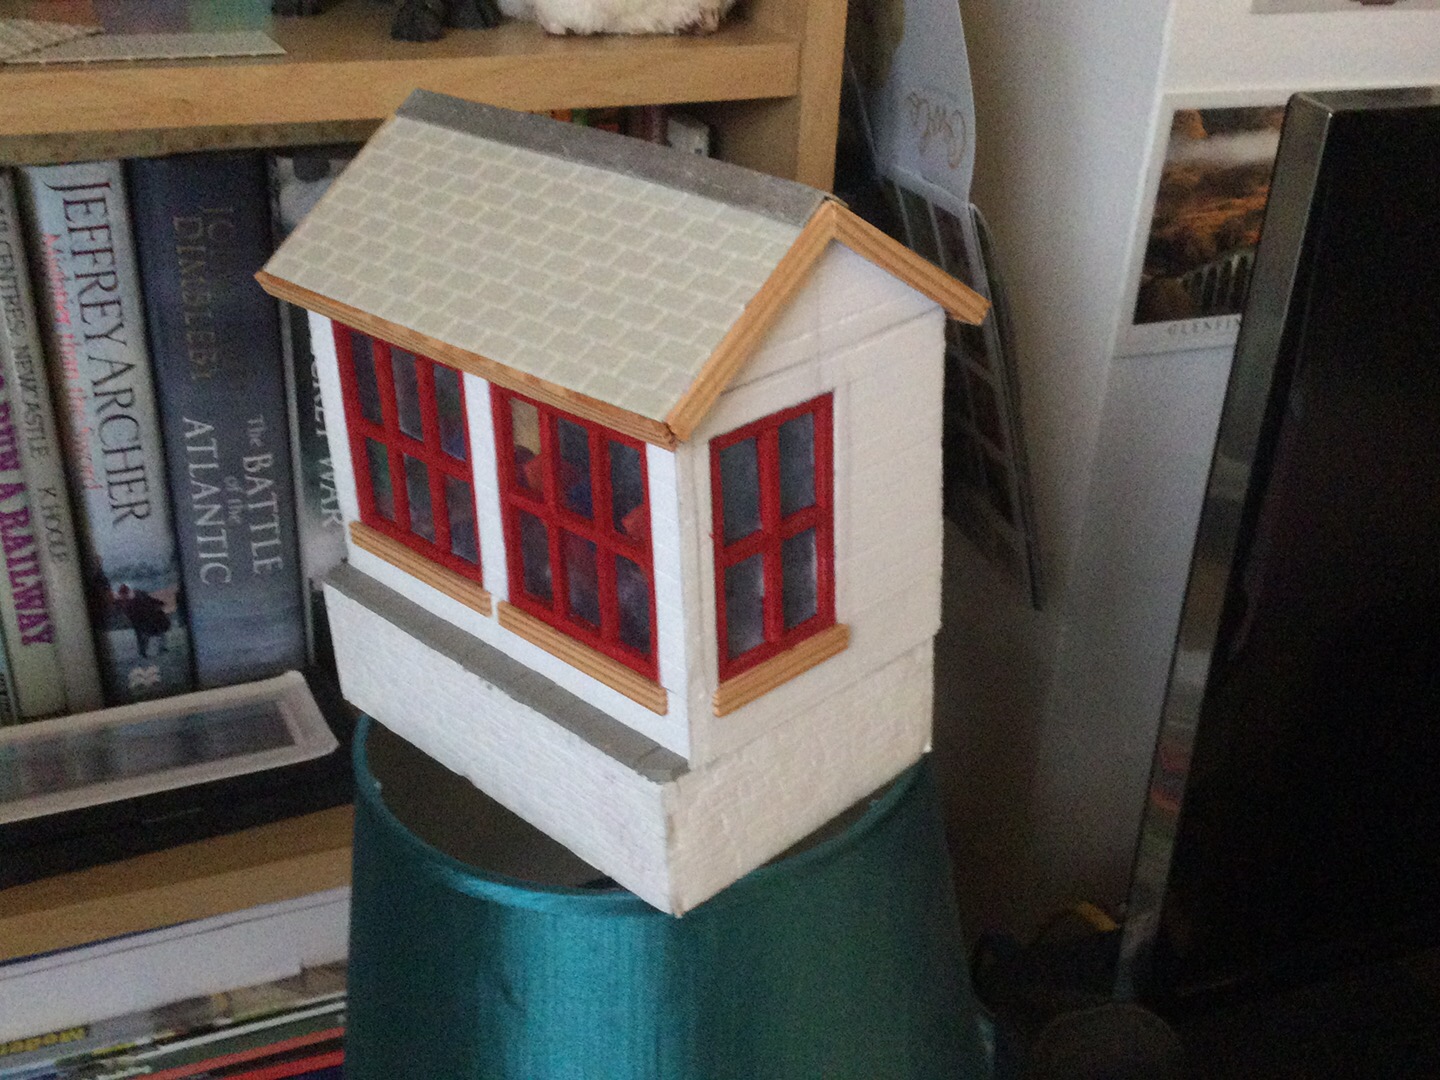
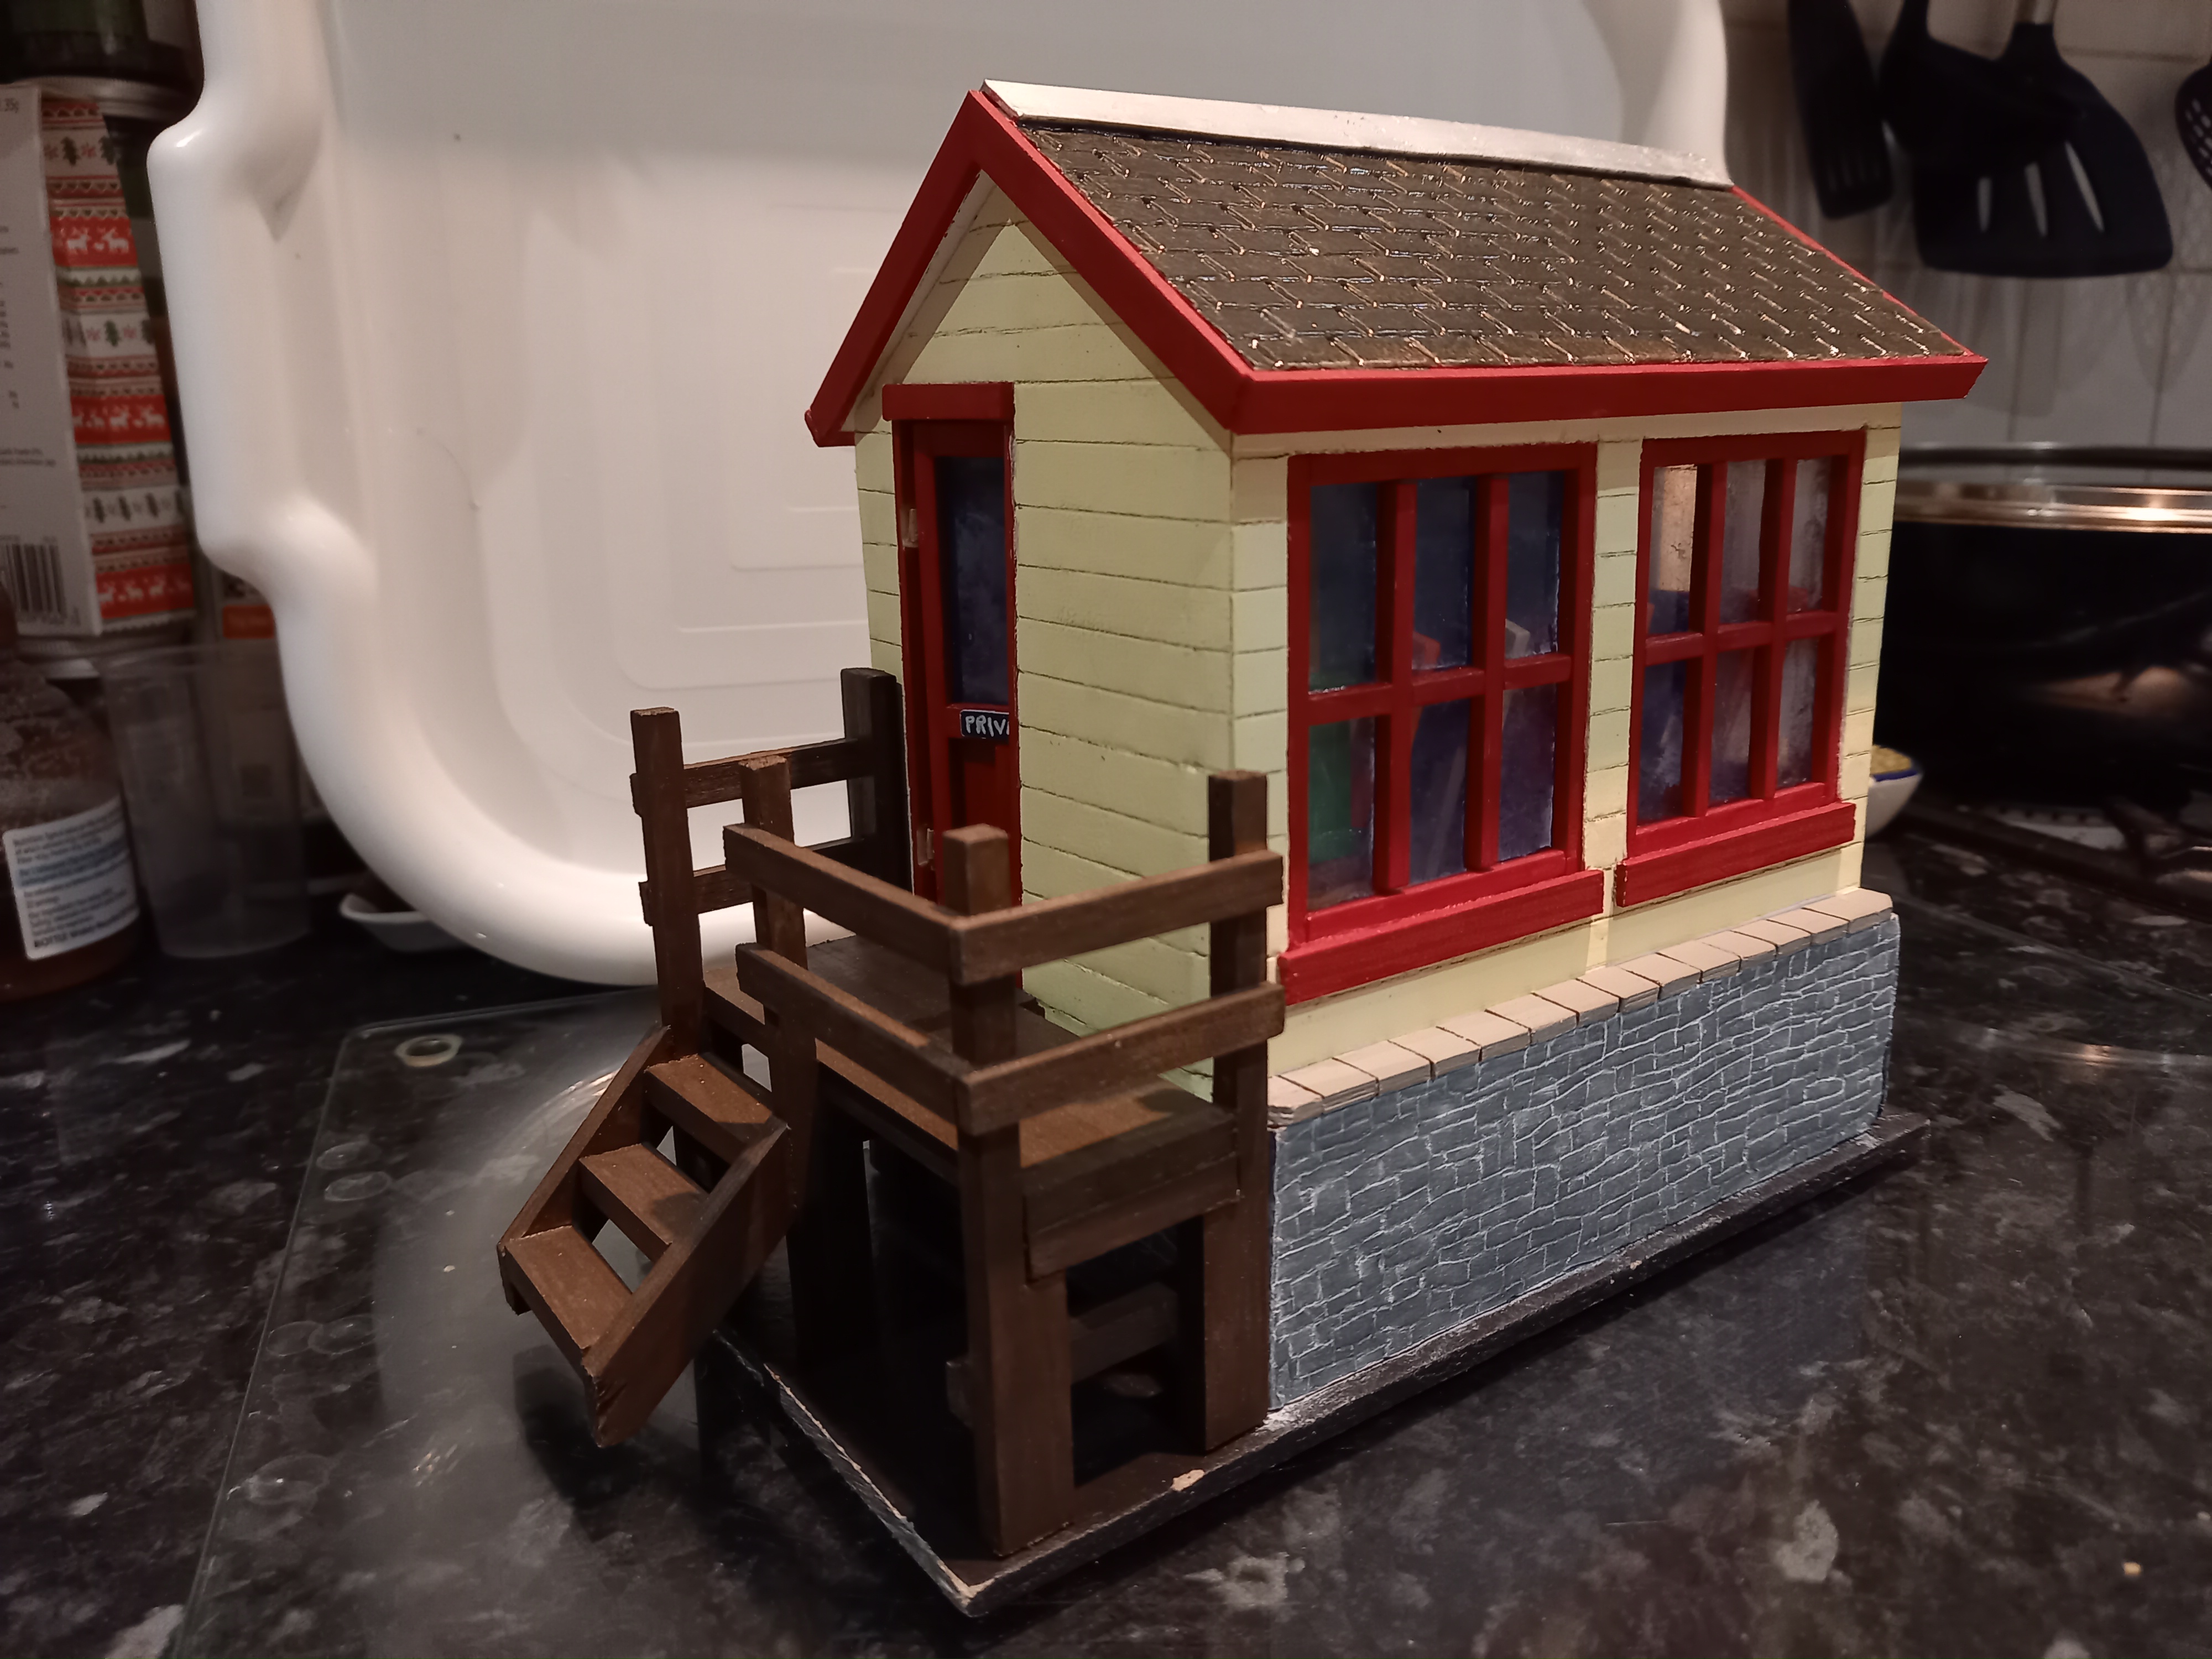
Just to round out this thread, here’s the essentially finished signal box. Everything is complete minus nameplate, and signalman (who will be standing on the veranda.) I’m also trying to source some plastic drinking straws for guttering and drainpipes.
The base is a cut piece of carbon board, available from Jewsons for little cost. It’s hard, strong and reasonably heavy and cuts nicely with a panel saw. The box is superglued down onto it for rigidity. I’m rather impressed with this material, it’s tempting to use it as the basis for a locomotive or railcar. Does anyone have experience with using it thus?
(Edit: only to use as the chassis base! Too chunky for use as sides etc.)
The box walls were pre-scored during construction to represent the planks, I painted it creamy yellow acrylic and then very gently ran a 2B pencil (super sharp) through the grooves to bring out the dirt between the timbers. Similarly the stone base was pre-scored, painted dark grey acrylic and then I used a paint on / wipe off technique to bring out the mortar, and to tonally lighten the colour of the stone, using Humbrol matt white. I’m rather pleased with the overall result.
- 86BA3435-5CFB-41BC-9699-6D72F3719886.jpeg (1.97 MiB) Viewed 7227 times
Re: First scratch-build - signal box
Posted: Sun Aug 15, 2021 6:05 am
by philipy
That is excellent and even more so for a first attempt, well done.
As for using drinking straws, even if you can find the right diameters I think you'll find them a bit flimsy and difficult to work with. I use styrene tube and 1/2-round extrusions from Cornwall Model Boats. They come in a variety of sizes and the service is really good ( at least, it was pre-Covid, I haven't needed to use them recently).
Re: First scratch-build - signal box
Posted: Sun Aug 15, 2021 8:32 am
by ge_rik
Looks great. Thanks for the idea of using carbon board - not a material I've used or even heard of before.
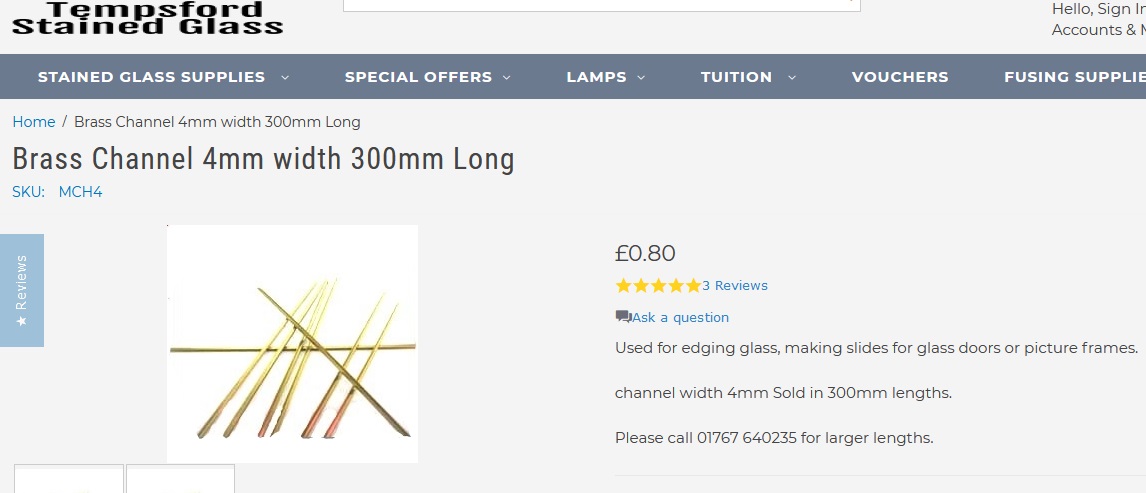
I use brass channel for my guttering. Not the expensive stuff from model shops but dead cheap stuff used by stained glass window makers for edging their glass panels. It's a heck of a lot cheaper.
https://tempsfordstainedglass.co.uk/brass-channel-5239
Rik
Re: First scratch-build - signal box
Posted: Sun Aug 15, 2021 10:29 am
by Peter Butler
A great success, particularly for a first. The brass channel is something I've not heard of before but sounds a perfect solution to me.
Re: First scratch-build - signal box
Posted: Sun Aug 15, 2021 1:08 pm
by ge_rik
Peter Butler wrote: ↑Sun Aug 15, 2021 10:29 am
A great success, particularly for a first. The brass channel is something I've not heard of before but sounds a perfect solution to me.
80p a foot
- metal c-channel.jpg (92.29 KiB) Viewed 6797 times
versus £5+ a foot
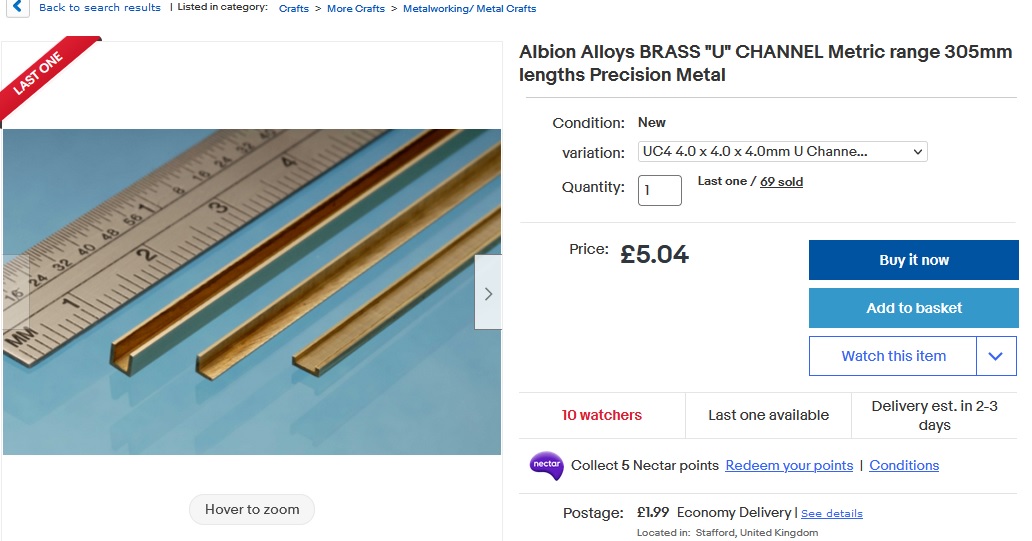
- metal u-channel.jpg (126.35 KiB) Viewed 6799 times
Rik
Re: First scratch-build - signal box
Posted: Sun Aug 15, 2021 10:18 pm
by Seb_N&BLR
Thanks for your kind comments.
The carbon fibre board comes in bundles of about 10-12, they’re roughly 300x500mm. I looked on Jewsons website but can’t find them, so perhaps the pack I recently bought was selling off old stock. Either way it’s really good for several modelling tasks. I’ve also used them to form the edge of a track-bearing trough through two planting rockeries in the garden.
Re: First scratch-build - signal box
Posted: Mon Aug 16, 2021 12:45 am
by Old Man Aaron
Love the attention to detail. I've found plastic straws (the bendy variety at least) to have no ability whatsoever to retain paint or glue. These days I just use 5mm ABS tube bought cheaply through Evilbay. Will have to get some of that lead-lighting channel..
Re: N&BLR Ongoing Projects
Posted: Sat Oct 23, 2021 4:31 pm
by Seb_N&BLR
About time I posted my latest efforts, I’ve amended the thread title so I can update without my OCD kicking off
My main project over the summer period was to extend the N&BLR trackbed from its somewhat embryonic state, through two garden rockeries and towards what will become the second main station (of five planned.) NB this makes my garden sound much larger than it is - I’m content with stations being close together but out of sight of one another.
The challenge was a 4ft gap between rockeries, thereby presenting the opportunity for an engineering solution. With some available Bath stone I built abutments, and the main truss under-girder span of 2ft6in was constructed using aluminium angle suitably bolted together. The decking is creosote-soaked stripwood with track laid on top. I’ve somehow managed to continue the steady 1:40 falling gradient unbroken through both rockeries and the bridge itself, more luck than judgement although having floating ballasted track does make adjusting the line and level very straightforward.
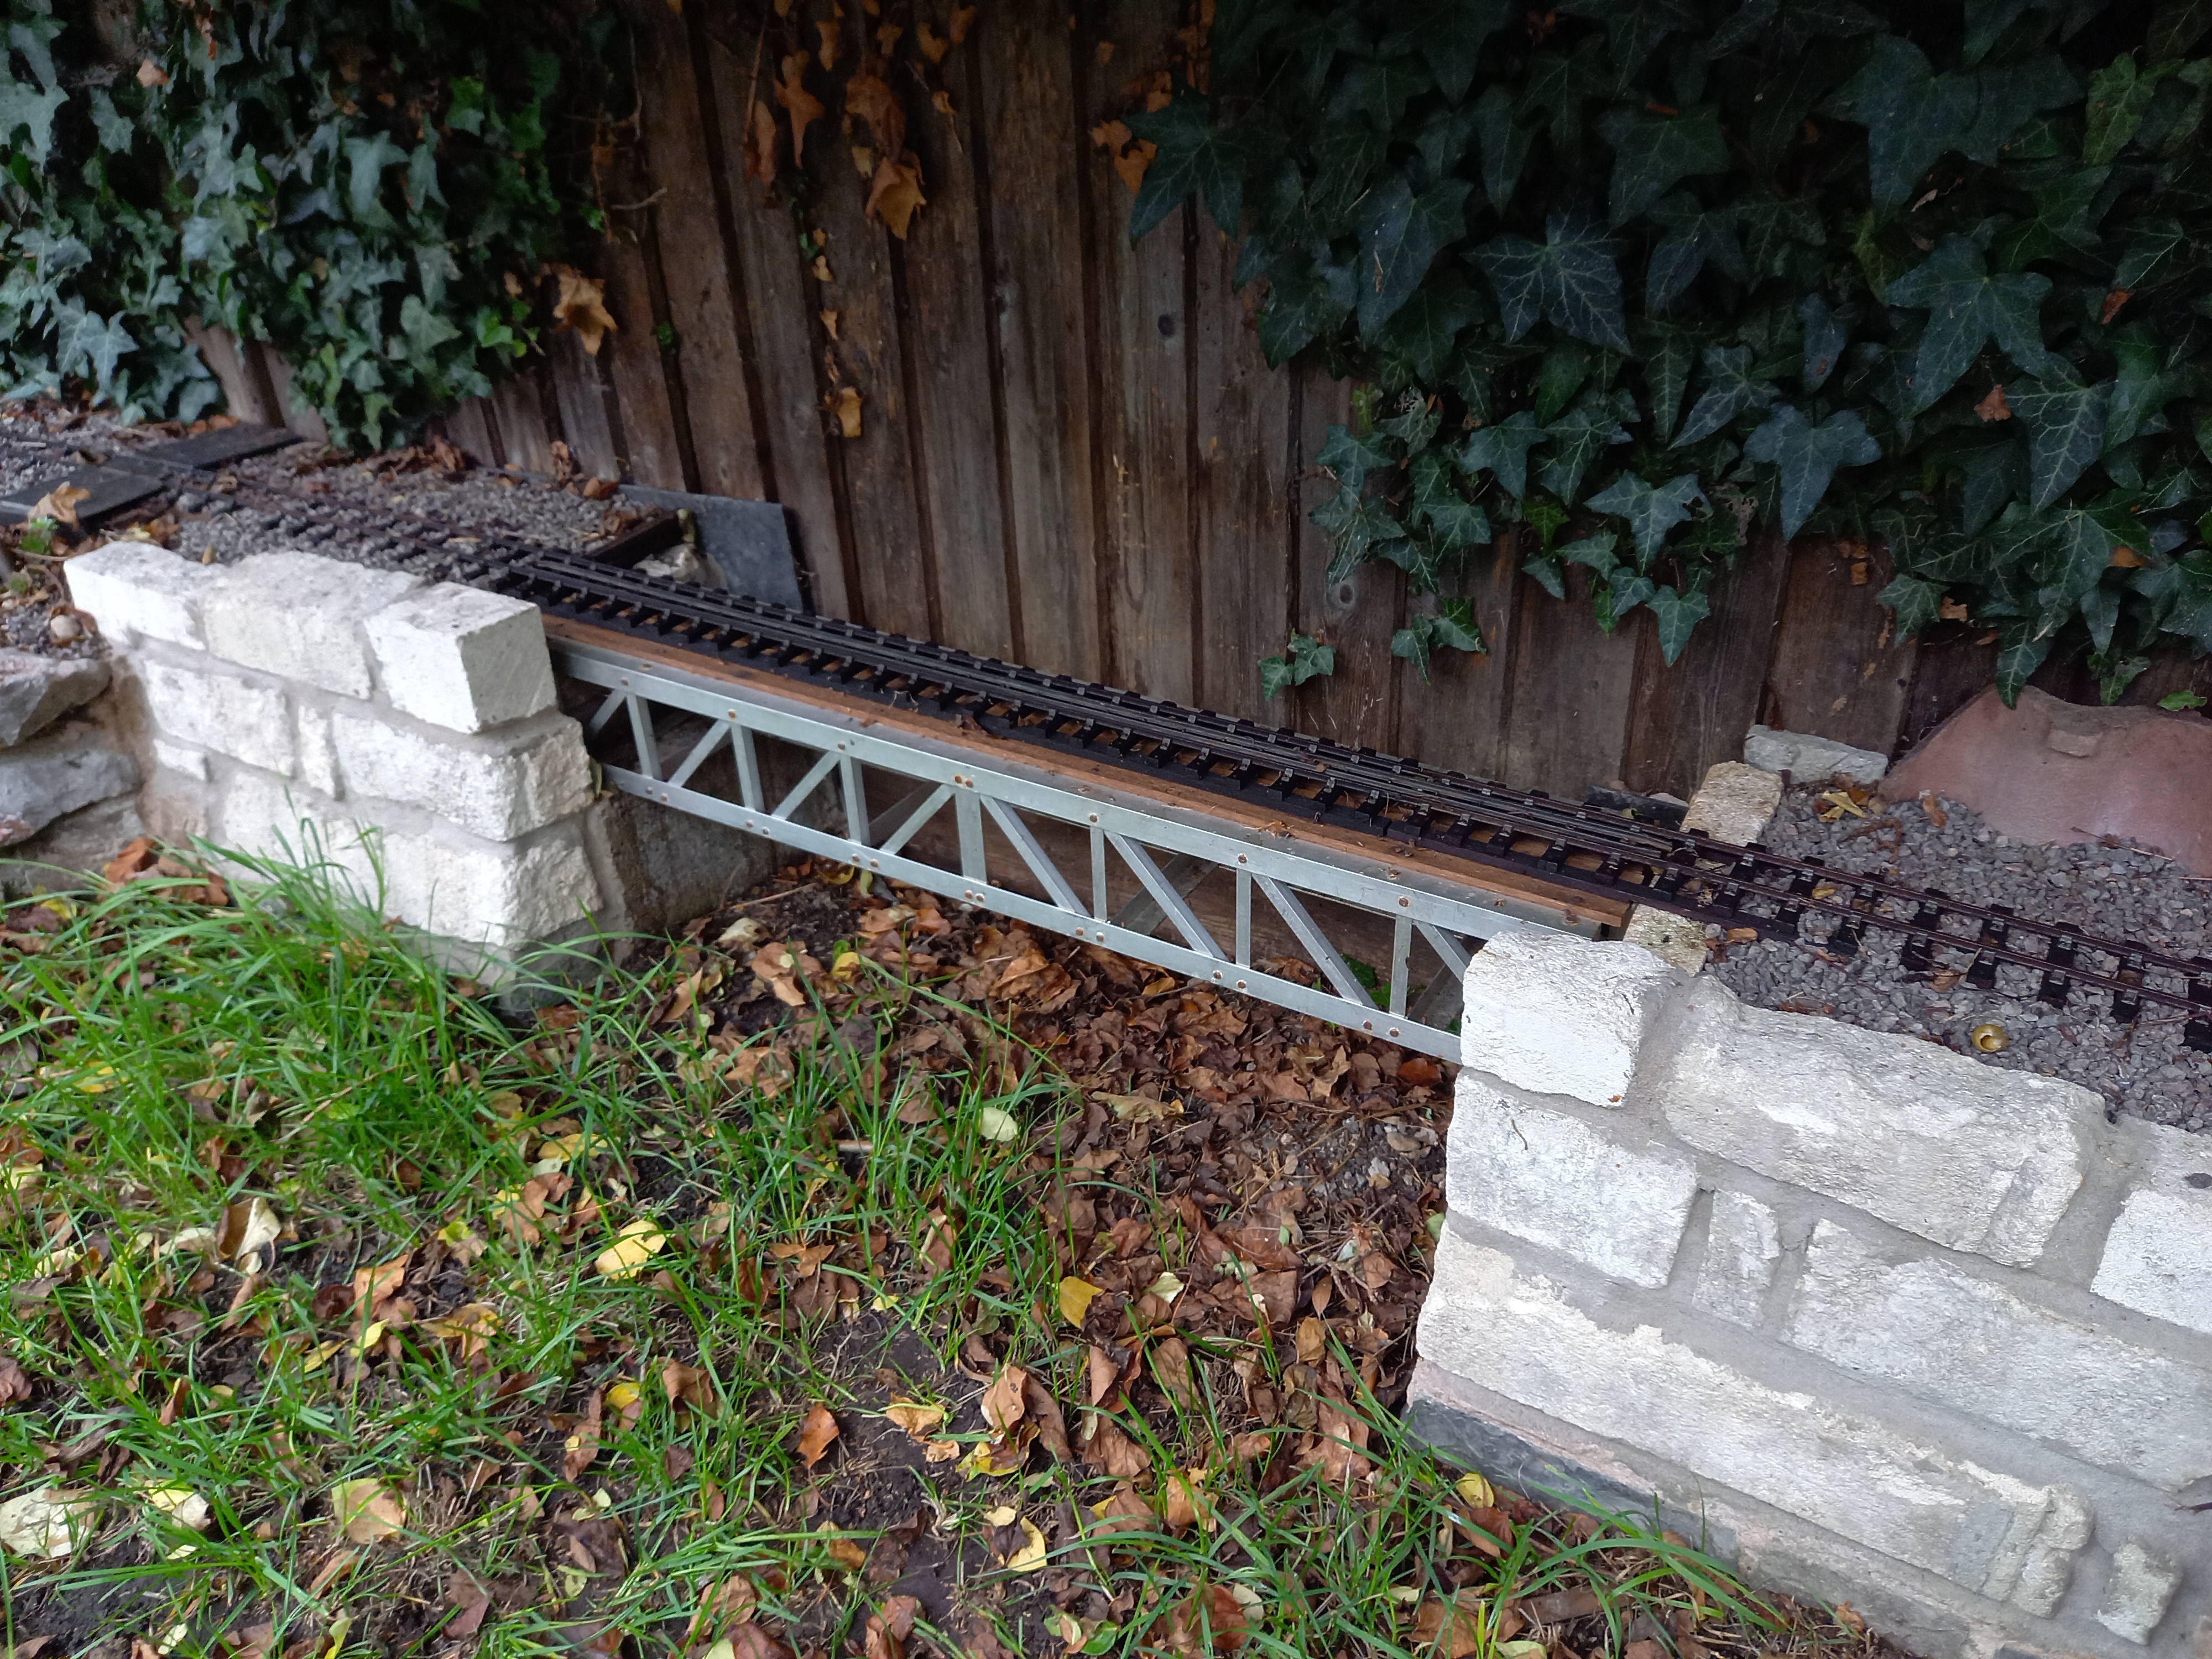
- AE52F1DA-EA5F-47C2-B6C6-6C865C9B8F71.jpeg (4.48 MiB) Viewed 6624 times
With the track now running up to our recently erected ‘outdoor room’, I decided to emulate the smaller BR Western Region halts (such as Church’s Hill on the Tetbury branch, seen here:
https://www.steampicturelibrary.com/sta ... 2475.html )
Summer House Platform was built to serve the local landowner’s manor, the grounds of which this section of the N&BLR traverses. Latterly it provides tourists and visitors with easy access to their destination, although trains only stop (by request) during daylight hours. The platform is Cuprinol-treated stripwood on a carbonboard base, representing a basic timber / sleeper construction.
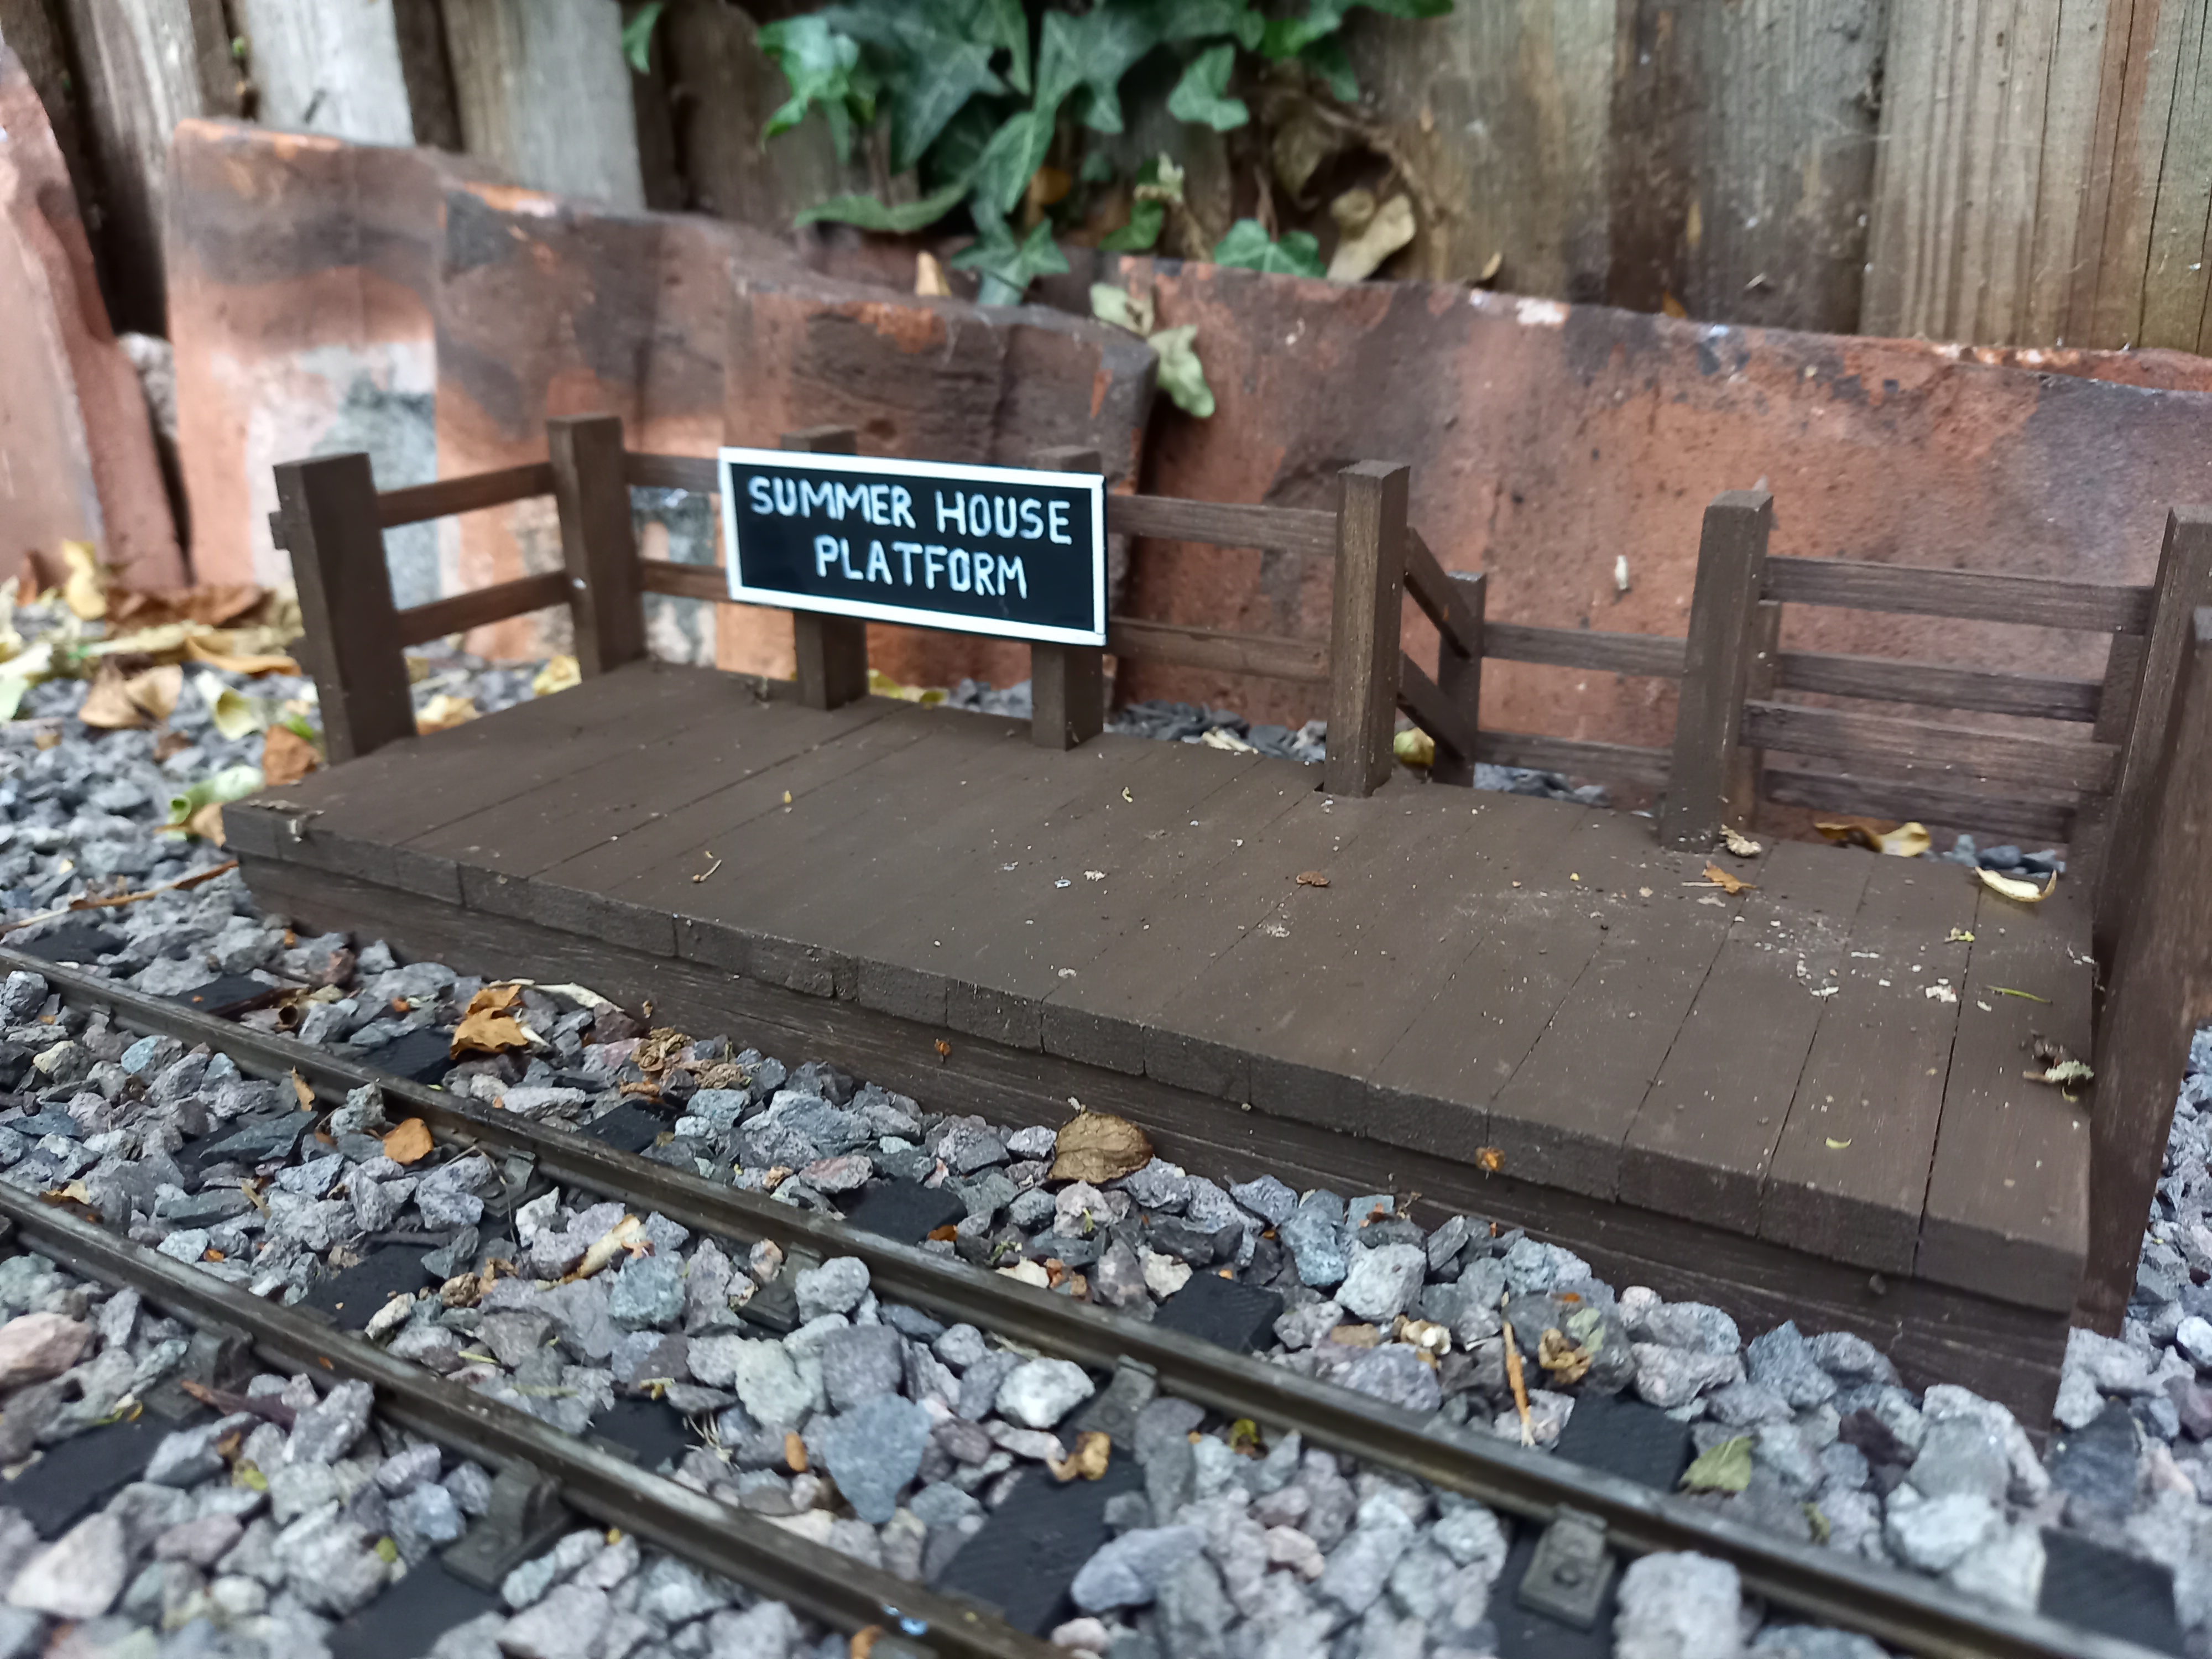
- 187C4920-E5C3-49EF-B08D-0CF3A719AB6D.jpeg (2.47 MiB) Viewed 6624 times
For the record, I still haven’t properly run a train…
Re: N&BLR Ongoing Projects thread
Posted: Sun Jan 09, 2022 8:40 pm
by Seb_N&BLR
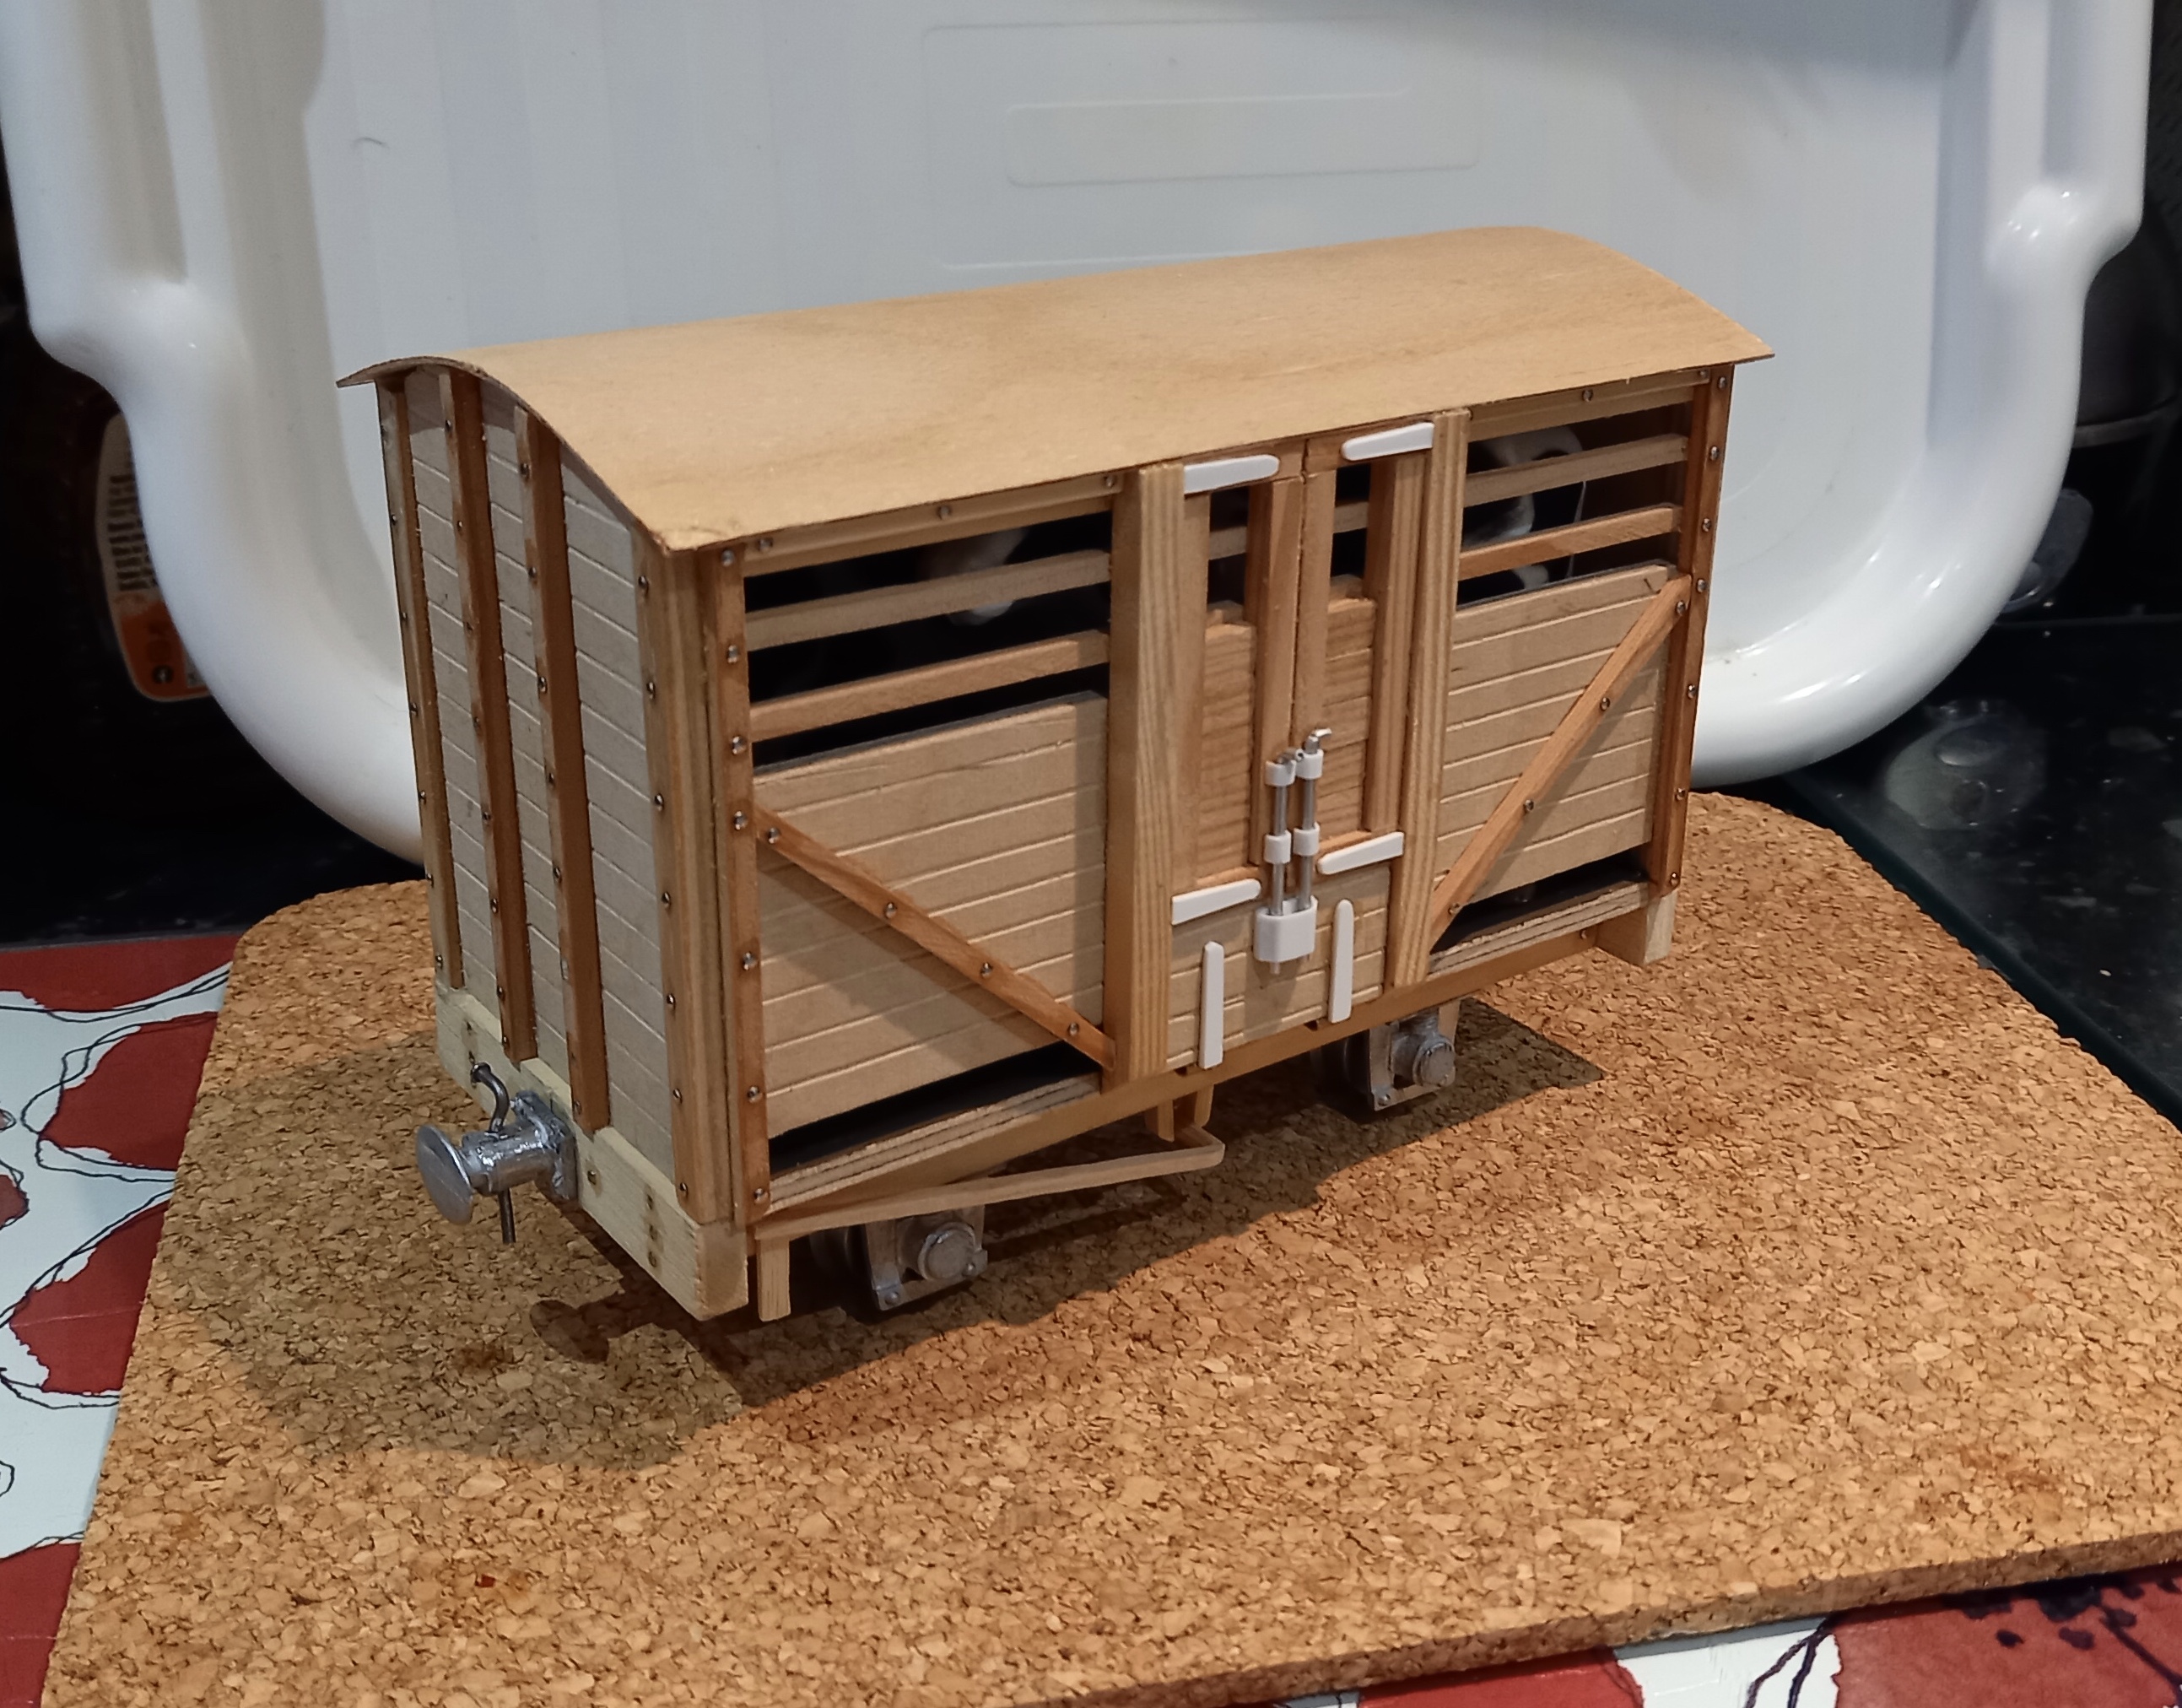
Other than painting it, I’ve today finished my ‘Christmas project’ which was to scratch build a cattle wagon. The friesian residents are a pair of 1:25 Bachmann cows, all the way from Las Vegas courtesy of eBay

the third one didn’t fit but it came with a plastic milking machine (complete with slightly concerning anatomically correct attachment

) so I’ll use both for scenery at a later date.
- AD93E578-5977-4B2B-93A0-D8440C6D8CD9.jpeg (1.33 MiB) Viewed 6269 times