Page 1 of 1
freelance carriage build
Posted: Wed Jan 27, 2021 12:39 pm
by georgesheppard
My latest project to while away the hours has been to build a freelance victorian guards carriage kit from Jeremy Irwin.
Having only built IP engineering kits previously I was blown away by the quality and contents of this kit. Other than glazing (and paint!), everything you need to build a highly detailed model is included.
* all carriage parts laser cut from MDF
* wheels + ball bearings
* lighting kit inc batteries
* 3D printed door handles + roof vents
* buffers
Here are the parts laid out on my kitchen table.
- 1_kit_contents.jpg (5.06 MiB) Viewed 5779 times
Having spent some time watching the build instructions video provided by Jeremy, I decided to start on the interior. Rather than paint the interior, I decided to try a wood stain + MDF sealer + lacquer approach, which I think has worked quite well. The floor was sprayed with PlastiKote grey after sealing with MDF sealer.
- 2_stain_interior.jpg (2.8 MiB) Viewed 5779 times
I deviated somewhat from the instructions as I intended to paint the under frame components, guard duckets and overlays separately before final assembly.
Re: freelance carriage build
Posted: Wed Jan 27, 2021 12:50 pm
by georgesheppard
With the interior completed and the main body constructed, I started painting. The roof was assembled and painted as well as the ~ 10 layer sides for the under frame.
First off I covered the windows + roof opening with masking tape from the inside to protect the stained interior. The carriage was then sprayed with grey primer, I've been using Rust-Oleum Surface Primer Grey so far which seems to work well for me. The bottom side was painted with Satin Black spray paint.
- 3_paint_prep.jpg (2.7 MiB) Viewed 5777 times
After some discussion the forum, I changed my plan to do a split cream & blue livery with black overlays to a simpler cream & blue colour scheme.
Cream - Hycote XUK1027 Ford Sierra Beige
Blue - Plastikote Gloss pacific Blue Spray Paint (ral5010)
I learned the hard way that these paints do not like each other's company, having painted the duckets in blue then attempting to overspray cream. The paint reacted and cracked up. I stripped the paint, re-primed and then painted separately. I think i'll try and get paints from the same manufacturer if possible.
The interior lighting was fitted and a quick test, everything looking good so far!
- 4_painted.jpg (2.62 MiB) Viewed 5777 times
Re: freelance carriage build
Posted: Wed Jan 27, 2021 12:56 pm
by georgesheppard
Decals from IP engineering were applied followed by a coat of semi gloss lacquer. Steps and hand rails were glued into position, as well as fitting the under frame and wheels. I splashed out on some brass handles from swift sixteen for the exterior. For the interior I used the supplied 3D printed parts. For simplicity I used a single run of 1mm perspex for glazing. Given I had made some effort to present a well finished interior, I tried to mask the perspex with some balsa cut into strips, stained with wood stain and then lacquered. The finish could probably be tidier but at least it covers most of the perspex from the interior.
- 5_finished.jpg (2.15 MiB) Viewed 5776 times
The spray paint job isn't perfect but for my fourth carriage build I'm pretty pleased overall. I picked up some new tricks after watching Jeremy's build videos so hoping to continue to improve on my skills for the next build. I have two more kits from Jeremy to build next, both 3 compartment victorian carriages.
- IMG_0078.jpeg (2.38 MiB) Viewed 5776 times
Re: freelance carriage build
Posted: Wed Jan 27, 2021 1:40 pm
by philipy
That is avery nice build, well done. Looking forward to seeing the rake,once you've done the others.
Re: freelance carriage build
Posted: Wed Jan 27, 2021 1:42 pm
by Peter Butler
It looks very neat and tidy to me, Jerry is a Forum member so should be watching too!
Re: freelance carriage build
Posted: Wed Jan 27, 2021 2:22 pm
by Jimmyb
As said, a nice build. As for paint, especially spray can paint, at one time car paint was a big no-no, but a lot of car paint is now acrylic. Previously I have had issue with lacquer reacting with paint, and when the model is finished and decals applied that is heart breaking.
Re: freelance carriage build
Posted: Wed Jan 27, 2021 6:58 pm
by Soar Valley Light
That is a smashing job George. It's a lovely model and the quality of the build is impressive. I love the livery by the way

CFLR Andrew
Re: freelance carriage build
Posted: Thu Jan 28, 2021 8:12 am
by FWLR
Love this build, the livery colours are superb. You have done a fantastic job George.

Re: freelance carriage build
Posted: Thu Jan 28, 2021 9:09 am
by ge_rik
What a great thread with a fine looking outcome. It's the sort of thread which I'm sure people will refer back to.
Rik
Re: freelance carriage build
Posted: Fri Jan 29, 2021 10:08 am
by Soar Valley Light
ge_rik wrote: ↑Thu Jan 28, 2021 9:09 am
What a great thread with a fine looking outcome. It's the sort of thread which I'm sure people will refer back to.
Rik
Spot on Rik. I've no doubt I shall be referring back it from time to time in the future.

Just the sort of thing that makes this site such a useful resource.

CFLR Andrew
Re: freelance carriage build
Posted: Tue Feb 16, 2021 9:24 pm
by georgesheppard
I've almost finished the second carriage in the rake. All that's left is some interior tidy ups to cover the perspex windows with some stained balsa wood. Less photos to share on this build.
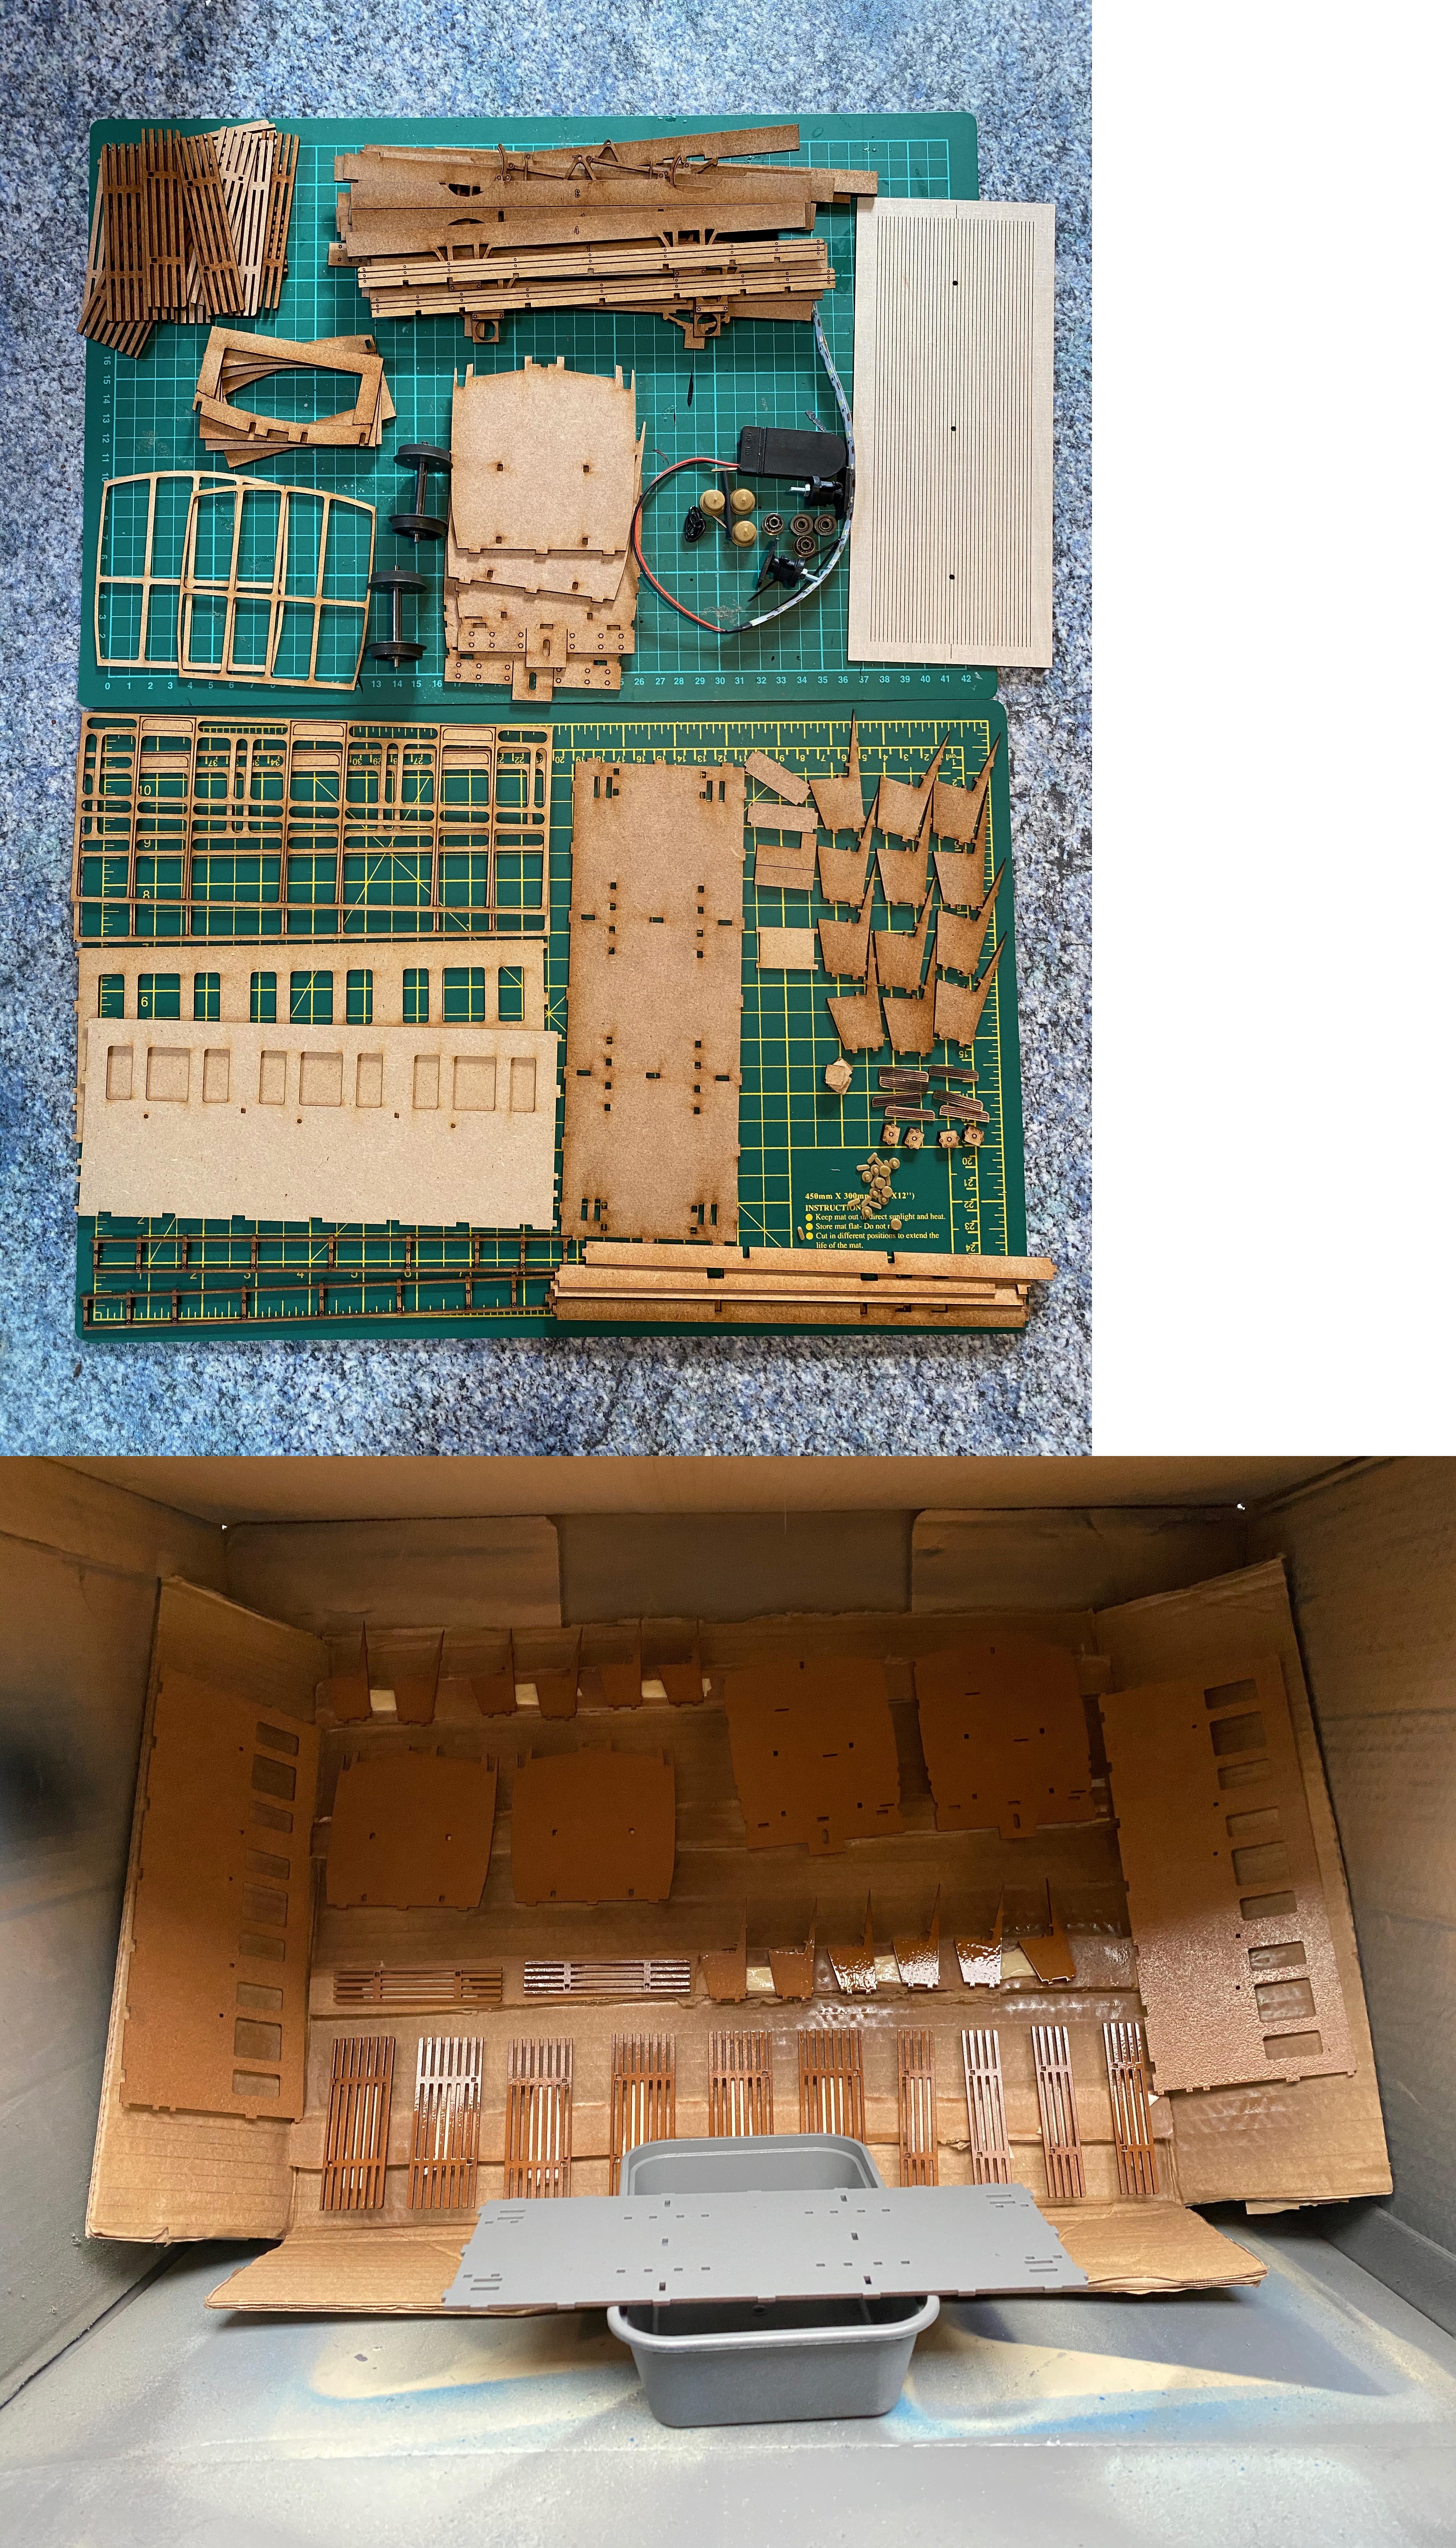
The first photo shows two stages with some bits skipped. The first half is all the kit parts laid out on the kitchen table. The second is during spraying lacquer after staining with antique pine wood stain + sealing with MDF sealer. This was a now seemingly obvious tip I picked up from Jerry's build videos where he uses small pieces of rolled up masking tape to attach pieces to a piece of cardboard. This makes spray painting much easier than my previous method of balancing pieces on various sizes of takeaway boxes.
- Merged_document.jpg (4.1 MiB) Viewed 5436 times
I wanted to share some photos of the roof construction as compared to others I think it's really top notch. It goes together really nicely. The strange looking notches are to fit the supplied LED lighting strip & battery pack.
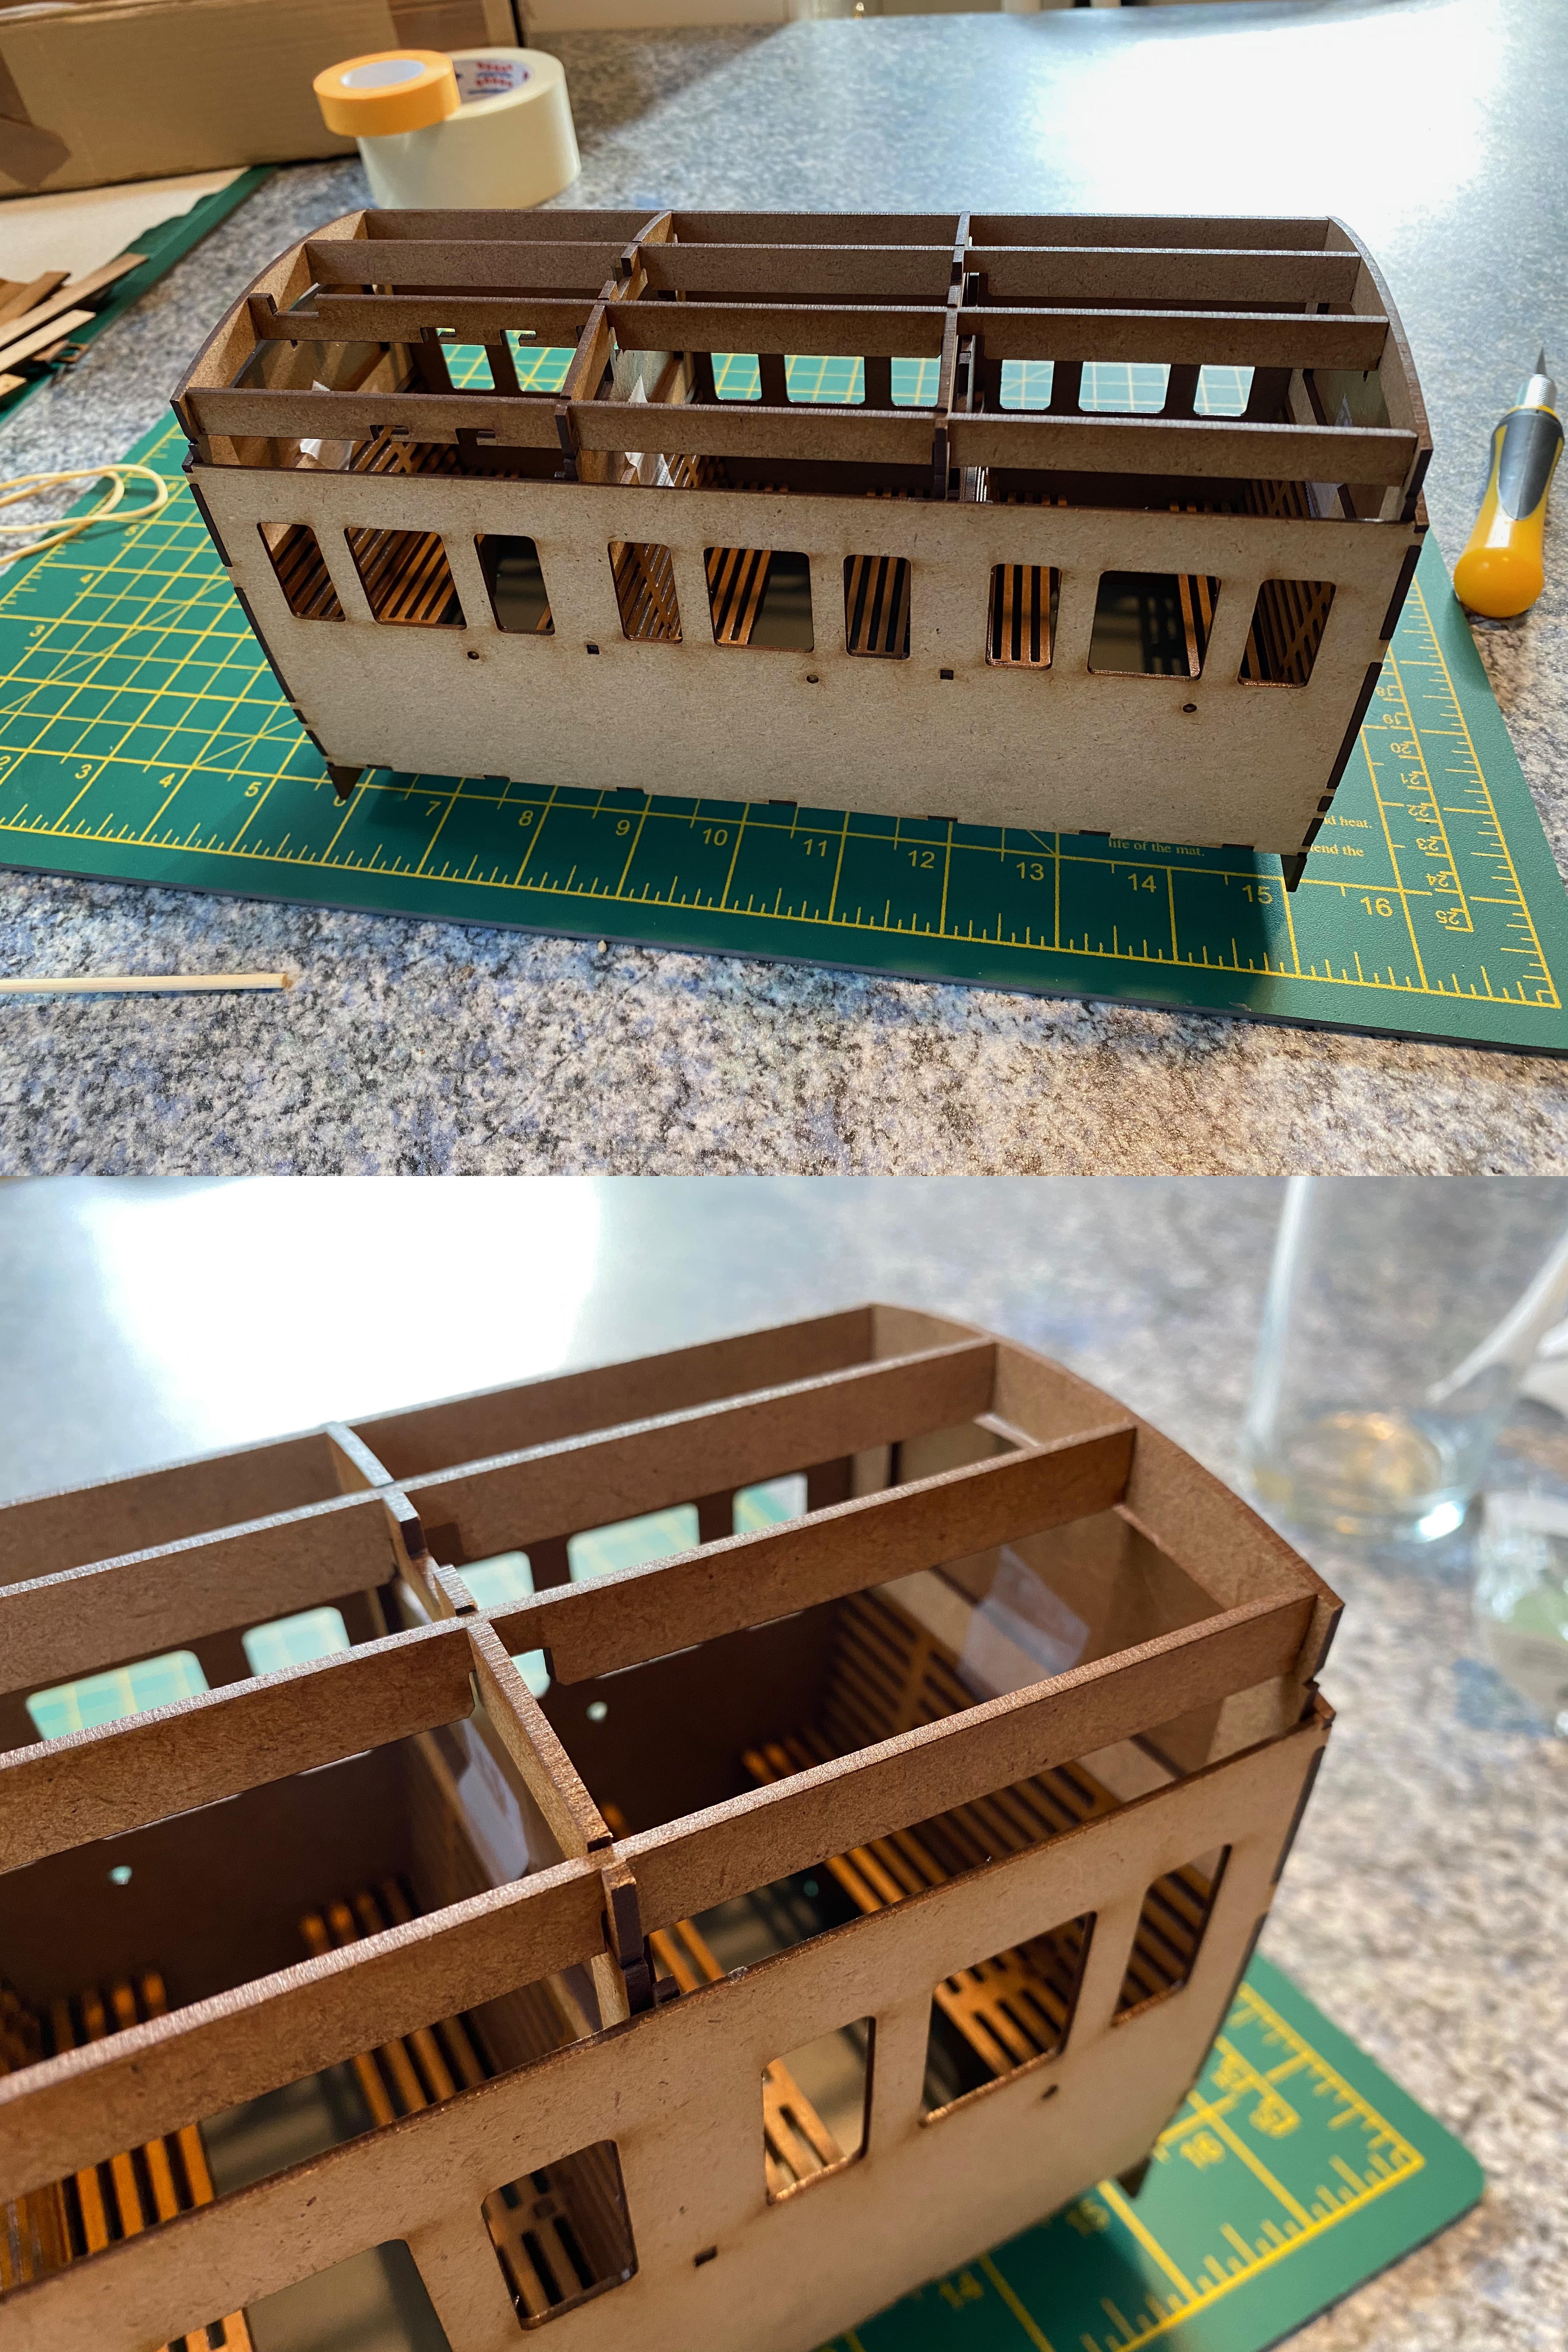
- Merged_document (1).jpg (2.73 MiB) Viewed 5436 times
Re: freelance carriage build
Posted: Tue Feb 16, 2021 9:31 pm
by georgesheppard
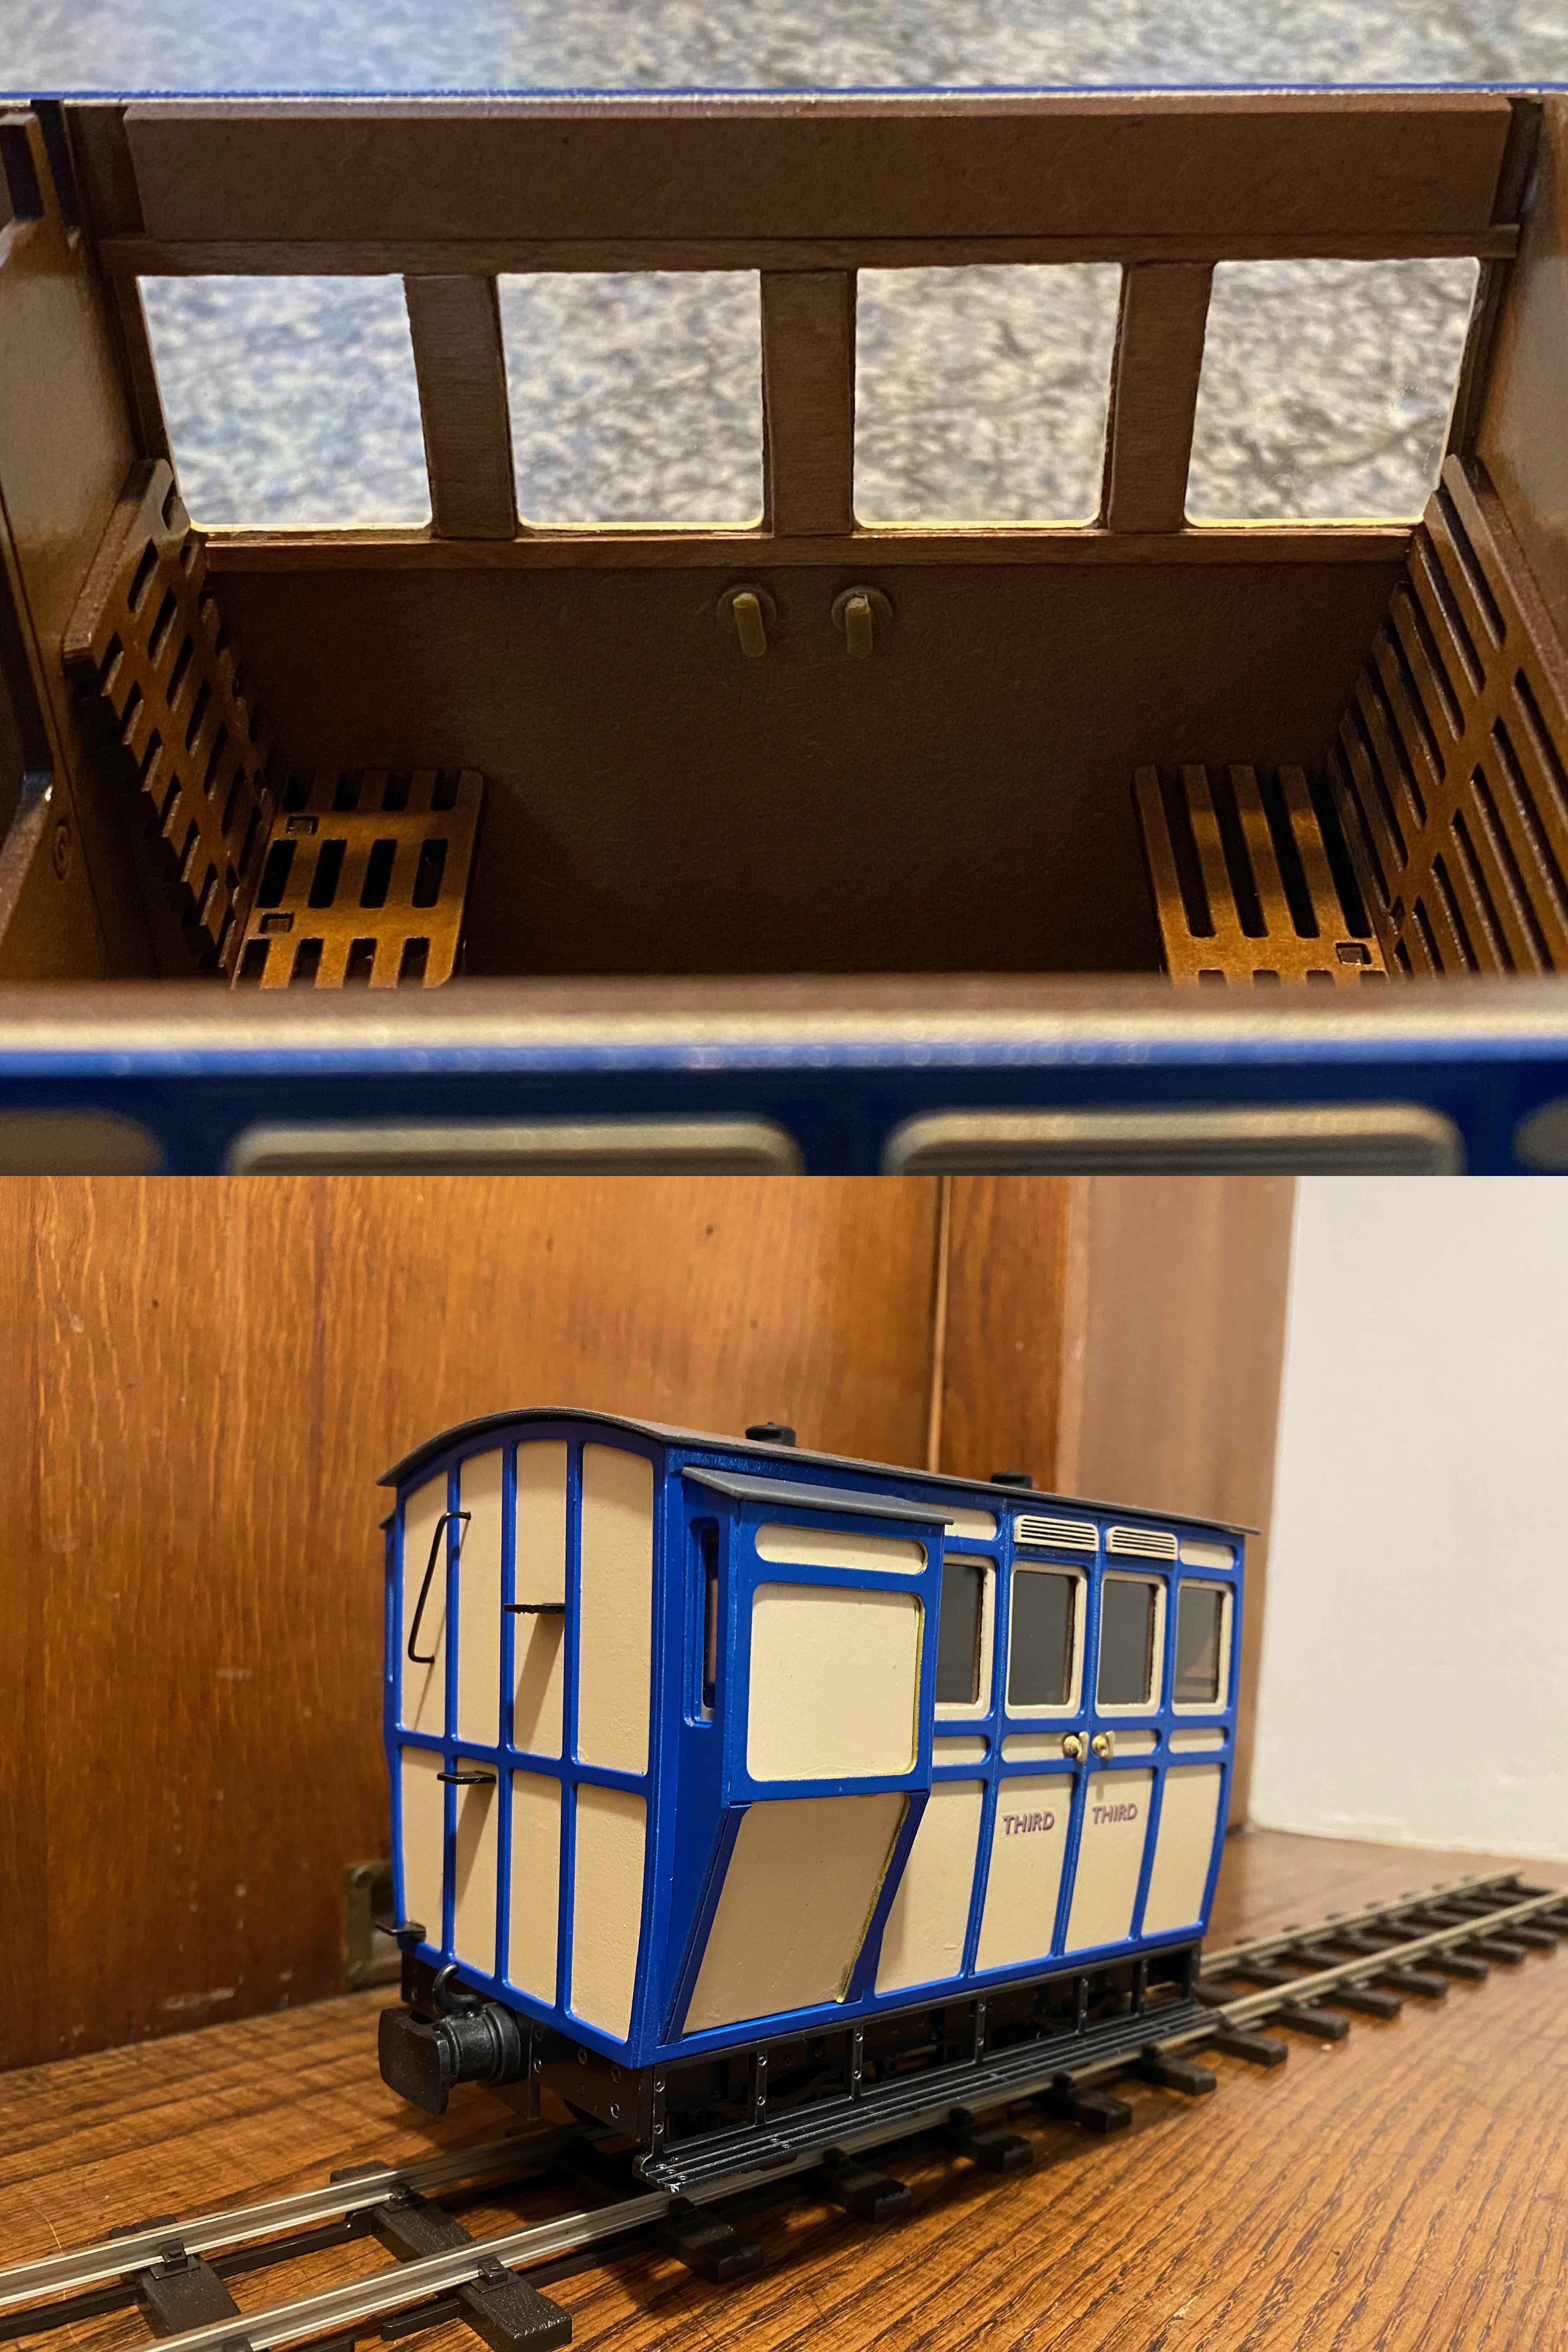
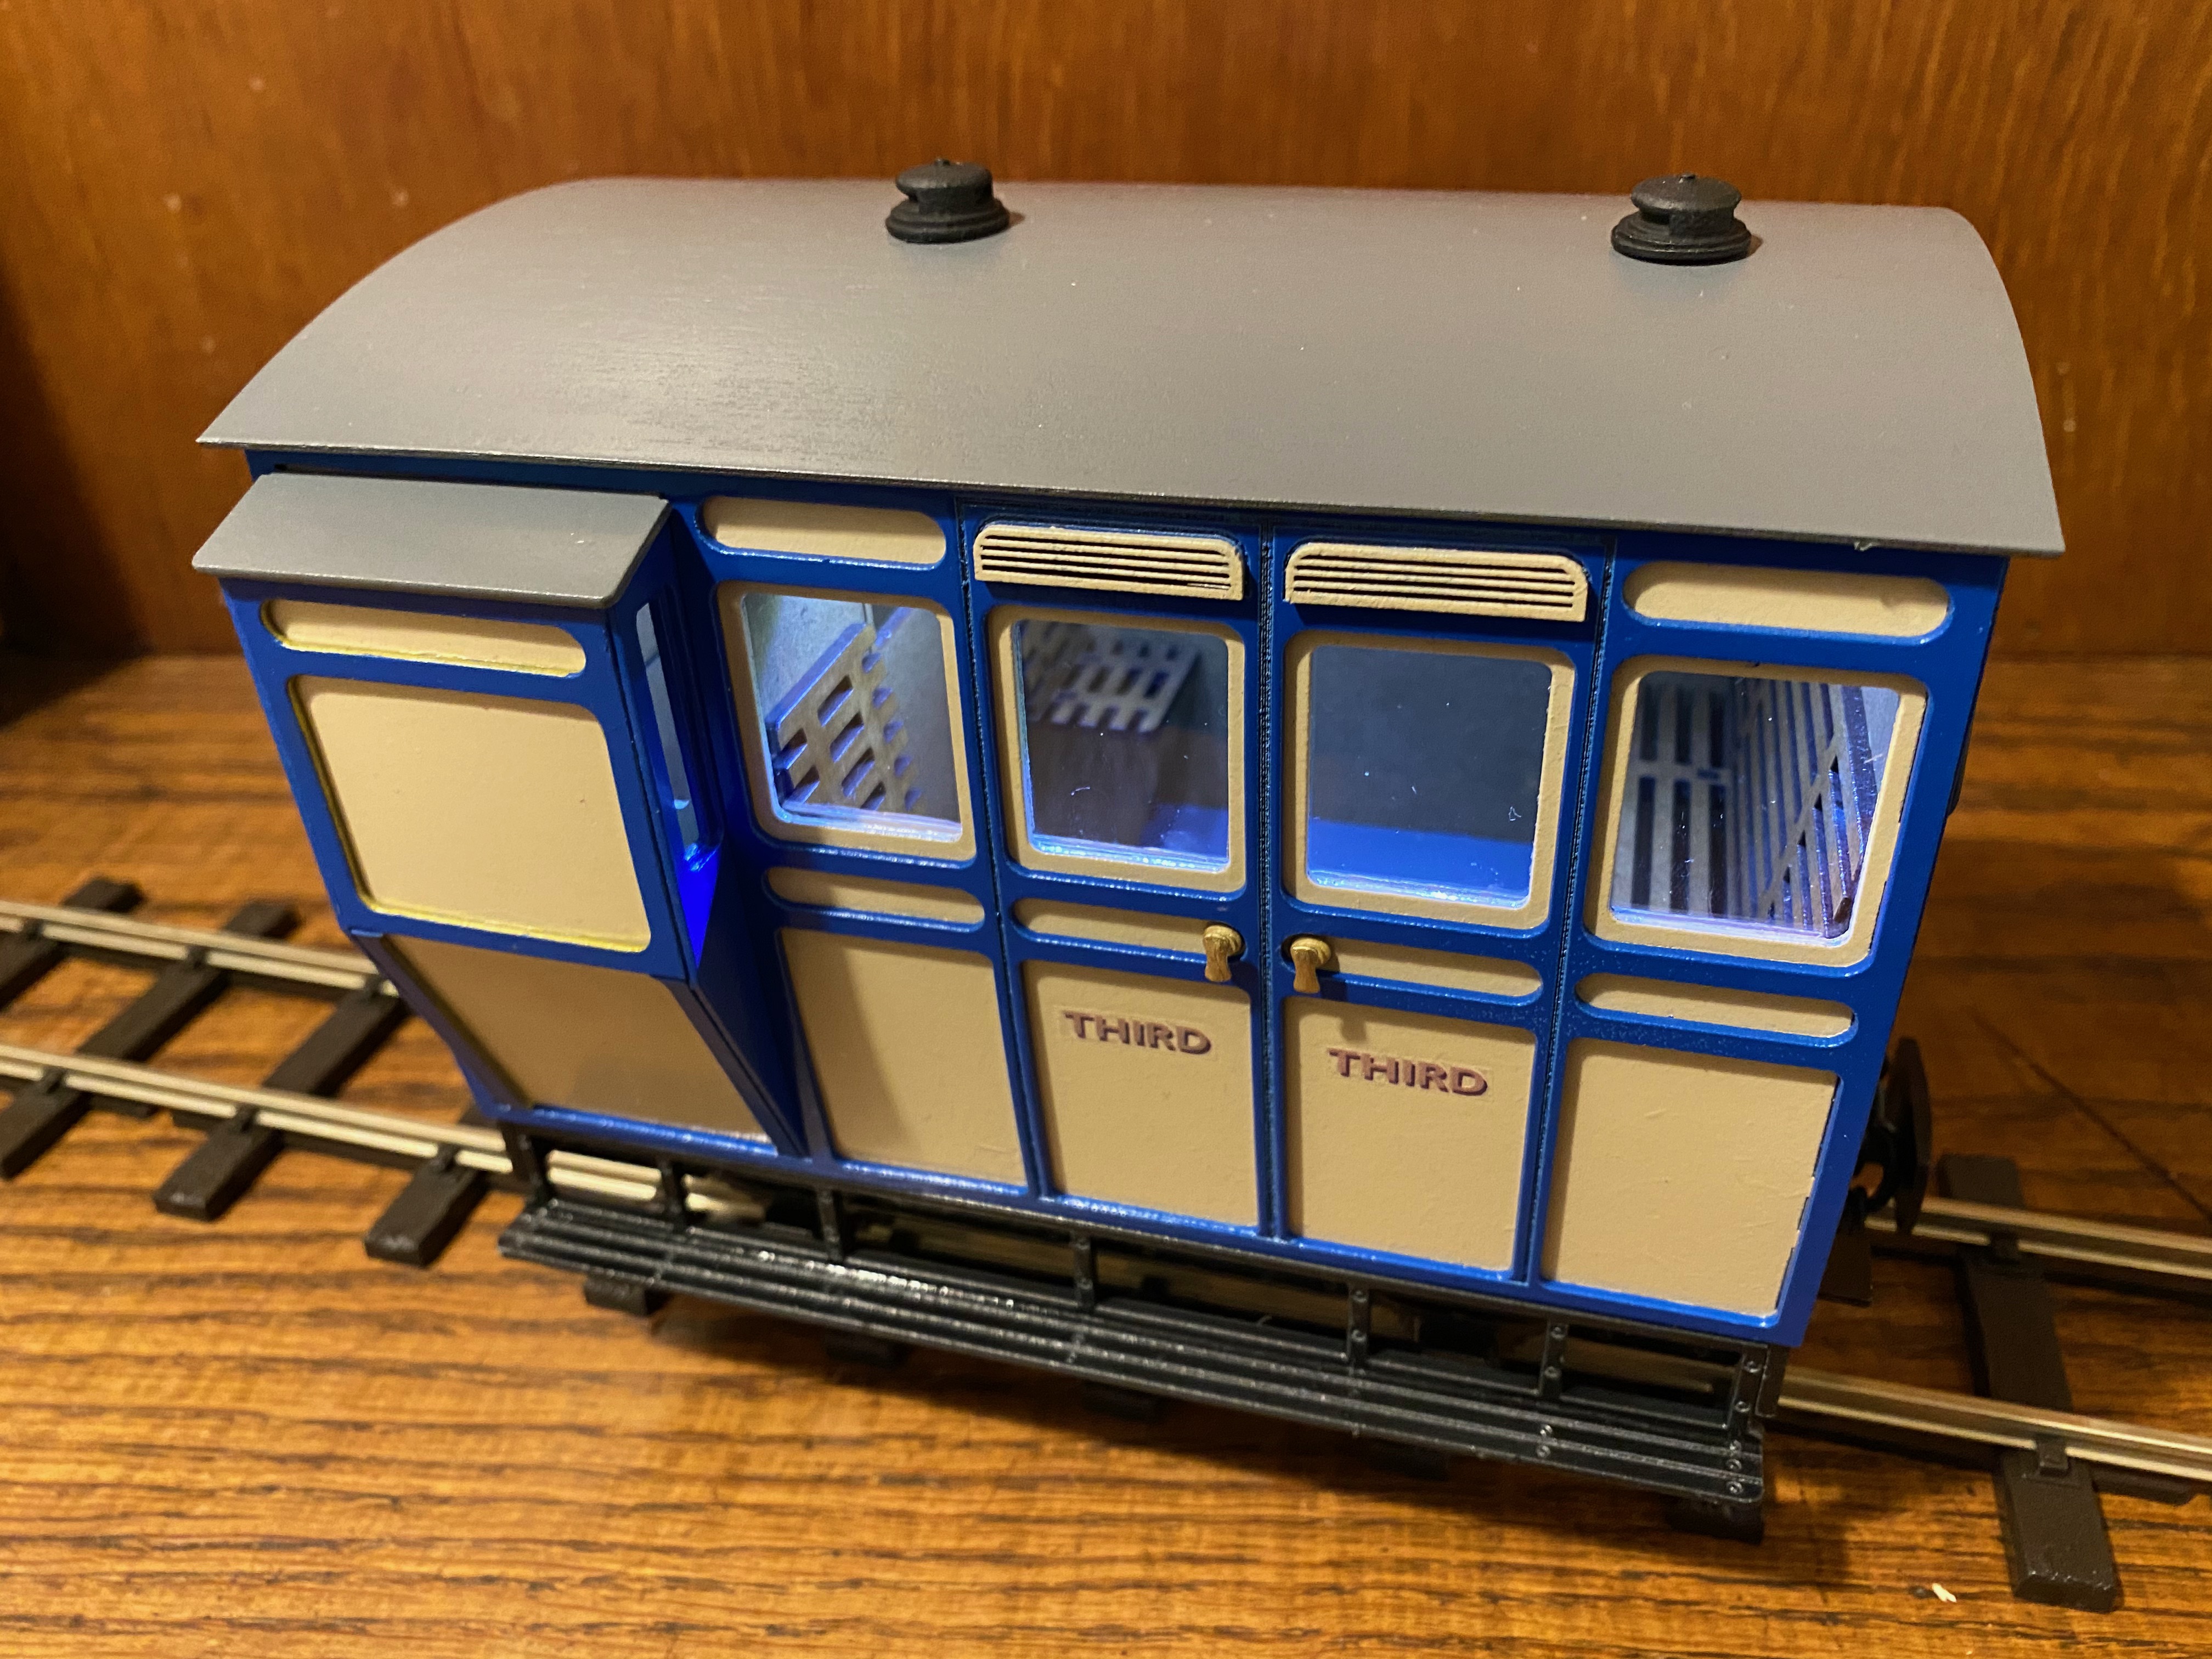
Skipping to the end, here is the completed carriage (bar interior finishing). I decided to try gold lining the inside edges of the overlay which I think adds a little extra to the look. Thanks for the tips earlier in this thread!
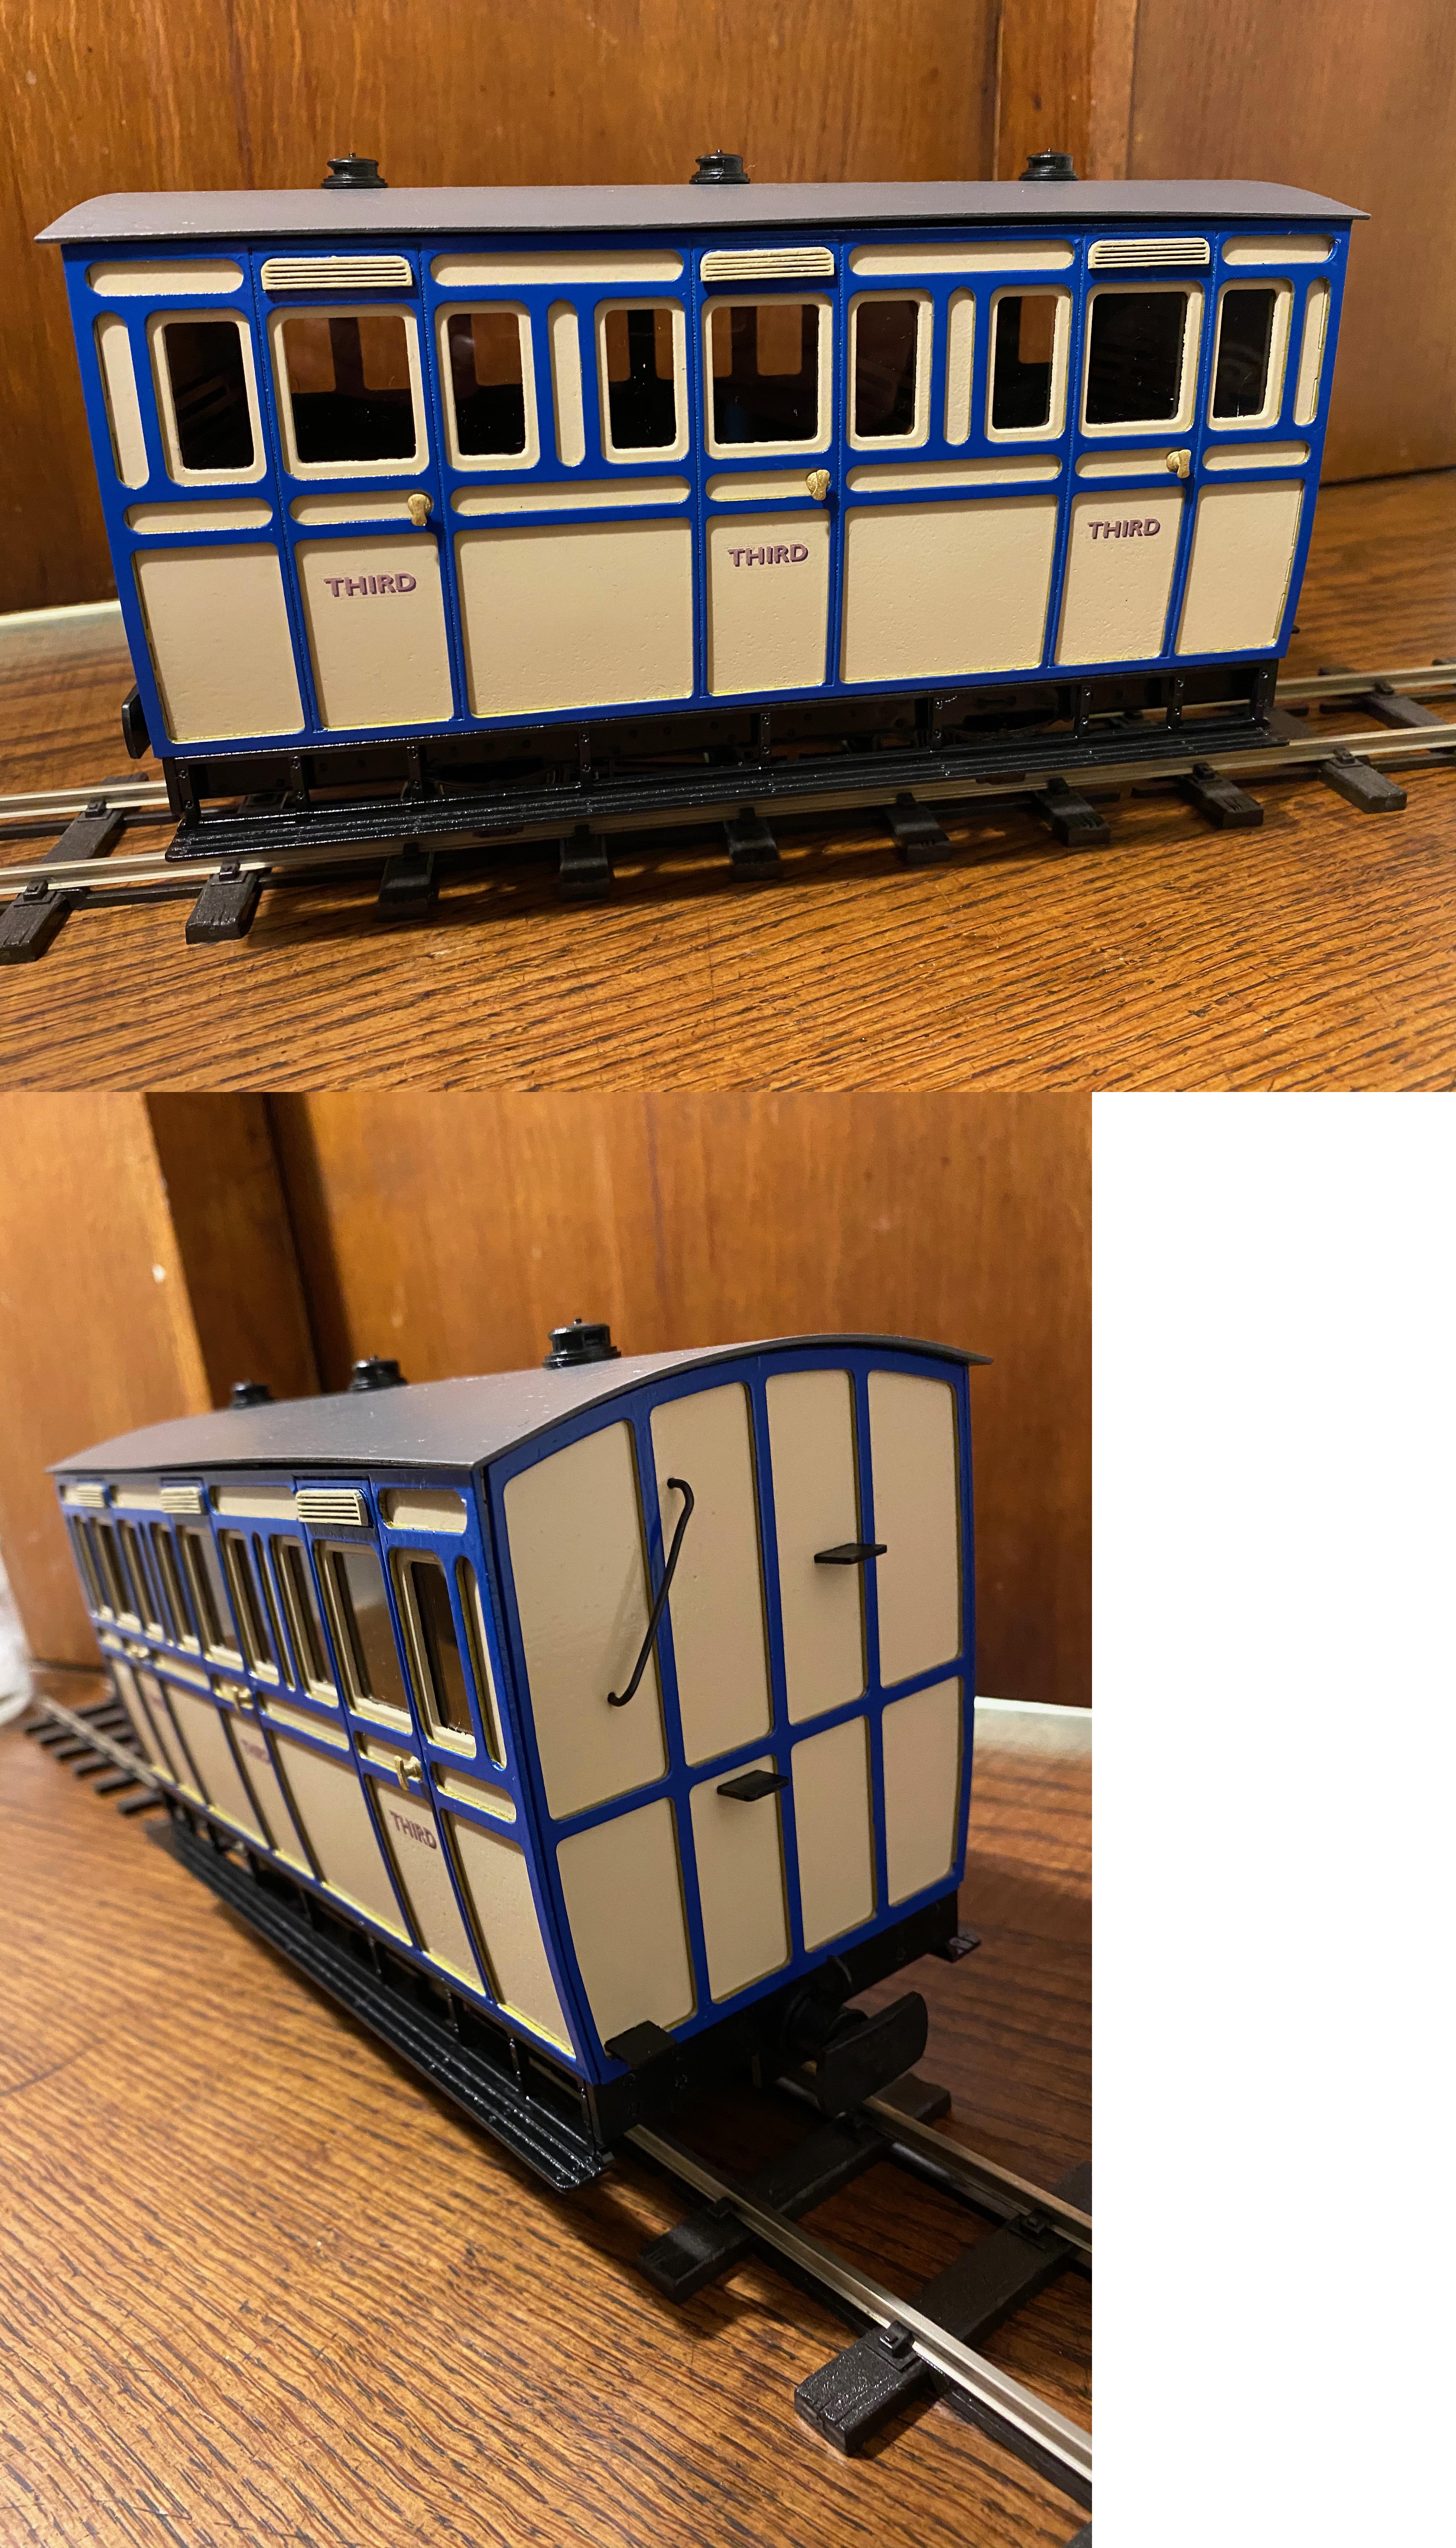
- Merged_document (2).jpg (2.92 MiB) Viewed 5435 times
Here is the two carriages I've completed so far.
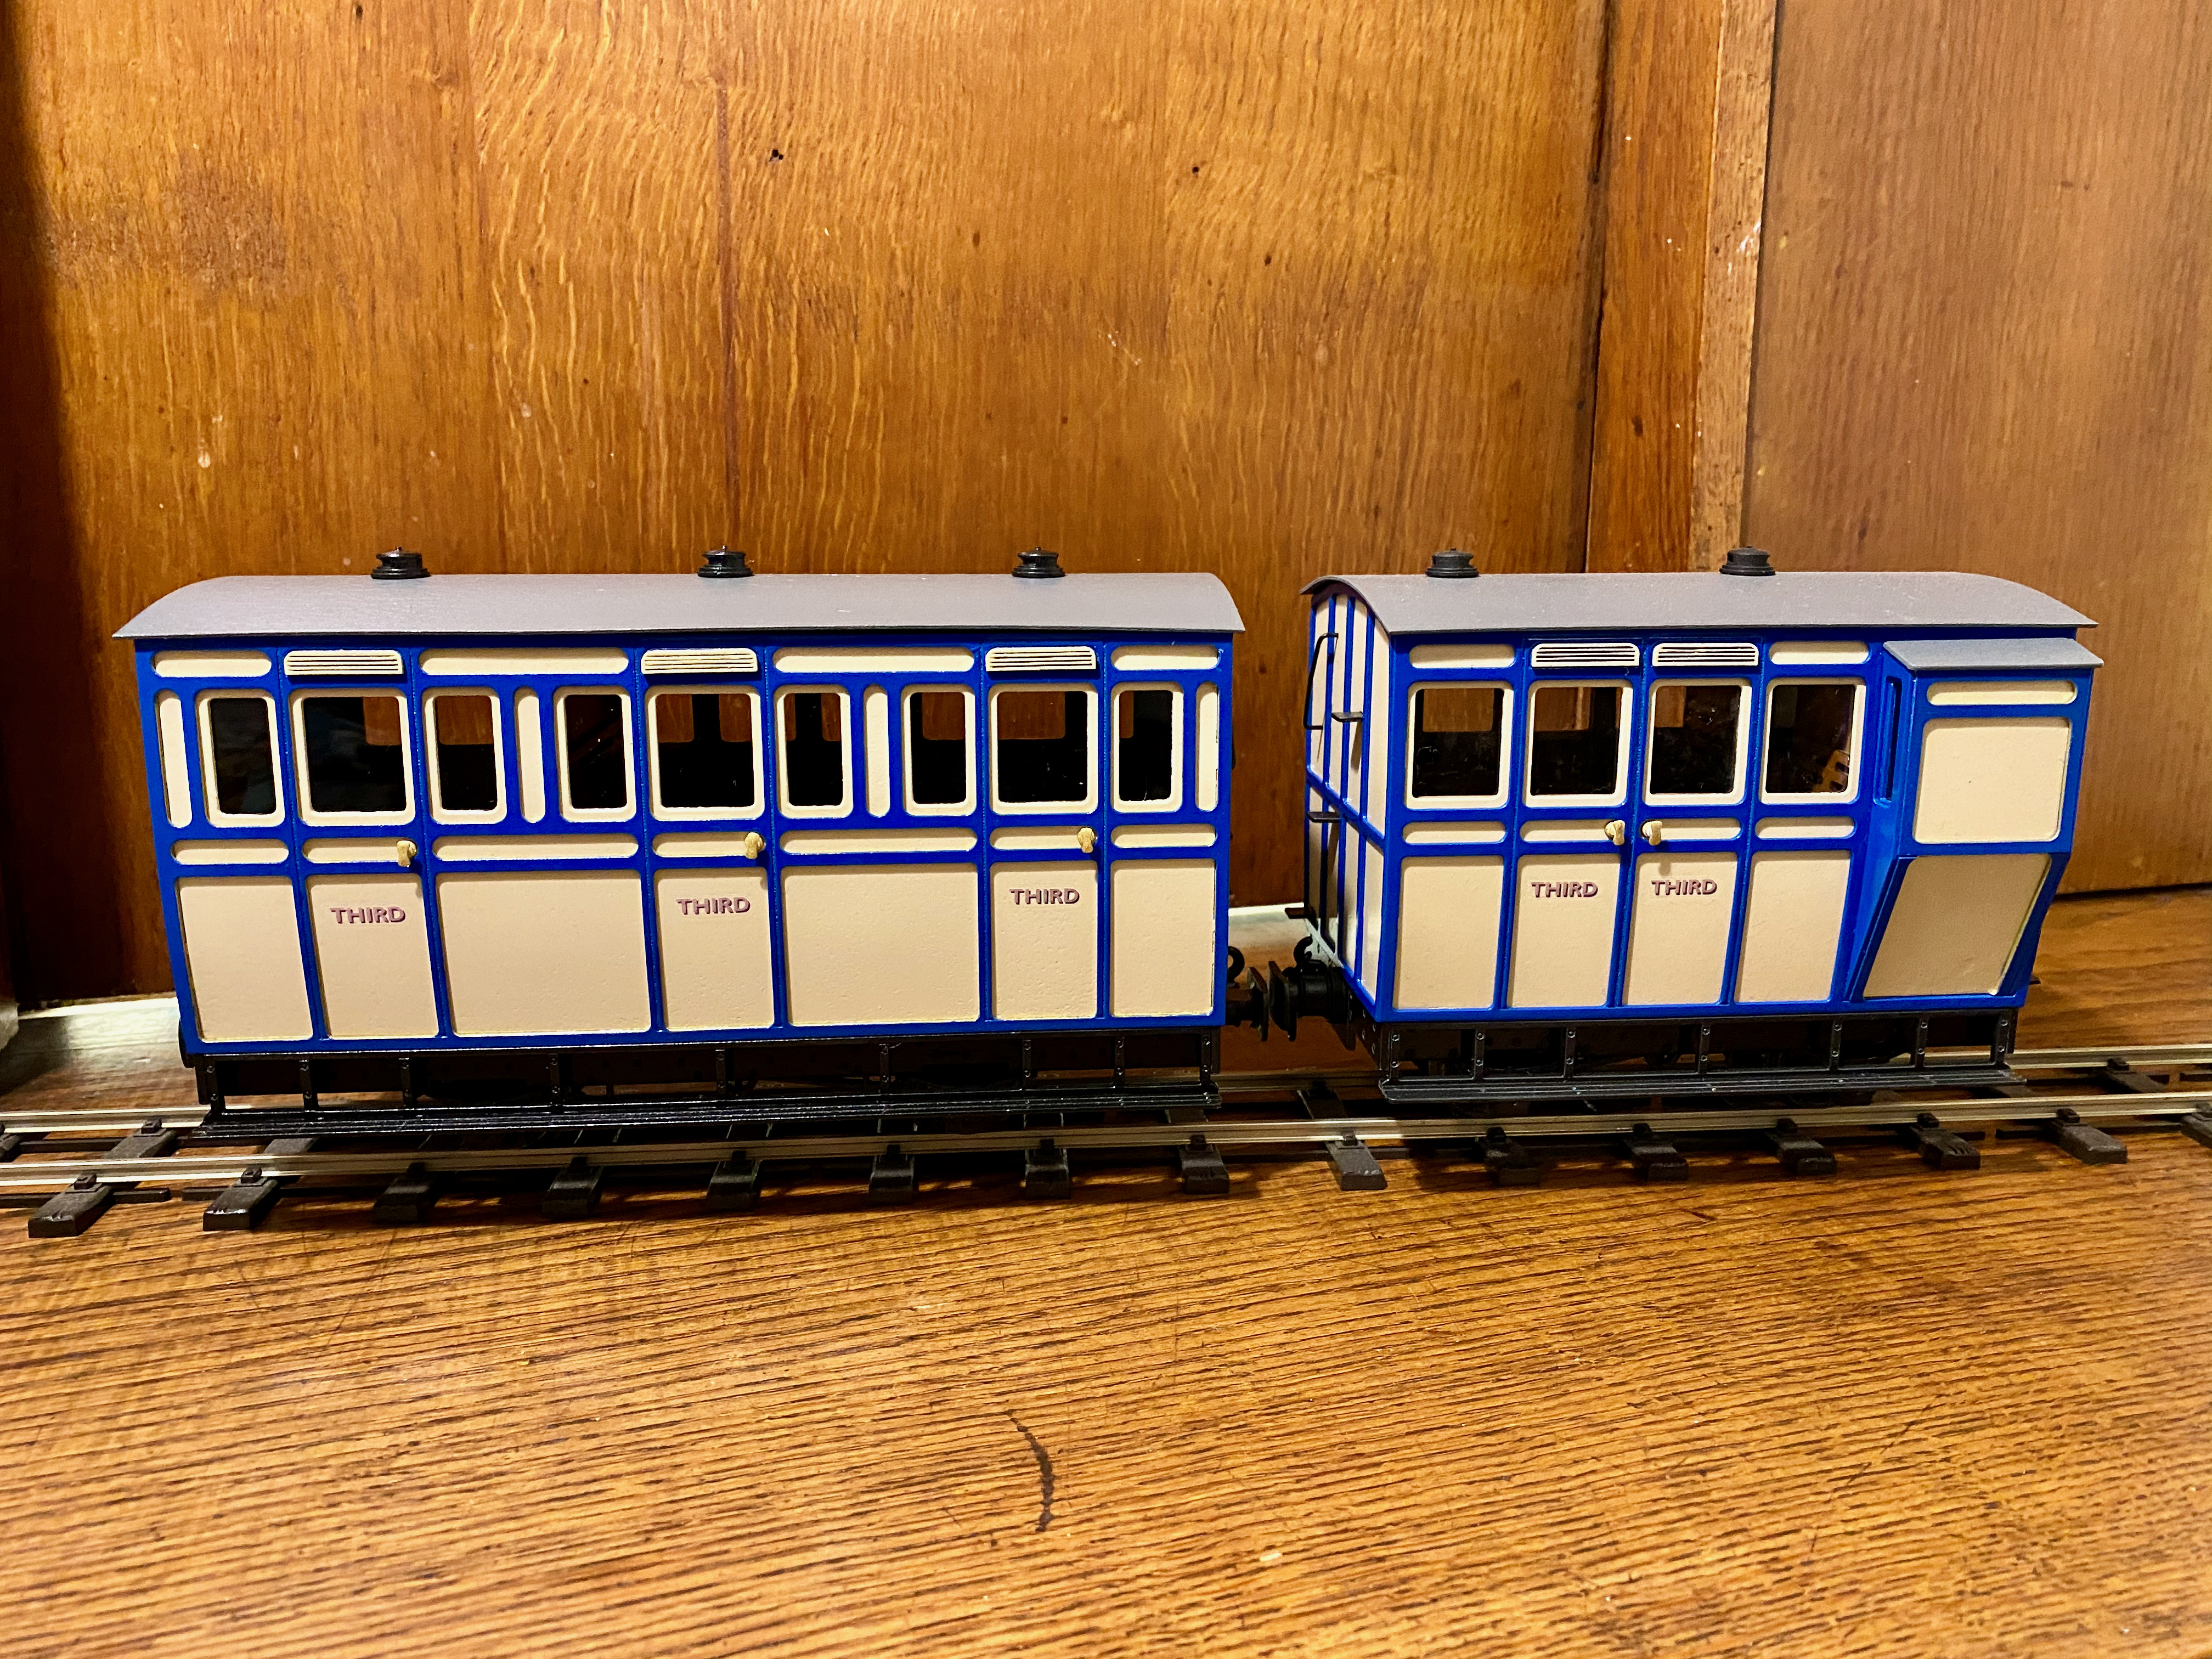
- IMG_0374.jpeg (4.14 MiB) Viewed 5435 times
They look pretty good together in my opinion!
Re: freelance carriage build
Posted: Tue Feb 16, 2021 10:06 pm
by Peter Butler
They do look good together George, you seem to have mastered kit building very quickly, well done.
Re: freelance carriage build
Posted: Wed Feb 17, 2021 7:27 am
by philipy
Very nice. I knew the rake would look good after seeing the first one by itself.
Re: freelance carriage build
Posted: Wed Feb 17, 2021 7:52 am
by ge_rik
Very smart. That colour scheme will look great amongst the foliage in the garden.
Rik
Re: freelance carriage build
Posted: Wed Mar 03, 2021 6:27 am
by big-ted
Agreed with others. That's a lovely pair of carriages!
Re: freelance carriage build
Posted: Thu Mar 18, 2021 8:49 am
by KjellAn
Very nice coaches. The paintjob was excellent.