Page 14 of 18
Re: 3 D Printing 16mm models
Posted: Tue Dec 15, 2020 5:16 pm
by philipy
My version of SU must be different to yours, but I have managed to find Window --> Default Tray --> Soften Edges which I guess is much the same. Never seen it before and never tried it so can't help with your query I'm afraid. I did a quick google search and half watched one Youtube but it seems to be more to do with hiding geometry lines i.e the lines on a cylinder, than the triangulation on a figure. i.e if the facest on the lgs of the driver have hard edge lines, you can 'lose' them, but I don't think it would actually lose the angles between the facets, which is what we are seeing.
My guess, and I stress guess, is that the only way to deal with it is to make the figure huge ( lifesize?) and then scale it down so that the facets become vanishingly small and blend into each other.
Re: 3 D Printing 16mm models
Posted: Tue Dec 15, 2020 9:17 pm
by metalmuncher
As far as I know the "soften edges" just alters the shading so that instead of sharp edges you get a smooth transition between faces. Blender has a similar thing, enabled by right clicking on an object and selecting "shade smooth." These only affect the shading, not the actual triangles that make up the model, so the stl file will still be faceted. If you want to smooth out the facets on the model, one way is to add a subdivision surface modifier to the object in blender. This adds extra triangles and tries to smooth out sharp edges. Works pretty well on an organic model like a driver and clothes, but will turn a hard surface model e.g. a cube into a sphere if you're not careful. Also note it will massively increase the triangle count and therefore load on your computer while operating on the model or slicing, so probably best to do this after posing the model.
Re: 3 D Printing 16mm models
Posted: Wed Dec 16, 2020 5:42 am
by philipy
Thanks, that more or less confirms what I was trying to suggest about the softening. Your Blender suggestion sounds interesting, I'll have to look at that when I get a chance.
Re: 3 D Printing 16mm models
Posted: Wed Dec 16, 2020 7:34 am
by FWLR
Trevor Thompson wrote: ↑Tue Dec 15, 2020 11:15 am
Oh No - more difficult painting to do!
...................


.......
Re: 3 D Printing 16mm models
Posted: Wed Dec 16, 2020 2:47 pm
by Trevor Thompson
Im giving up on the extra lining on the wheels - I might have been able to do it if the wheels were separate from the carriage - but with it assembled its hopeless.
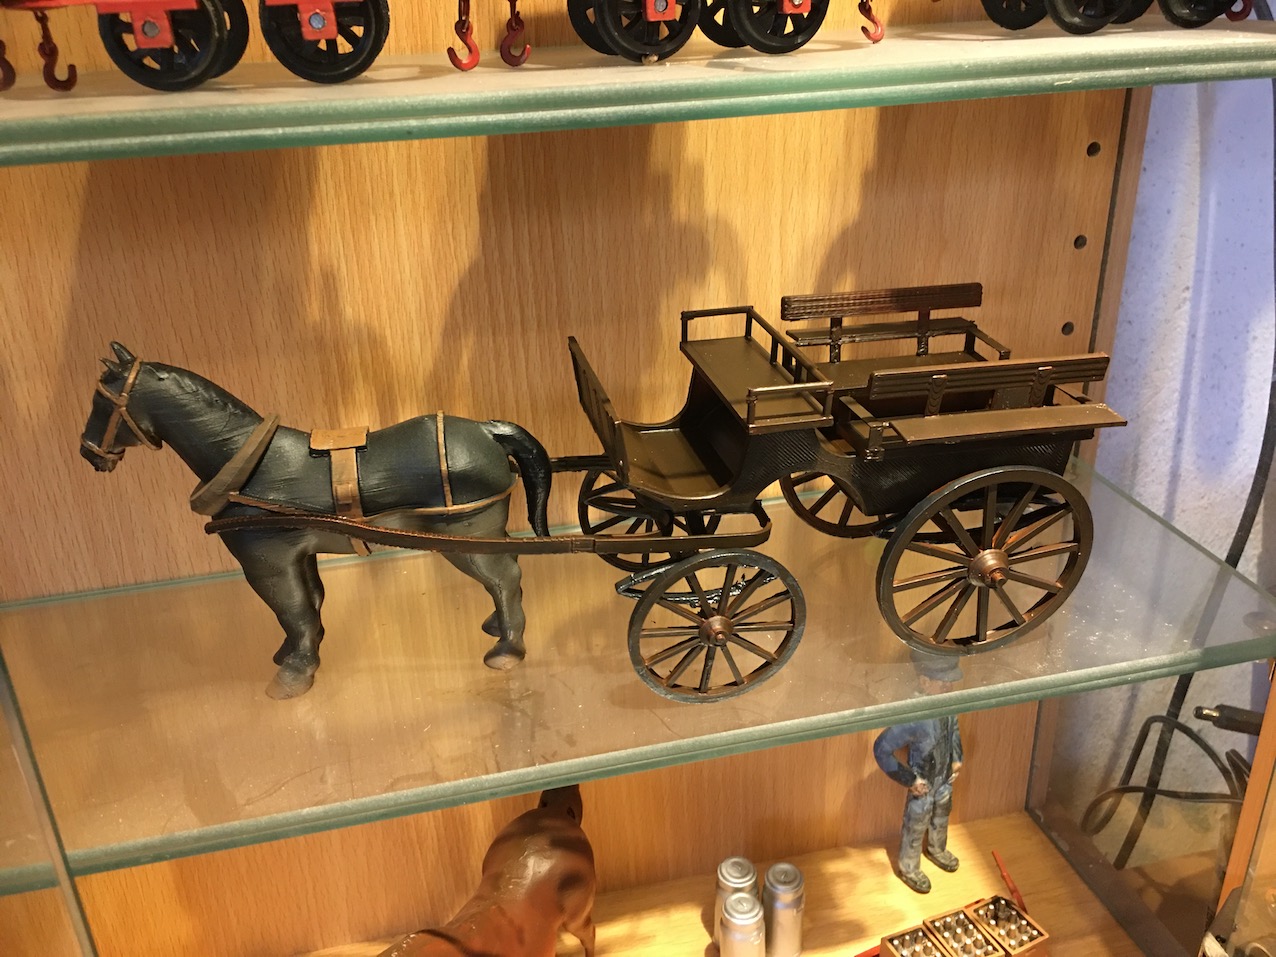
Anyway I attach a photo of the wagonette finished. I am looking forward to assembling all the elements of Tan - Bwlch station in the spring!
Just the goods shed to make.
The wagonette:
- IMG_1161.jpg (321.6 KiB) Viewed 3380 times
I am painting the Dandy wagons - one of which will be a coal wagon - and waiting for stainless rod for the axles. More on that later.
Trevor
Re: 3 D Printing 16mm models
Posted: Wed Dec 16, 2020 3:10 pm
by philipy
That looks magnificent Trevor. To say Well done is not nearly enough!
Re: 3 D Printing 16mm models
Posted: Wed Dec 16, 2020 3:29 pm
by ge_rik
It does indeed look brilliant!!
Rik
Re: 3 D Printing 16mm models
Posted: Wed Dec 16, 2020 4:46 pm
by Jimmyb
Trevor watched this all the way through, the end result is magnificent, well done.
Re: 3 D Printing 16mm models
Posted: Wed Dec 16, 2020 7:51 pm
by -steves-
Absolutely amazing work, I look at it and can't believe it's actually been 3D printed on an FDM printer, gob smacked, I truly am

Re: 3 D Printing 16mm models
Posted: Wed Dec 16, 2020 9:00 pm
by SimonWood
Gorgeous! What an absolutely superb result... the passengers of Tan-y-Bwlch are very lucky!
Re: 3 D Printing 16mm models
Posted: Thu Dec 17, 2020 9:15 am
by FWLR
It looks just so brilliant in the one colour now Trevor....Well done indeed.
And I love your horse also....

Re: 3 D Printing 16mm models
Posted: Fri Dec 18, 2020 9:17 pm
by Trevor Thompson
On to the next Project!
The only major part of Tan-Bwlch which I have yet to create is the Goods shed.
There have been some comments about build area - bear in mind that my printer only handles 150 x 150 x 150 mm.
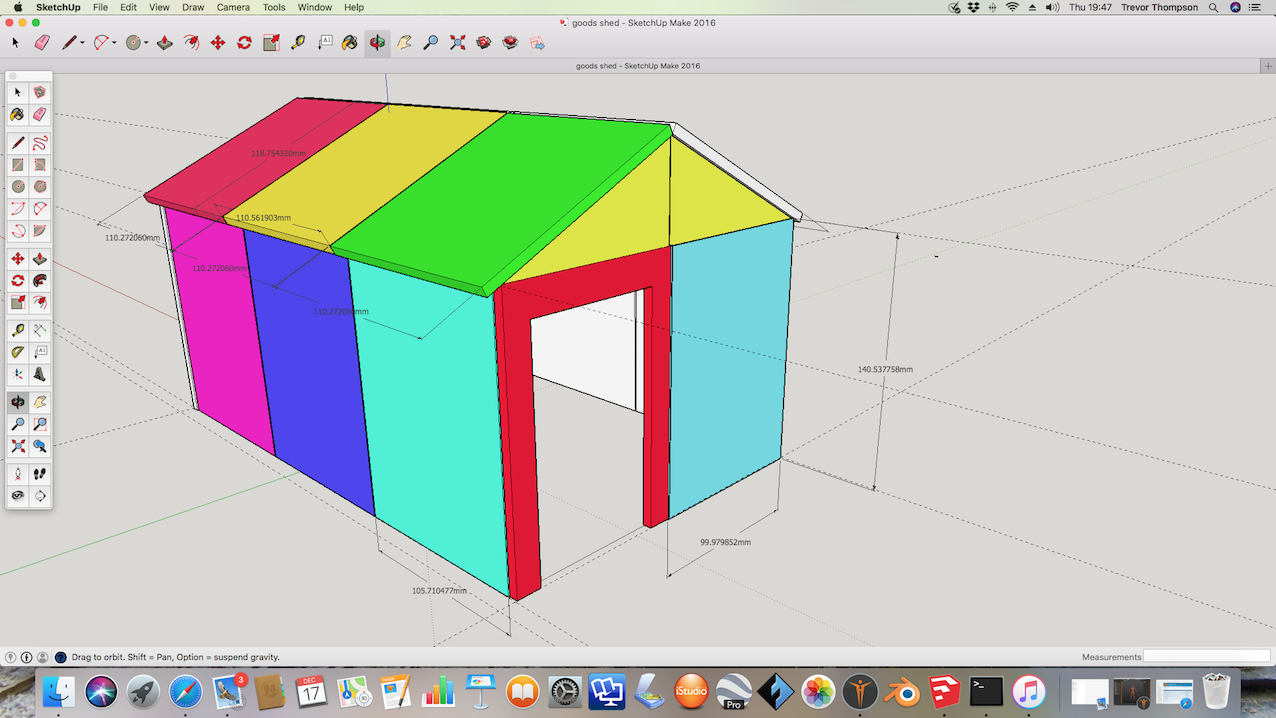
So I thought it might be worth sharing with you the detail of how I am planning to make a building which has a footprint of 320mm by 200 mm.
So a screen shot with a load of different colours:
- Screen Shot 2020-12-17 at 19.47.21.png (458.39 KiB) Viewed 4040 times
Each colour represents a different component. So this will need 16 different components to be printed.
Now you may well ask why bother to make flat plates on a printer when I could just make it from sheets of HIP. My answer starts with the fact that I have the filament in stock, and if I were to make it from sheet I would have to buy that specifically for this job. Next I have to add that I can make it 5 mm or even 10mm thick - and 5 mm which sheet would be expensive - more than the £15 I pay for a reel of filament.
So the sides and front and back will be flat sheets printed at the lowest definition setting and with 25% infil. The roof will be slightly more complex.
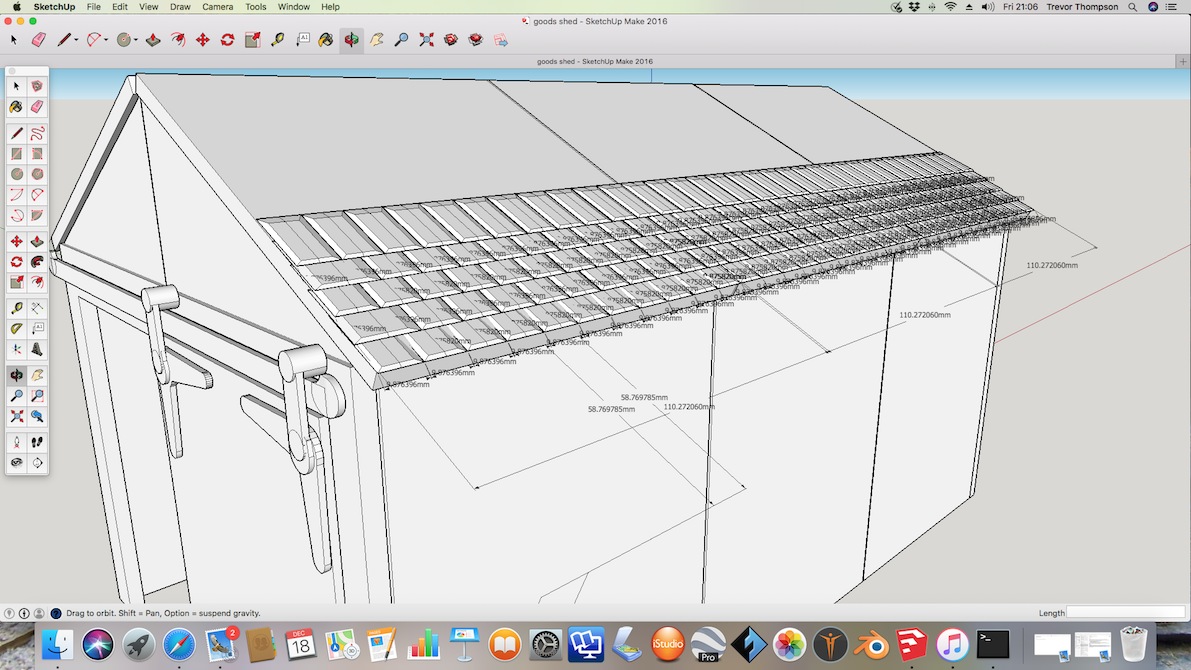
I am trying to make the roof with the slates printed into it. Here is the drawing so far:
- Screen Shot 2020-12-18 at 21.06.48.png (527.41 KiB) Viewed 4040 times
The builders are currently making the new slated roof on the cottage and of course I have been watching them! So the bottom layer of slates on this roof (small ladies by the way) fit with joints on the joints in the three roof sections. Of course the next layer up which has wide ladies at each end (1.5 times the width of small ladies) make a slate straddle the joint in the roof panels. I am in the process of creating half slates for each side of this joint. I am hoping that the joints in every alternate layer will not be obvious.
The alternative would be to print individual slates and stick each one down . Can do that as I have created a stack of individual slates as a wagon load which split into individual slates. That is the reserve option. Its in reserve because I think I can line the slates up better the first way.
Trevor
Re: 3 D Printing 16mm models
Posted: Sat Dec 19, 2020 6:19 am
by FWLR
That is a very interesting build Trevor. Will be watching this very carefully..
Where do you buy your'e filament from please.
Re: 3 D Printing 16mm models
Posted: Sat Dec 19, 2020 11:48 pm
by Trevor Thompson
I get my filament from eBay, and specifically this seller:

- Screen Shot 2020-12-19 at 23.44.24.png (405.62 KiB) Viewed 4001 times
I have found it to be consistent and that all the colours I have bought actually work equally well.
Trevor
Re: 3 D Printing 16mm models
Posted: Sun Dec 20, 2020 6:43 am
by philipy
I generally get mine from Amazon ( only to take advantage of my wife's Prime account with next day delivery) and get whatever is cheapest and/or fastest delivery at the time. I've never noticed any printing differences.
Re: 3 D Printing 16mm models
Posted: Sun Dec 20, 2020 7:51 am
by FWLR
Thanks guys. I can't find your seller though Trevor..
Re: 3 D Printing 16mm models
Posted: Sun Dec 20, 2020 9:55 am
by -steves-
philipy wrote: ↑Sun Dec 20, 2020 6:43 am
I generally get mine from Amazon ( only to take advantage of my wife's Prime account with next day delivery) and get whatever is cheapest and/or fastest delivery at the time. I've never noticed any printing differences.
That is what I do too. Just look for the cheapest on Amazon, don't care what colour or make. All the ones I have had so far print just the same, though saying that the last batch I had to increase the temp by 5 degrees yesterday just to get a better consistent flow.
Re: 3 D Printing 16mm models
Posted: Mon Dec 21, 2020 5:10 pm
by Trevor Thompson
FWLR wrote: ↑Sun Dec 20, 2020 7:51 am
Thanks guys. I can't find your seller though Trevor..
Its called PolyProps Ltd - its still there. I usually find it by looking for ABS printer filament and scrolling down until I see that picture with ABS splashed accross it.
Trevor
Re: 3 D Printing 16mm models
Posted: Tue Dec 22, 2020 7:11 pm
by Trevor Thompson
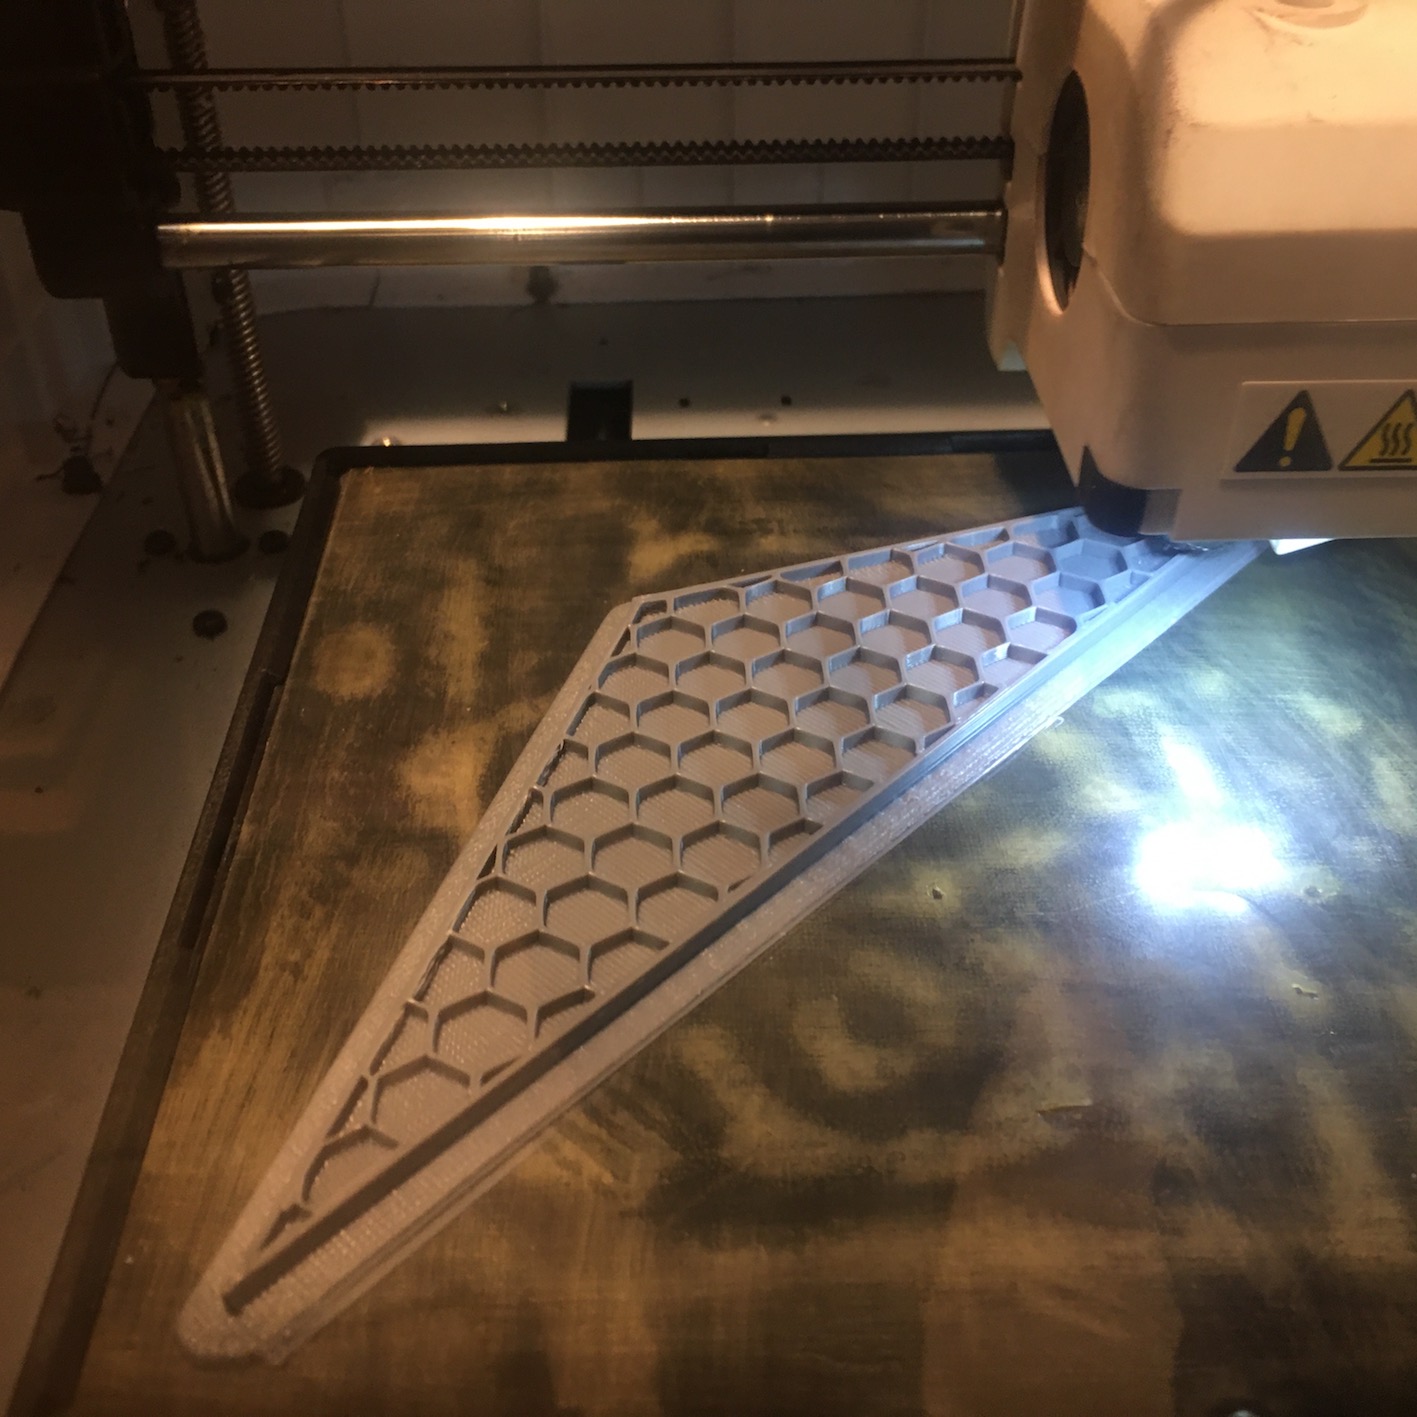
I have been printing the the sides and ends of the building. So far 3 side panels, and all 6 end panels have been printed. Just to show toy how much of these pieces are air - look at this:
- IMG_1176.jpg (325.21 KiB) Viewed 3860 times
That honeycomb is very open 10% infil - so I am not actually using that much filament. You cant do that with sheet material!
The biggest difficulty is minimising distortion as it cools and then while I glue the bits together - flat on a table and using clamps to hold everything down.
So the building as of tonight:
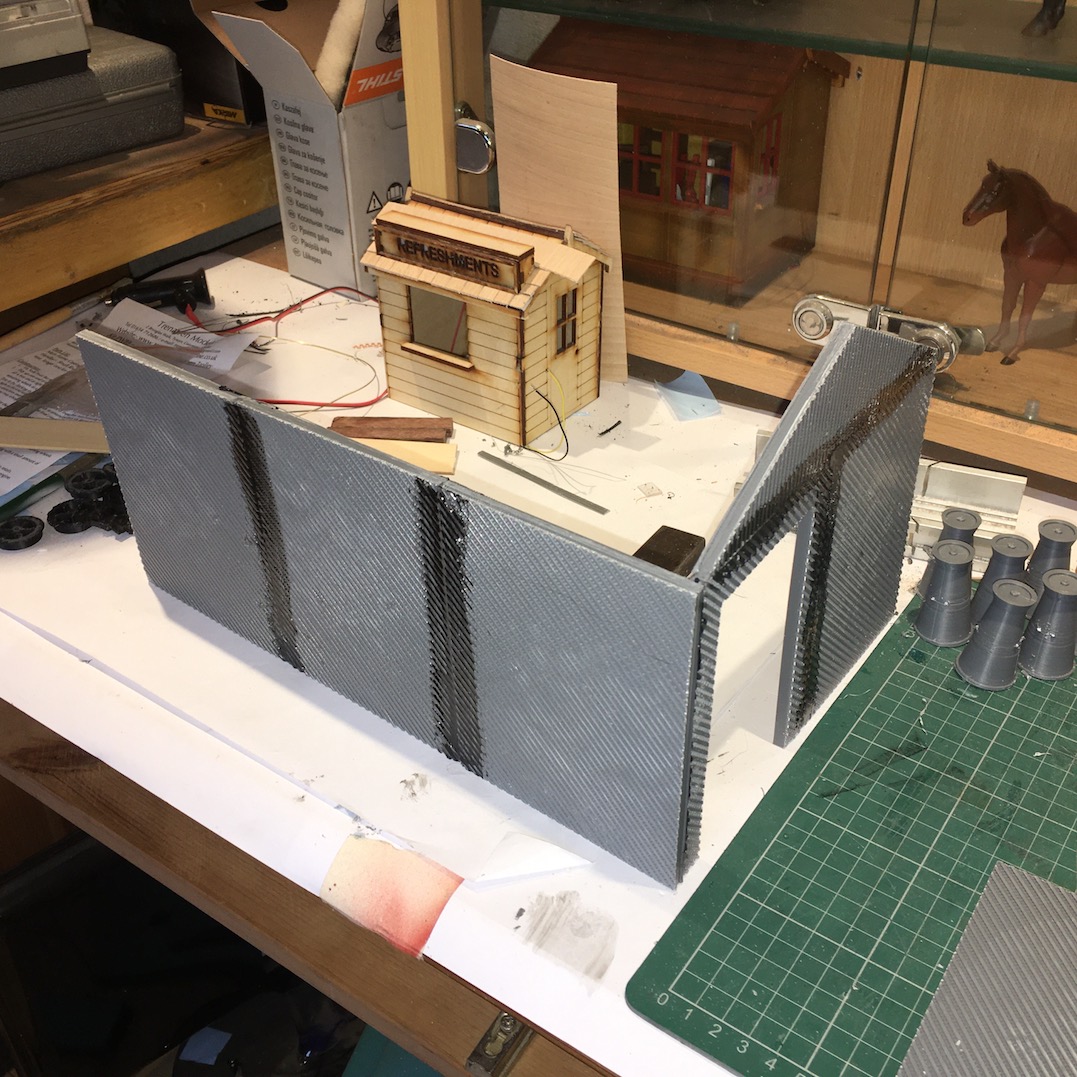
- IMG_1174.jpg (330.58 KiB) Viewed 3860 times
You can see the diagonal lines on the outside. That is the bottom of the raft. It is pretty firmly stuck to the print - so I am leaving it in place. I have just used a knife to remove the edges of the raft. I think that the rough surface will be better for adding the wall tile adhesive to. We will see!
Re: 3 D Printing 16mm models
Posted: Wed Dec 23, 2020 7:33 pm
by Trevor Thompson
I now have all the components for the walls printed. Interestingly about £9 worth of filament and 36 hours printing time. So I think it would be difficult to make it from anything else at a lower cost. While this has been printing I have been working on the live steam Garratt (as you might already have seen) so the printing time isn't really relevant - not at 150 watts anyway.
To try to keep the wall flat when I bonded it together I used clamps:
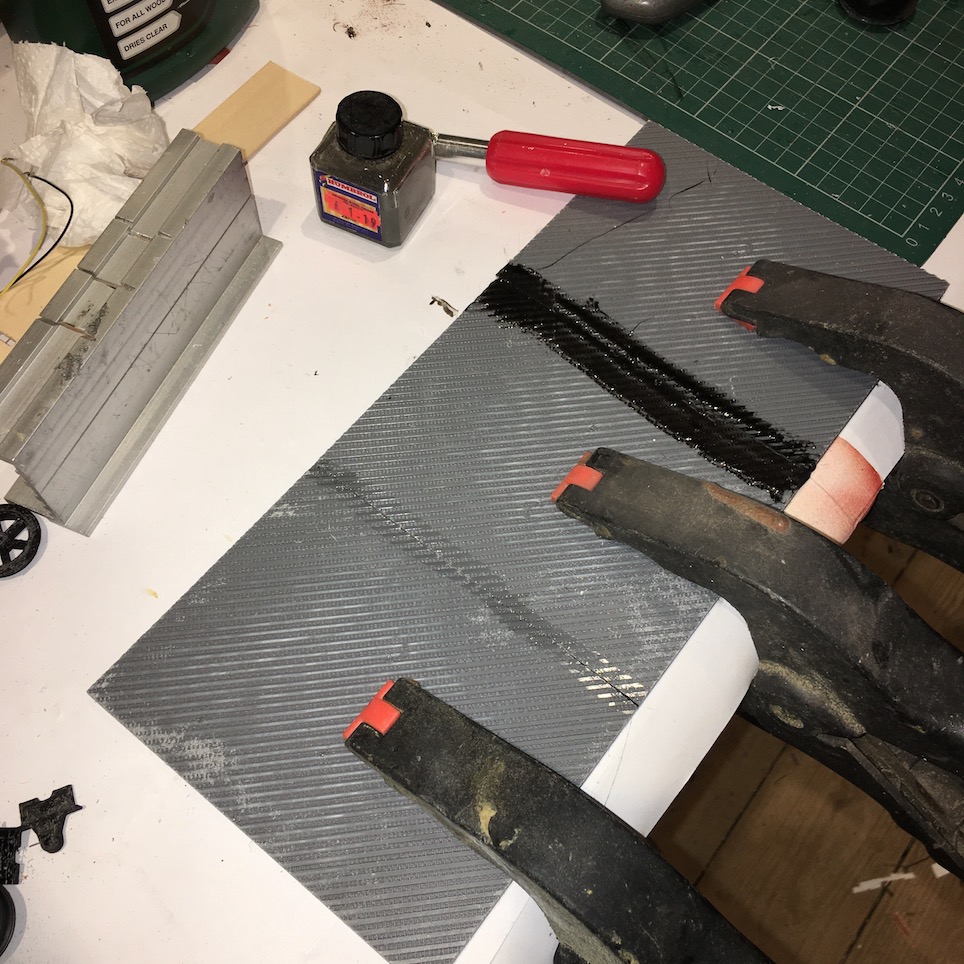
- IMG_1183.jpg (285.42 KiB) Viewed 3832 times
And I now have two ends connected to one side:
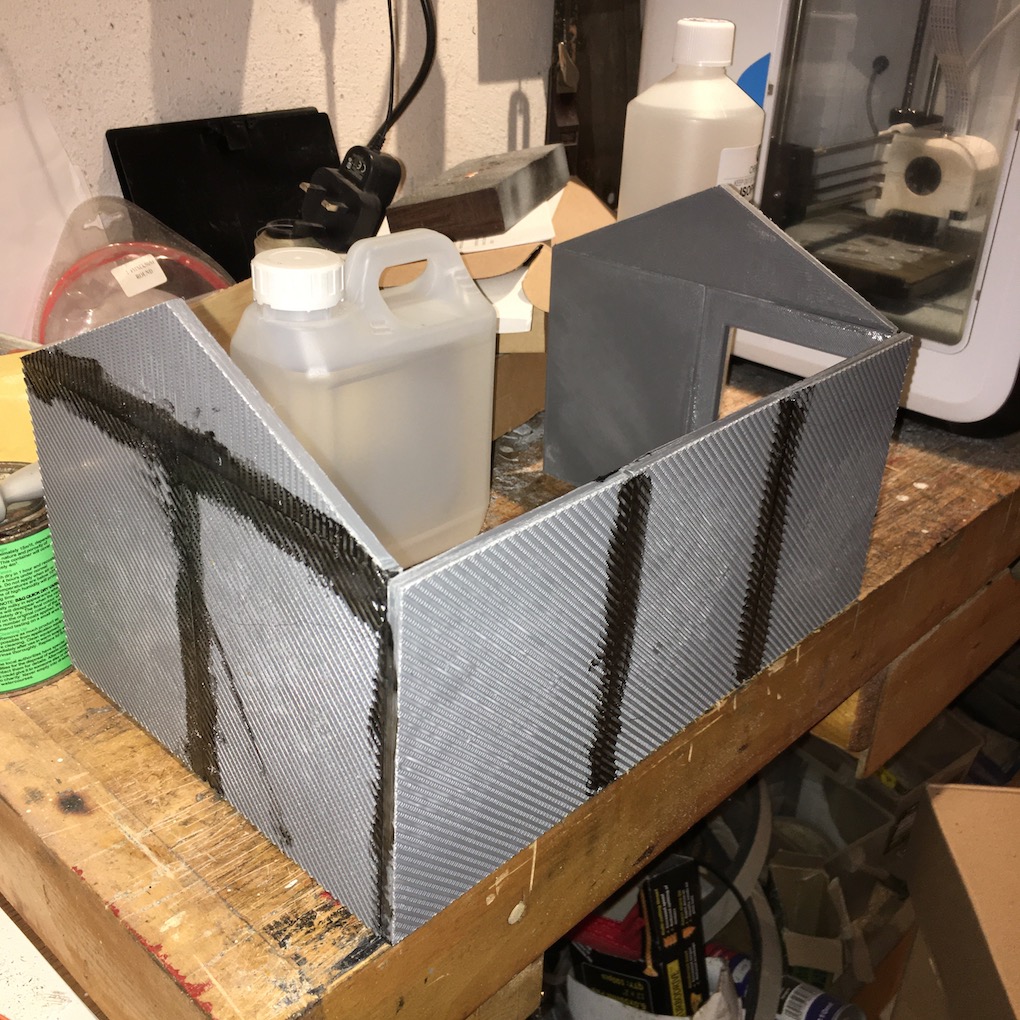
- IMG_1185.jpg (320.41 KiB) Viewed 3832 times
There is some distortion in the building at the moment. I have probably been taking the prints off the bed before they have properly cooled. I think that can be corrected tomorrow when the final side is added.