steamyjim wrote: Sun Aug 16, 2020 7:49 pm
Be interested to see your stock boxes Graeme. I'm undecided how I want to access my locomotive boxes -
Be careful what you ask for.........
This photo shows my standard small loco box, made from 6mm ply and 170mm x 19mm dressed pine. That isn't a standard board size in Aust., so I have to rip down 184mm x 19mm dressed pine, which is where the Triton Workcentre comes in. The front slide and the back of the case are 6mm ply, so the next step for the pine is a trip through the router table to cut a groove on both sides of the board to house the back and provide tracks for the front slide. The top and bottom are then cropped from the the board using the saw bench and the top and bottom have steps routed out to locate the ends. The top then has a piece cut off which forms the top lip of the slide.
Glue it all together with yellow PVA woodworking glue and clamp it up with band clamps until the glue dries, usually overnight. Finish is stain varnish, which seals the wood and stops water and oil from locos staining it. As well as the carry handle fixed to the top, there are also rubber feet fitted to the bottom. These stop damage to table tops and other cases and also clear the handle so the boxes can be stacked and remain stable.
The photo also shows the cradle used to stop the loco rattling around inside the case. The longitudinal strip of 3mm ply locates the wheels (much easier to make and fit than routing two grooves) and is 39mm wide in my case, as I run on 45mm gauge tracks. The clamping blocks are made to match a particular loco and have felt pads where they contact the loco when screwed down. One, or sometimes both, are removable so the loco can be rolled off the cradle onto the track. The little block at the front is there to make it easy to slide the cradle out of the case.

- Case 7.jpg (116.65 KiB) Viewed 9942 times
The next photo shows the case with a loco in residence. I try and make all the boxes to the same internal dimensions, so the cradles are interchangeable. The original plan was to have only a couple of boxes, but as the fleet grew, I found they were also good for storage as well as transport.

- Case 8.jpg (127 KiB) Viewed 9942 times
I make them in two lengths and so far everything I've built fits into one of those two sizes. The longer ones are for the big tender locos, but only the length changes, the other dimensions stay the same. The photo shows both sizes stacked, with locos inside. For tender engines I fit a third clamp which holds down both loco and tender separately. Stops them coming adrift in transit if the road is bumpy.

- Case 10.jpg (160.3 KiB) Viewed 9942 times
The next case is the lighter plywood one I've recently started making for small battery powered models like rail motors and works motors. Easy to make, just needs a sheet of 7mm ply ripped into strips and docked to length, then glued and nailed. The aluminium angle that forms the tracks for the front slide is a standard 20mm x 12mm extrusion from the rack in the local hardware store. The handle, feet and loco cradle are the same and are interchangeable with the cases for steam locos. Much easier to make than the solid wood ones, as a router isn't necessary and if 9mm ply was used it would be strong enough for steam locos.

- Case 9.jpg (102 KiB) Viewed 9942 times
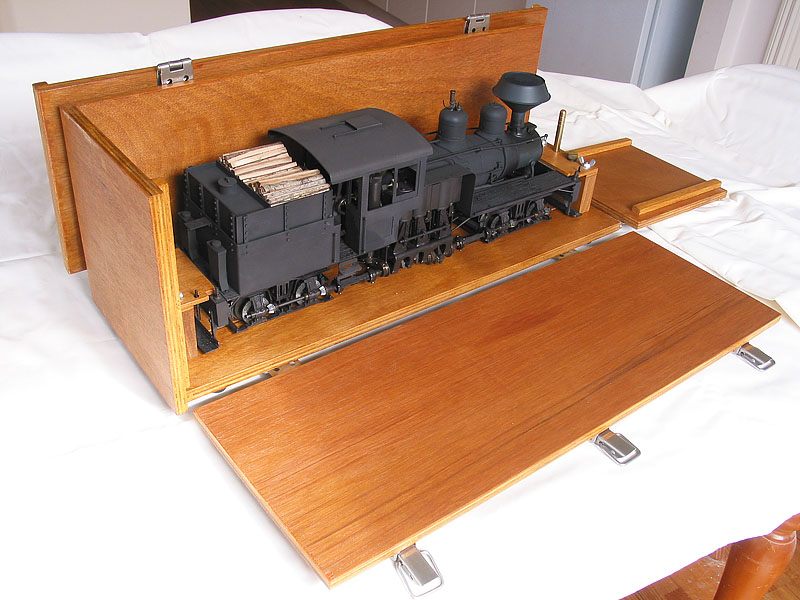
The last loco case photos shows the Shay in the ply box made by Accucraft and used to pack the model. Instead of their usual nested cardboard boxes, this replaced the inner box. The Argyll NA class model was supplied in something similar. All I've done is to fit feet, a handle and stain it. It came with two grooves already in the bottom, so I didn't make a cradle, just added the clamping blocks.
The first photo shows it locked up for transport, the second opened up to show how it works. Being plywood, it is easy to make, as you just need to rip a sheet of 9mm ply down into the necessary width strips and dock them to length. My IOM railcar came in the usual two cardboard boxes and I was going to make one of these for it, but I was unable to source suitable catches locally.

- Case 11.jpg (119.27 KiB) Viewed 9942 times
- Case 12.jpg (130.26 KiB) Viewed 9942 times
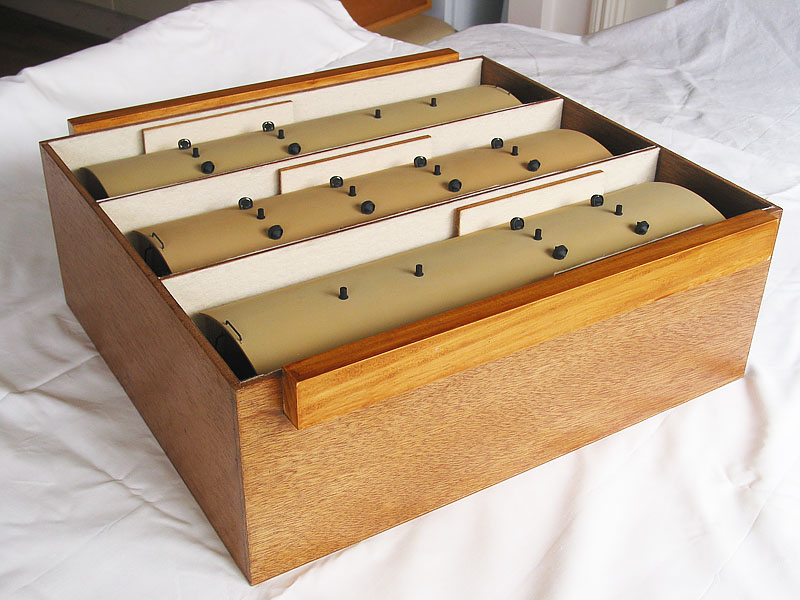
The next couple of photos are my rolling stock storage trays. The first one has three passenger cars in it, but the bogie wagons use the same design. The only variation is that the ones for open wagons aren't as deep. The spacers with the felt pads are there to stop the models rattling around during transport. The footboards are wider than the carbody, so the spacers fill the resulting gap and stop things moving around. Much easier to use than chunks of foam rubber and less likely to get lost. The cleats on the side are there to locate the trays when stacked for storage and also provide convenient handles for carrying a loaded tray.
The timber bogies are stored in a similar tray, but they are shorter and narrower than other bogie stock, so they are mounted across the tray. That way the tray is the same size, but it holds five models, not three.
- Case 13.jpg (128.12 KiB) Viewed 9942 times
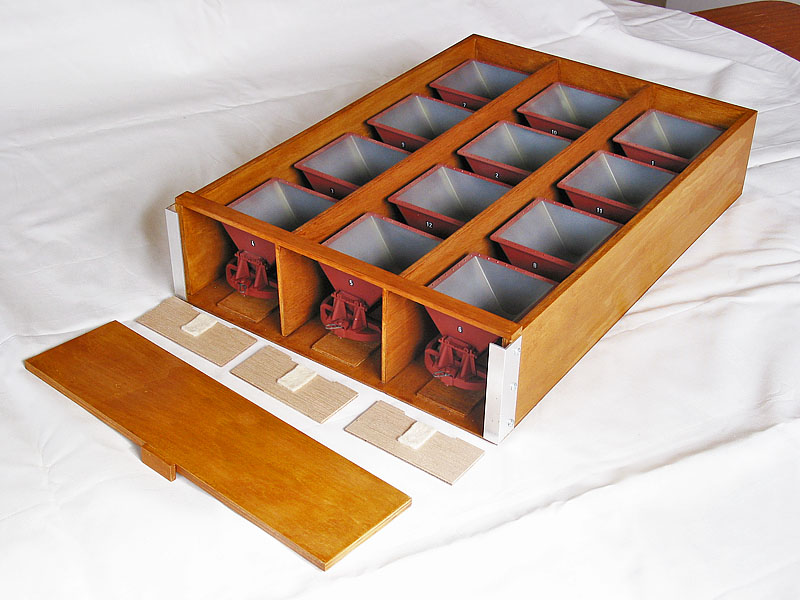
The last photo is a 'one-off' storage tray I made for the string of skips. They are semi-permanent coupled into rakes of four and there is an end slide so each rake can be pulled out onto the track and coupled up fairly quickly. They are a pain to transport, so they haven't left home to date.
- Case 14.jpg (123.34 KiB) Viewed 9942 times
The larger 4-wheel wagons are currently wrapped in bubble wrap and placed in plastic storage crates. I still haven't gotten around to working out a tray for them, hence no photos. It will probably be much the same as the bogie stock trays, with two wagons in each compartment.
My storage/carry cases are designed for my circumstances, where I only transport models by car around the Melbourne area. No idea how they would go on public transport.
You mentioned side loading, top loading and end loading cases for locos. My personal preference is obviously for side loading using a cradle.
I have one other loco case, not shown, built by Brian Wilson and supplied with the Garratt. The loco is mounted on a cradle, but the opening flap is on the end of the case. Sliding the cradle in and out of the case longitudinally is a bit of a trial, not helped by the loco's weight.
Fishing a model in and out of a box vertically doesn't float my boat either. A cradle with tall handles that are easily accessed might make it less painful, but not something I've tried. Something like the cradle with lifting straps supplied by Roundhouse with the Darj Garratt might also be an option with top loading cases.
Regards,
Graeme