Re: What to do with a tiny, barren wasteland?
Posted: Sun Sep 06, 2020 1:25 pm
Old Man Aaron wrote: ↑Sun Sep 06, 2020 11:51 am Thanks again. In spite of the limited space, I'm pleased with how this "test track" is turning out.
It wasn't a popular model from what I've heard, very much a niche prototype. But given it was a relatively quick conversion of the existing Innisfail Fowler, one can see why RH picked it for that year's release, whilst developing the Darj. Garratt.
Re. the caustic soda, that's good to know, cheers. Interesting that you had similar issues with your RH wheels. Now that you mention it, the difference between bogie and driving flanges is quite apparent, looking at my Innisfail Fowler atop the desk here. Never noticed that..GTB wrote: ↑Tue Aug 25, 2020 1:41 pm As you found, caustic soda can dissolve aluminium just as easily as an acid. It also dissolves zinc, tin and lead, so you also need to be careful with it around galvanised steel, tinplate and solder.........
I also had some problems recently on the track extension with Roundhouse bogie wheels and the new turnouts, but interestingly not with the driving wheels on those locos. Turned out the bogie wheels had deeper and thicker flanges than the drivers. Instead of modifying the turnouts, I reprofiled the wheels in the lathe to the G1MRA coarse standard I use and have had no further problems.
28/08/20
Parts for a cattle grid were made up and stored, some months back. Assembled in place with epoxy. The test runs highlighted numerous hollows in the track, which were filled by spreading hand-fulls of crusher dust into those sections, then washing it in with the hose.
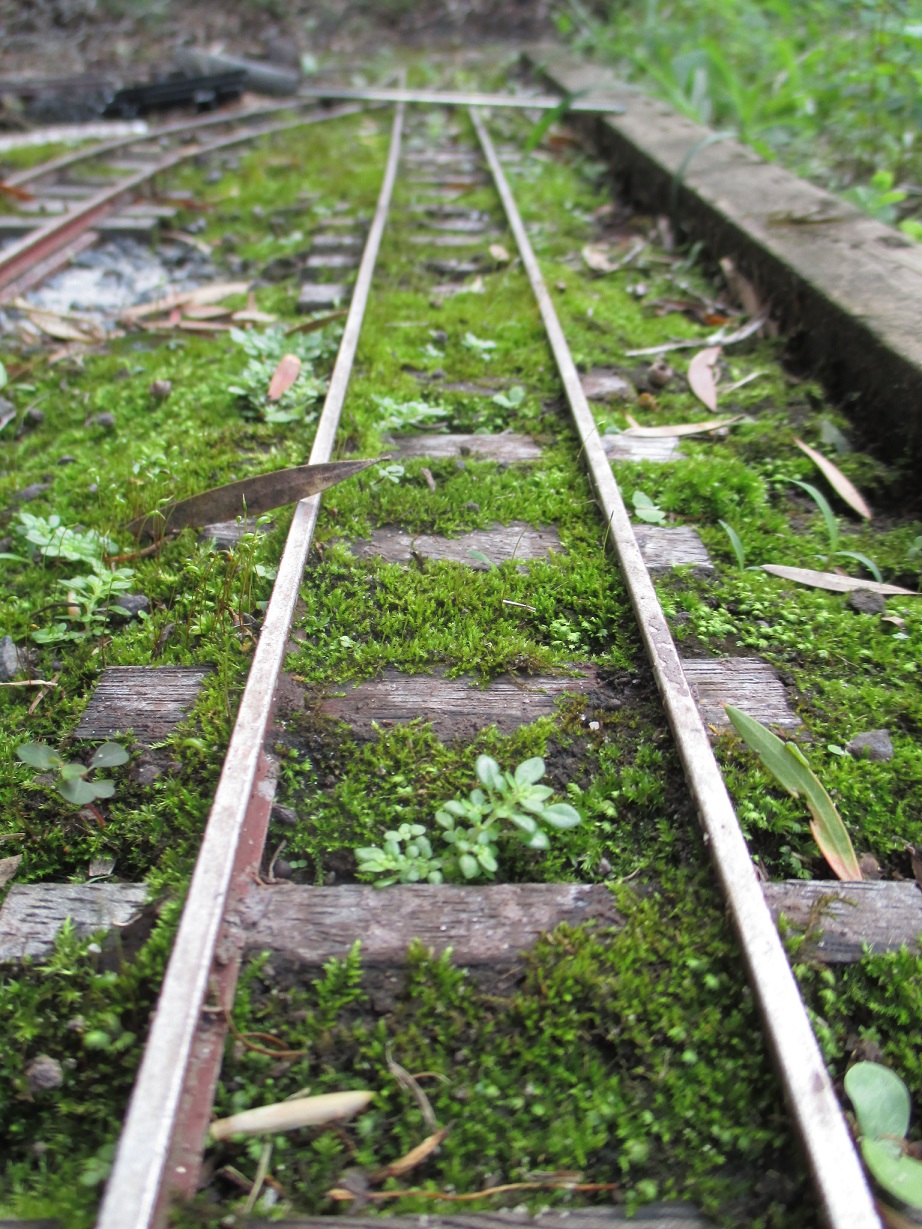
The handlaid track was ballasted leaving the sleeper tops exposed, to give the cedar a chance at lasting. The flex track's plastic sleepers however, allow more of that "narrow gauge effect". Just as last time round, moss was scraped up and torn into small pieces, then mixed with the ballast, prior to application.
I expect most of the moss will die, but some survived and spread on the last tramway:
A converted Echo Toys open wagon is ideal for this job. Unlike all my other stock, this wagon can get filthy, as I can simply hose it clean after use. And it's Binnie wheels have been temporarily replaced with the original "pizza-cutters" - which ensured any ballast wasn't fouling the pathways of sensibly-sized flanges. The excess ballast was spread away with a 3" brush.
Once content, the ballast was gently but thoroughly soaked. I know this is a bit long-winded, but it's for my own future reference - by the time I get to ballasting Stage Two, I'll have forgotten the exact methods..
A 50/50 mix of water and Sika outdoor PVA (with the usual dishwashing liquid) was then sprayed. I left it a couple minutes to soak in a bit, then sprayed again, a little more lightly this time.
After another few minutes, a sprayer with only water in it, washed the glue from the sleeper tops before it completely dried.
29/08/20
Whilst I'm pleased with the effect, I should've used a mix with less crusher dust and more sand/dirt for this "tramway style" section. Might lightly sift some sand, cement and dye over this bit to give it a "soil-ier" appearance..
I also forgot to wipe the glue from the railheads, so will have to go around scraping away the dried glue, with a wood chisel..
Two points and a couple of random sleepers received the "new ballast" mix, to look as though they've been recently re-timbered.
31/08/20
Over half the ballast has turned white, in spite of no rain. Thankfully, there's an excellent forum you may have heard of, that has discussed this issue in the past. I expect this trapped moisture to clear up in the coming weeks. If not, surely our rapidy-approaching Summer will boil it out..
05/09/20
With The track of Stage One nearly complete, thoughts turned to getting Stage Two built before the weather gets too hot.
Was surprised to get this knocked up in a day.
This will be an elevated mill yard, loco shed/servicing, and navvy siding. Maybe a "dead row" if I can squeeze it in, we'll see once the points arrive..
The timber frame is only untreated pine held together with chipboard screws, as it needs only last a few years before we buy a place. A cat-run we built from the same cheap timber, lasted eight years in the constant humidity of our last yard. Cautiously-optimistic about this..
On a railway-related tangent here - Depending on the humidity of a given day, the house air conditioner's moisture drain expels 5-15 liters of clean water with every day of use. The drain can be seen at top right, and runs into the downpipe. For reasons I suspect relating to the cheap construction of this house, the drain line's gradient was almost non-existent, resulting in the line backing up, and water dripping from the air vent inside, onto the television unit. The pipe has since been disconnected from it's hole cut into the downpipe, and the water now drains without issue. But that's a lot of "free" water I could use in the garden. To that end, some 20mm PVC pipe, fittings and a 300L tank have been bought. Need another pair of Besser blocks (cinder blocks) upon which to mount the tank, before I can connect it. This lot should pay for itself within a year.
06/09/20
Stealing Mitch Stack's idea of corrugated iron as a fasica, I bought a few rolls of "miniature" iron in strips, intended for use as garden edging. (Wasn't enthused with the idea of cutting up full-size roofing sheets with tinsnips or a grinder)
The trial-and-error job of cutting the sheets to the ground's contour was less of a pain than I expected.
Some extra support timbers (mostly from offcuts) were needed before fitting the iron. The black hose is from the caravan sink, running into a convenient stormwater drain. Aye, it's legal, one can run greywater (sinks, washing machines) into a storm drain in Queensland.
I'll cut and fit the top tomorrow, weather permitting.
Regards,
Aaron
Nice to see my idea of Coro iron sheeting in affect!,looks good mate!
Mitch