Page 1 of 2
'Refurbishing' the Bridge over the Greta
Posted: Mon Aug 13, 2018 5:39 pm
by Lonsdaler
The rail crossing over the Greta river has until now consisted of some 1/4" ply over which the track was laid. It is located on the end of a curve which transitions onto Bogg Causeway (think The Cobb). This was another section of track where curves were only notionally 38 inch radius, so some major embankment reshaping has been undertaken, and the track relaid, now on recycled Filcris board.
With a much smoother curve now, the company has decided to re-instate the old plate iron bridge supports.
They are manufactured from 5mm foamboard, with plasticard strip overlaid. Nail art comes to the rescue for riveting detail. Support walls from moulded mortar have been positioned ready to support the side plates when they are fixed in place.

- 2018-08-13 17.19.07-1.jpeg (147.03 KiB) Viewed 9708 times
Before that, liberal application of red lead (Halfords Red Oxide Plastic primer) is required!
Re: 'Refurbishing' the Bridge over the Greta
Posted: Mon Aug 13, 2018 6:24 pm
by philipy
Looking very good so far. Do keep us posted with progress as you go.
Re: 'Refurbishing' the Bridge over the Greta
Posted: Mon Aug 13, 2018 6:38 pm
by ge_rik
Looks good. Really like the look of that lettering.
Rik
Re: 'Refurbishing' the Bridge over the Greta
Posted: Mon Aug 13, 2018 7:00 pm
by tom_tom_go
Very convincing looking iron, interested to see the finished product.
Re: 'Refurbishing' the Bridge over the Greta
Posted: Mon Aug 13, 2018 7:44 pm
by IanC
That looks brilliant work so far Phil. I can't wait to see it in situ. It will make a great feature.
Re: 'Refurbishing' the Bridge over the Greta
Posted: Tue Aug 14, 2018 9:11 am
by Lonsdaler
ge_rik wrote: ↑Mon Aug 13, 2018 6:38 pm
Looks good. Really like the look of that lettering.
Rik
The lettering is the Slaters plastic variety. Probably a bit oversize, but I'm sure the company wanted to make its presence known when they constructed it.

Our summer has reverted to normal - even with no rain showing on the rain radar, we have persistent drizzle at the moment. If I'm lucky, it will dry up later, and work can continue.
Re: 'Refurbishing' the Bridge over the Greta
Posted: Tue Aug 14, 2018 8:37 pm
by laalratty
Looks very nice, I look forward to seeing all of the improvements at some point.
With regard to the weather, that boiling hot Monday running trains at yours a few weeks ago seems but a distant memory now!
Re: 'Refurbishing' the Bridge over the Greta
Posted: Tue Aug 14, 2018 10:08 pm
by Lonsdaler
laalratty wrote: ↑Tue Aug 14, 2018 8:37 pm
Looks very nice, I look forward to seeing all of the improvements at some point.
With regard to the weather, that boiling hot Monday running trains at yours a few weeks ago seems but a distant memory now!
Doesn't it just. Beddgelert would be the perfect engine to test the new curves!
Re: 'Refurbishing' the Bridge over the Greta
Posted: Tue Aug 14, 2018 10:30 pm
by laalratty
Lonsdaler wrote: ↑Tue Aug 14, 2018 10:08 pm
laalratty wrote: ↑Tue Aug 14, 2018 8:37 pm
Looks very nice, I look forward to seeing all of the improvements at some point.
With regard to the weather, that boiling hot Monday running trains at yours a few weeks ago seems but a distant memory now!
Doesn't it just. Beddgelert would be the perfect engine to test the new curves!
I guess I'll have to bring it around sometime then. Will pack a reserve engine in the box next time just in case though...!

Re: 'Refurbishing' the Bridge over the Greta
Posted: Wed Aug 22, 2018 10:05 am
by Lonsdaler
A bit of a hiatus in progress on this, in no small part due to the resumption of 'normal' August conditions (Rain = well, rain. Dry = heavy drizzle, with occasional rain)

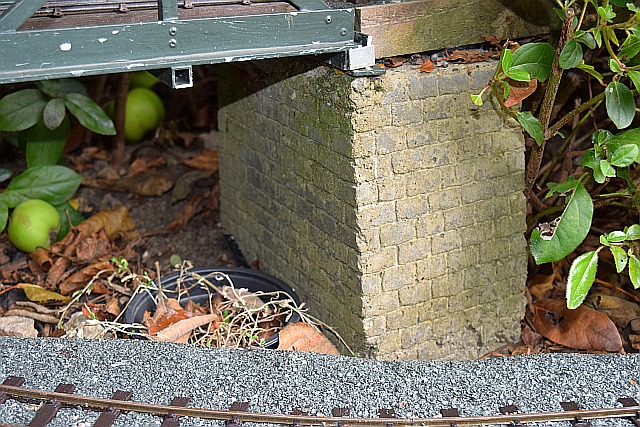
I made use of some inherited stone walling made of cement to form the bridge piers

- 2018-08-16 13.26.57-2-1.jpeg (160.14 KiB) Viewed 9501 times
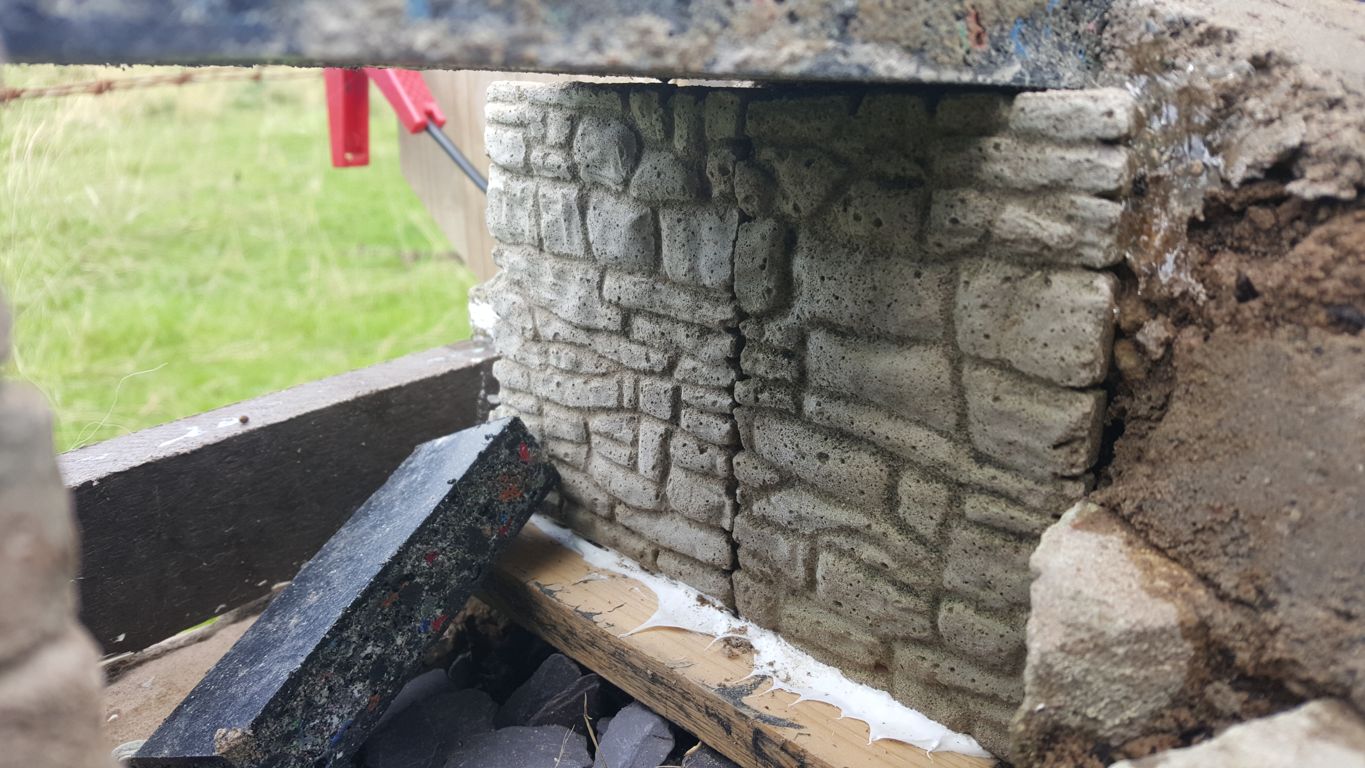
- 2018-08-16 13.26.23-2.jpeg (189.2 KiB) Viewed 9501 times
These were fixed in place using a product called Stixall (by Everbuild, I think). This is the only effective adhesive I have found for fixing cement items to other materials. BTW, it's not the white stuff along the bottom of the wall here - that is an Evo Stik product, which despite claiming a good wet bond, tends to release wood as soon as it gets wet!
Over the course of the summer months, I have also been busy mass producing the walling to go along the causeway, using moulds similar to those Cain Howley demonstrated at Peter's some time ago.
I needed over 20 of these castings (Each of these is about 10 inches in length), so produced 2 at a time, using an ordinary sand and cement mix. Moulds poured in the morning were set enough for removal come the evening during the welcome warm spell.

- 2018-06-24 11.20.53.jpeg (314.96 KiB) Viewed 9501 times
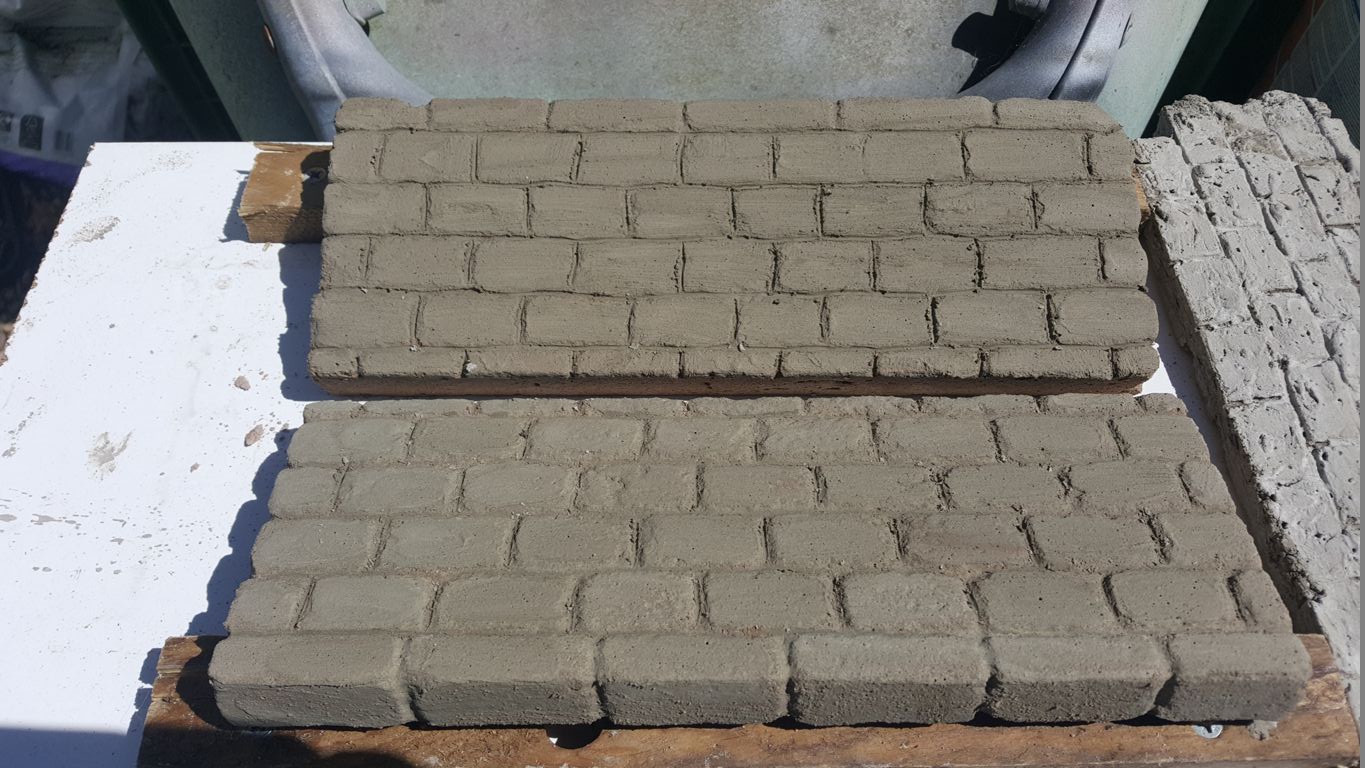
- 2018-06-24 11.21.19.jpeg (209.16 KiB) Viewed 9501 times
After removal from the mould, the masonry joints were scraped out using an old hacksaw blade, and then the casts were left to harden. The final treatment was to 'paint' them with mortar stabilising slution, to enable better bonding of paint, once they are fixed in place.
They have now been fixed to the causeway using Stixall again. Once firmly attached, the gaps were filled with exterior polyfilla, and stonework gaps 'pointed' in.
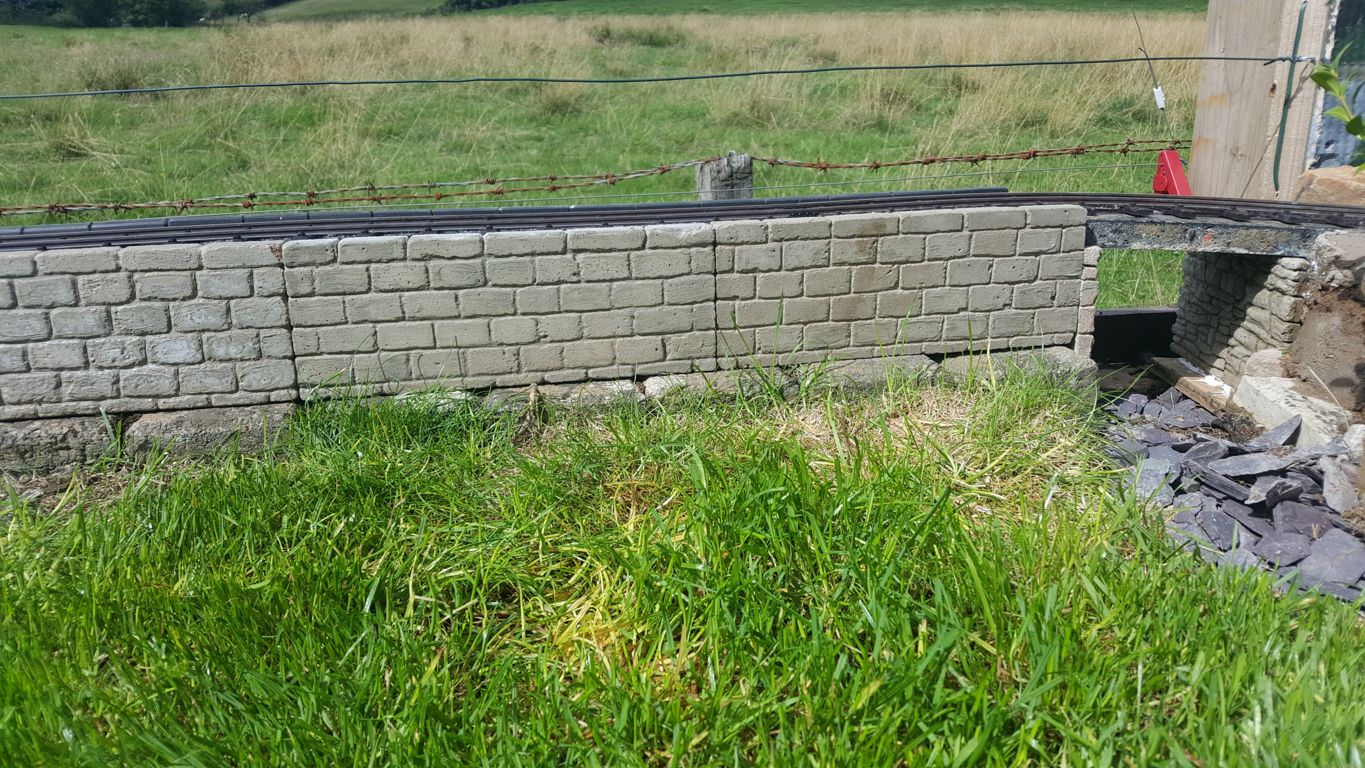
- 2018-08-16 13.30.57-2.jpeg (313.51 KiB) Viewed 9501 times
Meanwhile, back at the bridge - I've decided it was probably a mistake to call this thread 'Refurbishment', as I have opted to go for a more time worn look, with vague rusting, and the copper of the lettering with a verdi gris coating.

- 2018-08-14 16.58.07-2.jpeg (161.51 KiB) Viewed 9501 times
The protective coat of flat varnish has been applied, and as soon as a 'dry' dry spell arrives, these will be fixed in place, and the bridge supports coloured to hopefully better represent stone.

- 2018-08-21 13.50.25-2.jpeg (105.81 KiB) Viewed 9501 times
Re: 'Refurbishing' the Bridge over the Greta
Posted: Wed Aug 22, 2018 10:25 am
by Peter Butler
All looking very good Phil, glad to see the use of a mould for concrete walling being taken up, yours has been more successful than our experiment as we used the wrong type of cement.... Postcrete, which was laid dry too thickly and didn't absorb enough moisture throughout. We learn and pass on our mistakes as well as our successes.
Re: 'Refurbishing' the Bridge over the Greta
Posted: Wed Aug 22, 2018 10:50 am
by philipy
Really coming on well there Phil. A little bit of fettling abnd then the winter to weather it all, should look fantastic come next spring.
I'm not sure how Cain Howley makes his moulds but about 4 years ago I was in need of a bridge support and cast one out of solid concrete. I can't remember the mix I used but the mould was made from 4 pieces of spare ply pre-shaped to fit, the stone courses laid on with a hot melt glue gun, then all screwed together and poured with the mould upside down because the pier is tapered. Then at the green concrete stage, the mould panels were unscrewed and just dropped off.
- DSC_0004.JPG (228.32 KiB) Viewed 9495 times
- DSC_0001.JPG (227.07 KiB) Viewed 9495 times
Re: 'Refurbishing' the Bridge over the Greta
Posted: Wed Aug 22, 2018 11:02 am
by Peter Butler
Cain used silicone to mark out the mortar courses but unfortunately they came away from the mould trapped in the concrete so were not re-usable. I like your idea of a hot glue gun as it should be more permanent, and your castings look great too!
Ours was just a quick 'something to do' scheme at one of our local group meetings, normally Cain makes a 'master' and creates a flexible mould for his proper production models which are highly detailed.
Re: 'Refurbishing' the Bridge over the Greta
Posted: Wed Aug 22, 2018 12:29 pm
by Lonsdaler
Thank you Peter and Philip for the encouraging words.
I can see the benefit of going for a flexible mould for many reproductions, and even though mine was for 24 casts, I felt this mould would suffice - and it did. However, I set the mortar lines using aliphatic resin (The reasoning being that it was thicker than the PVA I had, which was my first 'idea' for detail). They lasted reasonably well, but needed some repair after half a dozen casts were done. Virtually having completed the moulds, the thought of a hot glue gun occurred to me, but too late by then!
It was the 'drudgery' of producing the wall moulds that persuaded me to use the 'gifted wall sections' for the bridge supports - I just couldn't face making another 2 detailed casts! Especially for something that will be largely hidden from view!
Actually Peter, my first attempt was with quick setting cement, but it was so lacking in plasticity that it failed to produce anything useable, so from then on I decided to go for standard Portland with very fine sand (I think it was a bag of play sand, actually). Generally, I'm really pleased with the results - a few have airholes where I didn't agitate them sufficiently, but the local geology can explain that away
and anyway, it gives the moss and algae somewhere to get started!
Re: 'Refurbishing' the Bridge over the Greta
Posted: Wed Aug 22, 2018 12:41 pm
by Lonsdaler
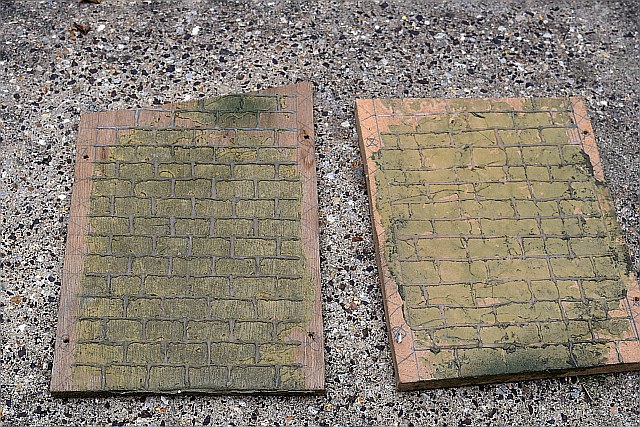
I have realised that I actually missed a step from the construction 'log' entry above. I did manage yesterday to also apply a coat of thinned matt black paint (about 1/2 white spirit to 1/2 matt black) to the castings, to form the base coat for my wall painting.
The older castings under the bridge went immediately grey in colour, whilst my 'stabilised' wall sections have retained more of the black shading
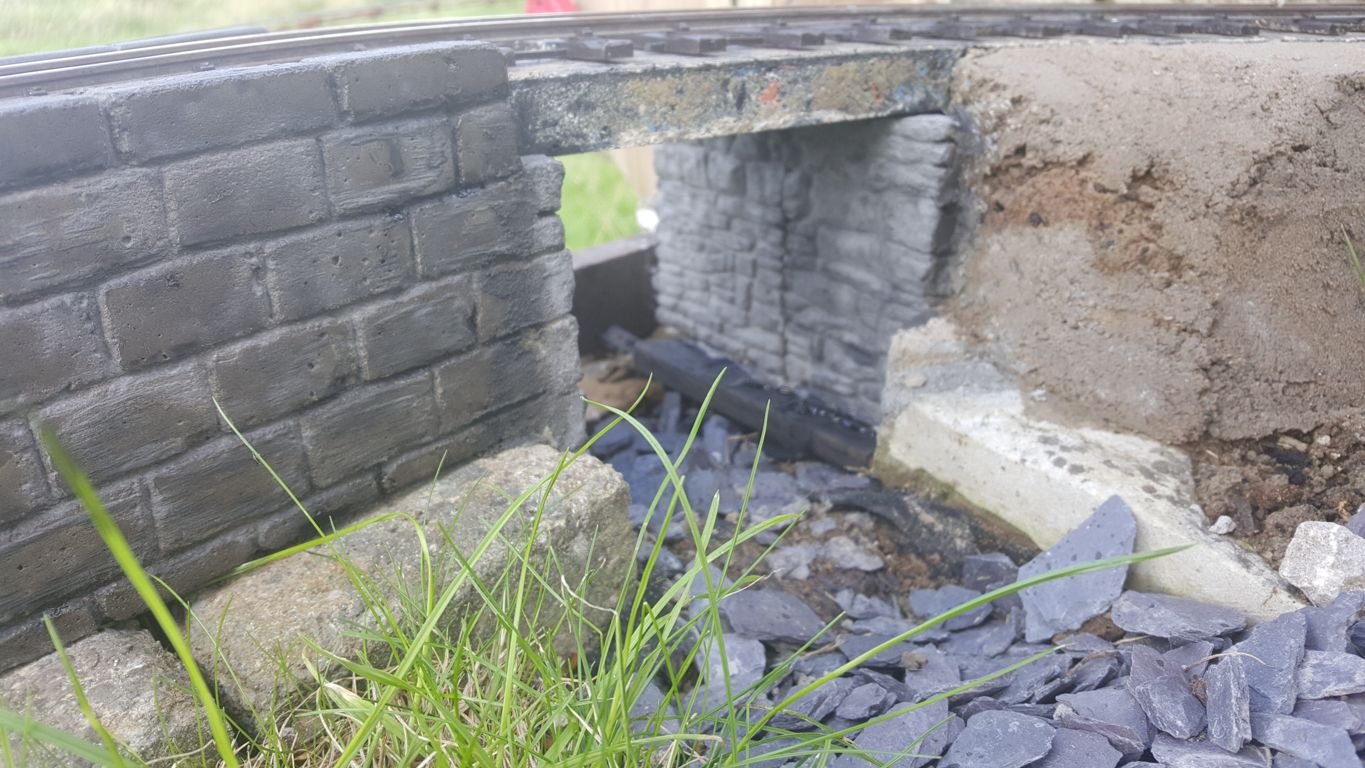
- 2018-08-21 13.49.13-2.jpeg (196.74 KiB) Viewed 9485 times
And this is a view of the wall section now joined and undercoated - it looks a bit patchy in these photographs, taken shortly after painting, but this morning, peering through the rain streaked windows, they are a uniform black colour!

- 2018-08-21 13.49.38-2.jpeg (262.68 KiB) Viewed 9485 times
It is conceivable, although unlikely, given the vagaries of a North West summer, that I may get the opportunity to apply the rest of the paint and affix the bridge panels some time this week. Or next...

Re: 'Refurbishing' the Bridge over the Greta
Posted: Wed Aug 22, 2018 1:03 pm
by philipy
That last pic looks amazing. A wash of Yoghurt and let nature do the rest, I don't think I'd bother trying to pick out individual stone myself, but as always, its yours so do what you want!
Re: 'Refurbishing' the Bridge over the Greta
Posted: Wed Aug 22, 2018 2:57 pm
by IanC
That's fantastic work Phil. It looks impressive in the pictures and I'll bet it's even better in the flesh.
Re: 'Refurbishing' the Bridge over the Greta
Posted: Wed Aug 22, 2018 3:33 pm
by ge_rik
Looking great. A good mix of techniques and media. Amazing the range of knowledge and skills we develop as garden railway modellers!!
Rik
Re: 'Refurbishing' the Bridge over the Greta
Posted: Thu Aug 23, 2018 7:03 pm
by Andrew
That's really looking very good - the paint wash has made the stone walling look very convincing...
I've taken a note of Stixall as well, sounds just the thing...
Cheers,
Andrew.
Re: 'Refurbishing' the Bridge over the Greta
Posted: Fri Aug 24, 2018 9:25 am
by Lonsdaler
Andrew wrote: ↑Thu Aug 23, 2018 7:03 pm
That's really looking very good - the paint wash has made the stone walling look very convincing...
I've taken a note of Stixall as well, sounds just the thing...
Cheers,
Andrew.
Thank you Andrew. A technique picked up from a friend who isn't a forum member, but has the most convincing 32mm outdoor railway I have ever seen. As for Stixall - it has been a revelation to me. It's available in many colours and will actualy bond in water. The only caveat is keep it off the faces of anything you fix!
