White Metal Soldering
Posted: Thu Jul 19, 2018 10:33 pm
The IP kit that I am currently trying to build has a fair chunk of whitemetal bits that build up into the bonnet and radiator assembly. I decided to solder these together as I fancied a challenge and have not soldered any white metal since I built a 00 LNER B1 about 20 years ago.
I know that many people don't really do soldering and whitemetal soldering is even more of a black art that can result in an expensive puddle on the work bench. So I decided post some information. Please note this is not a "How to do it" but more of a "How I do it" and there are people out there much more skilled than me.
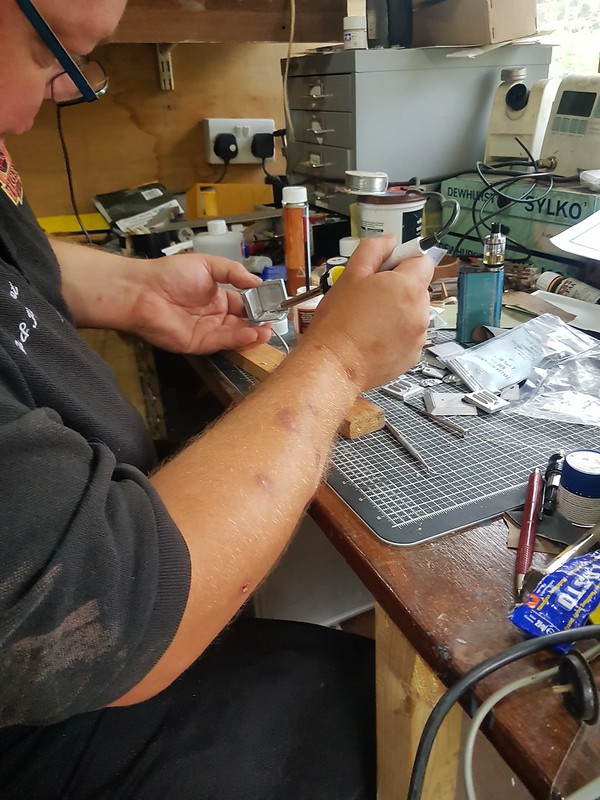
The pictures are not great as it is hard to hold a camera and a soldering iron at the same time.
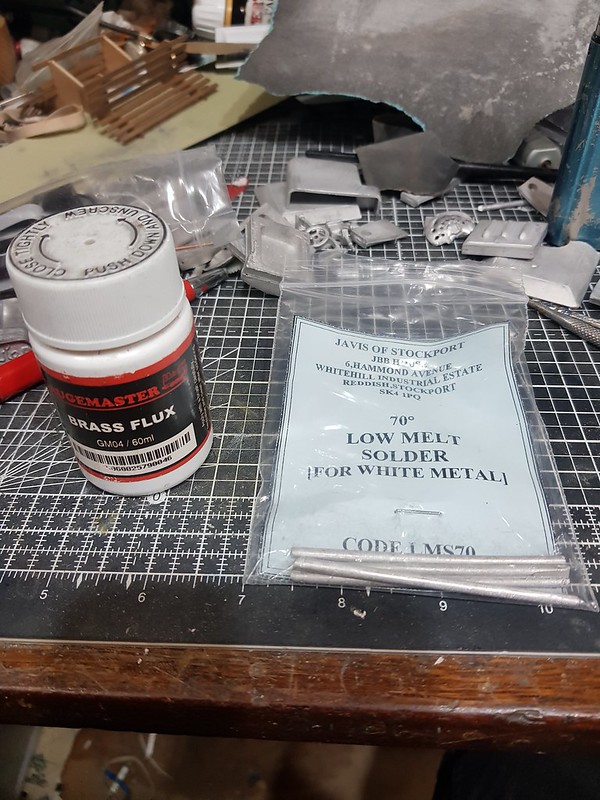
Equipment:- Low melt solder, I am using 70oC melting point, others are available. If you are building something that has lots of little bits and some big chunky bits, it is worth using a higher melting point solder (100oC) for the main build and then adding the detail with the 70oC stuff.
Flux - I use a brass flux that is phosphoric acid based, helps clean the joint and allows the solder to flow.
Soldering Iron - Some clever blighters will tell you to use a normal iron, you can, I have, I don't anymore. I use a cheap temperature controlled iron.

You will need the iron set higher than the melting point of the solder. For 70oC solder I have it around 150/170oC. At this temp there is little risk of melting the whitemetal.
Technique:- File and sand the parts until they fit well together. Ideally you want a very small gap between them to allow the solder to flow by capillary action. So you may not want to smooth the mating surfaces too much.
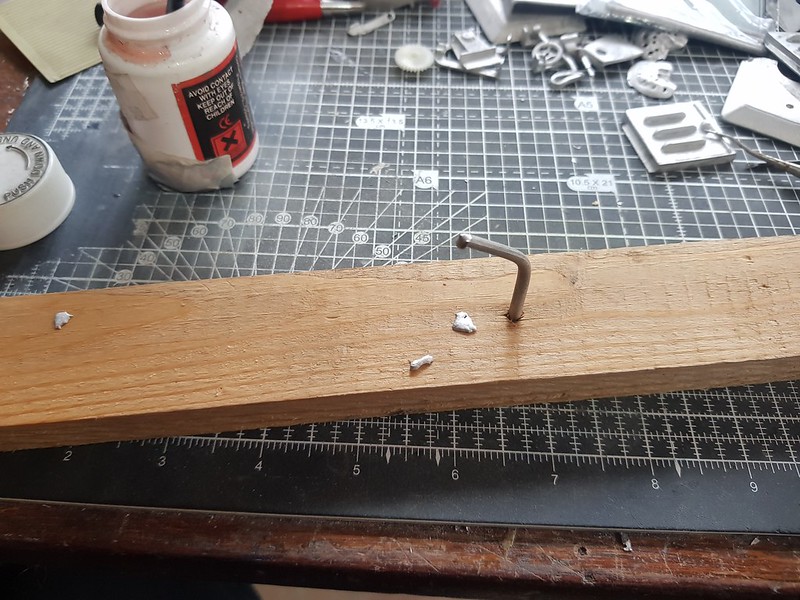
Position the parts correctly, off cuts of wood are your friend here, avoid using blocks of metal as they will act like a heat sink, avoid plastic for obvious reasons. As you get more confident you may find that you can hold larger parts as you solder them.
If I am soldering larger parts together I will put a few shavings of solder in the joint to make life easier. Nothing too large about the thickness of a finger nail will do.
Paint the joint with flux
Apply the iron to the solder - you will get a nice sizzle as the flux evaporates, the solder may get drawn into the joint as the metal gets warm, or you may need to run the iron along the joint to spread it out. Whitemetal castings will draw a lot of heat away from the iron. Add more solder as required, but be careful as any excess will need cleaning and this can be a pain. I use a desoldering bulb or even an old screw driver to remove excess before it cools. Like football, your first touch is often your best touch, knowing when to stop is the key.
Now leave to cool and admire your handiwork.
Clean up with old files, sandpaper or fibre pencils. You may wish to wash the job in clean water to remove any traces of flux.
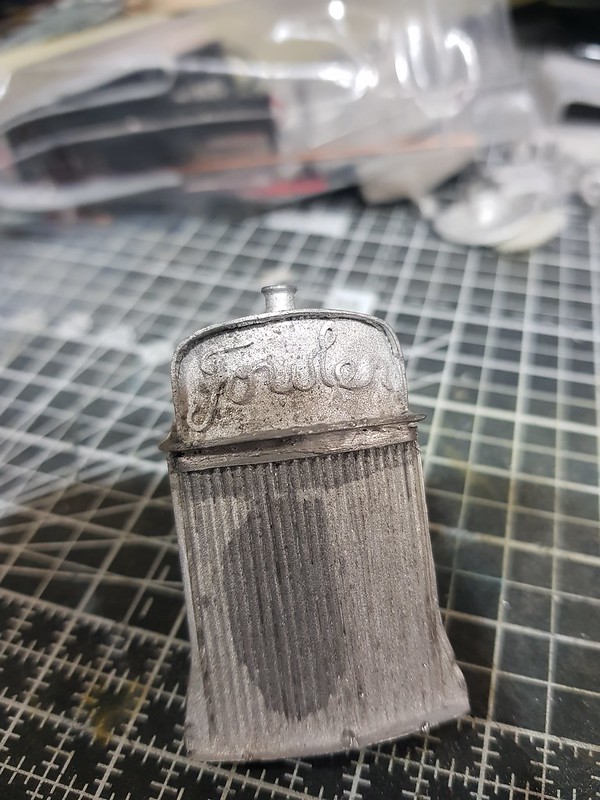
The tank of the rad was separate from the core, not a bad job even though I do say so myself. You can hardly see the join.
I do urge anyone to have a try at doing this, don't be afraid. Practice with a scrap kit or buy someones aborted project from ebay to have a go with. It is not hard, it just takes a little patience and the results are well worth it.
I know that many people don't really do soldering and whitemetal soldering is even more of a black art that can result in an expensive puddle on the work bench. So I decided post some information. Please note this is not a "How to do it" but more of a "How I do it" and there are people out there much more skilled than me.
The pictures are not great as it is hard to hold a camera and a soldering iron at the same time.
Equipment:- Low melt solder, I am using 70oC melting point, others are available. If you are building something that has lots of little bits and some big chunky bits, it is worth using a higher melting point solder (100oC) for the main build and then adding the detail with the 70oC stuff.
Flux - I use a brass flux that is phosphoric acid based, helps clean the joint and allows the solder to flow.
Soldering Iron - Some clever blighters will tell you to use a normal iron, you can, I have, I don't anymore. I use a cheap temperature controlled iron.
You will need the iron set higher than the melting point of the solder. For 70oC solder I have it around 150/170oC. At this temp there is little risk of melting the whitemetal.
Technique:- File and sand the parts until they fit well together. Ideally you want a very small gap between them to allow the solder to flow by capillary action. So you may not want to smooth the mating surfaces too much.
Position the parts correctly, off cuts of wood are your friend here, avoid using blocks of metal as they will act like a heat sink, avoid plastic for obvious reasons. As you get more confident you may find that you can hold larger parts as you solder them.
If I am soldering larger parts together I will put a few shavings of solder in the joint to make life easier. Nothing too large about the thickness of a finger nail will do.
Paint the joint with flux
Apply the iron to the solder - you will get a nice sizzle as the flux evaporates, the solder may get drawn into the joint as the metal gets warm, or you may need to run the iron along the joint to spread it out. Whitemetal castings will draw a lot of heat away from the iron. Add more solder as required, but be careful as any excess will need cleaning and this can be a pain. I use a desoldering bulb or even an old screw driver to remove excess before it cools. Like football, your first touch is often your best touch, knowing when to stop is the key.
Now leave to cool and admire your handiwork.
Clean up with old files, sandpaper or fibre pencils. You may wish to wash the job in clean water to remove any traces of flux.
The tank of the rad was separate from the core, not a bad job even though I do say so myself. You can hardly see the join.
I do urge anyone to have a try at doing this, don't be afraid. Practice with a scrap kit or buy someones aborted project from ebay to have a go with. It is not hard, it just takes a little patience and the results are well worth it.