Discussion of Live Steam locomotives should be located here
-
Jackf88
- Cleaner

- Posts: 22
- Joined: Wed Apr 11, 2018 12:48 pm
Post
by Jackf88 » Fri Jun 01, 2018 12:51 pm
Hi all,
I'm Jack and I'm pretty new to live steam but am a steam crew volunteer and am an engineer by trade so I thought I'd take the plunge on a kit build lady Anne!
I'm mid way through(ISH) my first live steam build having assembled the chassis and fitted all boiler parts necessary for running (body to follow) I'm currently waiting for a chuffer and a shiny gold on black name plate 'Scafell Pike'
On first two runs the loco has a pronounced side to side motion of the rear axle, can't decide if this is down to poor adjustment of the con rods or valve timing!? Any help is greatly appreciated!

Pics to follow

-
Peter Butler
- Driver

- Posts: 5261
- Joined: Sun Sep 09, 2012 10:33 pm
- Location: West Wales
Post
by Peter Butler » Fri Jun 01, 2018 2:25 pm
Hi Jack and welcome to the Forum. Although I am not a live steam person myself, and therefore can't give any advice to you about your build, I am keen to see the progress and final result of your build.
Please let us have pictures and any details which might share your experience.
Last edited by
Peter Butler on Sat Jun 02, 2018 8:56 pm, edited 1 time in total.
The best things in life are free.... so why am I doing this?
-
TonyW
- Driver
- Posts: 1357
- Joined: Fri May 16, 2008 9:25 am
- Location: North Wales
-
Contact:
Post
by TonyW » Fri Jun 01, 2018 3:22 pm
Jackf88 wrote: ↑Fri Jun 01, 2018 12:51 pm... the loco has a pronounced side to side motion of the rear axle ...
Probably the cranks are not fully located on the axle ends. Remove the rods then on all three axles:
- Remove the crank fixing screws
- Using soft jaws (e.g. wood) in a vice squeeze the cranks fully home on to the axles
- Re-fit crank fixing screws and tighten fully by using two screwdrivers, one on each end of the axle
Be careful to avoid bending the fixed crank pins on the rear axle!
If that doesn't sort it out then Roundhouse can supply suitable washers that fit between the cranks and the axle bearings.
-
Jackf88
- Cleaner
- Posts: 22
- Joined: Wed Apr 11, 2018 12:48 pm
Post
by Jackf88 » Fri Jun 01, 2018 3:45 pm
TonyW wrote: ↑Fri Jun 01, 2018 3:22 pm
Jackf88 wrote: ↑Fri Jun 01, 2018 12:51 pm... the loco has a pronounced side to side motion of the rear axle ...
Probably the cranks are not fully located on the axle ends. Remove the rods then on all three axles:
- Remove the crank fixing screws
- Using soft jaws (e.g. wood) in a vice squeeze the cranks fully home on to the axles
- Re-fit crank fixing screws and tighten fully by using two screwdrivers, one on each end of the axle
Be careful to avoid bending the fixed crank pins on the rear axle!
If that doesn't sort it out then Roundhouse can supply suitable washers that fit between the cranks and the axle bearings.
Great, thank you Tony! I have to admit I wasn't convinced the G clamp I used was doing an amazing job when I fitted them. Will give it a try asap!
-
Jackf88
- Cleaner
- Posts: 22
- Joined: Wed Apr 11, 2018 12:48 pm
Post
by Jackf88 » Sat Jun 02, 2018 7:18 am
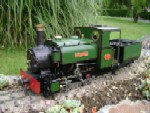
Photo's as promised

Obviously need to do some more painting but will probably wait until I get the body kit and have a session!
Also I can't seem to get them to appear in order so apologies for multi post

-
Attachments
-
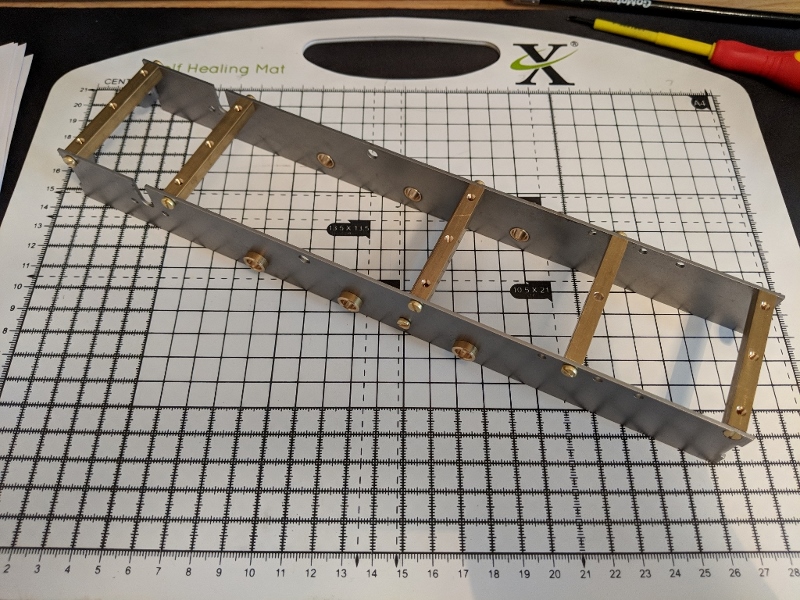
- IMG_20180411_172554 (1024x768) (800x600).jpg (369.38 KiB) Viewed 5510 times
-
Jackf88
- Cleaner
- Posts: 22
- Joined: Wed Apr 11, 2018 12:48 pm
Post
by Jackf88 » Sat Jun 02, 2018 7:19 am
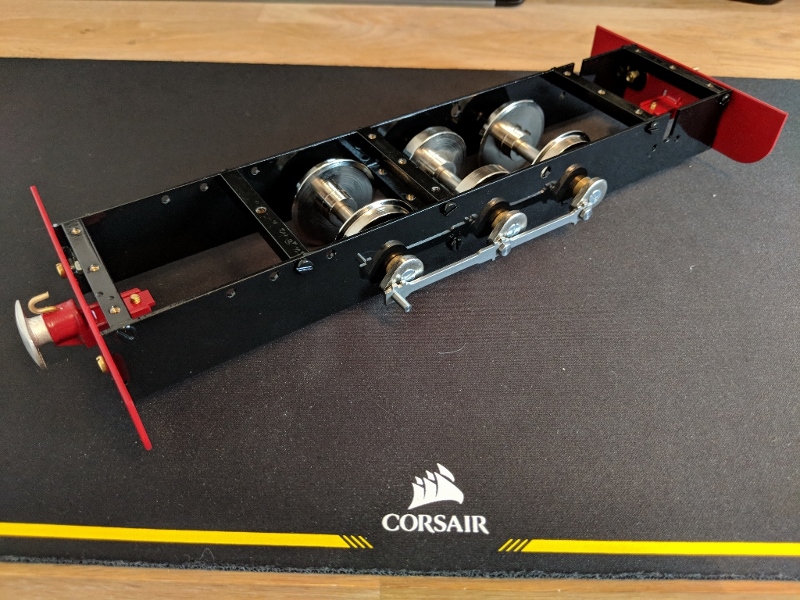
- IMG_20180428_135544 (1024x768) (800x600).jpg (325.88 KiB) Viewed 5509 times
-
Jackf88
- Cleaner
- Posts: 22
- Joined: Wed Apr 11, 2018 12:48 pm
Post
by Jackf88 » Sat Jun 02, 2018 7:20 am
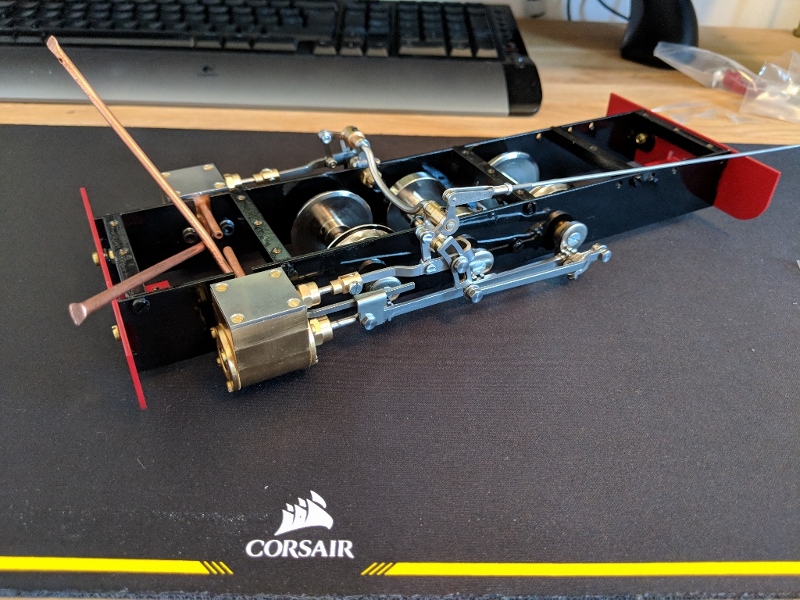
- IMG_20180506_111518 (1024x768) (800x600).jpg (341.84 KiB) Viewed 5506 times
-
Jackf88
- Cleaner
- Posts: 22
- Joined: Wed Apr 11, 2018 12:48 pm
Post
by Jackf88 » Sat Jun 02, 2018 7:21 am
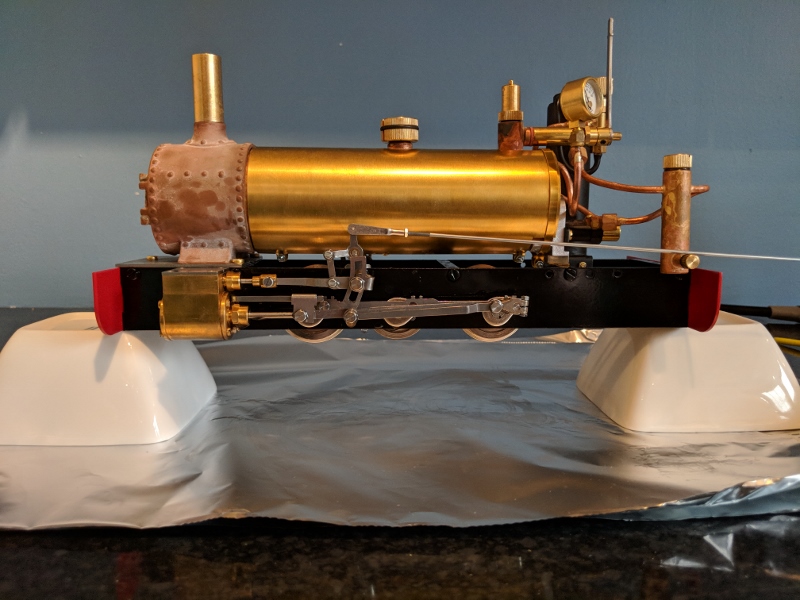
- IMG_20180531_202351 (800x600).jpg (249.19 KiB) Viewed 5506 times
-
bazzer42
- Driver
- Posts: 1215
- Joined: Sun Nov 25, 2012 1:37 pm
- Location: Forest of Dean
Post
by bazzer42 » Sat Jun 02, 2018 7:54 am
That is looking nice, afraid I can't help with any advice on construction but do have a soft spot for Lady Anne. The body is just right (not that yours is fitted yet!). Any decision on colour?
-
FWLR
- Driver
- Posts: 4313
- Joined: Sat Aug 05, 2017 9:45 am
- Location: Preston, Lancashire, UK
Post
by FWLR » Sat Jun 02, 2018 8:22 am
I am really going to after try and get some money together and again try and scratch build a Lady Anne….it’s my next and last live steamer…..

Welcome Jack, hope we can see more soon of your build, it’s looking brilliant unto now…..

-
Jackf88
- Cleaner
- Posts: 22
- Joined: Wed Apr 11, 2018 12:48 pm
Post
by Jackf88 » Sat Jun 02, 2018 11:19 am
bazzer42 wrote: ↑Sat Jun 02, 2018 7:54 am
That is looking nice, afraid I can't help with any advice on construction but do have a soft spot for Lady Anne. The body is just right (not that yours is fitted yet!). Any decision on colour?
Thank mate, colour wise I was fairly set on brunswick green, but having recently seen a couple done up as BR Black so now I'm not sure?!

-
tom_tom_go
- Driver
- Posts: 4824
- Joined: Wed Feb 23, 2011 3:08 am
- Location: Kent, UK
-
Contact:
Post
by tom_tom_go » Sat Jun 02, 2018 11:56 am
That's the most gloss frame I have ever seen, it has a mirror finish!
What did you use, looks like it will be very durable.
-
Keith S
- Driver
- Posts: 1628
- Joined: Thu Feb 24, 2011 11:44 pm
- Location: Canada
Post
by Keith S » Sat Jun 02, 2018 8:42 pm
How did you get on pressing the cranks down a bit more firmly on the axles? Looking at your pictures there does seem to be quite a bit of space there. After all, 'tis only the wheels on the inside or the cranks on the outside that stop lateral movements of the axles, and the beating of the reciprocating motion on the turning axle does make it want to "walk" back and forth: you see this force in action on 0-4-0 locomotives "waddling" as they make their way along.
-
Jackf88
- Cleaner
- Posts: 22
- Joined: Wed Apr 11, 2018 12:48 pm
Post
by Jackf88 » Sat Jun 02, 2018 10:42 pm
tom_tom_go wrote: ↑Sat Jun 02, 2018 11:56 am
That's the most gloss frame I have ever seen, it has a mirror finish!
What did you use, looks like it will be very durable.
Haha it was a cellulose gloss black from the local DIY place! Don't look too close

shinier than I'd like to be honest but it's gone on nice and thick so hopefully hard wearing! Took forever to cure!
-
Jackf88
- Cleaner
- Posts: 22
- Joined: Wed Apr 11, 2018 12:48 pm
Post
by Jackf88 » Sat Jun 02, 2018 10:44 pm
Keith S wrote: ↑Sat Jun 02, 2018 8:42 pm
How did you get on pressing the cranks down a bit more firmly on the axles? Looking at your pictures there does seem to be quite a bit of space there. After all, 'tis only the wheels on the inside or the cranks on the outside that stop lateral movements of the axles, and the beating of the reciprocating motion on the turning axle does make it want to "walk" back and forth: you see this force in action on 0-4-0 locomotives "waddling" as they make their way along.
Haven't had a chance yet, but as soon as I've down it and had a steam up will make sure I post! Ran really nicely otherwise, nice steam beat

it was possible to stop it waddling by putting a little side pressure win the wheels but you could tell by the sound it was still not quite right
-
IanC
- Trainee Driver

- Posts: 798
- Joined: Mon Feb 15, 2016 9:15 am
- Location: Nr. Warrington, Cheshire
Post
by IanC » Sun Jun 03, 2018 9:19 am
Hi Jack.
I have a Lady Anne. Mine was factory built. I love it. Mine happens to be in Maroon, but as it's a popular colour I've seen lots in different colours. It seems to suit them all! In all honesty I'd love another, but that would give me a dilema. I like black too so would it be black, stick with maroon for a 'fleet colour' or go with something different like Brunswick Green? While on the subject of colour, if you look at full sized locomotives of all gauges, I've never come across one where the back of the buffer beams are painted red. However it's your locomotive, just go with what you think is good. Because you've put it together you'll know how to take it apart if you want to make mods later, or change the colour.
I can't offer any build tips, but will follow with interest. I might get a kit and have a go myself.
Ian
Ian
-
TonyW
- Driver
- Posts: 1357
- Joined: Fri May 16, 2008 9:25 am
- Location: North Wales
-
Contact:
Post
by TonyW » Sun Jun 03, 2018 10:27 am
IanC wrote: ↑Sun Jun 03, 2018 9:19 am... I've never come across one where the back of the buffer beams are painted red ...
Amen to that! Add unpainted shiny wheels to the list too.
-
Jackf88
- Cleaner
- Posts: 22
- Joined: Wed Apr 11, 2018 12:48 pm
Post
by Jackf88 » Sun Jun 03, 2018 10:39 am
TonyW wrote: ↑Sun Jun 03, 2018 10:27 am
IanC wrote: ↑Sun Jun 03, 2018 9:19 am... I've never come across one where the back of the buffer beams are painted red ...
Amen to that! Add unpainted shiny wheels to the list too.
Haha yeah bufferbeams was a school boy error, will be painting backs black when I next do some paint
I'd never really thought of the wheels but you're right, probably paint black at the next opportunity too!
-
IanC
- Trainee Driver
- Posts: 798
- Joined: Mon Feb 15, 2016 9:15 am
- Location: Nr. Warrington, Cheshire
Post
by IanC » Sun Jun 03, 2018 10:58 am
Jackf88 wrote: ↑Sun Jun 03, 2018 10:39 am
TonyW wrote: ↑Sun Jun 03, 2018 10:27 am
IanC wrote: ↑Sun Jun 03, 2018 9:19 am... I've never come across one where the back of the buffer beams are painted red ...
Amen to that! Add unpainted shiny wheels to the list too.
Haha yeah bufferbeams was a school boy error, will be painting backs black when I next do some paint
I'd never really thought of the wheels but you're right, probably paint black at the next opportunity too!
yes, I missed off the shiny wheels too. Mine are black. I'm gradually losing most of the brass handrails, boiler bands etc. A painted finish looks better IMHO.
Ian
Ian
Who is online
Users browsing this forum: ax1709cjm and 1 guest


 shinier than I'd like to be honest but it's gone on nice and thick so hopefully hard wearing! Took forever to cure!
 it was possible to stop it waddling by putting a little side pressure win the wheels but you could tell by the sound it was still not quite right