Page 1 of 1
My version of 'Ellie'
Posted: Mon Mar 19, 2018 5:09 pm
by Tony Bird
Hi,
Like others I have bought Camden's relatively new book Ellie the Steam tram. I like the simplicity of this model locomotive but it is more 7/8" scale rather than the 16 mm scale I usually work in so I have decided to make a similar model albeit a little smaller. I have started with the boiler which I often do when making steam models. I had some 54 mm diameter (2.1/8") which is a little larger than the 50 mm suggested but instead of being 100 mm long it has been reduced to 80 mm long; as this will significantly reduce the boilers water capacity a large steam dome will be fitted. The boiler is fitted with staple shaped heat exchanging pins.
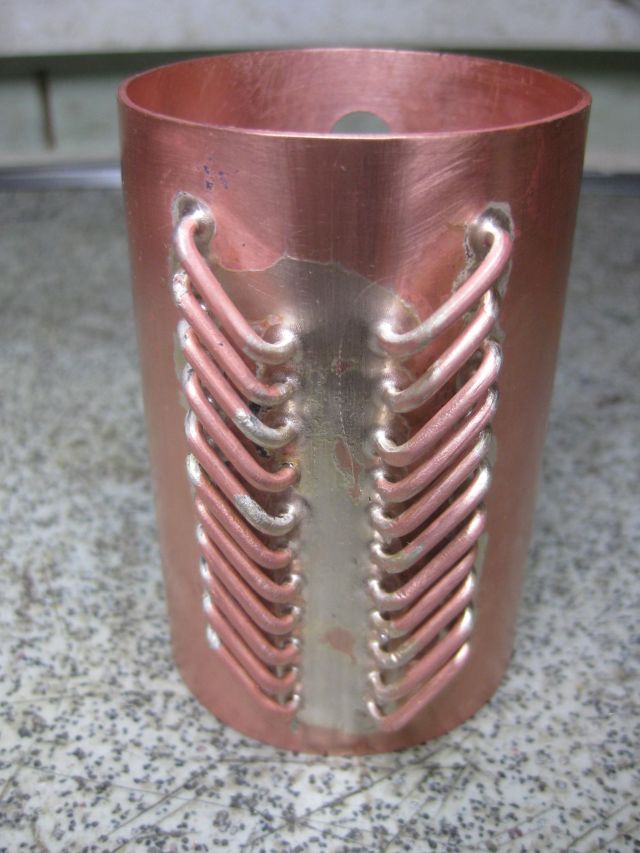
- The heat exchanging pins silver soldered into boiler
- IMG_3416 LR.jpg (81.43 KiB) Viewed 8842 times
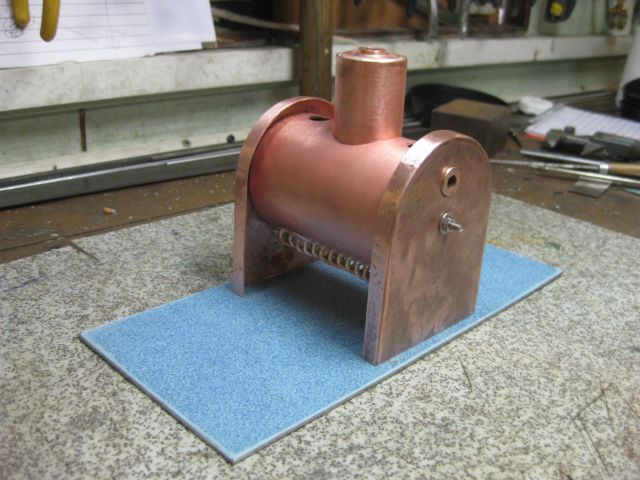
I found part of an old steel shelf to use as a footplate and an old hot water cylinder provided the copper to make a flame guard boiler support.
- IMG_4176 LR.jpg (67.16 KiB) Viewed 8842 times
At the end of playing today the flame guard almost finished.
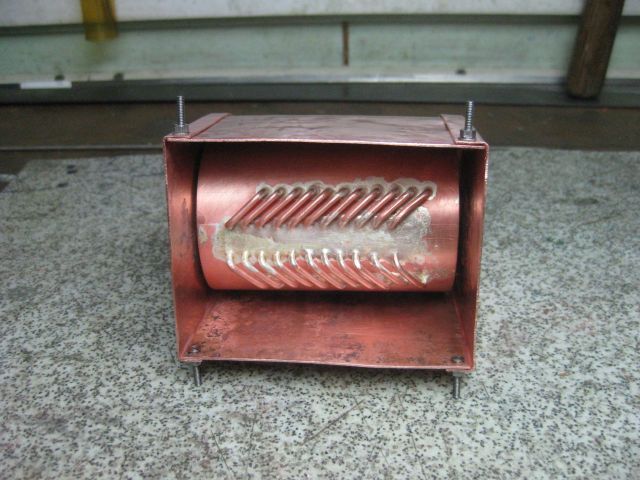
- IMG_4178 LR.jpg (69.11 KiB) Viewed 8842 times
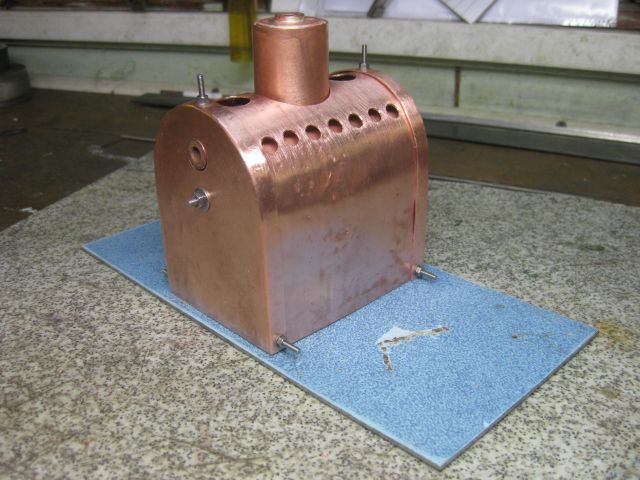
- IMG_4180 LR.jpg (67.01 KiB) Viewed 8842 times
Next I think I will see what wheels I have and make a start on the chassis, I think it will be the Jack shaft version.
Regards Tony.
Re: My version of 'Ellie'
Posted: Mon Mar 19, 2018 10:26 pm
by LNR
Very nice copper work Tony, like the heat exchanger part. Looks to be an interesting project.
Grant.
Re: My version of 'Ellie'
Posted: Tue Mar 20, 2018 5:33 pm
by Tony Bird
Hi,
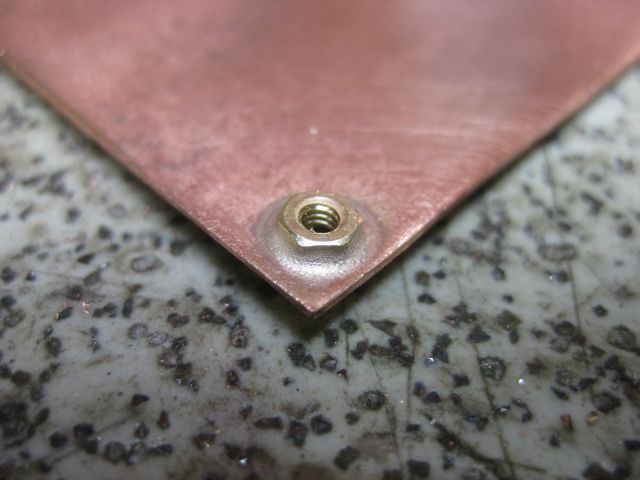
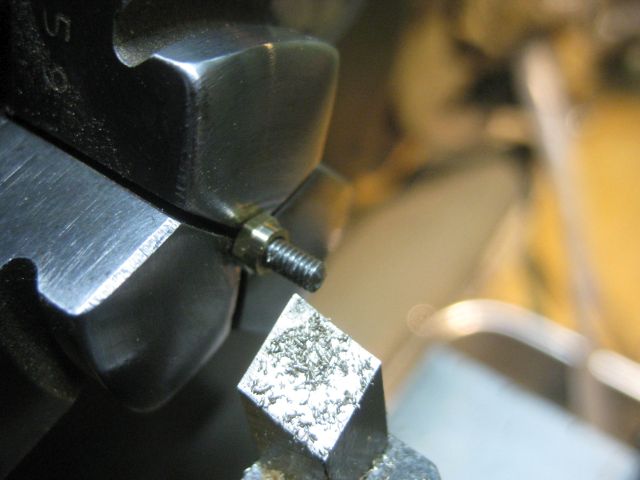
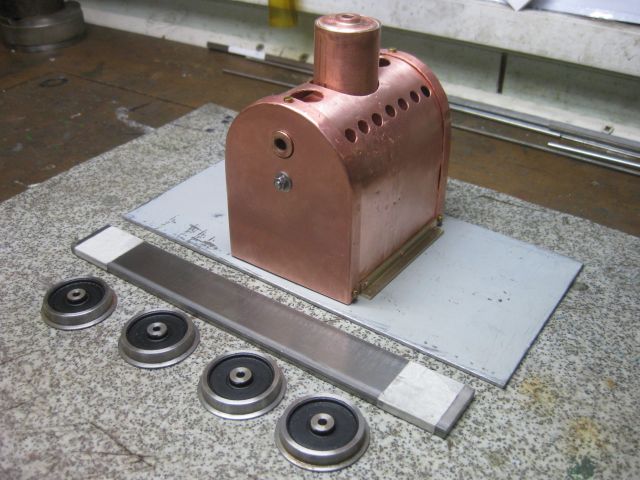
I went to B&Q and bought some 25 mm x 2 mm steel strip to use as frames. Soldered shouldered nuts the the flame guard to hold it together and found a set of 30 mm wheels that might be IPE products.
Regards Tony.
- IMG_4182 LR.jpg (45.75 KiB) Viewed 8768 times
- IMG_4181 LR.jpg (43.46 KiB) Viewed 8768 times
- IMG_4186 LR.jpg (68.72 KiB) Viewed 8768 times
Re: My version of 'Ellie'
Posted: Tue Mar 20, 2018 6:11 pm
by Big Jim
Nice start that Tony, I look forward to seeing the finished job.
Re: My version of 'Ellie'
Posted: Tue Mar 20, 2018 8:02 pm
by tom_tom_go
You make it look very easy Tony.
Re: My version of 'Ellie'
Posted: Thu Mar 22, 2018 8:54 am
by Tony Bird
Re: My version of 'Ellie'
Posted: Mon Mar 26, 2018 5:29 pm
by Tony Bird
Hi,
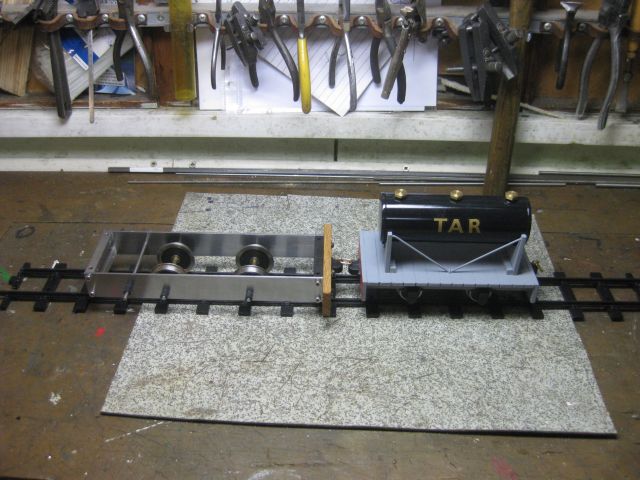
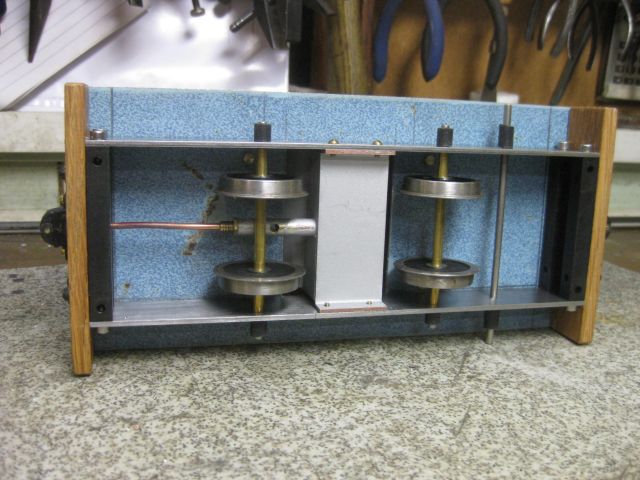
Not a lot of progress on 'Ellie' as it is the beginning of the 'playing' season and I have been preparing our portable layout and stock for it. However I did manage to fit one wooded buffer beam (externally fired boilers make the chassis very hot and I am delicate) which is useful when picking a hot model up. The wheels and axles have been temporarily fitted to work out coupling height and it has been checked against my highest model to work out a maximum chimney height.
Regards Tony.
- IMG_4388 LR.jpg (71.68 KiB) Viewed 8598 times
- IMG_4397 LR.jpg (73.28 KiB) Viewed 8598 times
Re: My version of 'Ellie'
Posted: Tue Mar 27, 2018 4:00 pm
by Tony Bird
Re: My version of 'Ellie'
Posted: Wed Mar 28, 2018 5:38 pm
by Tony Bird
Re: My version of 'Ellie'
Posted: Thu Mar 29, 2018 5:37 pm
by Tony Bird
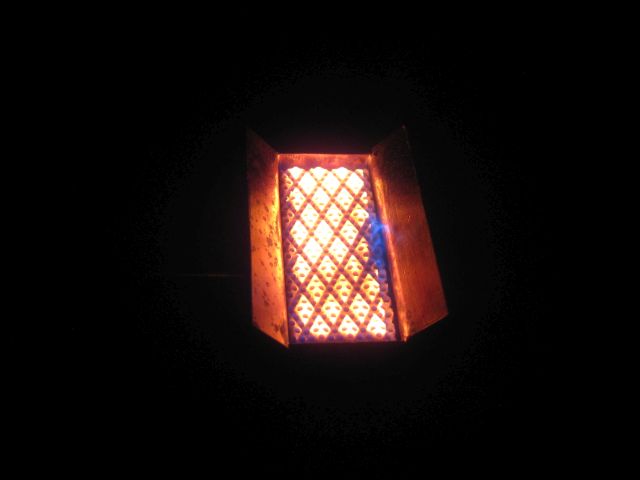
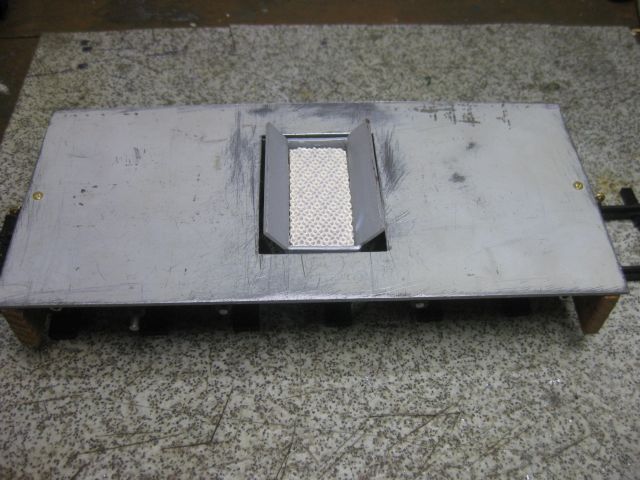
Hi,
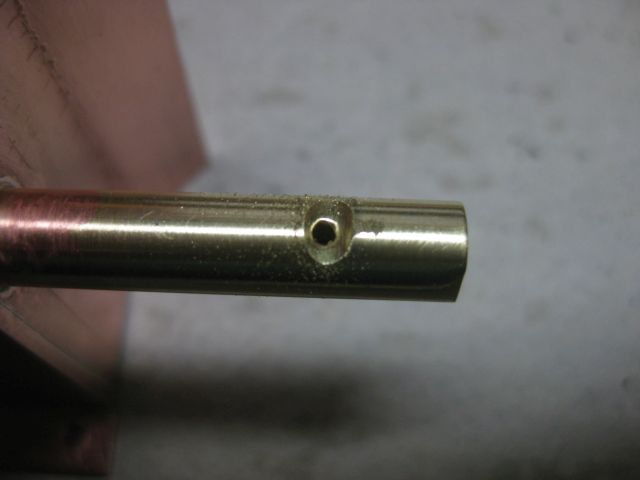
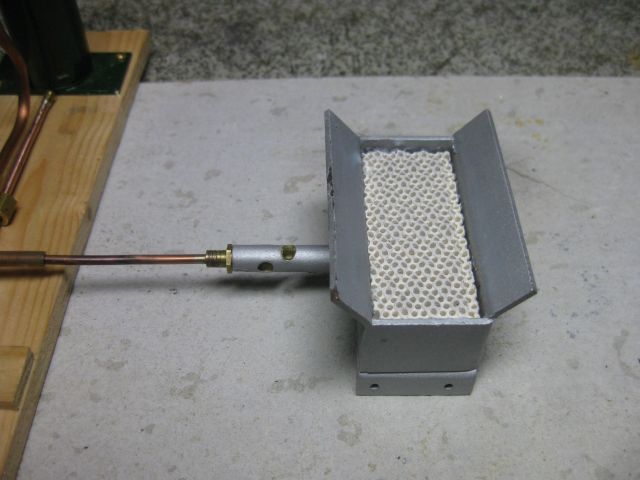
Today I got the ceramic burner working. First I positioned the tube in the burner the jet was hand held and the tube moved in and out until the best looking flame was achieved. It usually works out that the tube ends up about its ID from the far side of the burner. Photo 1 is adjusting Photo 2 the best result. The tube was then soldered in place.
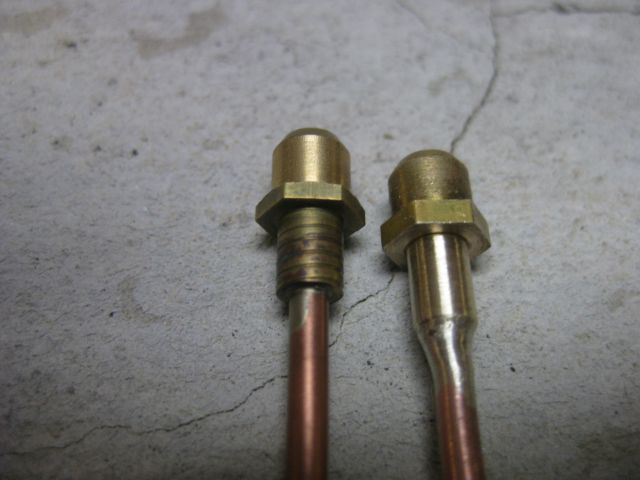
The jets in this case a No.3 is soldered to the pipe. Photo 3.
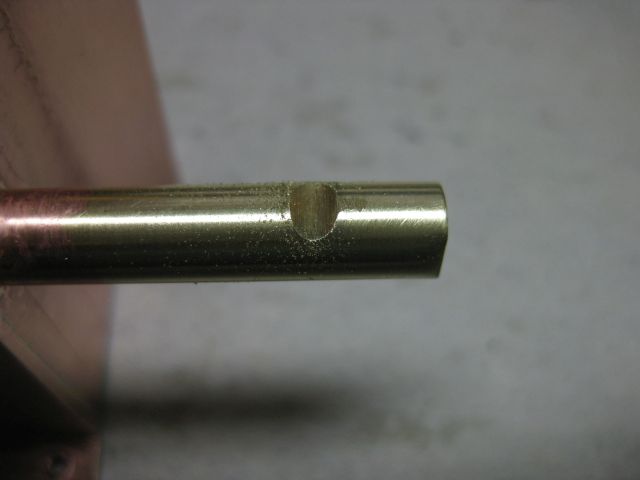
The air holes are started by filing across them then drilling a hole which is open up until the burner looks OK Photos 4&5.
With this burner four holes were needed to get the gas/air mix right Photo 6.
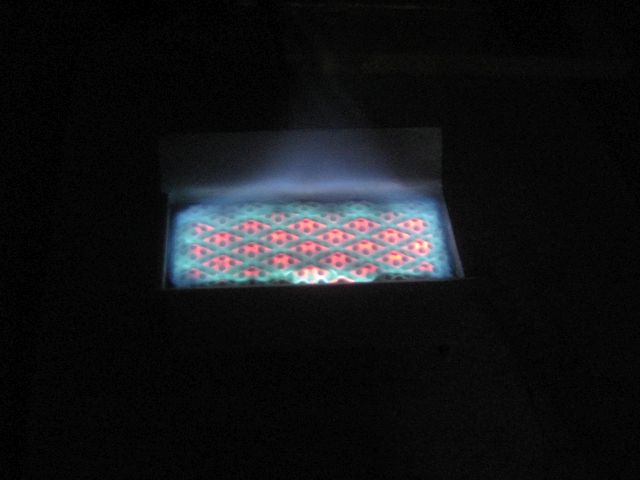
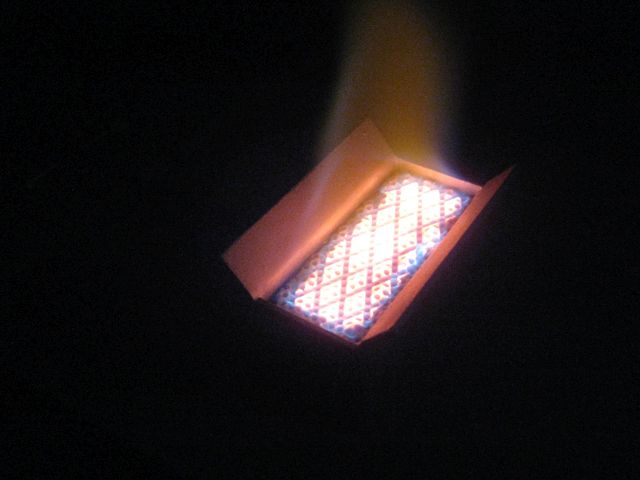
Flame low Photo 7. Flame high Photo 8.
Burner fitted in Chassis Photo 9. Given the low position of the burner the boiler will be lowered to improve the combustion space.
Regards Tony.

- IMG_4422 LR.jpg (51.45 KiB) Viewed 8481 times
- IMG_4424 LR.jpg (24.18 KiB) Viewed 8481 times
- IMG_4425 LR.jpg (43.96 KiB) Viewed 8481 times
- IMG_4426 LR.jpg (24.16 KiB) Viewed 8481 times
- IMG_4427 LR.jpg (25.29 KiB) Viewed 8481 times
- IMG_4437 LR.jpg (47.36 KiB) Viewed 8481 times
- IMG_4435 LR.jpg (31.16 KiB) Viewed 8481 times
- IMG_4436 LR.jpg (32.77 KiB) Viewed 8481 times
- IMG_4438 LR.jpg (61.87 KiB) Viewed 8481 times
Re: My version of 'Ellie'
Posted: Thu Mar 29, 2018 7:36 pm
by philipy
Fantastic, Tony, please keep it coming.
Not sure which I envy most, the skill, the workshop or the ability to devote the time to it!
Re: My version of 'Ellie'
Posted: Fri Mar 30, 2018 7:00 am
by DG
Tony
thanks for this post. I am also building an Ellie but sticking to the plan as it is all new to me. Your post is great inspiration and a source of lots of brilliant ideas , thank you.
Dave
Re: My version of 'Ellie'
Posted: Fri Mar 30, 2018 9:24 am
by FWLR
philipy wrote: ↑Thu Mar 29, 2018 7:36 pm
Not sure which I envy most, the skill, the workshop or the ability to devote the time to it!
Agree with everything philipy says, words are not enough to express your expertise.
FANTASTIC…….

Re: My version of 'Ellie'
Posted: Tue Apr 03, 2018 5:57 pm
by Tony Bird
Hi,
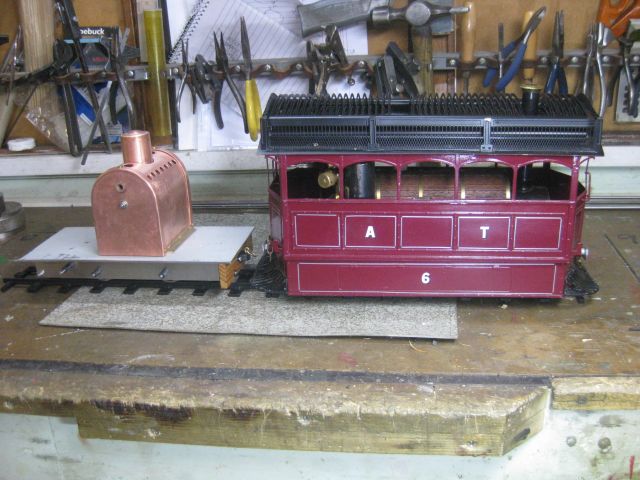
Having finished the ceramic burner not a lot has been done to Ellie. The burner has been fitted to the chassis and the boiler has been lowered by 8 mm to get a better proportioned combustion space. A fire hole/lighting/viewing hole has been drilled in the boiler flame guard and as the model is going to the 16 mm Narrow Gauge Modellers AGM in Peterborough as an exhibit this Saturday the boiler has temporally been attached to the footplate.
Regards Tony.
- IMG_4460 LR.jpg (69.93 KiB) Viewed 8350 times

- IMG_4459 LR.jpg (63.47 KiB) Viewed 8350 times
Re: My version of 'Ellie'
Posted: Tue Apr 03, 2018 6:18 pm
by bambuko
Tony Bird wrote: ↑Thu Mar 29, 2018 5:37 pm...The air holes are started by filing across them then drilling a hole which is open up until the burner looks OK ...
Tony, I am puzzled by the particular way you do the air holes

Is it because the filing improves performance in some way? or is it just to make hole drilling easier?
Hope you can elaborate, please.
thank you
Chris
Re: My version of 'Ellie'
Posted: Wed Apr 04, 2018 7:42 am
by Tony Bird
Hi Chris,
Tony, I am puzzled by the particular way you do the air holes
Is it because the filing improves performance in some way? or is it just to make hole drilling easier?
Hope you can elaborate, please.
As you suggest it is to make drilling the hole easier. It is never easy to drill what is quite a large hole through a rod accurately and even more difficult to do it in a thin wall brass tube that has been annealed. Even putting a centre in the tube can flatten it unless it is supported inside, jigs can be made but I have found that filing a half round flat across it makes it easier. The flat is filed so its length is about the same as the hole required sometimes doing this breaks though into the tube if not a small drill held in a pin chuck is used the create a hole. With this hole a small hole the other side of the tube can be drilled because it can be supported outside. With a hole on both sides of the tube it is made larger using a round file or if you have one a brooch. Slowly increasing the size of an air hole on a burner tube can be useful as it allows small adjustments of the gas/air mix. About the largest practical hole in a 1/4" K&S tube is 4 mm.
Regards Tony.
Re: My version of 'Ellie'
Posted: Wed Apr 04, 2018 9:17 am
by bambuko
That's cleared it - thank you.
I am following your thread with interest because I want to use similar burner in my loco
Re: My version of 'Ellie'
Posted: Thu Apr 05, 2018 8:16 am
by FWLR
Have a great weekend Tony…I’am sure there will be loads of interest and questions to answer.