Page 2 of 4
Re: My Winter Project - 2 Car Multiple Unit
Posted: Sun Dec 10, 2017 7:46 pm
by ge_rik
James from Devon wrote: ↑Sun Dec 10, 2017 7:38 pm
Thanks for looking and I hope you enjoy the updates.
Cheers
J
Enjoy and admire......
Rik
Re: My Winter Project - 2 Car Multiple Unit
Posted: Sun Dec 10, 2017 8:00 pm
by Soar Valley Light
Hi Jim,
My goodness, there is some very imaginative work going on there. The results are really good, it's very interesting following the progress and the result promises to be something really exceptional. Keep the updates coming please!
Andrew
Re: My Winter Project - 2 Car Multiple Unit
Posted: Sun Dec 10, 2017 8:01 pm
by steamer68
Fantastic work James coming along nicely thanks for the updates on this great build.

Re: My Winter Project - 2 Car Multiple Unit
Posted: Sun Dec 10, 2017 8:37 pm
by Peter Butler
Great idea for the bogie sides.... I hate multiples!
Re: My Winter Project - 2 Car Multiple Unit
Posted: Sun Dec 10, 2017 9:43 pm
by River Lin
This is coming along beautifully. The finished model will be something to be proud off..
D.
Re: My Winter Project - 2 Car Multiple Unit
Posted: Sun Dec 10, 2017 10:21 pm
by tom_tom_go
As usual James you make it all look so easy to achieve the great results you produce.
Re: My Winter Project - 2 Car Multiple Unit
Posted: Sun Dec 10, 2017 10:33 pm
by James from Devon
tom_tom_go wrote: ↑Sun Dec 10, 2017 10:21 pm
As usual James you make it all look so easy to achieve the great results you produce.
Thank you Tom....of course, you only see the pictures that I choose at the end of the day. I spare you guys the frustrated shouting / pile of broken / dropped / wrong parts in the bin and my wife bringing me coffee to calm me down .... When I set out building the railway, I had imagined that the most pleasure would come from sitting in the garden on a sunny evening watching the trains run around... I never thought that so much pleasure could come from making my own stock

Re: My Winter Project - 2 Car Multiple Unit
Posted: Sun Dec 10, 2017 10:45 pm
by Peter Butler
I couldn't agree with you more James... the pleasure of seeing something you have made yourself and knowing the effort which has gone into it is far in advance of anything 'off the shelf' running round your garden.
Keep the faith!
Re: My Winter Project - 2 Car Multiple Unit
Posted: Mon Dec 11, 2017 6:41 am
by philipy
Looking good Jim.
Interesting that you chose to mould the bogie sides rather than 3D print them. Presumably you decided that trying to clean up 8 complicated surface prints to a decent standard would be too problematic?
Agree with your comment about the pleasures of building. I've found before that people are sometimes bemused by the fact that I can spend ages getting something built, run it once or twice and then do nothing more with it.
Re: My Winter Project - 2 Car Multiple Unit
Posted: Mon Dec 11, 2017 7:57 am
by pandsrowe
James, that's truly inspirational. Would you be so kind as to pass on details as to your moulding and casting techniques?
Re: My Winter Project - 2 Car Multiple Unit
Posted: Mon Dec 11, 2017 9:17 am
by bazzer42
Nice workmanship, I think that blue is going to work well.
Re: My Winter Project - 2 Car Multiple Unit
Posted: Mon Dec 11, 2017 9:42 am
by ge_rik
James from Devon wrote: ↑Sun Dec 10, 2017 10:33 pm
........, I had imagined that the most pleasure would come from sitting in the garden on a sunny evening watching the trains run around... I never thought that so much pleasure could come from making my own stock
..... and of course, the added pleasure of knowing that the stock running gently round the garden on that sunny evening is quite unique to your railway and all your own work
Rik
Re: My Winter Project - 2 Car Multiple Unit
Posted: Wed Dec 13, 2017 7:06 pm
by Todsmods
Looks great
Here is a picture of the Australian railcar set i designed myself
NSWGR CPH and CTH railmotor
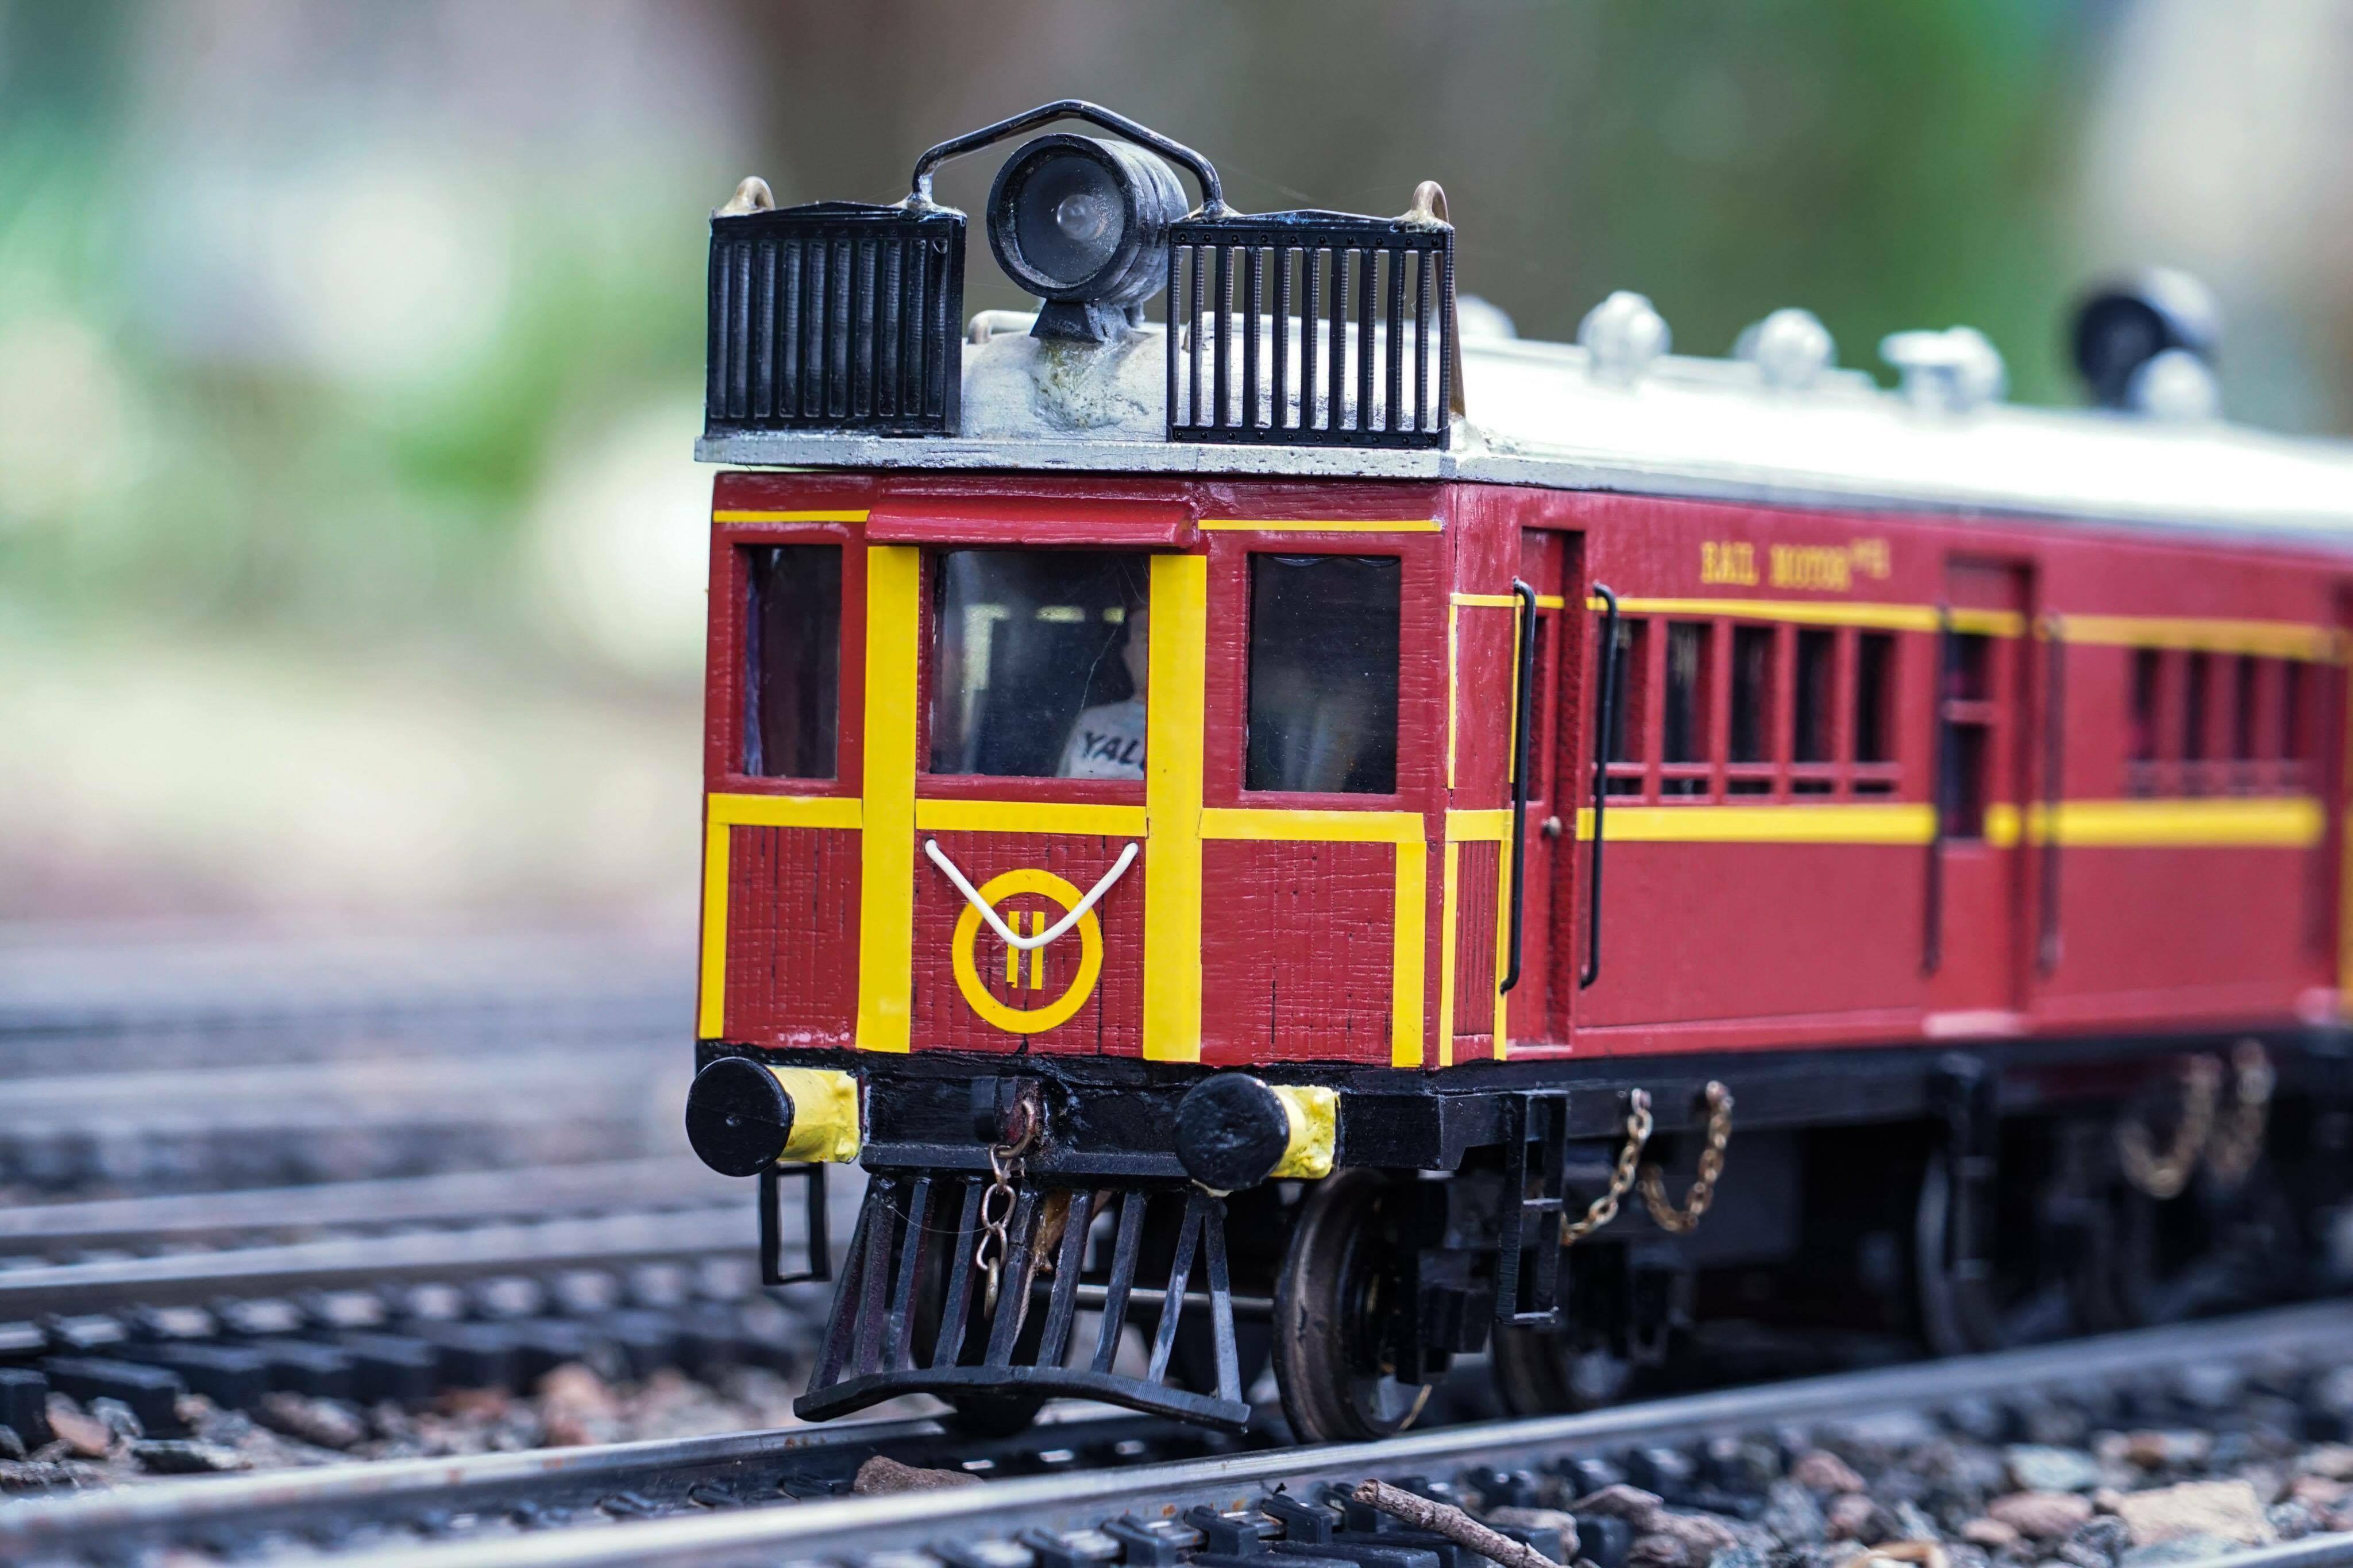
- received_10212728860830403.jpeg (653.24 KiB) Viewed 7141 times
Re: My Winter Project - 2 Car Multiple Unit
Posted: Sun Dec 17, 2017 5:18 pm
by James from Devon
Todsmods wrote: ↑Wed Dec 13, 2017 7:06 pm
Looks great
Here is a picture of the Australian railcar set i designed myself
NSWGR CPH and CTH railmotor received_10212728860830403.jpeg
Thanks and I love your railcar....what gauge is it?
Re: My Winter Project - 2 Car Multiple Unit
Posted: Sun Dec 17, 2017 5:19 pm
by James from Devon
bazzer42 wrote: ↑Mon Dec 11, 2017 9:17 am
Nice workmanship, I think that blue is going to work well.
Cheers! it comes up a little bright in the camera flash. In case you want any, its Tamiya Flat Blue XF-8

Re: My Winter Project - 2 Car Multiple Unit
Posted: Sun Dec 17, 2017 5:20 pm
by James from Devon
Peter Butler wrote: ↑Sun Dec 10, 2017 8:37 pm
Great idea for the bogie sides.... I hate multiples!
Yeah! multiples are the devils work!
Re: My Winter Project - 2 Car Multiple Unit
Posted: Sun Dec 17, 2017 5:22 pm
by RylstonLight
I like your solution for the springs to accomodate the moulding. Simple once you are clever enough to think of it!
Re: My Winter Project - 2 Car Multiple Unit
Posted: Sun Dec 17, 2017 5:25 pm
by James from Devon
RylstonLight wrote: ↑Sun Dec 17, 2017 5:22 pm
I like your solution for the springs to accomodate the moulding. Simple once you are clever enough to think of it!
Cheers! I was less clever for the four or five methods I tried first which didn't work very well at all!
Re: My Winter Project - 2 Car Multiple Unit
Posted: Sun Dec 17, 2017 5:36 pm
by James from Devon
pandsrowe wrote: ↑Mon Dec 11, 2017 7:57 am
James, that's truly inspirational. Would you be so kind as to pass on details as to your moulding and casting techniques?
Hi, thanks for you comments and happy to talk through what I do. I must say I am not a moulding expert but have been dabbling for a couple of years. If you want expert advice, I would ask Ron at Swift Sixteen, he clearly has some Jedi-Level skill!
I use a condensation cure silicone for the mould. I make a master of the part I need and if both sides need to have specific dimensions then I make a 2 part mould but these bogie sides did not need details on the back so a single sided, or open mould would do.
I glue the master to a thick piece of plastic and make a lego box around it with around an inch all the way around the edge of the part. Mi and pour in the silicone (I use MB Fibreglass for mine) in a thin strand from one corner (this eliminates air bubbles and let the silicone flow around the part. Wait the full time the rubber needs to set and leave the mould somewhere flat and warm.
One the rubber is hard, remove the lego and carefully peel the mould away from the master.
I use Fast Cast resin for my parts. Mix is 1:! - my tip here is thoroughly mix it but quickly, you have about 2 mins before it starts to set.
Pour slowly into the mould and i use a cocktail stick to trace around the mould detail once the resin has been poured, this dislodges an air bubbles. also, tap the mould or hold a running drill against it, anything to vibrate the resin for about a minute - this further removes air bubbles.
Resin takes some practice but worth the effort. Like I say I am not an expert so the above may or may not be the "proper" method but it works for me!
There is a company in the USA called Smooth-On, they have a you tube channel with lots of great instructional videos. I use them regularly!
Hopes that's useful
Cheers
Jim
Re: My Winter Project - 2 Car Multiple Unit
Posted: Sun Dec 17, 2017 5:49 pm
by James from Devon
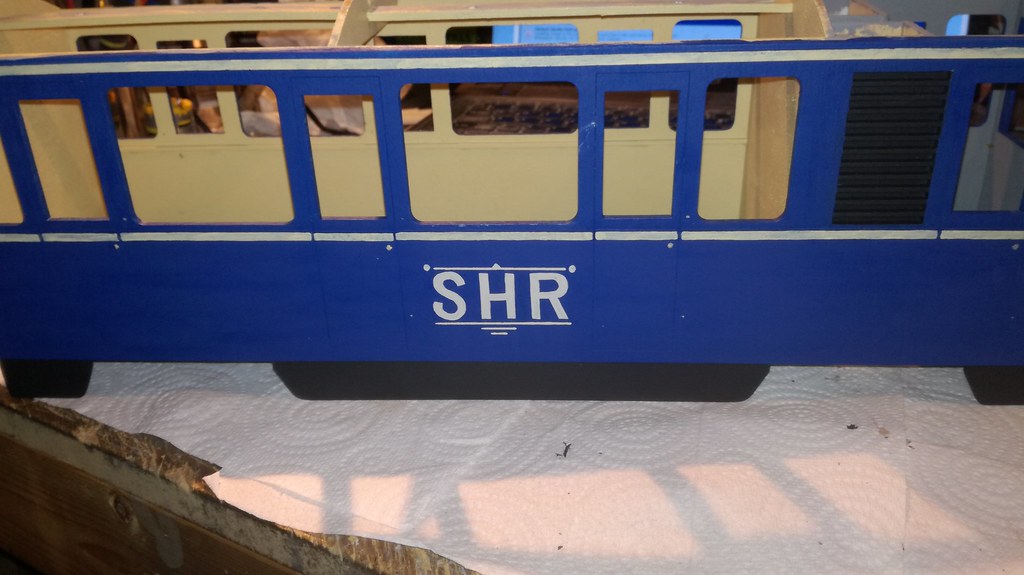
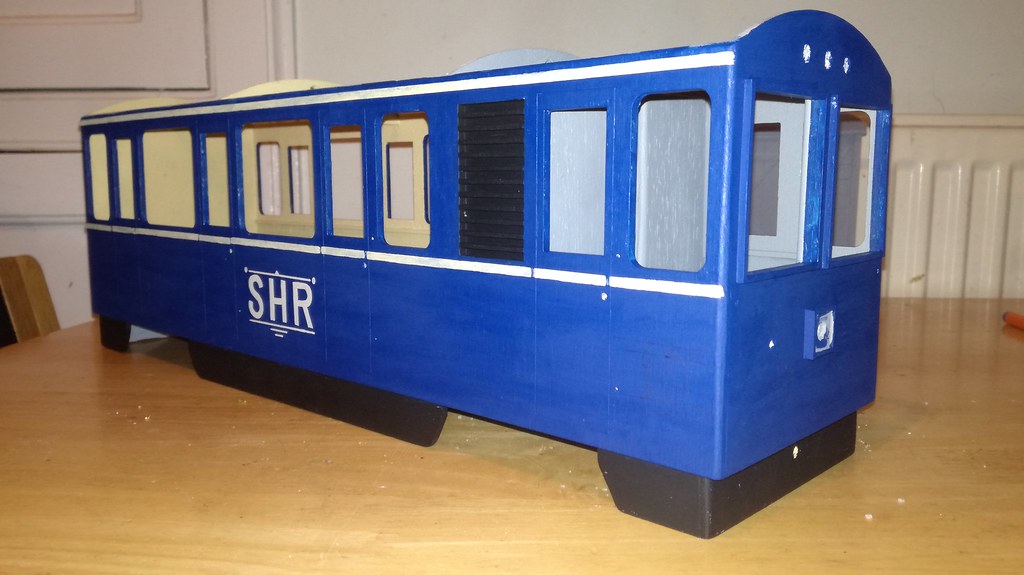
Ok, so here is my weekly update and I managed to have a quick test out on the track between showers to prove my bogie design an make sure i wasn't going to be hitting the tunnel sides...which thankfully, I didn't.
Nice to see it move under its own power but of course I have a load to do to finish this model off so it's back to the workshop.
Here is a short video of the test run. I need to add some weight under the back buffer beam to balance out the weight of the batteries but other than that, it ran quite well.
https://www.youtube.com/watch?v=Fue-Ne5 ... e=youtu.be
This week was mainly painting and wiring.
Paintwork - the blue is not as bright outside, the camera flash makes it a little bright!
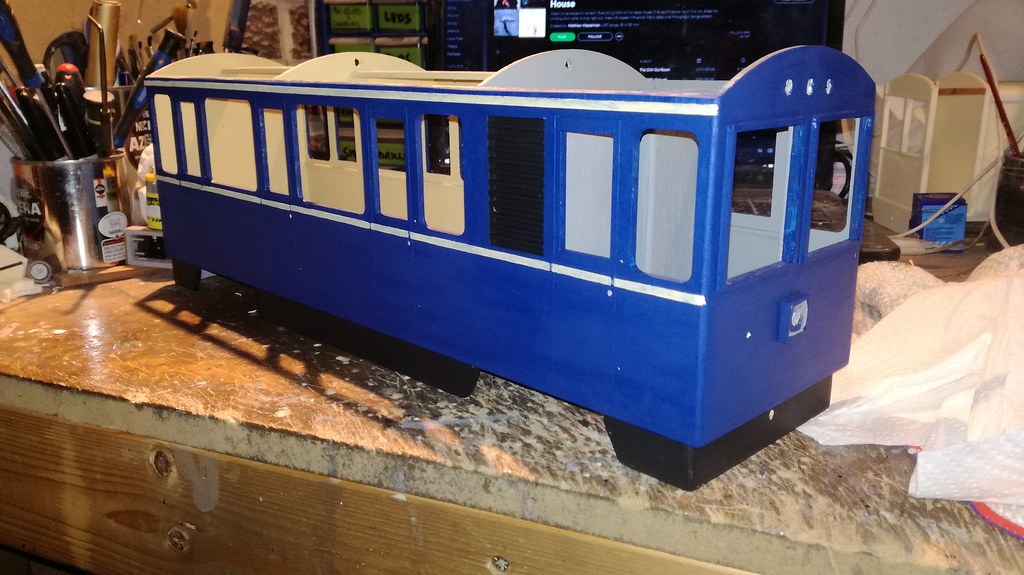
Signwriting...tedious, but fun!
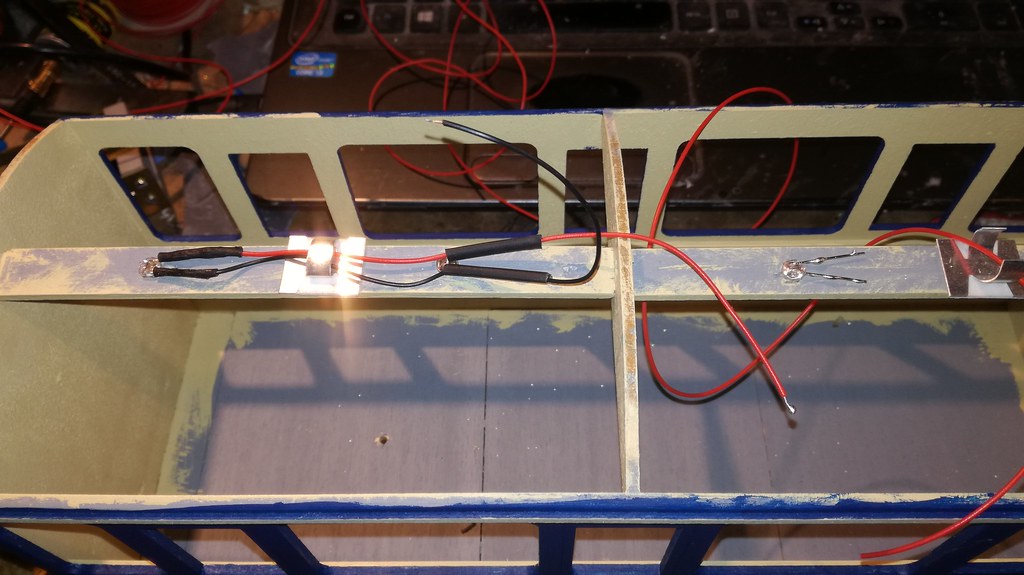
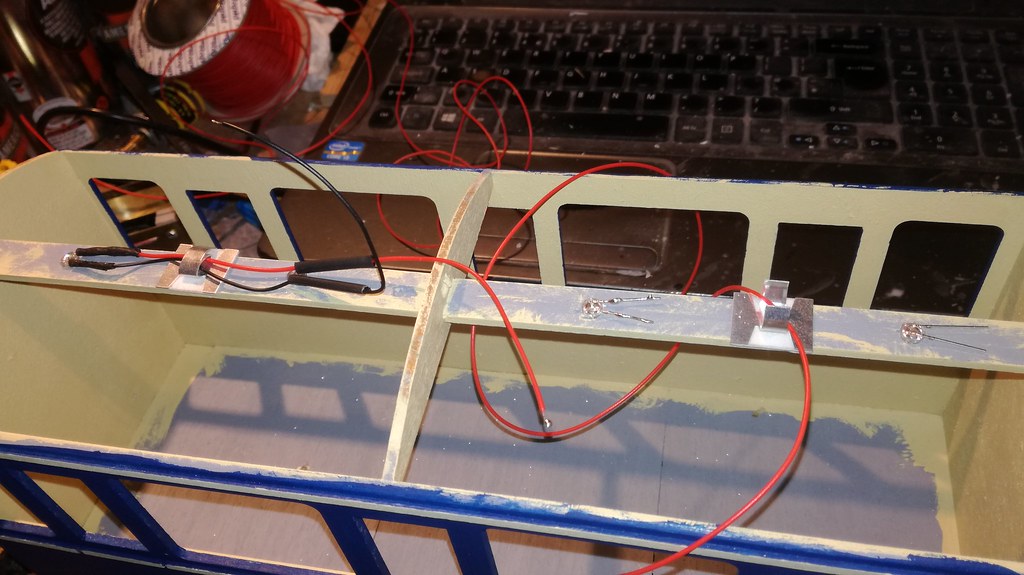
Interior lighting with warm white LEDS:
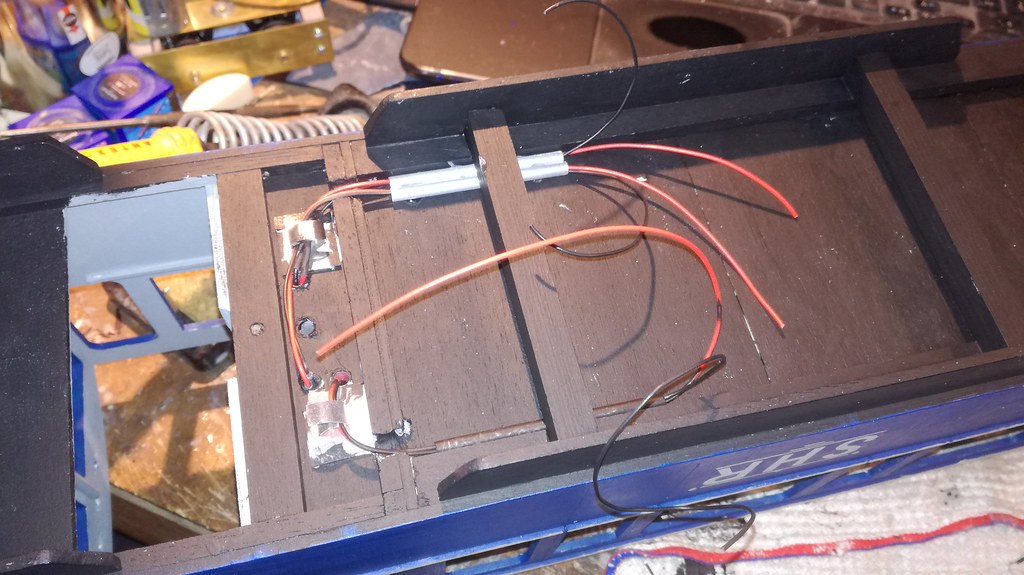
Wiring for motor and batteries ready for RC gear to be fitted:
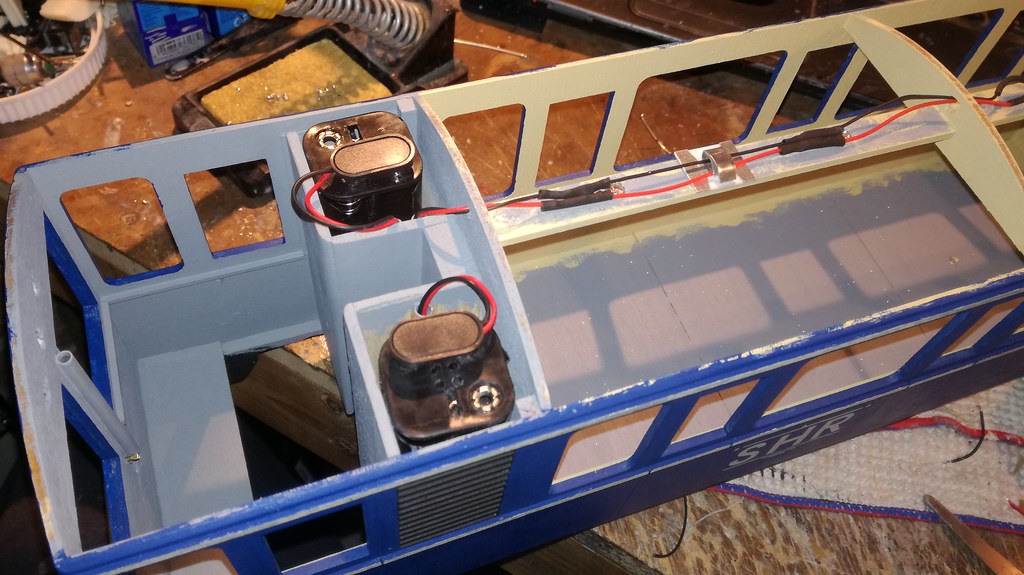
Battery packs:
Being charged for the first time:
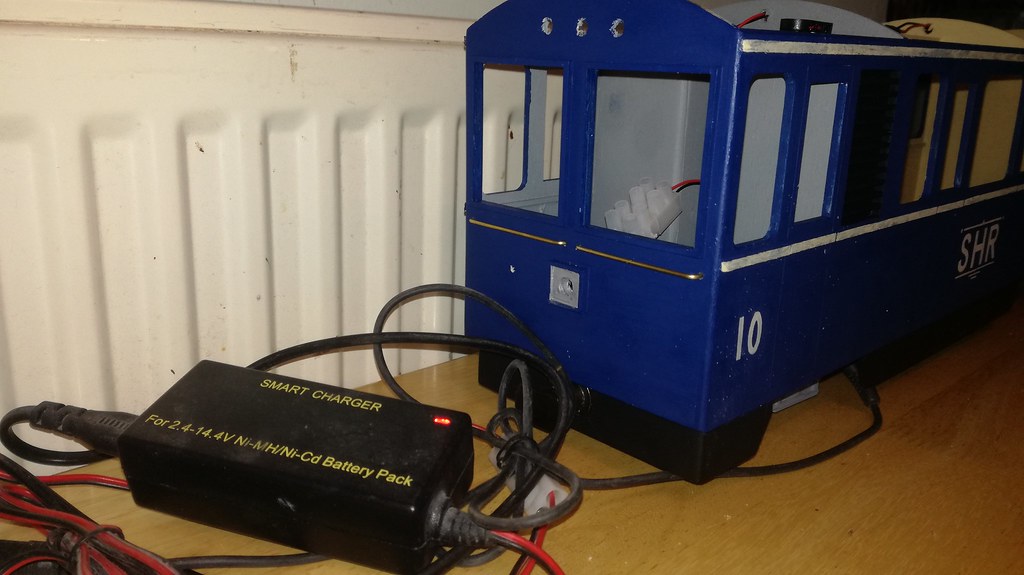
Outside on the track for the first time:
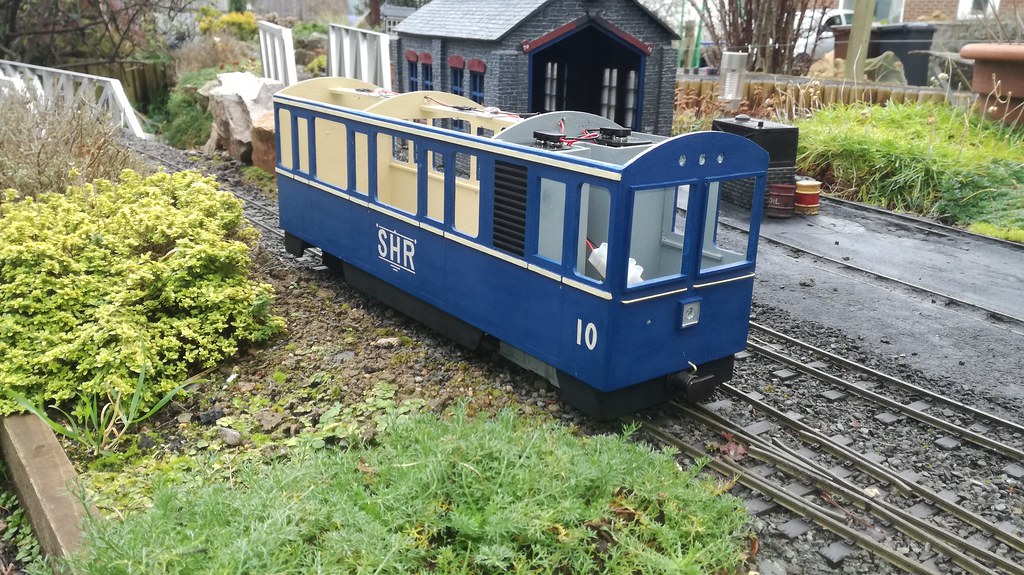
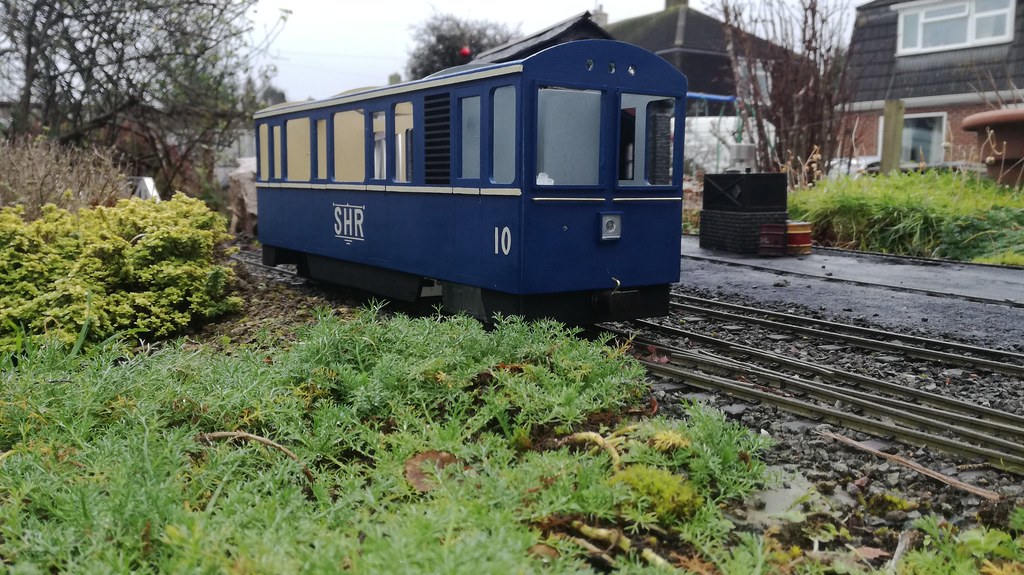
That's it for this week - next job is to finish the interior of this one and then crack on with the trailer car.
Thanks for all the support people, much appreciated.
I will likely post another update this week but just in case I don't...I wish you all a lovely, happy and train-filled Christmas