Hi Peter et al.
Following on the thread of how i made the tumblehome using lamination of wood layers, i thought i would tackle the guards duckets next. I knew that it is possible to use steam or boiling water to soften plasticard. It could then be formed to the required shape, held till cold and it will then retain its new shape. My experience is that even though it was cold when the pressure was released it slowly straightened out again to almost its original shape - flat.
I next decided to try laminating using two pieces of 0.6mm plasticard cut to width but longer to allow for cutting to length when finished.
I first boiled the kettle again. Got a round metal former and a bottle of MEK ready. I put the twp pieces of p.card into a cup and immersed in boiling water for a minute to soften them. I then quickly dried the pieces on tissue, applied MEK to one for about 2 cms from one end, put the two pieces together and rolled and held them tightly around the former for about 5 minutes for the MEK to dry.
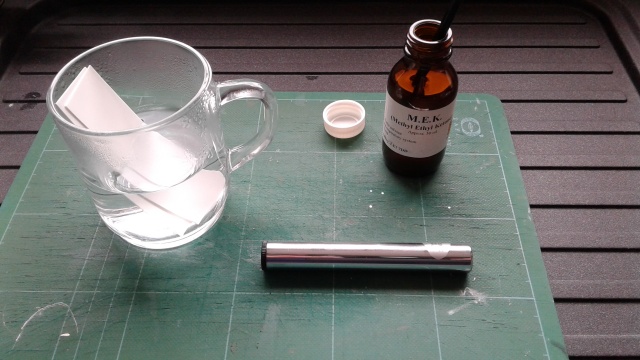
- IMG_20170703_162343.jpg (86.79 KiB) Viewed 3657 times
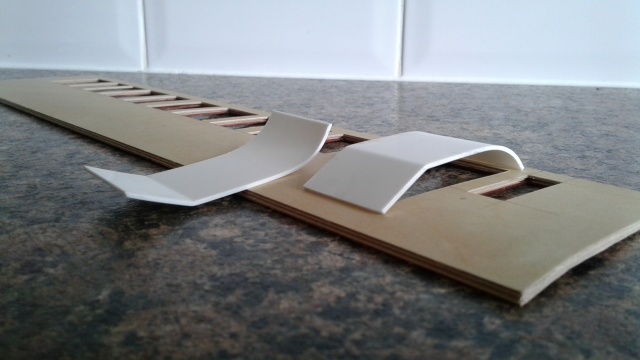
I repeated this for the other ducket and then cut the curved end to length.

- IMG_20170703_162729.jpg (66.59 KiB) Viewed 3657 times
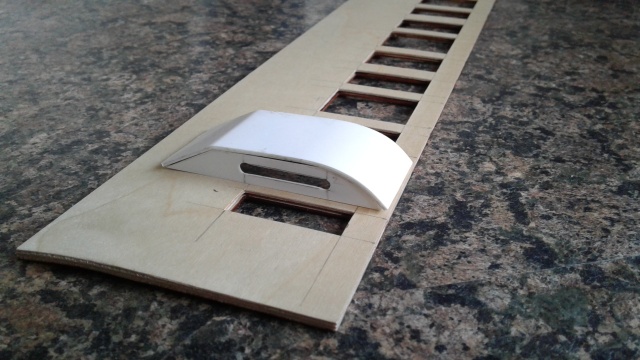
The next stage was to measure and fold the lower part of the ducket inwards and then part the layers slightly to allow MEK to be brushed between and held in place to cure. This gave me the following when the lower end was also cut to length.
- IMG_20170703_162454.jpg (61.63 KiB) Viewed 3657 times
A strip of p.card was cut 10mm wide and the ducket used as a template to draw the shape which was then cut with a knife.

- IMG_20170703_193658.jpg (121.42 KiB) Viewed 3657 times
The window was cut as a rectangle with a knife and the ends rounded with a needle file.
- IMG_20170703_193723.jpg (95.17 KiB) Viewed 3657 times
The ducket components now need cleaning and glueing before fitting.
I realise it would have been easier to carve solid duckets from wood but i want them to look realistic from the coach interior with a seat fitted inside as per the plan.
David.
David T.