IP engineering Laser Cut Ffestiniog Carriage No17/18

Discussion of Rolling Stock related topics should go here
User avatar
laalratty
Retired Director
Retired Director
Posts: 3887
Joined: Wed Jan 16, 2008 5:35 pm
Location: Morecambe

IP engineering Laser Cut Ffestiniog Carriage No17/18

Post by laalratty » Fri Feb 20, 2009 9:15 pm

The ANLR's latest piece of passenger rolling stock arrived today (yep, no scratchbuilding this time), a IP laser cut Ffestiniog bogie carriage. This my first bogie coach from IP engineering. I soon had the postage packaging ripped off to reveal...
Image
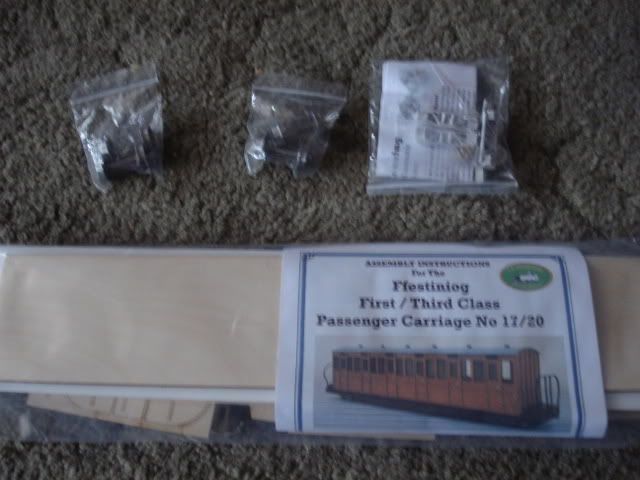
The actual kit, instructions, a pair of Ip's small bogies and 2 sets of wheels. A quick read through of the instructions showed them to be fairly basic as usual, but all that is neccesery (I think IP use the principle of KISS, keep it simple stupid.)
Image
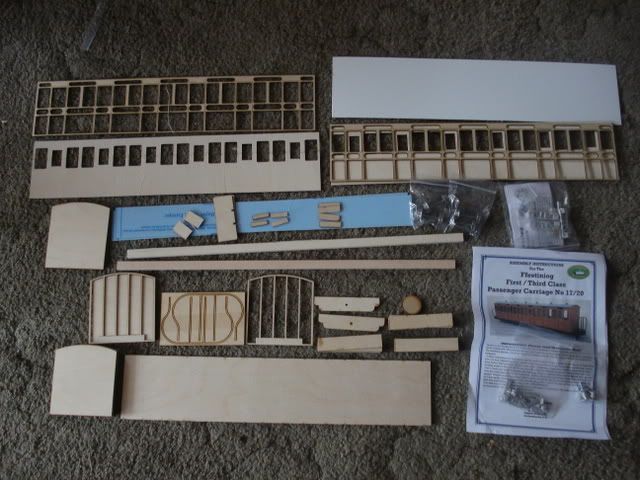
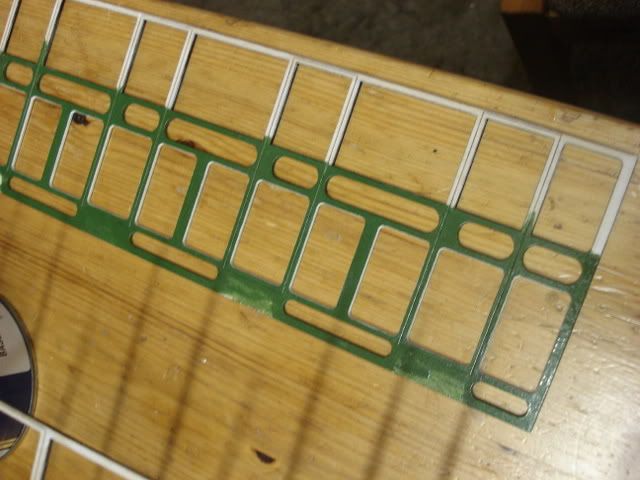
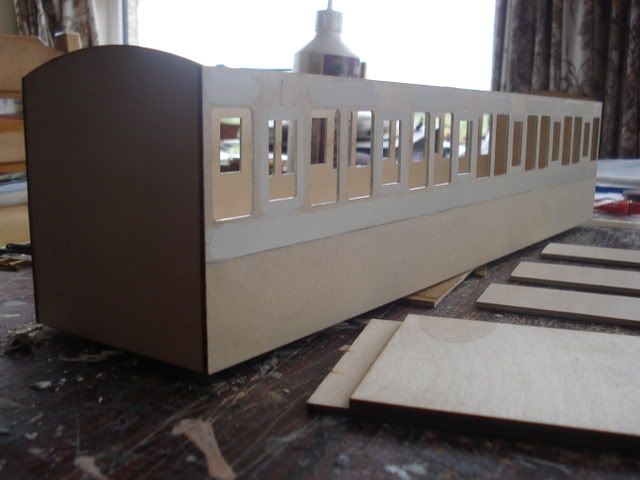
The parts laid out, showing some of the great overlays made posible by the use of laser cutting. I was a bit concerend that some of the smaller wooden parts were not in their own bag, this would increase the chance of them getting lost. A parts list would of been useful as well. As it was, I had a spare zip up bag, so I put the parts in there
Image
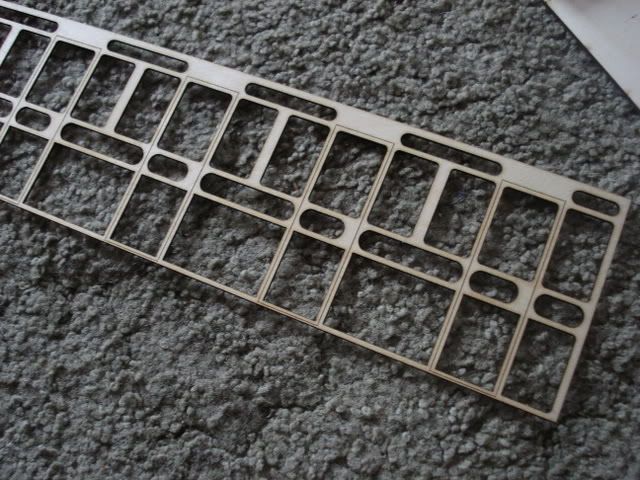
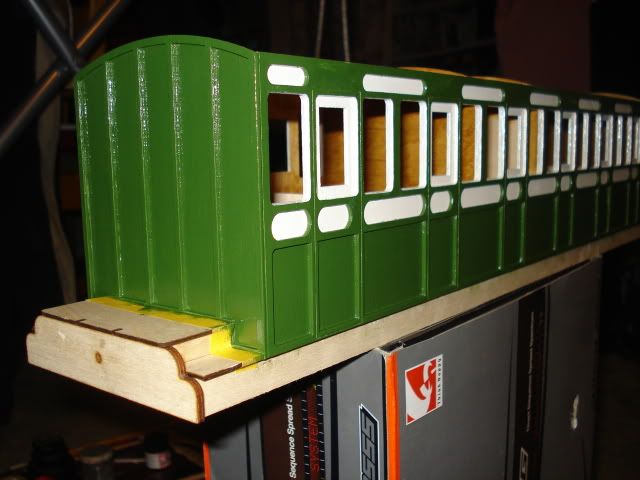
A closer look at the superb overlay. As with the Vale of Rheidol van I built for SLRmidge, the quality of the cutting and detail is fantastic, I can see this kit litterely falling together, although I will make a few alterations to make the carriage more faithful to the prototype and also look nice with my scratchbuilt carriages. Livery will be green and off white, like my other carriages. I will keep you updated with progress, although the package from IP also contained the bits neccesery to finish off the permanant way van so I will be doing that as well.
"What the hell is that?"
"It's a model icebreaker sir."
"It's a bit big isn't it?"
"It's a full scale model sir....."

pauly
Driver
Driver
Posts: 1970
Joined: Tue Aug 12, 2008 9:18 pm

Post by pauly » Fri Feb 20, 2009 9:17 pm

I think I know a certain Admin who will be jealous ;) :lol:
A steam propelled life-style.

User avatar
ACLR
Retired Director
Retired Director
Posts: 1592
Joined: Wed Oct 17, 2007 6:22 am
Location: Brisbane
Contact:

Post by ACLR » Fri Feb 20, 2009 9:17 pm

that looks great mate :D

SillyBilly
Retired Director
Retired Director
Posts: 3536
Joined: Sat Aug 18, 2007 11:00 pm

Post by SillyBilly » Fri Feb 20, 2009 10:40 pm

Nice one, personally I'd get some different bogies, the ones provided look a bit out to me. One of the guys around here bowed the sides on his kit, do you want me to ask if he could do you some hints for bowing it?

User avatar
laalratty
Retired Director
Retired Director
Posts: 3887
Joined: Wed Jan 16, 2008 5:35 pm
Location: Morecambe

Post by laalratty » Fri Feb 20, 2009 10:50 pm

Well I know what would be involved, and I am possibly tempted as I will be discarding 3 of the diverders and making my own so as to make it that the third areas as 2 compartments like number 17. I take it it is just cut a curve in the sides and divider and narrow the floor to suite. I would like a pic of the finished result if that is possible? As for the bogies, I will leave them as they are as they cannot be seen much anyway (that and they have effectively been paid for!)
"What the hell is that?"
"It's a model icebreaker sir."
"It's a bit big isn't it?"
"It's a full scale model sir....."

User avatar
laalratty
Retired Director
Retired Director
Posts: 3887
Joined: Wed Jan 16, 2008 5:35 pm
Location: Morecambe

Post by laalratty » Thu Feb 26, 2009 9:42 pm

I have started this carriage over the last few days, however in a masive break in tradition for me, "I am doing all the right instructions, but not necesserely in the right order" :lol:
This is because I want to get one of the most tedious jobs out of the way first, paiting the overlays for the side. Paiting them before glueing them on means that there will be not having to be very neat painting around the beading. However, the inside of the windows are to be painted white to match Ffestiniog carriage 17
http://www.frheritage.org.uk/wiki/Carriage_17 and as the rest of the overlay is to be painted green, i'll have to be careful. I painting the overlay, I will assemble the body, and paint all of the areas of white before gluing the overlay on. From then on, i'll be doing things in the right order, though i'm thinking of making a wood roof insted of using the plasticard, it all depends on whether I can get the plasticard to bend right! I'll hopefully post some pics of progress soon.
Ps Sorry William, i'm still not painting the ends red... ;)
"What the hell is that?"
"It's a model icebreaker sir."
"It's a bit big isn't it?"
"It's a full scale model sir....."

User avatar
LMS-Jools
Driver
Driver
Posts: 1325
Joined: Thu Sep 25, 2008 9:24 pm
Location: Northwest UK

Post by LMS-Jools » Fri Feb 27, 2009 8:35 am

Looking forward to seeing it completed. :twisted:

User avatar
SLRmidge
Trainee Driver
Trainee Driver
Posts: 985
Joined: Tue May 27, 2008 6:06 pm
Location: Lancashire

Post by SLRmidge » Fri Feb 27, 2009 9:56 am

At this rate you're going to have to get another engine to pull all these coaches :!: :lol: :lol: :lol:
Ian of the SLR(N)

User avatar
Matt
Driver
Driver
Posts: 1978
Joined: Sat Nov 24, 2007 3:56 pm

Post by Matt » Fri Feb 27, 2009 7:59 pm

Maybe you can get ptlrsam to lend you Black Combe.
Garden Railways-best hobby in the world.

User avatar
laalratty
Retired Director
Retired Director
Posts: 3887
Joined: Wed Jan 16, 2008 5:35 pm
Location: Morecambe

Post by laalratty » Fri Feb 27, 2009 11:07 pm

Matt wrote:Maybe you can get ptlrsam to lend you Black Combe.
Well it has visited the ANLR- TWICE! Unfortunatly it refuese to pull trains under 30 feet long and usually brings a massive rake of freight with it
All I am saying to Midge's post is ;)
"What the hell is that?"
"It's a model icebreaker sir."
"It's a bit big isn't it?"
"It's a full scale model sir....."

User avatar
laalratty
Retired Director
Retired Director
Posts: 3887
Joined: Wed Jan 16, 2008 5:35 pm
Location: Morecambe

Post by laalratty » Sat Feb 28, 2009 9:41 pm

Well here is one of the overlays painted
Image
The area not painted will be done when the carriage side is assembled. It has taken a long time to get this far, 1 coat of primer, and 3 coats of green and 2 of white (can you see it, on the inside of the windows, I must be a masachist!) A long time with small brushes, that white on the inside of the windows took 1 1/2 to 2 hours a coat! The green took just as long per coat as well. Hopefully I will start on the body tommorow, this also has some pre painting to be done on it before the overlay is fitted
"What the hell is that?"
"It's a model icebreaker sir."
"It's a bit big isn't it?"
"It's a full scale model sir....."

User avatar
Palmerston
Trainee Fireman
Trainee Fireman
Posts: 194
Joined: Mon Feb 02, 2009 5:56 pm
Location: Southest of The Netherlands

Post by Palmerston » Sat Feb 28, 2009 11:11 pm

Looking forward to see your progress as i need one for my Taliesin

User avatar
laalratty
Retired Director
Retired Director
Posts: 3887
Joined: Wed Jan 16, 2008 5:35 pm
Location: Morecambe

Post by laalratty » Sun Mar 01, 2009 9:08 pm

Palmerston wrote:Looking forward to see your progress as i need one for my Taliesin
Well if you do get one, don't use 2 colours if painting the overlay seperatly, unless you have lots of spare time!!! Finally finished that job today, after about a week!
Also started on the carriage body today, ends joined to floor, and one side glued on with no trouble at all. All parts are to exclty the right size, just as you would expect. I have cut the replacement half height partitions today as well, this will give me 3 spare partitions for other projects. Will post another pic tommorow hopefully.
"What the hell is that?"
"It's a model icebreaker sir."
"It's a bit big isn't it?"
"It's a full scale model sir....."

User avatar
MuzTrem
Driver
Driver
Posts: 1122
Joined: Sun Feb 10, 2008 6:51 pm
Location: Buckinghamshire
Contact:

Post by MuzTrem » Mon Mar 02, 2009 9:28 pm

laalratty wrote:Well if you do get one, don't use 2 colours if painting the overlay seperatly, unless you have lots of spare time!!!
Good advice for carriage-buidling generally, I think! I had a lot of trouble getting the liveries right on our B1 and K1, so I've pretty much decided that any future carriages will be in a one-colour scheme.

User avatar
laalratty
Retired Director
Retired Director
Posts: 3887
Joined: Wed Jan 16, 2008 5:35 pm
Location: Morecambe

Post by laalratty » Tue Mar 03, 2009 9:27 pm

Here is a pic of the carriage body
Image
Paint has been applied to the areas where the body side shows through the overlay above waist level, and also around the windows. As it is at the end of today, one side is ready for the application of the overlay, and the other needs a last coat of white. Since this pic was taken, 2 of the partitions have been glued in, I will put in the other 3 tommorow and also hopefully have the overlays for the sides and ends glued on. This will make the carrige look far more complete :)
"What the hell is that?"
"It's a model icebreaker sir."
"It's a bit big isn't it?"
"It's a full scale model sir....."

User avatar
laalratty
Retired Director
Retired Director
Posts: 3887
Joined: Wed Jan 16, 2008 5:35 pm
Location: Morecambe

Post by laalratty » Wed Mar 04, 2009 10:07 pm

I've been busy today, whislt the grey was drying on the roof of the pw van, I painted on the final coat of white on the body, and fitted the interior partitions, including my three half height replacements for the full height ones supplied.
Image
After the paint had dried, I fitted the overlays to the side. The rsult looks like this
Image
Looks rather nice to me! :) The green on the overlay needs some touching up, this will be done when the rest of the body is painted.
Next up is fitting the end overlays, and building up the balcanies.
"What the hell is that?"
"It's a model icebreaker sir."
"It's a bit big isn't it?"
"It's a full scale model sir....."

User avatar
laalratty
Retired Director
Retired Director
Posts: 3887
Joined: Wed Jan 16, 2008 5:35 pm
Location: Morecambe

Post by laalratty » Sat Mar 14, 2009 8:29 pm

Been slowly carrying on with this, to the extent where the painting of one side is vitually complete, along with one end.
Image
The interior is having extra detail fitted such as luggage racks, carpet and upholstered seats in the first class compartment. The interior has been stained as per the rest of the ANLR carriage fleet.
I am hoping to have it running by the end of March ready to do some photography with Taliesin
"What the hell is that?"
"It's a model icebreaker sir."
"It's a bit big isn't it?"
"It's a full scale model sir....."

User avatar
andysleigh
Driver
Driver
Posts: 1362
Joined: Thu Oct 18, 2007 6:21 pm
Location: Guildford
Contact:

Post by andysleigh » Sat Mar 14, 2009 9:12 pm

Thats looking great!
Very crisp looking paint work.


What is a good wood stain to use?
Image

User avatar
laalratty
Retired Director
Retired Director
Posts: 3887
Joined: Wed Jan 16, 2008 5:35 pm
Location: Morecambe

Post by laalratty » Sat Mar 14, 2009 9:44 pm

ermmm, I just have used some stuff lying around before, although this had run out before this coach. For this dad brought some "diamond hard satin varnish" in medium oak shade from that manufacturor that claims it does "exactly as it says on the tin" (hint hint! :lol:) This appears to be ok, and you can clean your brushes in water. It does say do 2 coats but one coat appears to me ok to me.
"What the hell is that?"
"It's a model icebreaker sir."
"It's a bit big isn't it?"
"It's a full scale model sir....."

User avatar
andysleigh
Driver
Driver
Posts: 1362
Joined: Thu Oct 18, 2007 6:21 pm
Location: Guildford
Contact:

Post by andysleigh » Sat Mar 14, 2009 11:08 pm

laalratty wrote:ermmm, I just have used some stuff lying around before, although this had run out before this coach. For this dad brought some "diamond hard satin varnish" in medium oak shade from that manufacturor that claims it does "exactly as it says on the tin" (hint hint! :lol:) This appears to be ok, and you can clean your brushes in water. It does say do 2 coats but one coat appears to me ok to me.
ok, thanks.

That was a silly question, good wood stain, theres tons of the stuff. urg...
Image

Post Reply

Who is online

Users browsing this forum: No registered users and 6 guests