Page 6 of 8
Posted: Sun Feb 19, 2017 11:09 pm
by LNR
Great photos James , line has settled in nicely. I like the first shot, passengers waiting for their train, only to find a coal train pulled up!
I imagine it won't be long before you'll be out with the shears cutting back the MYOB.
Grant.
Posted: Mon Feb 20, 2017 7:05 am
by philipy
As the others have said, it is all looking rather tasty.
Posted: Mon Feb 20, 2017 6:30 pm
by James from Devon
Thanks for all the lovely comments guys... If any of you find yourselves in the wilds of Devon then feel free to message me and do pop in for a steam up.

Posted: Fri Feb 24, 2017 9:36 pm
by James from Devon
I decided to have a run of a couple of trains today:
Video for anyone who's interested:
[video]
https://www.youtube.com/watch?v=aHDIQzs ... e=youtu.be[/video]
Happy steaming
Posted: Fri Feb 24, 2017 10:52 pm
by Peter Butler
Lovely shots on a beautiful day James. The line looks quite spectacular now and your stock fits in just right.
Posted: Fri Feb 24, 2017 11:35 pm
by jim@NAL
looking great more pic please
Posted: Sun Mar 26, 2017 10:00 pm
by James from Devon
So hello people! Welcome to spring.
In the time since the last update, not much has happened. It seems to rain every time I have a day off. I did make it outside today but a lot of my update is workshop based for now. Fingers crossed for some good weather.
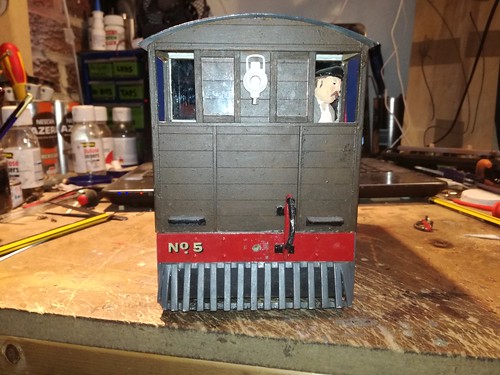
I decided I needed a medium sized brake van. I had a few wheels around and some other bits as well as a couple of shady looking figures so I made this one...here it is with weathering almost finished.

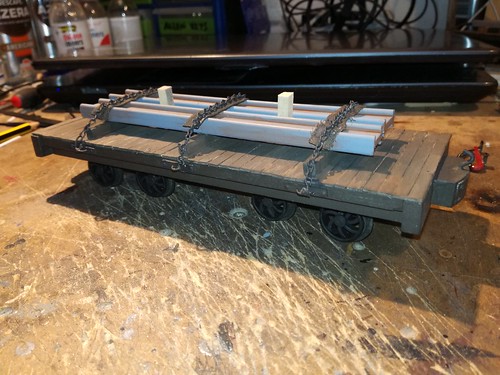
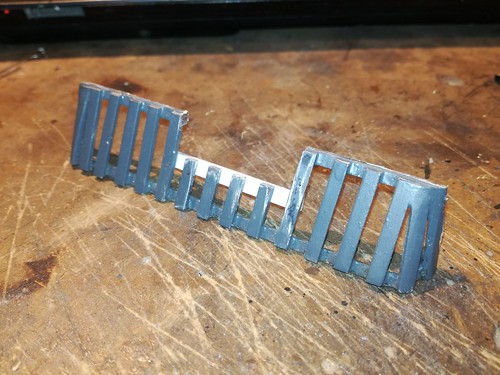
Also wanted some flat wagons so these are made with my own design resin cast bogie, wood frame with good old coffee stirrers for planking. The loads are an old feather duster handle cut up and painted red and a broken coat hanger which had a nice profile, again, painted and weathered.

My son's IP tram needed to come in for a little maintenance and a repaint. I modified the cowcatcher to fit Accucraft couplers much lower (at the right height from the rail) than they were previously. I also removed the erroneous buffer beam and replaced it with a chunky piece of wood.
Front end before:
During:
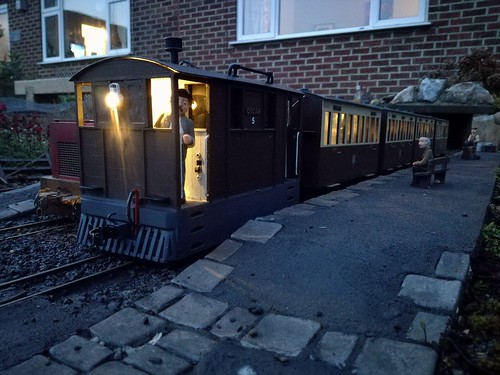
And here it is out on the track - oh, he also asked me to fit lights to the engine and its matching carriages, so, here is the train all lit up and with its shiny new buffer beam and cow catcher arrangement:
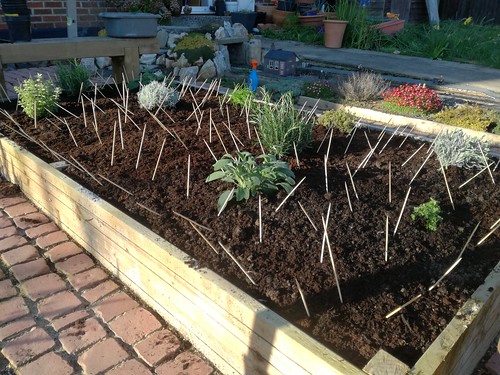
Not railway related but I have finished off the herb garden which is in the centre of the railway. The spikes are bamboo skewers and are an attempt to deter the neighbourhood cat which seems to have a love of digging multiple holes before deciding to cr*p in one of them. I'll update if its successful!!
One more video to watch if you want to, this is night running with the illuminated train:
https://youtu.be/a1LUlUN3HRY
Hope you enjoy the update and more very soon.
Thanks as always for the nice comments and advice, it really makes a difference to me.
Happy steaming!
Posted: Sun Mar 26, 2017 10:33 pm
by Peter Butler
Nice work again James, your video work is most impressive... I really must make the effort one day.
Posted: Sun Mar 26, 2017 10:49 pm
by LNR
Enjoyed that, nice subtle lighting in the carriages. Your railway obviously enjoys good passenger patronage.
Grant.
Posted: Mon Mar 27, 2017 8:06 pm
by markoteal
Love the lighting - be good to see how you set up in a carriage - I have tried but never seem to be able to hide the wire running from the battery under chassis to the lights under the roof
Posted: Mon Mar 27, 2017 8:44 pm
by James from Devon
markoteal wrote:Love the lighting - be good to see how you set up in a carriage - I have tried but never seem to be able to hide the wire running from the battery under chassis to the lights under the roof
Hi, thanks for the comment and hope you are well Mark. I will try and take some pictures for you next time I have a roof off but in short, get a piece of 5mm dia tube...plastic / brass / ali and then drill a 5mm hole in the corner of the coach (you may have to drill through a seat ) - make sure its right in the corner. Stick the tube through the hole in the floor and glue in place in the cornner. Cut it off about 5mm shorter than the side of the coach.
Glue 10mm wide strips of 3mm wood strip from one end of the coach to the other (or one across each compartment) being sure to leave 5mm clearance between the top of this strip and the roof. Drill 5mm holes for the LEDs and use either 1 LED for each compartment or 3 spread over the coach. Glue the LEDs in place sparingly!
Pass the wires through the tube and then solder to the first LED, then wire the rest in parallel through the coach making sure to use sticky cable clamps or glue to keep the wires above the LED holding strip.
Connect up the battery and check they work then paint the tube the same colour(s) as the inside of the coach....job done....no visible wires.
TIP: Get a bit of card, fold in half to make a 90 degree angle and glue over the strip of wood over the back of the LED - this will stop the light glowing through a plastic roof! - guess how I know that!!!???
Glue a switched 2 x AAA battery holder under the carriage and use the self adhesive cable clamps to keep the wires tidy and out of sight - if you can see the battery box sticking out from under the solebar then put it between the axles / bogies and make a fake air / vacuum tank to glue on the outside of the solebar which will hide it.
Last tip...NEVER use white LEDs - they give a blue/whit light and just look wrong...use WARM WHITE - you can get bags of 20 from Ebay for about a quid.
Hope that's helpful
Posted: Mon Mar 27, 2017 8:45 pm
by James from Devon
LNR wrote:Enjoyed that, nice subtle lighting in the carriages. Your railway obviously enjoys good passenger patronage.
Grant.
Hey Grant, hope you are well. I am not so certain about the patronage, I think we just have a few regular customers. It's odd, but I see the same people on the train day after day

Posted: Mon Mar 27, 2017 8:48 pm
by James from Devon
Peter Butler wrote:Nice work again James, your video work is most impressive... I really must make the effort one day.
Thanks Peter and I'd love to see a video of your railway. I just use my phone camera on one of those little tripods. My buddy Mark (Ace engineering) uses a super smart digital video camera and edits properly so I always aspire to make videos like his or Rik's from Peckforton
Re:
Posted: Tue Mar 28, 2017 10:18 pm
by markoteal
James from Devon wrote: ↑Mon Mar 27, 2017 8:44 pm
markoteal wrote:Love the lighting - be good to see how you set up in a carriage - I have tried but never seem to be able to hide the wire running from the battery under chassis to the lights under the roof
Hi, thanks for the comment and hope you are well Mark. I will try and take some pictures for you next time I have a roof off but in short, get a piece of 5mm dia tube...plastic / brass / ali and then drill a 5mm hole in the corner of the coach (you may have to drill through a seat ) - make sure its right in the corner. Stick the tube through the hole in the floor and glue in place in the cornner. Cut it off about 5mm shorter than the side of the coach.
Glue 10mm wide strips of 3mm wood strip from one end of the coach to the other (or one across each compartment) being sure to leave 5mm clearance between the top of this strip and the roof. Drill 5mm holes for the LEDs and use either 1 LED for each compartment or 3 spread over the coach. Glue the LEDs in place sparingly!
Pass the wires through the tube and then solder to the first LED, then wire the rest in parallel through the coach making sure to use sticky cable clamps or glue to keep the wires above the LED holding strip.
Connect up the battery and check they work then paint the tube the same colour(s) as the inside of the coach....job done....no visible wires.
TIP: Get a bit of card, fold in half to make a 90 degree angle and glue over the strip of wood over the back of the LED - this will stop the light glowing through a plastic roof! - guess how I know that!!!???
Glue a switched 2 x AAA battery holder under the carriage and use the self adhesive cable clamps to keep the wires tidy and out of sight - if you can see the battery box sticking out from under the solebar then put it between the axles / bogies and make a fake air / vacuum tank to glue on the outside of the solebar which will hide it.
Last tip...NEVER use white LEDs - they give a blue/whit light and just look wrong...use WARM WHITE - you can get bags of 20 from Ebay for about a quid.
Hope that's helpful
Thanks James - when I get my next coach set up, I'll definitely follow these steps
And the momentum wagon had a trip out at the weekend - still awaiting its steam buddy - the trip to Peterborough or soon afterwards should get that sorted!

Cheers
Mark
Re: Staple Hill Railway - New Line
Posted: Mon May 01, 2017 7:57 pm
by James from Devon
Hi Everyone. Time for another little update from Devon. As usual, I have not had as much time to work on the line as I would have liked but things are progressing a little and planning for the last stage of the extension is underway, in fact, blockwork has also started:
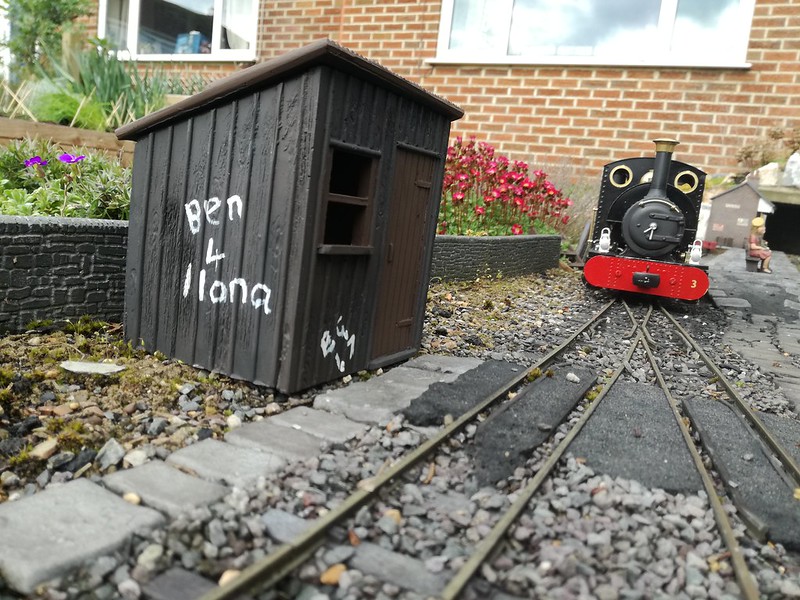
A little line side hut has appeared at Staple Hill - graffiti courtesy of my step son and his girlfriend
The route of the extension. The line will cross the path to the house (where I am standing to take the picture) I need to make a hinged bridge (somehow) for the double track route and find a new area to store the building materials
This will finish off this end of the garden:
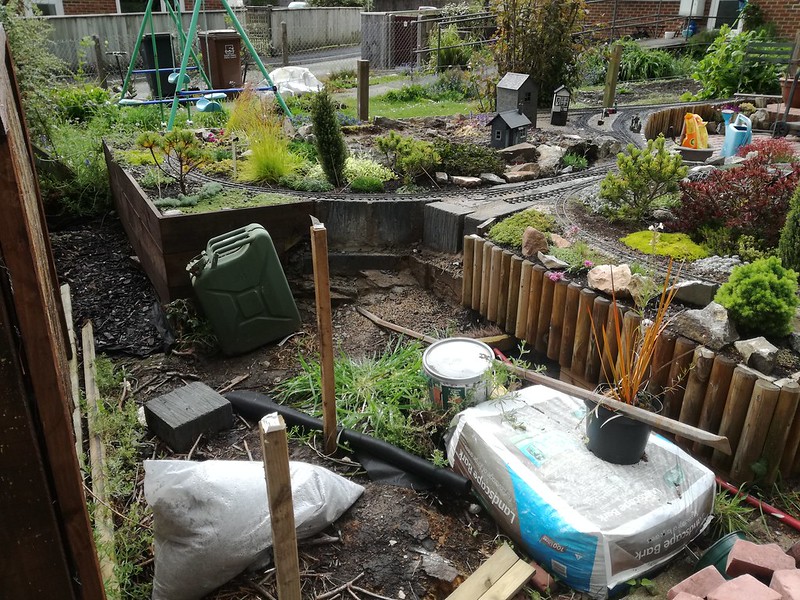
Turning 180 degrees, there will be a block built track bed behind my wife's seating area! Double track with a passing loop for storage of a long train here. I can't finish off the new fence until this track bed is built:
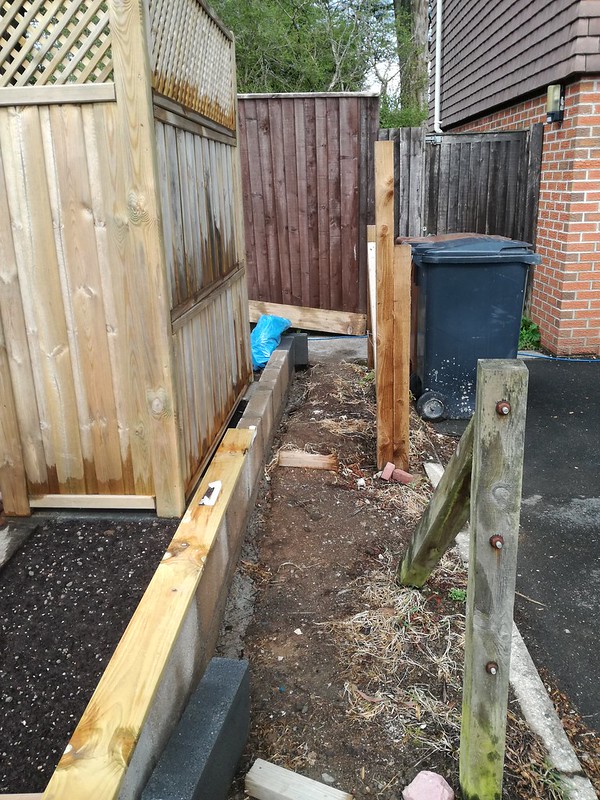
And the route up the far side of the garden next to our patio and raised beds (under construction) the track on this curve will be on a block faced block wall and the patio will be fitted around the curve (I hope):

A little more rubble compacted in the area for the village:
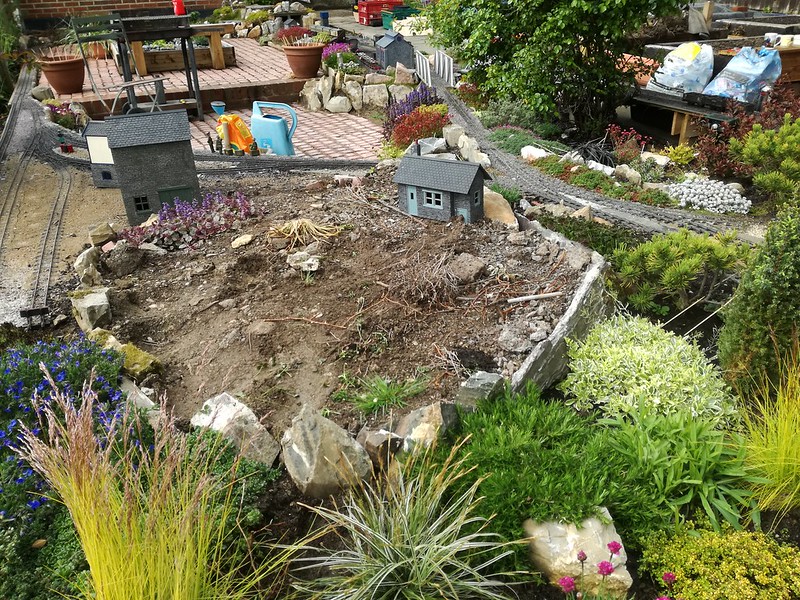
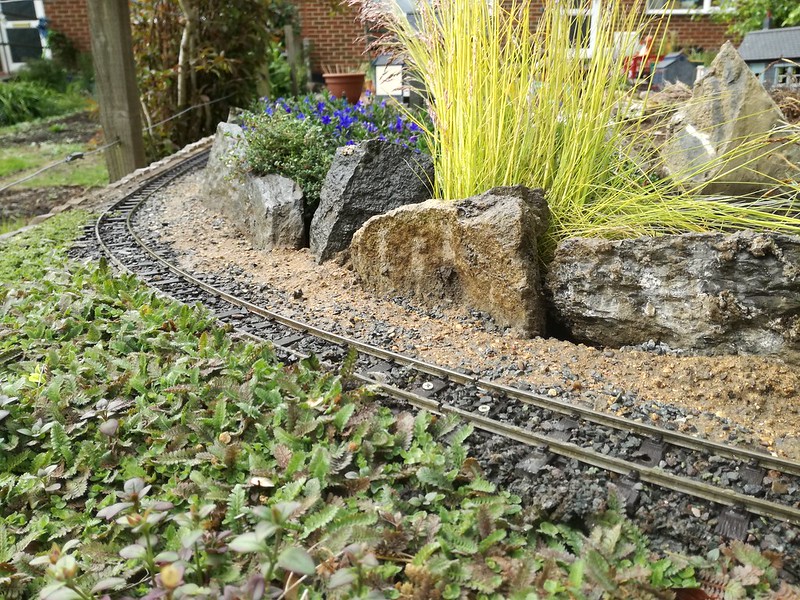
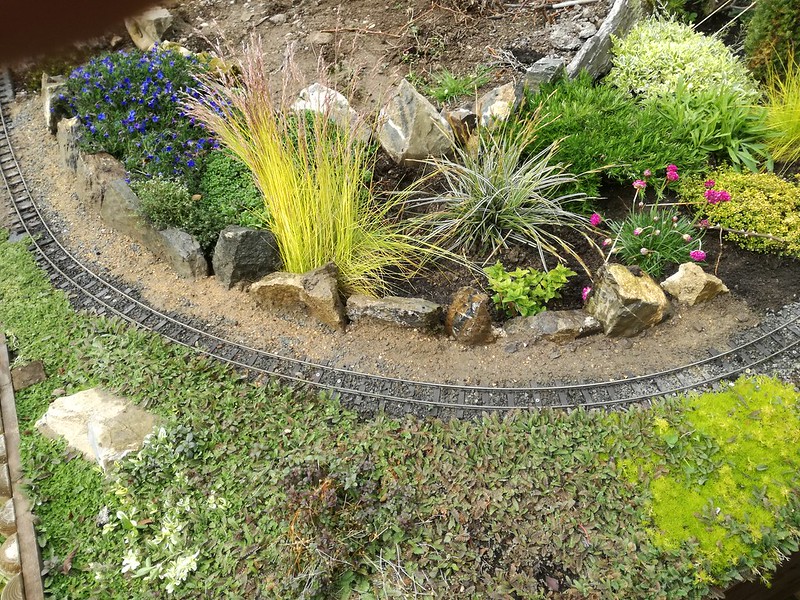
This area had become problematic with the plants doing so well they were overhanging the track and causing a derailment or 2! I have cut back plants and concreted in rock to form a border and keep vegetation further from the track. Not an issue for the miniature ferns in the foreground, they just look nice and cause no running problems:
That's it for now. other than to say that I have some items of rolling stock plus a Bulldog loco listed in the for sale section if anyone is interested.
Happy steaming
Re: Staple Hill Railway - New Line
Posted: Mon May 01, 2017 8:28 pm
by tom_tom_go
Excellent James, the Bulldog is very tempting...
Re: Staple Hill Railway - New Line
Posted: Mon May 01, 2017 9:31 pm
by Peter Butler
The railway is looking wonderful James, the whole thing looks well established and fits into your garden well with good access and room to spare for socialising too!
I watched Ace's video and it captures your line perfectly.
Re: Staple Hill Railway - New Line
Posted: Wed May 03, 2017 8:18 pm
by Soar Valley Light
My goodness you've made a cracking job there James. I thought I was into heavy civil engineering but you're certainly giving me a run for my money!.
I love the way your line has developed, you've made great use of the space available. I really love your paving too, proper job!
Your planting is great and clearly becoming well established.
Well done and please keep the pictures coming to inspire us.
Andrew
Re: Staple Hill Railway - New Line
Posted: Mon May 22, 2017 11:02 pm
by jim@NAL
great looking line lots of nice planting too .
Re: Staple Hill Railway - New Line
Posted: Tue May 23, 2017 3:13 pm
by ge_rik
Wow, that's looking very smart
Rik