
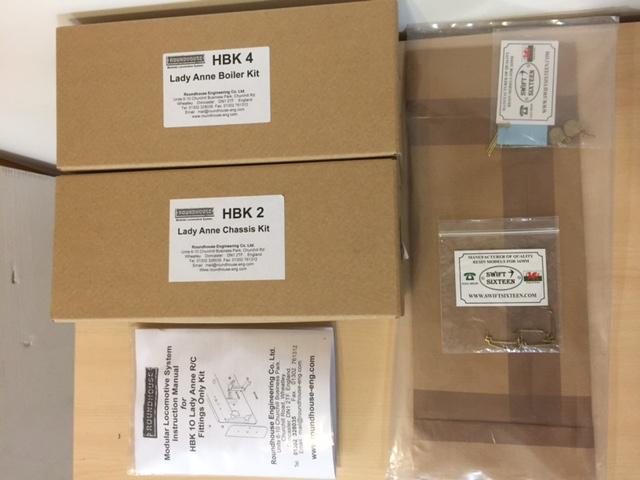
I have just started to build a new Loco
Using a :-
Lady Anne Chassis and Boiler
Swift Sixteen Owain body kit
I will post some pictures soon
Lady Owain
-
tom_tom_go

- Driver

- Posts: 4824
- Joined: Wed Feb 23, 2011 3:08 am
- Location: Kent, UK
- Contact:

This is very exciting. I love reading about new locomotive builds!
Now as I understand the "Owain" body kit is meant for an 0-4-0 chassis. The Lady Anne boiler is mounted quite low in the frames and these are longer than the 0-4-0 chassis. How will you make the body fit onto the Lady Anne? Presumably the smokebox will protrude a bit forward of the tanks, unlike the Ragleth-based conversion.
When you are finished I am sure it will be a great-looking engine. I really like the Swift Sixteen stuff. I'm looking forward to watching this build. Lots of pictures, please!


[quote="Keith S:115939"]...Now as I understand the "Owain" body kit is meant for an 0-4-0 chassis. The Lady Anne boiler is mounted quite low in the frames and these are longer than the 0-4-0 chassis. How will you make the body fit onto the Lady Anne? Presumably the smokebox will protrude a bit forward of the tanks, unlike the Ragleth-based conversion.
Being able to measure now I think I might move the Boiler back 10mm, that will make the smokebox door about level with the front of the Tanks.
It also moves the rear Boiler bush inside the Cab. So I will use the front Boiler bush for the Safety valve and dome (like George and Mildred).
I have started Riveting the Body - drilling all the dimples 0.8mm drill (1/32) then picking up this tiny rivet and pushing in the hole from the outside, pushing or pulling tight and then soldering. Cutting back and cleaning off is the worst part so only where it will be seen.


-
-steves-

- Administrator

- Posts: 2444
- Joined: Thu Jul 28, 2011 1:50 pm
- Location: Cambridge & Peterborough
That must have taken ages, but the results are fantastic.  Cant wait to see it painted up and finished
The buck stops here .......
Ditton Meadow Light Railway (DMLR)
Member of Peterborough and District Association
http://peterborough.16mm.org.uk/
Ditton Meadow Light Railway (DMLR)
Member of Peterborough and District Association
http://peterborough.16mm.org.uk/
-
-steves-
- Administrator
- Posts: 2444
- Joined: Thu Jul 28, 2011 1:50 pm
- Location: Cambridge & Peterborough
3 daysKeith S:116050 wrote:The amazing thing is, it's apparently only taken him three days! That would have taken me weeks! Mind you the chassis is going to have to all come apart again for paint.-steves-:116046 wrote:That must have taken ages, but the results are fantastic. :D
The buck stops here .......
Ditton Meadow Light Railway (DMLR)
Member of Peterborough and District Association
http://peterborough.16mm.org.uk/
Ditton Meadow Light Railway (DMLR)
Member of Peterborough and District Association
http://peterborough.16mm.org.uk/

Chassis already been apart to remove the T pipe and move the copper backwards, as the smokebox and boiler will be 10mm back.
The floor plates have been cut out and temp' fitted to allow design of the other bits,
Gas tank I will need a custom made one.
Whistle - valve and servo?
Battery & receiver
reverse servo - out front at the side of the smoke box
Oiler - I don't want it showing at the cab door


The floor plates have been cut out and temp' fitted to allow design of the other bits,
Gas tank I will need a custom made one.
Whistle - valve and servo?
Battery & receiver
reverse servo - out front at the side of the smoke box
Oiler - I don't want it showing at the cab door


Who is online
Users browsing this forum: No registered users and 6 guests