Katie,
-
Boustrophedon

- Trainee Fireman

- Posts: 235
- Joined: Wed May 22, 2013 7:43 pm
Katie,
Just ordered a Roundhouse Katie kit, will keep you updated with progress.

Good choice, it's a lovely little loco and a great kit to build, it took me 12 days to make and paint mine.
The bodywork is especially easy to assemble as most of it is pre-formed with only 4 joints to solder.
The bodywork is especially easy to assemble as most of it is pre-formed with only 4 joints to solder.
Mike
Wood Valley Works
http://www.woodvalleyworks.co.uk
Wood Valley Light Railway
http://www.wvlr.co.uk
Wood Valley Works
http://www.woodvalleyworks.co.uk
Wood Valley Light Railway
http://www.wvlr.co.uk


-
Boustrophedon
- Trainee Fireman
- Posts: 235
- Joined: Wed May 22, 2013 7:43 pm
I used Acid 8 etch primer and car spray paint both from Halfords
The colour is VW Paras Blue as it's very close to LNER Garter Blue.
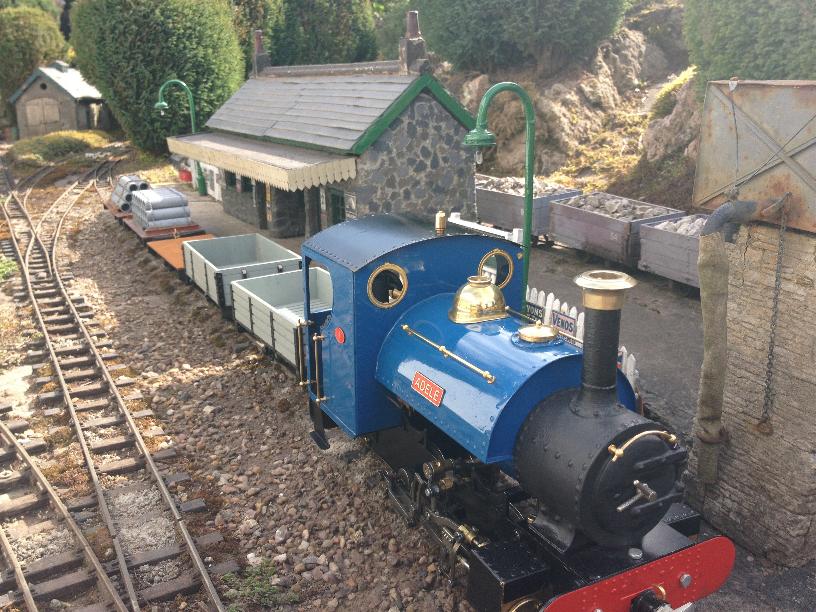
The colour is VW Paras Blue as it's very close to LNER Garter Blue.
Mike
Wood Valley Works
http://www.woodvalleyworks.co.uk
Wood Valley Light Railway
http://www.wvlr.co.uk
Wood Valley Works
http://www.woodvalleyworks.co.uk
Wood Valley Light Railway
http://www.wvlr.co.uk

Look on Chris Bird's "Summerland Chuffer" website. He does an article on painting. I followed his advice when I painted my "Billy" cab, and it was a much easier process than when I painted the boiler jacket and tender before reading his advice.
Putting the painted pieces in the oven on a low setting for half an hour makes a big difference. Car paint can take many days to harden fully, if you pop the painted piece in the oven after you spray it, you can touch the piece on the same day.
Also do not use washing-up liquid to clean the brass prior to painting. You must use acetone or some other degreaser. Washing-up liquid has hand-cream type stuff in it that will not rinse off well.
I despise painting, but follow Chris Bird's advice and you will find it easy and not too terrible.
Shameless plug:
I offer a painting service for kit-built locos, and I have a Lady Anne here now for precisely that treatment. The usual practice with kit locos is for the loose parts to be sent to me for painting but the Lady Anne has been built by its owner and I will be dismantling, priming, painting, reassembling and testing it before it goes back to him. Please drop me a line if this is of interest to you.
More details here: http://www.rhoshelyg.me.uk/Painting.html
Tony Willmore
Rhos Helyg Locomotive Works: http://www.rhoshelyg.me.uk
Facebook: https://www.facebook.com/RhosHelygLocoWorks
Rhos Helyg Locomotive Works: http://www.rhoshelyg.me.uk
Facebook: https://www.facebook.com/RhosHelygLocoWorks
-
artfull dodger

- Trainee Driver

- Posts: 545
- Joined: Thu Apr 12, 2012 2:23 pm
- Location: Kokomo, Indiana, USA
A Katie kit is high on my wish list. I fear even the kit will remain a pipe dream unless I hit the lottery. The exchange rate is still not the best for us here in the states. I swear I live in the wrong country. Everything I love steam is UK, from the real ones to models! Can't wait to see your progress pics. Mike
Silly NT's.....I have Asperger's Syndrome!
-
Boustrophedon
- Trainee Fireman
- Posts: 235
- Joined: Wed May 22, 2013 7:43 pm
I have thought in this direction, I will definitely be doing the frames myself, so as can get on with the build.TonyW:115806 wrote:Shameless plug:
I offer a painting service for kit-built locos, and I have a Lady Anne here now for precisely that treatment. The usual practice with kit locos is for the loose parts to be sent to me for painting but the Lady Anne has been built by its owner and I will be dismantling, priming, painting, reassembling and testing it before it goes back to him. Please drop me a line if this is of interest to you.
More details here: http://www.rhoshelyg.me.uk/Painting.html
-
Chris Cairns

- Driver

- Posts: 2366
- Joined: Mon Oct 29, 2007 7:25 pm
- Location: Glasgow, Scotland
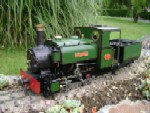
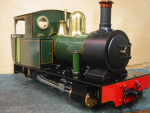
I picked up a 2nd hand kit built Katie late last year. Only the chassis frames & buffer beam had been painted, but no primer used so some of it was slowly peeling off.
This was one of the 'For Sale' images
I agree that Chris Bird's painting articles are very good, and confirm that baking the pieces in the oven really helps.
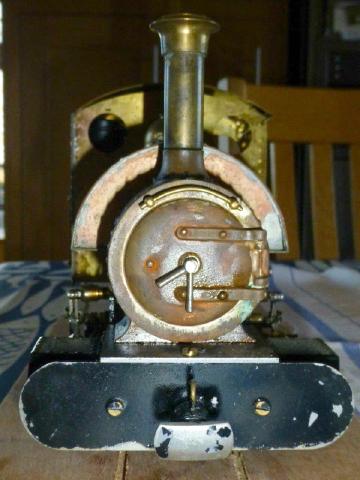
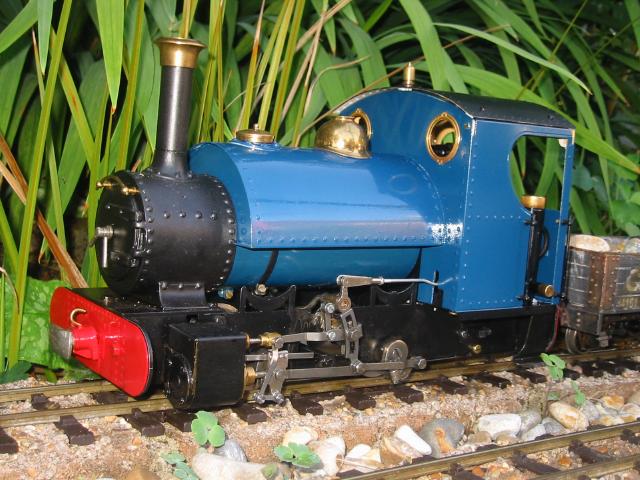
This is that loco now, having repainted the buffer beam, and degreased & painted the smokebox, chimney & front footplate
I used acid etch primer followed by plasti-kote Projekt Paint BBQ (for the black).
I would recommend painting the wheels before fitting.
One thing to watch out for when doing the body kit (as seen on my Katie & some others viewed online) is to ensure that you get the solder to flow onto the outside of the Saddle Tank Front, and the saddle tank to cab front joint (as mentioned in Pages 12 - 14 of HBK17 manual). I've had to redo these joints, and will need to redo the cab side one as well.
Chris Cairns
This was one of the 'For Sale' images
I agree that Chris Bird's painting articles are very good, and confirm that baking the pieces in the oven really helps.
This is that loco now, having repainted the buffer beam, and degreased & painted the smokebox, chimney & front footplate
I used acid etch primer followed by plasti-kote Projekt Paint BBQ (for the black).
I would recommend painting the wheels before fitting.
One thing to watch out for when doing the body kit (as seen on my Katie & some others viewed online) is to ensure that you get the solder to flow onto the outside of the Saddle Tank Front, and the saddle tank to cab front joint (as mentioned in Pages 12 - 14 of HBK17 manual). I've had to redo these joints, and will need to redo the cab side one as well.
Chris Cairns
So would I.Chris Cairns:115900 wrote:I would recommend painting the wheels...
Tony Willmore
Rhos Helyg Locomotive Works: http://www.rhoshelyg.me.uk
Facebook: https://www.facebook.com/RhosHelygLocoWorks
Rhos Helyg Locomotive Works: http://www.rhoshelyg.me.uk
Facebook: https://www.facebook.com/RhosHelygLocoWorks
-
Boustrophedon
- Trainee Fireman
- Posts: 235
- Joined: Wed May 22, 2013 7:43 pm
-
Boustrophedon
- Trainee Fireman
- Posts: 235
- Joined: Wed May 22, 2013 7:43 pm
OK pictures:
It has been too cold to paint in the garage for a while, but this week I made a start.

This is my spray booth, it a vacuum cleaner box I nicked from school. (The box not the vacuum.) At the bottom left you can see the wife's hair dryer which is used to pre warm the box the component being painted and the air inside. On the other side a vacuum cleaner (Nicked from another school, well retrieved from the skip and fixed.) is plumbed in to extract the fumes. It's not quite up to the task but makes a big difference. The Vacuum is outside the door, (in the rain at the mo).

Here you can just see the frames being given their outside coat of Halfords satin black.

After spraying the box is shut and the vacuum switched off and the hair drier on. In the shots above you can make out a meat thermometer stuck into the booth, which shows me I am getting a temp of 55 degrees, hot enough for the paint to be touch dry in five minutes. Then the parts are brought in and further cure on top of the radiator.
It has been too cold to paint in the garage for a while, but this week I made a start.
This is my spray booth, it a vacuum cleaner box I nicked from school. (The box not the vacuum.) At the bottom left you can see the wife's hair dryer which is used to pre warm the box the component being painted and the air inside. On the other side a vacuum cleaner (Nicked from another school, well retrieved from the skip and fixed.) is plumbed in to extract the fumes. It's not quite up to the task but makes a big difference. The Vacuum is outside the door, (in the rain at the mo).
Here you can just see the frames being given their outside coat of Halfords satin black.
After spraying the box is shut and the vacuum switched off and the hair drier on. In the shots above you can make out a meat thermometer stuck into the booth, which shows me I am getting a temp of 55 degrees, hot enough for the paint to be touch dry in five minutes. Then the parts are brought in and further cure on top of the radiator.
Last edited by Boustrophedon on Sat Feb 06, 2016 10:51 pm, edited 1 time in total.
-
Boustrophedon
- Trainee Fireman
- Posts: 235
- Joined: Wed May 22, 2013 7:43 pm


Who is online
Users browsing this forum: No registered users and 2 guests