Page 4 of 44
Posted: Sun May 11, 2014 8:54 pm
by Andrew
Hello again,
Progress is slower than I expected, partly due to poor weather and family commitments, but I'm getting there.
The decking that will form the base of the upper terminus is down and has been covered in roofing felt, I've started cladding the front and the first of the planters is in place:
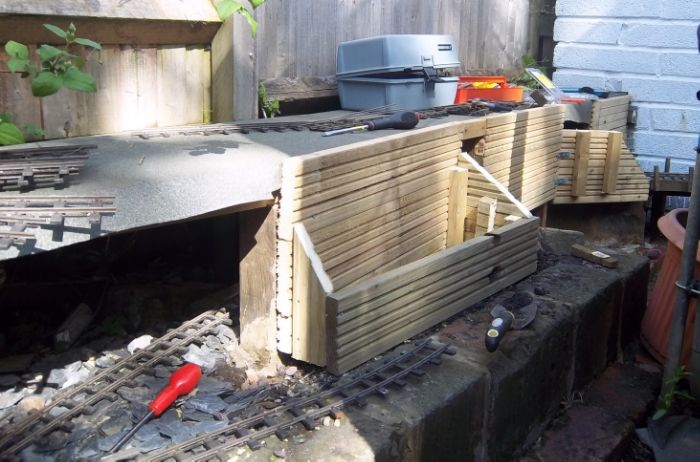
It'll all be clad in slate tiles, filled with earth and planted up. The earth in question is currently in the way of the final straight to the upper station, which is why I'm concentrating on scenics rather than building trackbed.
Here's where the tunnel mouth will be, where the running line to the lower terminus enters the tunnel beneath the upper one:
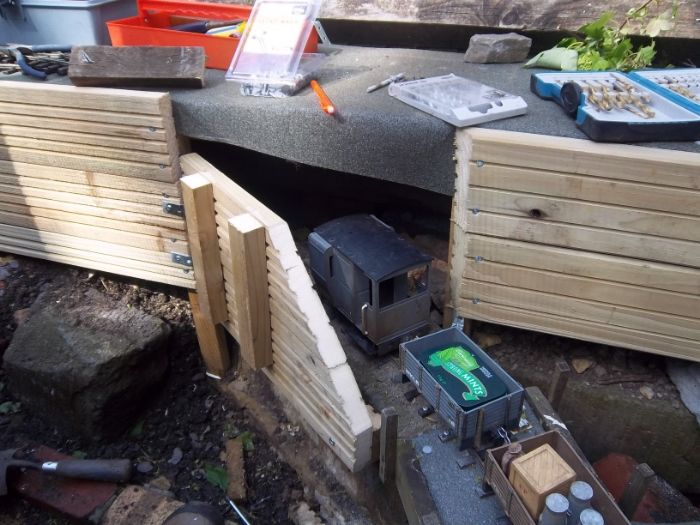
As you can see, it's all a bit cobbled together, but it seems to be working OK. I'm kind of making it up as I go along...
I should get some more woodwork done this week, then I'll start cutting tiles.
Cheers,
Andrew.
Posted: Sun May 11, 2014 8:58 pm
by kandnwlr
That´s looking interesting ...

Posted: Sun May 11, 2014 10:27 pm
by Andrew
kandnwlr:100549 wrote:That´s looking interesting ...
My wife says it looks like the warped creation of a deranged mind - one with strange geometric obsessions...
Posted: Mon May 19, 2014 9:12 pm
by Andrew
Evening all,
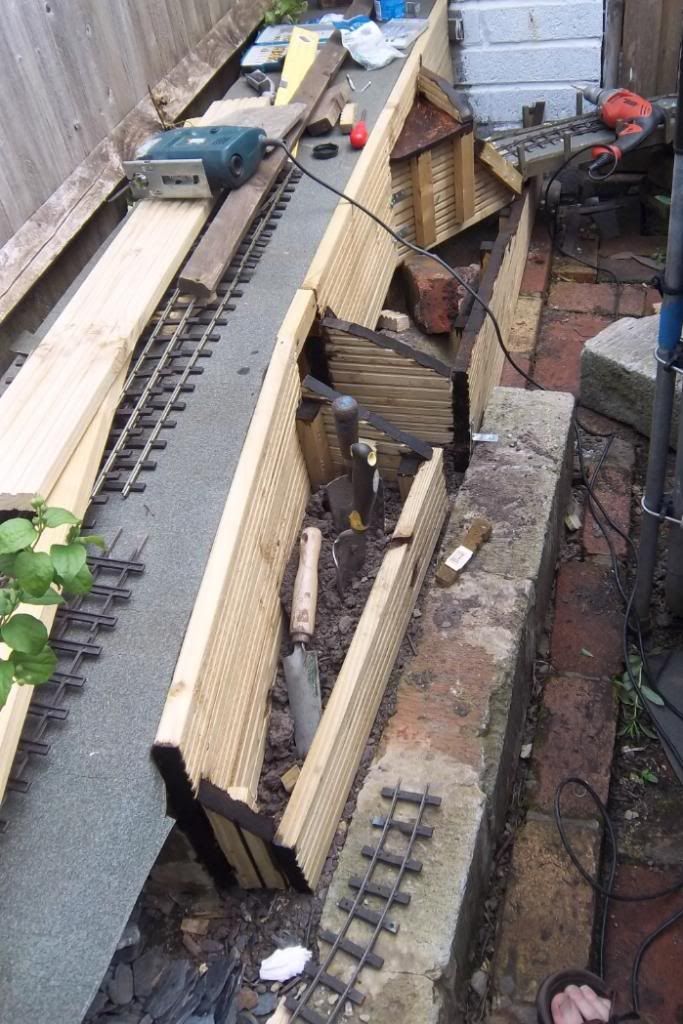
I had the day off work today and made the most of the warm weather to finish the woodwork planters that front my (under construction) upper terminus as well as hiding the running line that tunnels underneath it. The less said about the construction methods the better - it's VERY rough and ready, but all of the shoddiness should be hidden beneath the slate tiles that I'll clad the whole stucture with...
So. Here's the overall view, with tools etc covering the area that will be occupied by the station and the lower running line disappearing underneath at the top right of the picture. The trackbed on the right will be a siding from the lower terminus.
Halfway along I've created a little gap to assist in retrieving ailing trains. I think I might disguise it as an abandoned mine entrance:
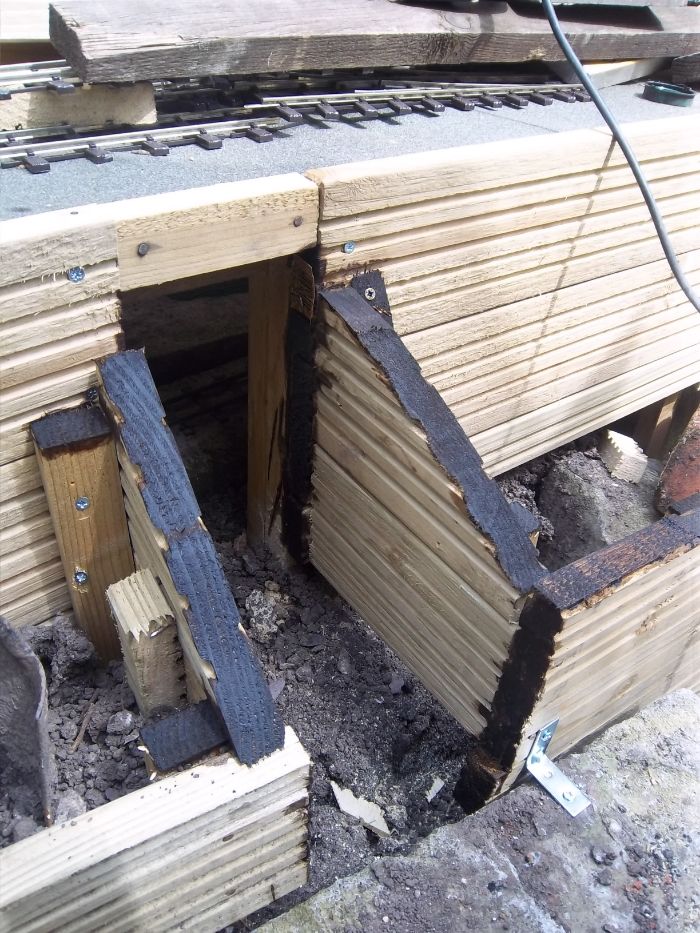
And here's the beginnings of one of the tunnel mouths - you'll need to use your imagination to picture an Aberglaslyn style rock tunnel...
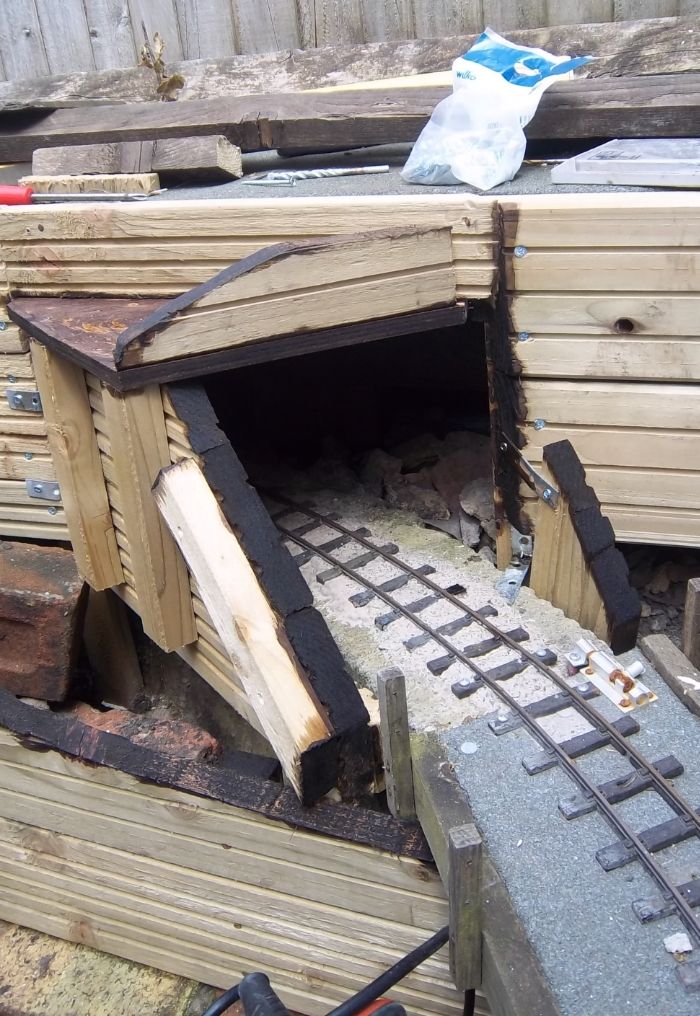
Cladding it all in slate's next, hopefully in the next week or two...
All the best,
Andrew.
Posted: Tue May 20, 2014 9:12 pm
by Soar Valley Light
Coming along nicely Andrew, it doesn't look too rough to me! I reckon that's going to be really interesting when it's finished. I look forward to seeing it.
Posted: Mon May 26, 2014 8:42 pm
by Andrew
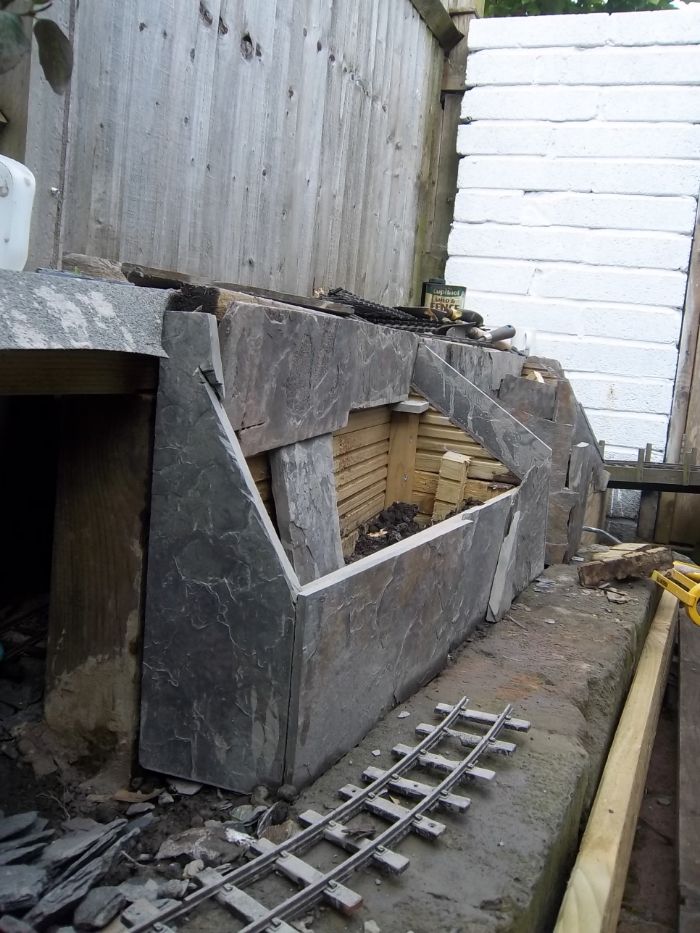
I managed to make a start on the slate cladding today, to turn my bodged-together planters into something vaguely resembling a Welsh hillside . Still a little angular but planting will soften it eventually...
I hope to get some more done tomorrow, weather permitting, then I need to fill in the gaps and tidy it up a little before filling then up with earth...
Posted: Mon May 26, 2014 8:55 pm
by Soar Valley Light
That's quite a transformation and looking very different now. I'm sure the planting up will further enhance the effect. Any idea what you're going to put in yet?
Keep up the good work,
Andrew
Posted: Mon May 26, 2014 9:00 pm
by kandnwlr
Like the slate cladding

Posted: Mon May 26, 2014 10:45 pm
by bazzer42
That is going to look good when it's planted up. Keep us posted.
Posted: Mon May 26, 2014 11:31 pm
by Andrew
Glad you like it chaps... At the moment it does still look a bit like a tiler's been on a drunken rampage (after a night on the tiles?!), but I'm hopeful that the overall effect will be OK, particularly from a distance.
Soar Valley Light:101038 wrote:Any idea what you're going to put in yet?
Well, there's plenty of Campanula (or something similar, we call 'em "Purplies"!) knocking about that I can use, and some "Snow in Summer" too - I'm after stuff that will cascade over the edges to soften them and disguise the true nature of the whole thing. I've got some fast growing Sedums that don't seem very fussy which I'll use to plug gaps, particularly over the tunnel mouth where there won't be much depth to the soil. That'll get me started... After that I'm not sure yet - it'd be nice to have some taller plants to poke up above the layer of the upper "baseboard". The site can't really be described as full sun" but gets some decent afternoon and evening light, might be able to use Box or similar? Any suggestions will be most welcome...
Thanks for the encouragement,
Andrew.
Posted: Tue May 27, 2014 8:32 pm
by Soar Valley Light
Hi Andrew,
That sounds like a good plan for fairly immediate effect, it should look good. You've obviously put some thought into the medium term too. This approach gives you a pleasing result whilst you look around and decide if you want to try something different in the longer term or stick with what you've got if it's working.
I really look forward to seeing the results grow!
Andrew
Posted: Tue May 27, 2014 9:17 pm
by jim@NAL
wow that looks great
Posted: Wed May 28, 2014 6:36 pm
by Andrew
Glad you're enjoying the work so far. Over the last few days - between showers - I've got more cladding cut and stuck in place and filled the gaps between some of the tiles, pressing slate dust into the filler to disguise the joins. That worked well until the rain started up again and turned it all to mush, I'll return to that task when the sun comes out. I've filled two of the three planters with earth and begun planting up, some of the stuff I mentioned earlier, plus a couple of mini (for now!) conifers from Wilco, two "Shrubs" (that's all the label said!) from Asda reduced from £2.50 to 22p(!!!) and a cheap Box picked up in Ikea earlier today. There's a long way to go, but I think it's gonna look OK... More photos soon... In the meantime I'm quite enjoying just looking out of the window at the building site - nothing says Wales like wet slate!
Cheers,
Andrew.
Posted: Fri May 30, 2014 11:53 am
by Andrew
I hope you'll indulge me as I wallow in a little recent history...
It's 4 years ago today since the last passenger train ran on my previous garden railway, the West Kent Light Railway, before it was ripped up to allow the construction of an extension to the kitchen. It took at least a year to sort out the chaotic mess that was left behind in the garden, and then another 6 months or so before any sort of running was possible on the new line, the (Windmill Hill) Welsh Highland. That's still a work in progress of course - I was hoping to get the full run in place before the anniversary but didn't quite make it. Should be there in a month or two though...
The last passenger train was inspired by those old photos of the last train on the L&B. No Manning Wardles of course, and a somewhat untidy collection of stock (everything I had at the time), but the idea was there...

Cheers,
Andrew.
Posted: Fri May 30, 2014 12:21 pm
by LnBmad
nice photo. needed more manning wardles though

hopefully youll have the line completed soon
Posted: Sat May 31, 2014 1:17 pm
by Andrew
Four years ago yesterday saw the last passenger train on my old line - four years ago today saw the last goods working. This one was inspired by the last days on the old Welsh Highland, when Russell collected wagons from along the line and returned them - and Baldwin 590 - to Dinas Junction. Back then I didn't own a model of Russell so my RH Bertie did the honours, heading up the line with a guard's van in tow:

And then returning with empty wagons:

Number 4 shunted the wagons in the shed and then retired to a siding to cool down - it all felt rather poignant...
Onwards and upwards - first train photos soon!
Andrew.
Posted: Sun Jun 08, 2014 9:18 am
by kandnwlr
Always a difficult moment, but looking forward to new photos here on the forum.
Posted: Sun Jun 08, 2014 3:53 pm
by Andrew
I was trying to get some construction done this afternoon but for the second time in an hour I've been driven back indoors by a sudden rain shower, grrrr...
Photos at some point...
Posted: Sun Jun 08, 2014 10:03 pm
by Andrew
Andrew:101571 wrote:I was trying to get some construction done this afternoon but for the second time in an hour I've been driven back indoors by a sudden rain shower, grrrr...
Well that happened another 3 or 4 times this afternoon but I did manage to get some construction done, will hopefully manage a little more tomorrow.
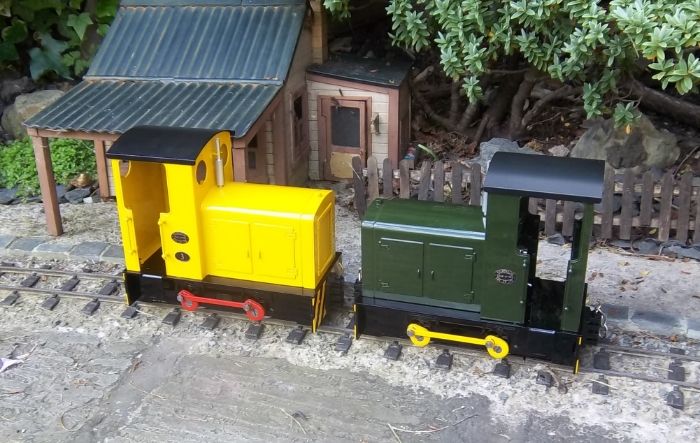
Clearly what's needed to get things finished is more motive power for works trains - and that's today's big news from the (WH)WHR. My brand new RH Little John arrived today from Derails, delivered in person by Dannypenguin of this forum - thanks Dan, nice to meet you! I asked for yellow rods and cranks to match the bufferbeams and I reckon it looks lovely - here it is on arrival with Dan's own version:
And again emerging from the half-complete tunnel mouth later in the day:
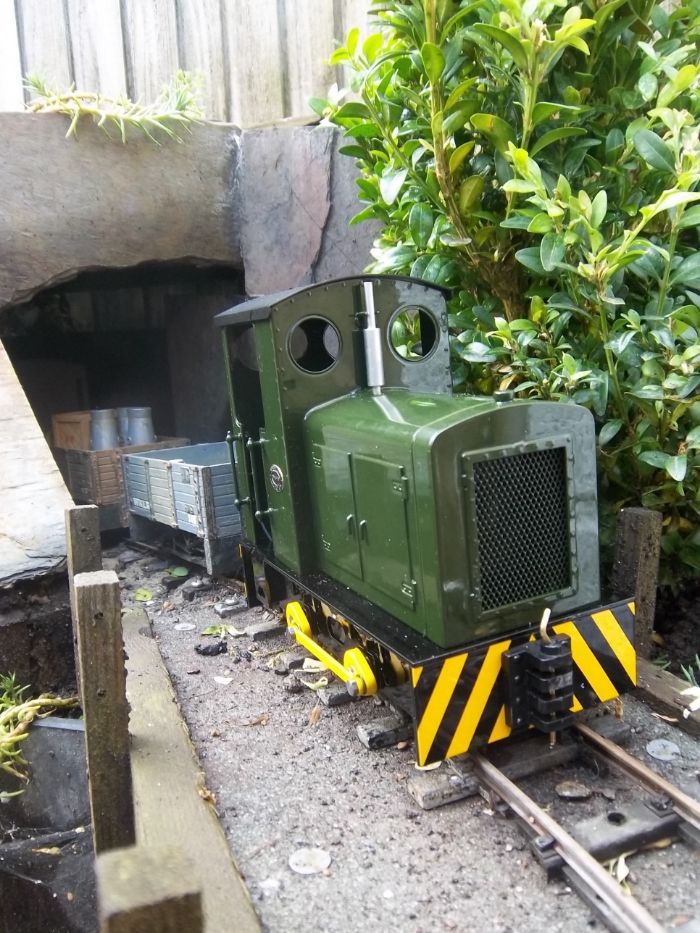
The tunnel is the result of further slate cladding work - the planters are now filled with earth and it's beginning to look OK I reckon - more photos when I've tidied up a bit:
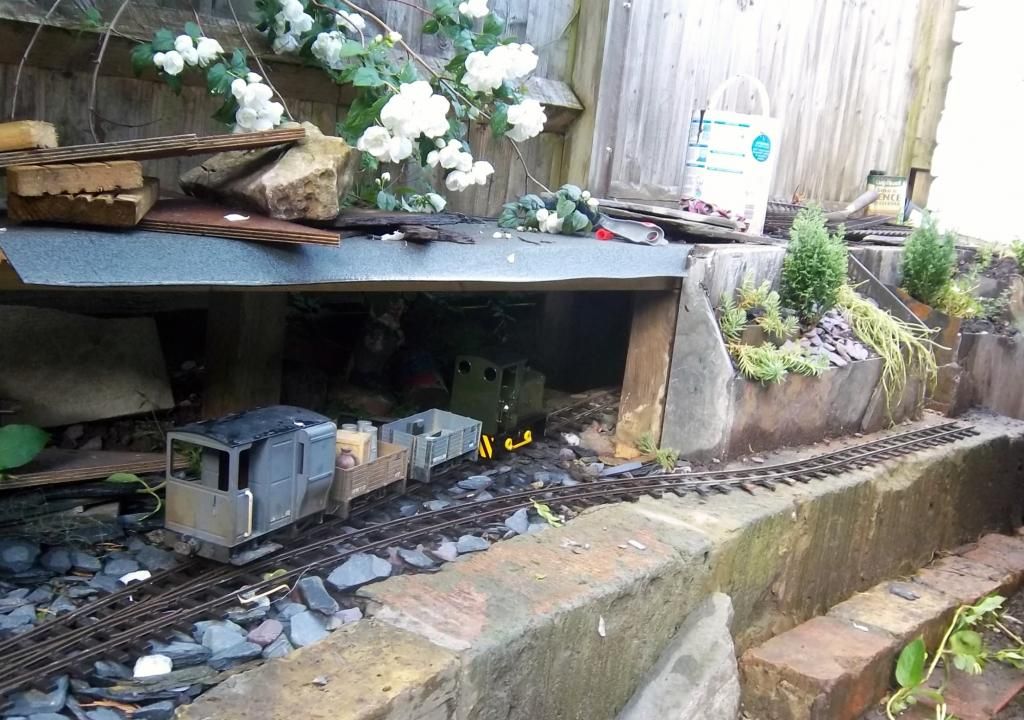
Off work tomorrow so I should get some more building done, and that new loco's going to need playing with too. I'll order some nameplates soon - it's to be called "Margaret", after my wonderful late mother-in-law, known these days as St Margaret, the Patron Saint of Unexpectedly Spotted Trains...
Cheers all,
Andrew.
Posted: Mon Jun 09, 2014 9:08 am
by Dr. Bond of the DVLR
Wow - the slate cladding looks really good! Can't wait to see the connecting line up there.