An international forum for garden railway modellers in all scales and gauges. It is free to join and is funded through voluntary contributions by its members. Many thanks to all those who keep it going. https://gardenrails.org/forum/
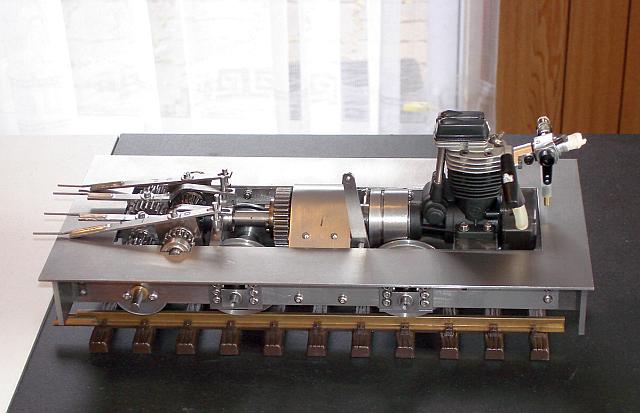
Mr. Bond of the DVLR:100826 wrote:With regards the protector/ oil bath - do you think a drain valve for changing the oil would be required or would you syringe it out?
I can't wait to see a video of the finished thing!
Well, at the moment I think we'll do without any drain and just apply oil to the gears before a run.
I can't wait to get it running too. Just need the on-board fuel tank and a new exhaust system. I could fill the gear case with excess castor oil from the exhaust system that doesn't go into the first gearbox, then it could finally overflow on to the track.
AndrewGVT:100827 wrote:Smashing work!!!
Thank you sir!
Posted: Fri May 23, 2014 6:42 pm
by Stuvon
I just love the proper engineering and thought that has / is going into this loco and would love to see it in the flesh. Just a shame your not local!
Posted: Sun Jun 01, 2014 4:16 am
by dewintondave
Stuvon:100893 wrote:I just love the proper engineering and thought that has / is going into this loco and would love to see it in the flesh. Just a shame your not local!
Thank you! I'm just a click on the keyboard away.
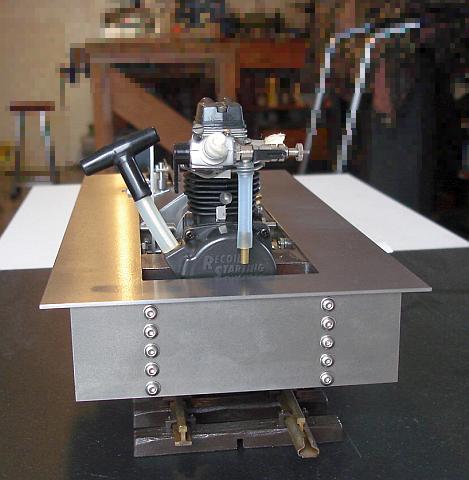
Here's the footplate, all one piece, lots of sawing and filing.
It weighs in at 3.4 Kg (7 lb 7 oz) now
Posted: Mon Jun 02, 2014 8:33 am
by dewintondave
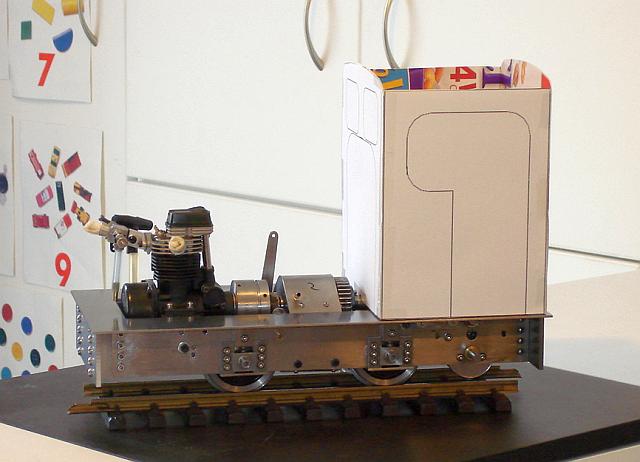
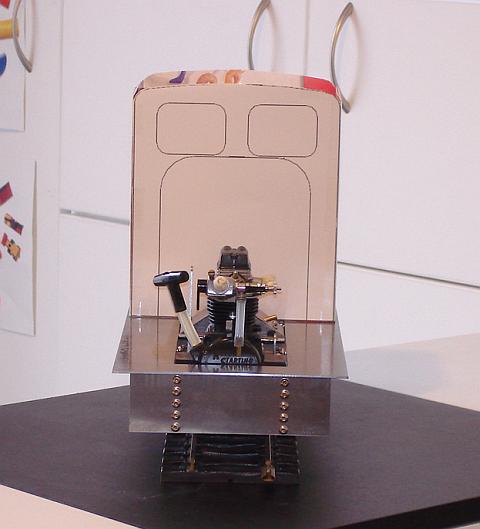
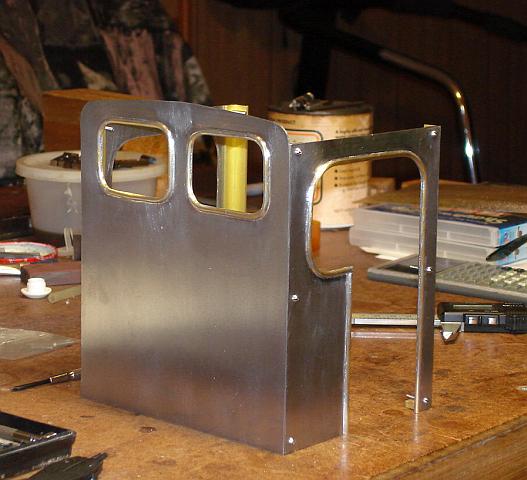
I had a big shock when the cab was mocked-up in card today, it's enormous!
Posted: Mon Jun 30, 2014 8:00 am
by dewintondave
Slow progress recently. Ended up cutting out the cab pieces by hand after wasting time and money on a scroll saw. Then spent a week waiting for a metre of 1/8" brass half round beading to arrive; to edge the window openings and doorways. The metre length wasn't quite enough, but the front and both sides are done. I've got some more on order for the rear sheet. It's quite an enjoyable process soft-soldering the beading. The most important part is annealing it first, otherwise it is far too stiff.
I need to have the superstructure finalised so that I can progress the exhaust, fuel tank, and controls.
Posted: Sat Jul 12, 2014 7:44 am
by dewintondave
Well, the cab is nearing completion. All the beading is on. It is time to make a gentle start on the bonnet.
Posted: Wed Jul 30, 2014 10:20 am
by dewintondave
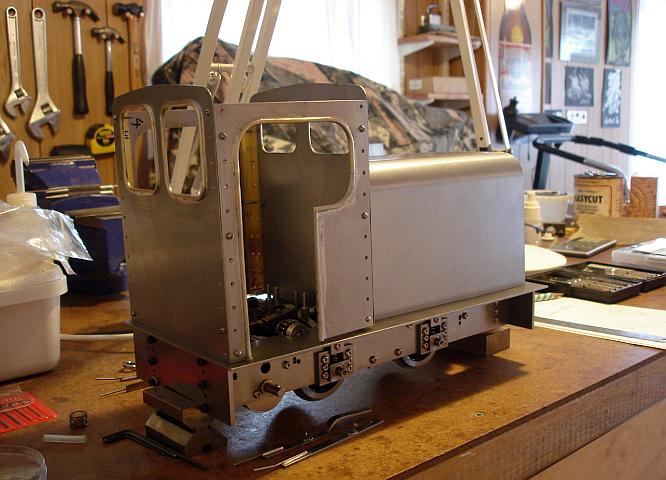
Here we are, I've bent up the bonnet in the wood vice. I like the end-on view, it's got that menacing look of the truck in "Duel" (I could put some battered old engine nameplates along the buffer beam of victims, lol).
Posted: Wed Jul 30, 2014 2:10 pm
by DickH
Superb work - looking good - can't wait to see the finished product.
Posted: Wed Jul 30, 2014 10:10 pm
by Peter Butler
I have watched this thread from beginning to present and up 'till now have nothing to contribute to the project..... but I must say I am in awe of your engineering skills, combined with the infinite amount of patience you have shown in developing this loco.
Even your workshop is neat and tidy..... I must lie down now!.
Posted: Thu Jul 31, 2014 8:14 am
by dewintondave
Thanks chaps. When I was younger I had little patience, let's hope I keep it up
Posted: Sun Aug 24, 2014 7:34 am
by dewintondave
Here's the latest progress, the side rods fitted, a test run on the line - pushed by hand...
The motion is a bit tight, it needs a good run under power.
Posted: Sun Aug 24, 2014 8:34 pm
by laalratty
That really looks like its coming together nicely, how far from running is it?
Posted: Mon Aug 25, 2014 8:27 am
by dewintondave
laalratty:103581 wrote:That really looks like its coming together nicely, how far from running is it?
I could run it now with the remote tank. It needs a good run as the motion is quite tight...
Posted: Sun Sep 07, 2014 8:36 am
by dewintondave
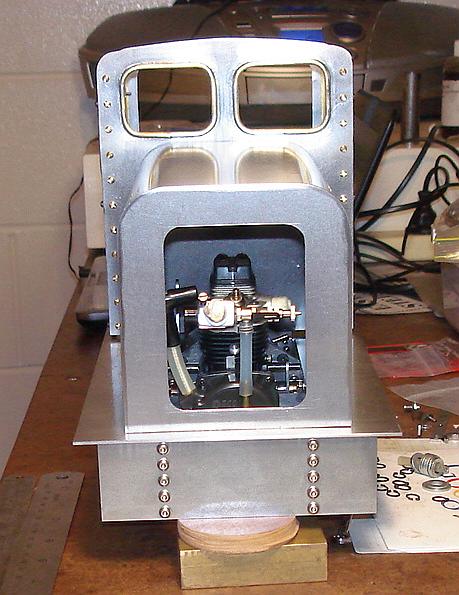
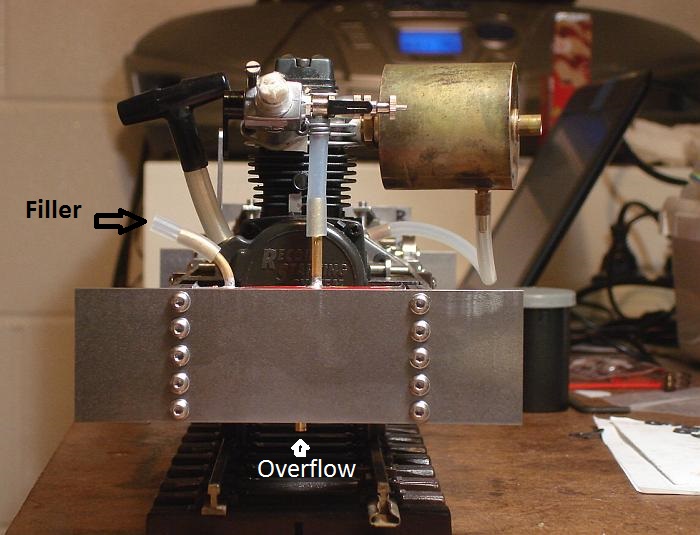
Finally, I got the loco running again. Last weekend I had lots of fun soldering up a small on-board fuel tank from a can. It only holds about 40 mL, but it lasts for 20 minutes and can be topped-up when running.
Just keep filling until fuel comes out the overflow.
Video of the run
Posted: Thu Oct 30, 2014 1:39 pm
by Annie
What a beautiful example of model engineering
Posted: Thu Oct 30, 2014 11:12 pm
by dewintondave
Annie:105276 wrote:What a beautiful example of model engineering :D
Thank you Annie.
---
I've been making multi-height couplings for the loco, these are chunky fabrications and have taken a long time...
Posted: Thu Oct 30, 2014 11:47 pm
by TTHLRMatt
Got to congratulate you! That is one very good looking diesel.
Posted: Sat Nov 01, 2014 9:24 am
by Big Jim
More power to your elbow. I can't wait to see pictures of it running.
Posted: Sun Nov 30, 2014 3:23 am
by dewintondave
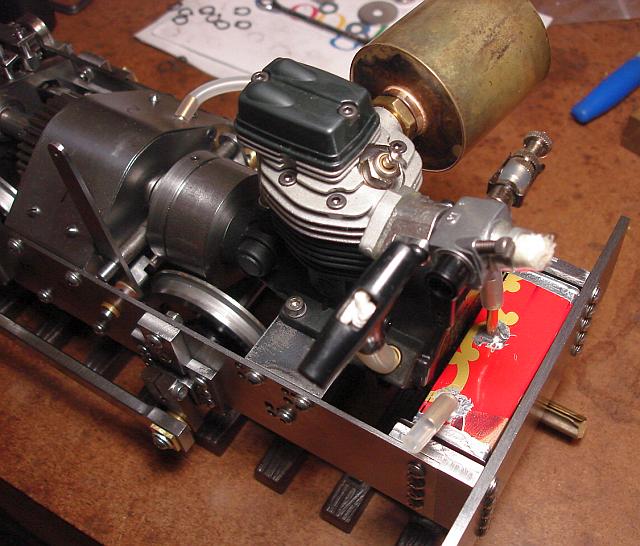
Recently I've been concentrating on the exhaust system. A manifold to turn the exhaust through 98 deg. Then a huge box for the gasses to expand in, and then exhaust pipe going up the front middle of the cab in between the windows. The exhaust box is all soft soldered together, and coated all over the inside surface with solder to protect the mild steel. The exhaust box has a capacity of about 200mL.
There's the oil drain at the base of the exhaust box.
Posted: Sun Nov 30, 2014 8:50 pm
by laalratty
Really does look excellent, the standard of work looks very high indeed.