Page 153 of 187
Re: Time to build a railway...but where?
Posted: Mon Jun 12, 2023 11:37 am
by Peter Butler
Andrew wrote: Fri Jun 09, 2023 9:48 am
The width explains why the one that Colonel Stephens bought for the Ffestiniog only seems to have been photographed at Boston Lodge - according to drawings, the newly restored Baldwin is 7' wide and only just fits between the walls and bridge parapets between there and Minffordd, so that crane would have stood no chance!
Thanks for the photograph and your comments Adrian, I think Andrew's explanation above is why the crane is shown with no straps etc. as it couldn't be operated in such limited loading gauge so there was no need to furnish it with such equipment. I have seen a design drawing showing the 'pads' which I constructed, so my guess is they were supplied new with the crane. All such items probably got lost or damaged between owners so were not on the photograph shown?
I'm not a railway historian so I had two options available to me with my model.... modify it to run and add suitable working equipment, or trap it in a siding (minus equipment) where I would be repeatedly asked, 'Why doesn't it run?'. Life is too short to cope with the latter!
Re: Time to build a railway...but where?
Posted: Mon Jun 12, 2023 1:14 pm
by ge_rik
I found a larger version of that photo and you're quite right, no toolbox or general clutter

- L&B Crane @Pilton.jpg (231.02 KiB) Viewed 8817 times
I searched around to see if the inclusion of tools etc on match trucks was one of those self perpetuating myths which railway modellers have created and at first struggled to find evidence for them ..... But then I tracked down these which seem to have built in tool chests. So, no a myth after all..

- handcrane100_0750h.jpg (113.65 KiB) Viewed 8817 times

- 15535805067_21cfbc9c3f_b.jpg (189.66 KiB) Viewed 8817 times

- 44330706551_e53f3d70c2.jpg (61.75 KiB) Viewed 8817 times
Rik
Re: Time to build a railway...but where?
Posted: Mon Jun 12, 2023 2:37 pm
by Phil.P
I think the last two photos show match trucks converted from Shunters wagons?
It would make sense, to use an existing set of drawings, with the addition of the 'dolly' for the jib.
Phil.P
Re: Time to build a railway...but where?
Posted: Tue Jun 13, 2023 5:58 am
by FWLR
I am sure they would have had some tools don't you think. They would have needed them to fasten bolts through chain links and eye bolts I would have thought. My dad always had tools on his crane just for those reasons.
Still I am like Peter, I am not a railway historian so I will leave it there, but if it was me, I would have a toolbox of some sort...
Re: Time to build a railway...but where?
Posted: Thu Jun 29, 2023 9:32 pm
by Peter Butler
It is a very rare thing for me to say but I have just started to build a kit which I have had for some time. Usually I can't wait to get stuck in, but due to other distractions I have only now begun this kit which I had for Christmas!
It has been worth the wait though, it is one of those odd-ball locomotives which so appeal to me.....

- 100_0240.JPG (275.24 KiB) Viewed 8664 times

- 100_0241.JPG (282.4 KiB) Viewed 8664 times
It is, of course, the PDF Models, Baldwin 50HP Petrol Tractor, another superb kit from them (as always) with plenty of scope to add detail as desired. This has a laser-cut metal chassis, metal wheels, motor and gearbox, 3D printed bonnet and attachments, and laser-cut clear acrylic cab, which is the only thing I have replaced with plastikard, mainly due to the fact I have no suitable solvent for the material.
The pictures show just some of the many parts, the ones in yellow are sanded and sprayed with filler/primer ready for paint.
It is an interesting locomotive and my research on the 'net show a great variety of construction variations, so plenty of opportunity to be creative.
I'm steadily getting through a generous supply of rivet heads, so more pictures to follow shortly.
Re: Time to build a railway...but where?
Posted: Fri Jun 30, 2023 4:55 am
by FWLR
Can't wait to see what you come up with Peter.
Going on our holidays today, so I may not be on the forum much, but knowing you

..you will have it almost finished by the end of next week...

Re: Time to build a railway...but where?
Posted: Fri Jun 30, 2023 9:38 am
by Old Man Aaron
Keep up the photos of your build, and you might just enthuse me to get back into mine!
Re: Time to build a railway...but where?
Posted: Fri Jun 30, 2023 12:29 pm
by ge_rik
This loco has always intrigued me. Be interested to see how it develops.
Rik
Re: Time to build a railway...but where?
Posted: Fri Jun 30, 2023 1:57 pm
by Phil.P
The amount of 'finishing' puts me off a little..
That, and the 1:1 screws fixing things together. - They just 'jar' with me.
Phil.P
Re: Time to build a railway...but where?
Posted: Fri Jun 30, 2023 3:09 pm
by Peter Butler
Phil.P wrote: Fri Jun 30, 2023 1:57 pm
The amount of 'finishing' puts me off a little..
That, and the 1:1 screws fixing things together. - They just 'jar' with me.
Phil.P
On your first point Phil, my confidence is growing with experience and I am not afraid to experiment. Previously I have used fine sandpaper to get an acceptable surface and it can take some time and effort, this time I really went for it and used 80 grit wet and dry (used dry) followed by a final rub with 600 grit (also dry).
This has worked very well and with a spray of filler primer a perfectly smooth finish is achievable.
For your second point, the kit appears to be well thought out to minimise the number of screws visible in the finished model. I'm not there yet, but most of the fixings appear to be hidden or can be disguised later. Even professionally built, and far more expensive models usually have some fixings on view.
Re: Time to build a railway...but where?
Posted: Fri Jun 30, 2023 8:09 pm
by Peter Butler
A spray coat of grey primer over the filler/primer and ready for attaching the rivet heads (supplied). These are tiny, I would estimate 1mm diam. and tend to stick together by static electricity(?). I follow the advice given by the late Peter Farley and use Evo-Stik PVA applied with a cocktail stick. A number of glue dots can be applied first followed by attaching the rivet heads, each one picked up with the cocktail stick and carefully sited, although there is still some time before the glue sets.....

- 100_0250.JPG (266.39 KiB) Viewed 8590 times

- 100_0256.JPG (228.55 KiB) Viewed 8590 times

- 100_0257.JPG (232.99 KiB) Viewed 8590 times
Once applied, another spray coat of grey primer ensures they are encapsulated and firmly attached to the body. I have used this method previously and can assure you it works. The seemingly random positioning of the heads follows the various cab fittings, including gear lever frame, driver's seat etc. As I said before, both prototype and model examples are all different so I'm just filling in the spaces.
Re: Time to build a railway...but where?
Posted: Sat Jul 01, 2023 7:58 am
by ge_rik
That is a good finish, Peter. Well worth the effort.
Rik
Re: Time to build a railway...but where?
Posted: Sat Jul 01, 2023 8:06 am
by FWLR
Well I think those spacers are really filled in Peter. This is going to be some loco when you finish it to your usual very high standard. You know how I value your experience mate and I could see myself doing the exact same way you have done. I haven't used the
EVO-STICK PVA myself, I use the blue exterior wood pva, I think that's EVO-STICK. On my hols at the moment so I can't look to check it..
I am on here without Anne knowing, she is showering

so I my not be able to see how your progressing until I come back....

Re: Time to build a railway...but where?
Posted: Sat Jul 01, 2023 8:09 am
by FWLR
Thinking about it, it may well be the same...
Those rivets on the cab look like small pearls, are they gem art, I have hundreds of them and I use a very small sewing needle to pick them up, though even then they go flying away sometimes...
Re: Time to build a railway...but where?
Posted: Sat Jul 01, 2023 10:26 am
by Peter Butler
Evo Stik (blue carton) is exterior quality, interior quality is in a green carton. I'm sure both would give the same results.
The rivet heads supplied are silver coloured and made of hard material (?) which would be difficult to stab with a needle, which is why I use the cocktail stick with a tiny amount of PVA on the point. None of them ever go missing this way.
Re: Time to build a railway...but where?
Posted: Sat Jul 01, 2023 12:29 pm
by ge_rik
Peter Butler wrote: Sat Jul 01, 2023 10:26 am
The rivet heads supplied are silver coloured and made of hard material (?) which would be difficult to stab with a needle, which is why I use the cocktail stick with a tiny amount of PVA on the point. None of them ever go missing this way.
I use the same method - except I use thick (High Viscosity) superglue
Rik
Re: Time to build a railway...but where?
Posted: Sun Jul 02, 2023 2:08 pm
by Peter Butler
Following the video build instructions by Peter Farley on YouTube, I have now assembled the chassis frame. This laser cut steel unit is really good as a foundation; it is well cut, perfectly flat and quite heavy. The 3D printed sections are fitted by means of concealed nuts set in the thickness of the material and the screw heads can be painted to match the frame....

- 100_0259.JPG (279.08 KiB) Viewed 8522 times
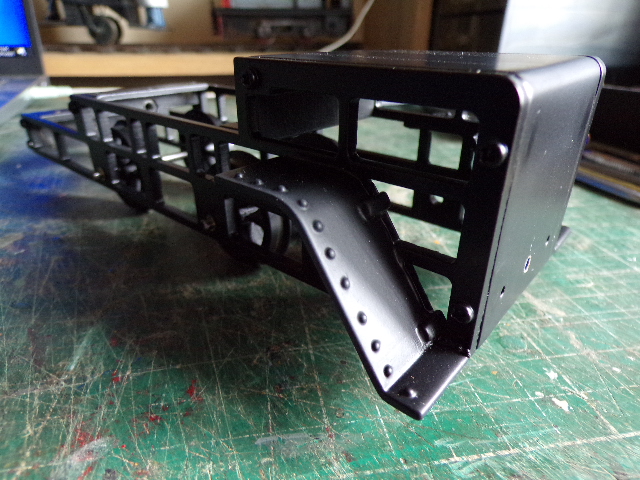
- 100_0258.JPG (299.44 KiB) Viewed 8522 times
The fuel tank has been attached by drilling tiny holes in each leg and corresponding holes in the bonnet. Brass rod is superglued in them to give a better bond than just face-to-face....

- 100_0261.JPG (278.47 KiB) Viewed 8522 times
Yet another spray coat of grey primer is giving a much improved surface and I have decided to keep it grey, as many prototypes seem to have been. Before I assemble the cab details a RC system is being installed. An on/off/charge switch and a charging socket are under the cab floor with the wiring concealed behind the cab control panel... well, that's the plan!
Re: Time to build a railway...but where?
Posted: Mon Jul 03, 2023 12:09 pm
by Old Man Aaron
Very well-made kit, innit? I like those nail art gems much better than the Cambrian rivets supplied with my kit a few years back.
Quartering is a pain, had to make a jig to get mine right.
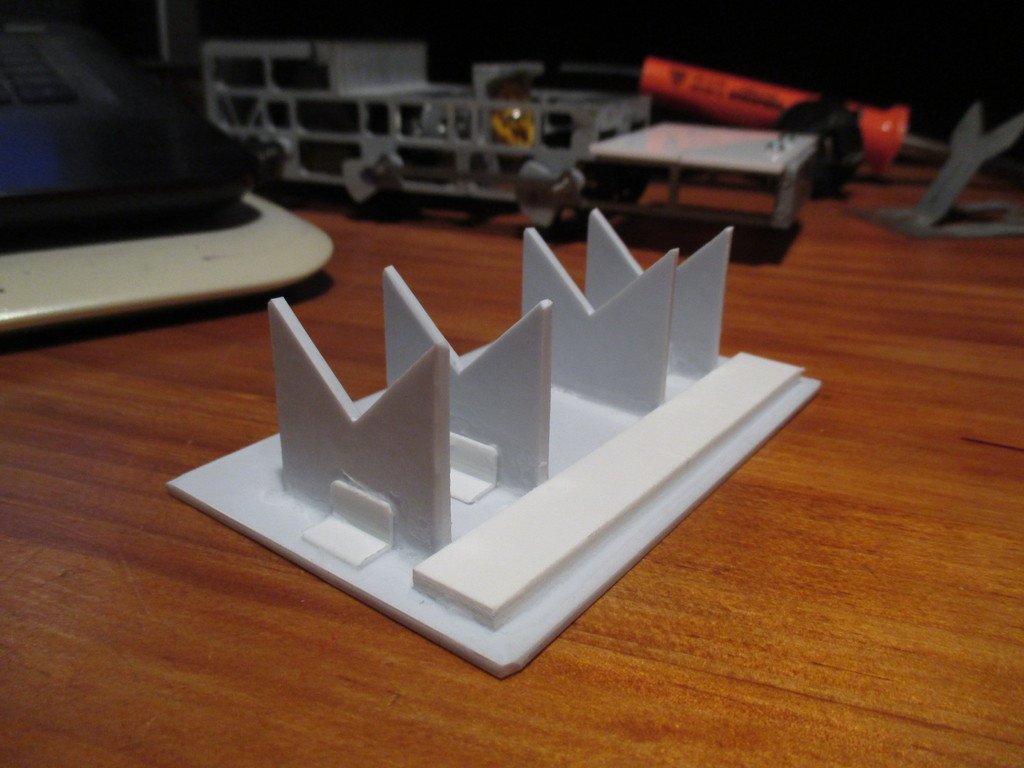
Nice cab!
Re: Time to build a railway...but where?
Posted: Mon Jul 03, 2023 12:22 pm
by FWLR
That jig is great

Re: Time to build a railway...but where?
Posted: Mon Jul 03, 2023 2:39 pm
by Peter Butler
Thanks for the jig idea, Aaron. I seem to recall seeing it previously but don't know where to look. Do you give any instruction on how to use it?
Meanwhile... the wiring is now complete and tested....

- 100_0265.JPG (270.58 KiB) Viewed 8509 times
The switch and charge socket are sited underneath the cab....

- 100_0262.JPG (239.81 KiB) Viewed 8509 times
The wires are kept tidy and will be concealed behind the modified control panel....

- 100_0270.JPG (275.86 KiB) Viewed 8509 times
