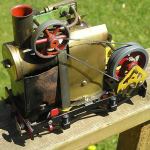
Almost there...

A very popular starting point for Live Steam. With their low cost comes a number of problems which can be discussed here
User avatar
dougrail
Driver
Driver
Posts: 1535
Joined: Mon Mar 14, 2011 5:11 pm
Location: Salopia; on the edge of Arcadia

Post by dougrail » Sat Dec 15, 2012 8:52 pm

Chris Cairns:78004 wrote:Doug,

I think you need to be methodical about what you have done with this loco to help track down the problem easier.


Agreed Chris. I try to be methodical but with limited experience and this engine being..."charming" I have to wonder. What should be a simple system can be an absolute minefield for technical faults and problems. No wonder many consigned their Mamods to the attic or scrap sidings. Mood aside, let's go step by side as you request. :)
So back in Feb it ran great with the MSS cylinders, a reverser valve and wheels. Loco dismantled for painting, etc.
Check.

"Deep Thought" specifications:

Custom 25psi SV by DLR Works, water topup, dome steam. MSS wheels, MSS simple cylinders and reverser block. Rev block and cylinders sourced from Pauly. Ran like a dream at STIA, video somewhere can be dug up if you're curious.
Loco re-assembled with same cylinders, reverser valve & wheels. Video proved that steam was getting to cylinders but was then escaping around the back plates and not going up exhaust. So either port timing is out or there is a blockage in the steam path.
Check.

"Second Chance" spec:

SAME - MSS cyls, reverser.

NEW: Deadleg lubricator and IPE incab regulator, along with corresponding steampipe via back and under boiler. Dome set now blocked off, no leaks reported from dome. SV now a 'stubby' IPE one - the stubby father of the tall Dream Steam upgrade SVs.

SV and regulator system cleared however, as proven that steam was getting to motion [ie at least to the rev block].
You told us the wheel quartering is OK so port timing should be correct. The rotary valve 'solder sandwich' is a red herring from SteamPig as it previously worked OK and it is unlikely the solder paste would break down unless you have been using a soldering iron or soldering torch on it. You have removed the cylinders to free up the pistons. These have been refitted and this time when you open the reverser valve the steam goes straight up the exhaust. So there is still a problem with the steam path.
Wheels are quartered. When one side points up, the others point east or west, dead flush. No wheels are loose on the axles. The rotary valve thing looks fine, as yes for control these are the same cyls and reverser. I have washed the reverser out to ensure there is no sanding/dust inside it. The cylinders have now been serviced so that they run freely whichever the rods are twisted. They also move in their sleeve much more effectively than before the "cap-comes off cleaning" that you advised this morning.

I can certify no soldering irons or heat have been near the solder of the rotary.

The steam gets to the cylinders sort of, as they move a few mm when the reverser is opened, as if they want to go. I think the steam path between reverser and the cylinders are the problem.
It does sound to me that your wheel quartering has gone (there was a case of MSS wheels falling off their axle shortly after first running a loco - search somewhere on the other Forum by a member Chris and his 2nd MSS Saddle Tank loco). Otherwise your reverser valve is not lining up with the steam holes in the chassis properly, or you have damaged the cylinder back plate gaskets, which form the steam path from the chassis holes to the cylinder back plate holes, and the return exhaust steam path.
I think these wheels were Mamod origin - before I repainted, they were red. They quartering as reported seems a-okay though.

I have checked the steam holes, four reverser holes each side match to the frame's holes. The gaskets are intact and gently oiled for sealant effect.
The only other change I can see you have made since Feb is fitting the dead leg lubricator. You have reported that all the pipework is OK and the oil is flowing. What type of steam oil are you using? I use 460 steam oil in all my steam engines which seems to work OK, although I suspect my William II would run better on a thinner oil.

Have you made any other changes to the mechanics of this loco since Feb that you have not previously reported?
All changes are now reported in this post. SV, in cab reg, dead leg luber and resulting steampipe. Plus dome sealed up.

Steam oil used is lubricating oil on the wheels and rolling parts, but for steam lubrication, I use Accucraft steam oil. Bought direct from an Accucraft dealer.
Be careful with frustration as you can lose concentration and end up breaking something. I speak from previous experience.

Chris Cairns.

Edit: Found the MSS wheel failure Topic here from Page 7 - http://modelsteam.myfreeforum.org/ftopi ... asc-90.php
Chris...you have NO IDEA how much this wretched engine has pissed me off :twisted: I have owned a number of locos, got them working. Swordbreaker I got a couple of folk's help with but did get it working by meself before they tweaked it [with my grateful thanks].

This one however has been the proverbial lead bollock since I bought it in 2011 from Ebay. Steam leaks, seized wheels, cylinders, now shot sight glasses, meths burner...it's had every fault and irritation that a Mamod could ever develop.

Now, we seem to be focusing back on the wheels quite a bit I notice as both you and Greg pointed out.

I happen to have a genuine, unused, pair of IPE Jane wheels in my stocks. We're talking black with metal rims and holes in the black area IPE wheels.

I'm going to test it after this latest sweep and see if it works. If not, I shall try swapping the wheels?

Many thanks

Lner fan Sam

Post by Lner fan Sam » Sat Dec 15, 2012 10:18 pm

Doug I understand that your swordbeaker has had it's cylinders modified to make them run better. I understand the the steam ports were countersunk to make to engine run slow but also to make it more powerful. Perhaps if this was done to your second chance cylinders they may have the more power to overcome the problems. Also to fact that swordbeaker is fitted with a pps steam reverser lever which is also countersunk on the steam holes. Perhaps this should be done as well to the reverser in this engine to improve the flow of steam.

I know how frustrating loco ownership can be. My 7 1/4 gauge electric loco is very basic in its construction and it is allways throwing up prop elm in my face. But there is no better feeling than getting a poor performing engine to run properly (which you should know with swordbreaker.

User avatar
dougrail
Driver
Driver
Posts: 1535
Joined: Mon Mar 14, 2011 5:11 pm
Location: Salopia; on the edge of Arcadia

Post by dougrail » Sat Dec 15, 2012 10:59 pm

To be fair, Swordbreaker hasn't been as half as much a problem as 'Chance has been. I got it to steam and run for ten mins without needing attention from a pro. :) It was afterwards when it was bedding it that a couple of issues struck - I then got James to 'superheat' it [because I blatently ignored a PPS design priciple] and then Dan to give it a go-over as he had done several oscillators for friends of mine.

Swordbreaker I'm almost at the stage I can bet money on it and rightly so as my pride and joy.

Chance on the other hand is a little bar stool.

~~~~~~~~~~~~~~~~~~

Did I mention I have now got to a stage where it'll steam and power itself? :D

Got two tank-fills of runs out of it tonight!! First was well, like a sewing machine for 2-3mins at a time.

Seconds run it needed more nudges. I have filmed parts of the second running session and will be putting them up shortly for analysis.

Spule 4

Post by Spule 4 » Sat Dec 15, 2012 11:58 pm

Bummer on not having compressed air. I have a spare compressor, but no good for you in the UK and me in the US.

There have been some that have done it from a car tire tho....
dougrail:78007 wrote:
Wheels are quartered. When one side points up, the others point east or west, dead flush. No wheels are loose on the axles.
If you have not already, check the wrist pins on the front drivers. If one is even slightly wiggly, you WILL have problems.

User avatar
dougrail
Driver
Driver
Posts: 1535
Joined: Mon Mar 14, 2011 5:11 pm
Location: Salopia; on the edge of Arcadia

Post by dougrail » Sun Dec 16, 2012 1:16 am

Hi Garrett,

I'll check them in the morning - though when I sanded them with fine paper they seemed fine to me. I took some footage tonight of a breakthrough, but not perfect yet. Your thoughts would be greatly appreciated.

START UP >

Image

1)Image

2)Image

3)Image

Spule 4

Post by Spule 4 » Sun Dec 16, 2012 1:50 am

Looked like some heavy priming early on, but maybe sorted by the last video?

User avatar
dougrail
Driver
Driver
Posts: 1535
Joined: Mon Mar 14, 2011 5:11 pm
Location: Salopia; on the edge of Arcadia

Post by dougrail » Sun Dec 16, 2012 2:23 am

Garrett,

I'm not so sure. Yes it primed early on [boiler wasn't even to the Max line!] but the fact it kept stopping and needed a boot worried me as well as there seemed to be a lot of steam coming from the motion end. :(

I await further thoughts.

User avatar
Superbiker_uk
Fireman
Fireman
Posts: 371
Joined: Wed Apr 01, 2009 7:36 am

Post by Superbiker_uk » Sun Dec 16, 2012 8:47 am

Hi Doug it is hard to tell from the videos but do you have steam coming from the SV? If so it would be my suggestion that it is either leaking or is realeasing way to early. General comment is there is too much steam coming from under the loco so definately something a miss with the steam path or reverser? If you are on meths a problem you can have is the steam losses from the reverser area can easily create a level of moisture sufficient to suppress the end wick of the burner adding to the boiler pressure  dips that make the loco stop.

Just had another look back and it's definatley struggling to maintain sufficient boiler steam pressure to keep the cyclinders 'powered up'. With running in I would say those cyclinders will just get better. As for the motion I cant see anything obvious on the the side shown that would create a binding problem. If you can ovecome the steam leaks you will get a nice runner.

User avatar
dougrail
Driver
Driver
Posts: 1535
Joined: Mon Mar 14, 2011 5:11 pm
Location: Salopia; on the edge of Arcadia

Post by dougrail » Sun Dec 16, 2012 11:05 am

With the steam, I'm running on kettle boiled water, would that explain the early-seeming release of steam? I usually wait til its coming outt he SV heavily as per my vid to ensure I have a good head.

Now regarding the leak/wicks, that makes sense, especially as a wick does tend to do down sometimes which in turn reduces the heat and in turn can lower the steam amount available.

There's got to be a leak somewhere, as evidenced by the steam that comes out under and likely as you say, moistening the wicks which in turn causes the down turn.

I'm going to take a photo of the underside as it is and put it up for examination. I'm then going to take out the steampipe and test it for leakage. If that's clear, could it then be the join -0 either pipe to luber pipe, or from luber pipe to rev block?

User avatar
Chris Cairns
Driver
Driver
Posts: 2372
Joined: Mon Oct 29, 2007 7:25 pm
Location: Glasgow, Scotland

Post by Chris Cairns » Sun Dec 16, 2012 12:02 pm

Doug, it got too late for me yesterday to post a reply.

As has already been discussed you have some major steam leakage, including the Safety Valve.

To service the safety valve have a look at my reference Topic - http://gardenrails.myfreeforum.org/IPM0 ... t6359.html Note how far the threaded cap is recessed at the top (You will screw it back into the same position), then you need to clean the stainless steel ball, the cup on the rod/plunger, and use a cotton bud to clean the inside of the valve body. Cover everything with steam oil when re-assembling.

You have 2 good bricks for resting the locomotive on so you should be able to use a small mirror underneath to see where the steam is leaking from. I have a good extending inspection mirror but a small make-up mirror would do as well.

Possible areas for steam leaks include the T piece of the lubricator. On some of these there is an 'O' ring inside the collar at the back of the T piece where you push the main steam pipe in (some do not have an 'O' ring) - I solder up that connection to prevent leaks. The other end of the T piece fits into the reverser block and if not orientated correctly that can leak as well.

From what I can see in the videos most of the steam is leaking around the cylinders. Even after lapping it can take some time for the cylinder face & back plate to bed in - make sure you coat those with plenty of steam oil. And here is some useful information from the 16mm NGM Mamod Handbook regarding cylinder back plate alignment.
16mm NGM wrote:Alignment of the port block on the frame is an important consideration. Assemble the block to the frame with the cylinder removed, leaving a little slack in the mounting screws. Using a straight edge, manipulate the block until an imaginary centre line between the steam ports is aligned with the wheel centre and crankpin.

Tighten the screws, and make a small mark against the frame and block in two places, to aid reassembly in the correct position. Remove the block , and refit the cylinder.
Image
As Garrett (Spule4) has already advised do check the crank pins for looseness on your wheels. These are a known failure on the old Mamod wheels, although MSS use a different style of punch which should be more effective.

Peter (Superbiker_uk) has already covered your meths burner, and I see you use the method of squirting meths over the boiler to keep the burner alight. Was this the meths burner you mentioned which was having a blockage problem. If so remove the wicks, use some nail varnish remover (Acetone) and lots of agitation to remove any deposits in the tank and burner tube. Drain out acetone, flush through with meths and watch through the fire tubes to see that meths is flowing OK. Not sure what you use for wick material but I have found the ceramic wood stove rope is ideal. After a few firings this rope seals around the top of the fire tube thus preventing any leakage when the loco topples over - less chance of a fireball.

One thing I have still not got around to making is some form of adapter or banjo bolt fitting allowing the use of a pressure gauge with the standard Mamod/MSS boiler. It would help in cases like this one to actually see how much pressure is available, and how much is being lost when you open the regulator/reverser control.

Chris Cairns.

User avatar
dougrail
Driver
Driver
Posts: 1535
Joined: Mon Mar 14, 2011 5:11 pm
Location: Salopia; on the edge of Arcadia

Post by dougrail » Sun Dec 16, 2012 1:50 pm

Hi Chris,

Support most welcome. For this test I've cleaned outt he SV as recommended, and replaced the meths burner with a spare IPE original one I have, having rewicked it.

Report due asap for inspection. After this test if there are no improvements I will then consider the lubricator junctions - steam pipe and reverser block connections.

User avatar
dougrail
Driver
Driver
Posts: 1535
Joined: Mon Mar 14, 2011 5:11 pm
Location: Salopia; on the edge of Arcadia

Post by dougrail » Sun Dec 16, 2012 2:41 pm

Right, steam test :-

Swapping meths burners - provided a far more efficient and evenly-spread fire. This allowed more steam and a couple mins more running time.

Startup - steam going to rev block. Loco needed a ton open on the reg to get it going. Once going it would go for 2-3 mins before stopping. Steam notable then, coming from under front end. As in there must be a small leak - one small enough to power the cyls when at full throttle but less and the leak would detract from the power avalable.

User avatar
Chris Cairns
Driver
Driver
Posts: 2372
Joined: Mon Oct 29, 2007 7:25 pm
Location: Glasgow, Scotland

Post by Chris Cairns » Sun Dec 16, 2012 5:05 pm

So you need a small mirror to see where this steam leak is coming from.

Looking more likely that it is the lubricator that may be causing the problem. If your steam pipe is not under tension entering the reverser block then the resistance that the steam meets trying to move the pistons may be enough to push the front of the T piece slightly out of the reverser block causing a leak, or leak from the back of the T piece.

If you remove the steam pipe from the regulator housing and bend the vertical part at the back towards the rear of the loco, when you put it back into the regulator housing that should put some forward tension on the steam pipe helping to keep it into the reverser block.

Chris Cairns.

Narrow Minded

Post by Narrow Minded » Sun Dec 16, 2012 5:57 pm

I put an "S" bend in the steam pipe from the in-cab regulator to the T piece. This passes through the flame as a super-heater and applies tension (into the lubricator and reverser) ;)

User avatar
dougrail
Driver
Driver
Posts: 1535
Joined: Mon Mar 14, 2011 5:11 pm
Location: Salopia; on the edge of Arcadia

Post by dougrail » Mon Dec 17, 2012 12:40 am

IT WORKS IT FINALLY WORKS!


After a week or so of surgery and several failed steamups, I gave the loco a complete once-over Saturday morning.

Cylinders

Caps popped off, insides smoothed out with Brasso and pistons sanded finely. Cleaned out with rag and old oil/grease cleaned with a cotton bud.

The first time I have ever done this - I was afraid before that once I had pushed out the caps, they would not pushfit back on to be steam tight. This fear has been overcome.

As a result, the cylinders act a hundred times more smoothly and freely!

Steam Pipe

This was rearranged to have less bend at the cab, slip past the windshields of the meths burners and also so that when installed, there would be more pipe under the boiler in order to create a 'tension press' when the front end was pressed into the receiver of the lubricator.

There was also the trick of having an s-bend in said pipe in order to create a less angled approach of the lubricator into the reverser block as well as to create more tension press.

Lubricator And Joint
The lubricator was adjusted so that its tail didn't push into the reverser block at an angle. The lubricator was also replaced last week at Butterley with a longer-tailed substitute courtesy of Narrow Minded who took the old one as part ex. :D The old one had a short tail, meaning the wider t-junction chamber rubbed against the central and cylinder trunions - a flaw common with these lubricators I find sadly. A longer steam-pipe tail would solve this flaw.

The other flaw was where the steampipe from the cab meets the lubricator. This is a push fit and so a 'tension lock' is necessary. Secondly, in a lot of these dead leg lubricators, there is no o ring to seal what is a steam joint. In my case, this was what was causing a lot of steam loss with 'Chance. My course of action was to cover this joint and the brass cap of said lubricator entry with a liberal slather of Greville Gasket Sealant. I bought the clear edition and dried it over a gas fire - it was ready within two hours but could still be curing.

Furthermore in a steam test three hours after application it worked - and survived - a meths-fire steam up!

Having now done this work and having now pretty much gone over this complete demon of a locomotive....here's the First steam test in action. :)

Image

Click vid to view. Roughly 5 mins of running with no interruption, fire stoking or nudging. I'm very pleased at this progress.

And finally a Works shot of the complete loco with an extra detail or two since its unveiling...

Image

JOB DONE - Hopefully...!!

Spule 4

Post by Spule 4 » Mon Dec 17, 2012 12:58 am

:D Well done!

User avatar
dougrail
Driver
Driver
Posts: 1535
Joined: Mon Mar 14, 2011 5:11 pm
Location: Salopia; on the edge of Arcadia

Post by dougrail » Mon Dec 17, 2012 1:15 am

Need to do a second steam test on bricks again, in both directions, and then a third and final one on rolling road. From there I can finally be done with this...!

cheers Garrett :)

User avatar
Chris Cairns
Driver
Driver
Posts: 2372
Joined: Mon Oct 29, 2007 7:25 pm
Location: Glasgow, Scotland

Post by Chris Cairns » Mon Dec 17, 2012 2:37 am

So our cheques are in the post!!
dougrail wrote:a flaw common with these lubricators I find sadly. A longer steam-pipe tail would solve this flaw.
That works for your configuration with a cab regulator. I have two Mamods with dead leg lubricators fitted which use the standard steam pipe and regulator/reverser set-up. So a longer steam pipe tail would not work in these locos particularly if I use a solid fuel burner, my 5 wick meths burner or the Merlin gas burner. The manufacturers could easily trim the inside face of the T piece during construction so that they do not foul the reverser pivot bolt. I have no problem with it fouling the cylinder pivot bolts - it sounds like you had a longer than normal cylinder pivot bolt fitted.

I'm sure that you are now very happy and looking forward to despatching 'Second Chance' to it's new owner.

Now is there not still that leaky boiler to fix on the industrial Mamod.

Mamods are not a toy - they are for life!!

Chris Cairns.

Narrow Minded

Post by Narrow Minded » Mon Dec 17, 2012 10:03 am

Chris Cairns:78097 wrote:Now is there not still that leaky boiler to fix on the industrial Mamod.

Mamods are not a toy - they are for life!!

Chris Cairns.
I'm working on that - and it's proving to be a sod! :?
There's no "sleeving" to the steam aperture, just a hole in the bottom of the boiler. The steampipe goes through a (rather chunky) gland which needs a fair amount of heat to solder in place - it aint gonna look pretty ;)

User avatar
dougrail
Driver
Driver
Posts: 1535
Joined: Mon Mar 14, 2011 5:11 pm
Location: Salopia; on the edge of Arcadia

Post by dougrail » Mon Dec 17, 2012 11:06 am

Aye and the help is much appreciated NM mate :)

How's them steelers I got you doing? They good?

Also, anyone got a spare brass boiler backend? Willing to pay and postage.

Post Reply

Who is online

Users browsing this forum: No registered users and 16 guests