Page 2 of 11
Re: NWNG Railways No.1
Posted: Mon Jun 26, 2017 12:02 am
by River Lin
Hi all.
Cut the tumblehome curves on the end panels and scribed and stained their internal planking today.
Outer view just propped up to show tumblehome.
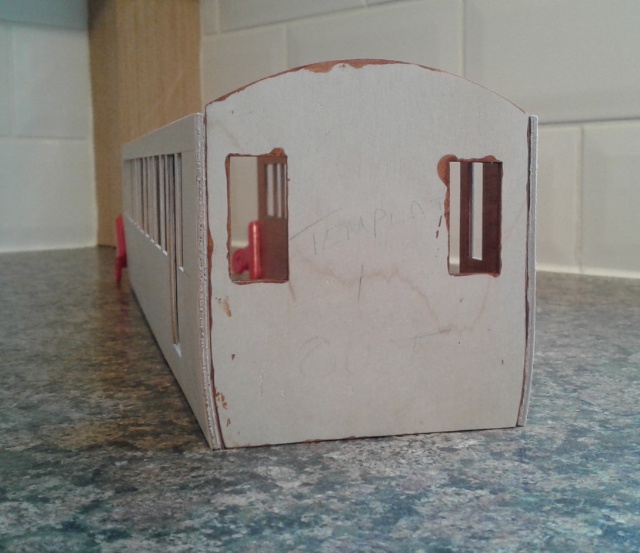
- IMG_20170625_203918.jpg (95.46 KiB) Viewed 5750 times
And inner.
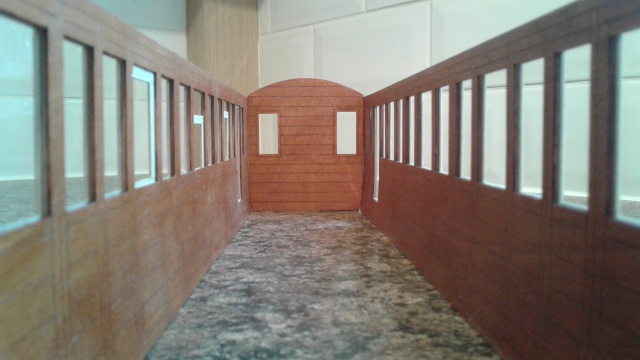
- IMG_20170625_203955.jpg (66.49 KiB) Viewed 5750 times
I can now finish and attach the beading to the end panels.
David.
Re: NWNG Railways No.1
Posted: Mon Jun 26, 2017 9:16 pm
by Soar Valley Light
Lovely work again David - and really effective photos!
Andrew
Re: NWNG Railways No.1
Posted: Tue Jun 27, 2017 8:37 pm
by River Lin
Hi all.
I have now been able to copy the curves from the lower edges of the coach ends onto the beading panels, complete the cutting out and glue on.
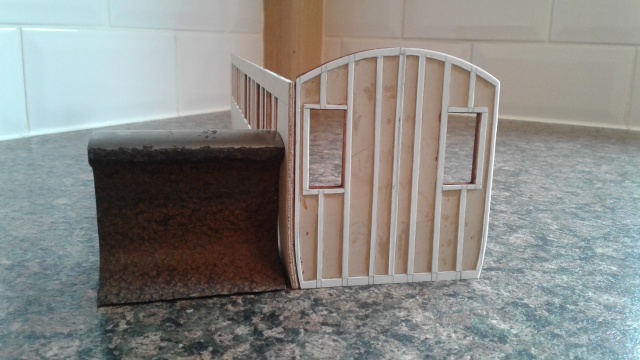
- IMG_20170627_201705.jpg (81.11 KiB) Viewed 5699 times
Could'nt wait to see how it looks in its rough state. I am really pleased with how the beading makes the curve stand out.
David.
Re: NWNG Railways No.1
Posted: Wed Jun 28, 2017 2:34 am
by LNR
That is going to look a picture when finished. Question, do the drop lights on the real thing drop right down to the sill. I notice that yours appears about to enter the tumblehome curve and wondered do the real ones have enough thickness in the wall to allow for this.
Grant.
Re: NWNG Railways No.1
Posted: Wed Jun 28, 2017 8:41 am
by JMORG
Looking good!
Just so you know, the FR is planning on building a replica of this carriage...
Re: NWNG Railways No.1
Posted: Wed Jun 28, 2017 9:26 am
by River Lin
Grant.
Hi. In the photo of the 12inch to the foot coach in my first post on this thread. It looks like the droplights do indeed drop down to the sill. Due to how i am making my model, my windows are designed to drop down about 2/3 so they do not jam in the tumblehome. (See photo 5 earlier.)
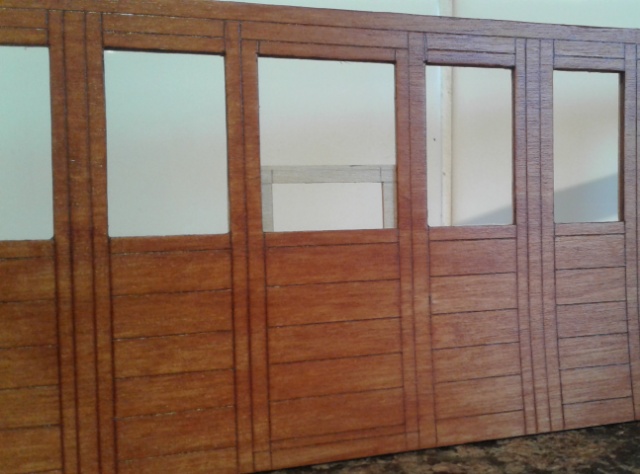
- IMG_20170628_085411.jpg (83.94 KiB) Viewed 5684 times
David.
Re: NWNG Railways No.1
Posted: Wed Jun 28, 2017 9:35 am
by River Lin
JMORG
Hi. If they do i hope they put luxury in the 1st class compartment as indicated by the original plan. I bet someone will then bring out a laser cut16mm kit.
David.
Re: NWNG Railways No.1
Posted: Wed Jun 28, 2017 10:21 am
by JMORG
I suspect that if 1st class is put back in it will be similar to the bowsiders and iron framed stock. When carriage 152 enters service, the current carriage 100 is going to be refitted as a third class top obs like 123. The old first class seats may end up in other stock like the NWNGR brake comp.
Re: NWNG Railways No.1
Posted: Mon Jul 03, 2017 9:56 pm
by River Lin
Hi Peter et al.
Following on the thread of how i made the tumblehome using lamination of wood layers, i thought i would tackle the guards duckets next. I knew that it is possible to use steam or boiling water to soften plasticard. It could then be formed to the required shape, held till cold and it will then retain its new shape. My experience is that even though it was cold when the pressure was released it slowly straightened out again to almost its original shape - flat.
I next decided to try laminating using two pieces of 0.6mm plasticard cut to width but longer to allow for cutting to length when finished.
I first boiled the kettle again. Got a round metal former and a bottle of MEK ready. I put the twp pieces of p.card into a cup and immersed in boiling water for a minute to soften them. I then quickly dried the pieces on tissue, applied MEK to one for about 2 cms from one end, put the two pieces together and rolled and held them tightly around the former for about 5 minutes for the MEK to dry.

- IMG_20170703_162343.jpg (86.79 KiB) Viewed 5612 times
I repeated this for the other ducket and then cut the curved end to length.

- IMG_20170703_162729.jpg (66.59 KiB) Viewed 5612 times
The next stage was to measure and fold the lower part of the ducket inwards and then part the layers slightly to allow MEK to be brushed between and held in place to cure. This gave me the following when the lower end was also cut to length.

- IMG_20170703_162454.jpg (61.63 KiB) Viewed 5612 times
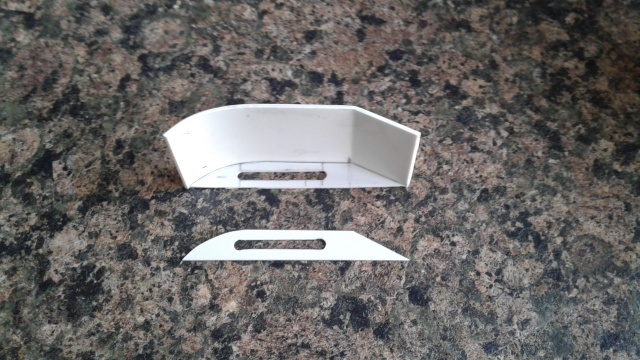
A strip of p.card was cut 10mm wide and the ducket used as a template to draw the shape which was then cut with a knife.
- IMG_20170703_193658.jpg (121.42 KiB) Viewed 5612 times
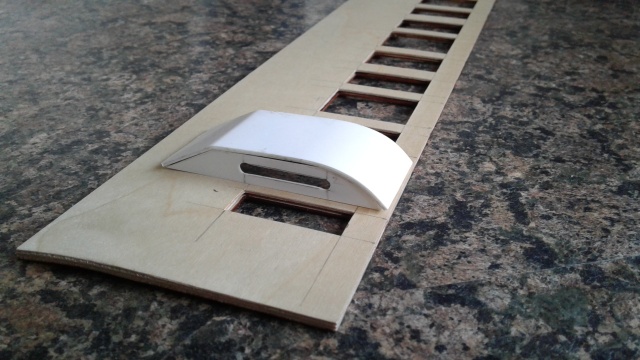
The window was cut as a rectangle with a knife and the ends rounded with a needle file.
- IMG_20170703_193723.jpg (95.17 KiB) Viewed 5612 times
The ducket components now need cleaning and glueing before fitting.
I realise it would have been easier to carve solid duckets from wood but i want them to look realistic from the coach interior with a seat fitted inside as per the plan.
David.
Re: NWNG Railways No.1
Posted: Mon Jul 03, 2017 10:31 pm
by Peter Butler
Brilliant..... thanks for that, I will give it a try myself.
Re: NWNG Railways No.1
Posted: Wed Jul 05, 2017 8:24 pm
by River Lin
Hi all.
Glued duckets prior to cleaning.
I am pleased with the outcome. The laminated body of the ducket gives a good rigidity even though the plasticard was initially guite thin. With the body pieces set to shape it was fairly easy to use them as a template to mark, cut and sand the sides prior to gluing in position.

- IMG_20170705_201003.jpg (531.45 KiB) Viewed 6916 times
David.
Re: NWNG Railways No.1
Posted: Sat Jul 08, 2017 8:20 pm
by River Lin
Hi all.
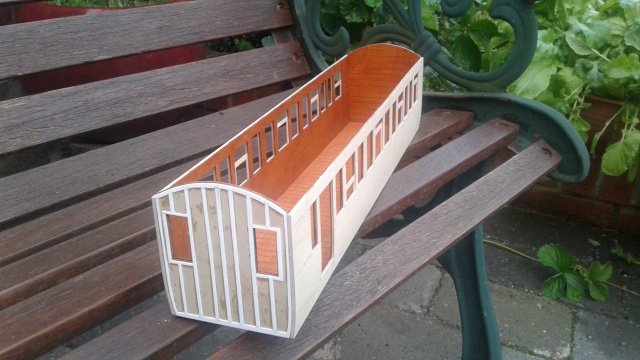
This is a landmark stage i like to get to. Four sides glued and floor in. Now to work on -
Internal fitting out.
External beading.
Underframe including wheels and couplings.
Removeable roof including lighting.
Sounds a lot of work but i will cut and fit the internal compartment partitions first to increase the rigidity of the structure.
- IMG_20170708_200915.jpg (96.47 KiB) Viewed 6886 times
Enjoy your weekend all. I'm looking forward to a steamup in Buckinghamshire tomorrow with my Lady Ann and some of my other WHR/NWNG stock.
David.
Re: NWNG Railways No.1
Posted: Sun Jul 09, 2017 12:54 am
by LNR
Just love that tumblehome!
Grant.
Re: NWNG Railways No.1
Posted: Sun Jul 09, 2017 8:27 am
by pandsrowe
I always thought that the majority of kit manufacturers had the right idea with their simple slab sides, easy to produce and easy to build. Now seeing your build l have completely revised my opinion.
Tumblehomes are a definite must.
Re: NWNG Railways No.1
Posted: Mon Jul 10, 2017 10:20 pm
by River Lin
Hi all.
I have cut the partitions to width but while thinking about the height i looked back at my paperwork to see that the coach had 3 roof oil lamps. It seems that the central 1st. Class compartment had a lamp of its own but the two compartments either side of this one shared a lamp between each pair. This must mean that the partitions between them must have been shorter than full height to allow for this.
Because of this i am now working on the roof so that when the lighting is in place i know how much below full height to make the partitions.

- IMG_20170710_213008.jpg (102.4 KiB) Viewed 6846 times
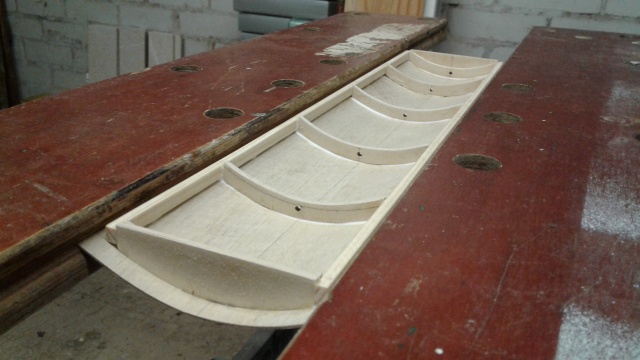
The photo shows the frame i am making for the roof including a few of the extra spars that i will fit to add strength. I am making these large enough to allow for an 8mm space between the coach roof and the internal ceiling panelling to allow the lighting components to fit between.
Re: NWNG Railways No.1
Posted: Wed Jul 12, 2017 8:10 pm
by River Lin
Hi all.
After cutting a roof from 1mm ply and allowing a 5mm overhang i am ready to construct the roof. I won't go into too much detail on this as i have posted on a previous thread my method for doing this.
Basically i use the horizontal pipe grooves on my Black and Decker Workmate to bend the roof downwards, using the curved end pieces as templates, until the curve is correct. I can then glue the roof frame in place after having marked a centre line on the curved end pieces and the roof to allow me to position the frame centrally. I use woodworkers pva for gluing as i need a good strong permanent fix.

- IMG_20170712_172616.jpg (74.53 KiB) Viewed 6708 times
Once the frame has started to grip i can then glue in the extra spars to give extra strength along the length of the roof.
I then leave the whole unit for 24 hours to dry before releasing the pressure.
- IMG_20170712_172708.jpg (75.99 KiB) Viewed 6708 times
I was able to leave the unit in the vice until about 3 this afternoon before releasing the pressure, crossing my fingers and trying on the coach.
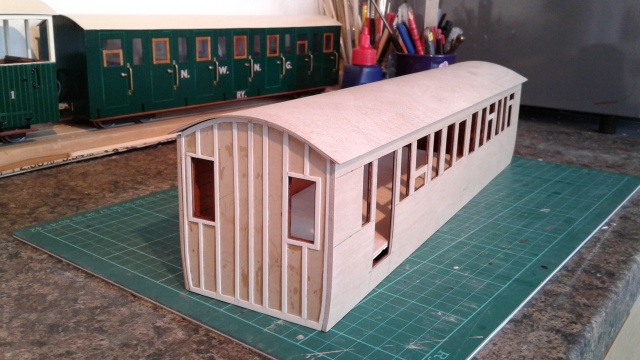
- IMG_20170712_184808.jpg (94.03 KiB) Viewed 6708 times
YES!!!! Result.
Now i need a trip to the model shop for another sheet of ply to make the internal coach ceiling before fitting the lighting. I can then go back to cutting the partitions to height.
David.
Re: NWNG Railways No.1
Posted: Thu Jul 13, 2017 8:01 am
by pandsrowe
David,
I do like your technique for getting the curve on you roof panels, it looks to be very controllable. Do you find that there is any relaxation in the curve when you remove the assembly from the work mate?
In the past I have usually wrapped my roof panels around a suitable curved object e.g. drainpipe and then soaked in hot water and then allowed to dry naturally. Although this does work it is rather a hit and miss process to ensure that you end up with the correct curve.
Re: NWNG Railways No.1
Posted: Thu Jul 13, 2017 9:10 am
by LNR
That coach is looking better and better.
Grant.
Re: NWNG Railways No.1
Posted: Thu Jul 13, 2017 9:34 am
by River Lin
Hi all.
Thanks Grant.
Phil. It all stays pretty solid. The two side rails under the roof and the extra spars help to hold the shape by adding stiffness and i don't skimp on type of glue used. A good quality wood glue is important that dries solid and i always leave it a good 24 hours before releasing the pressure. This roof was left for 28 hours.
Re: NWNG Railways No.1
Posted: Fri Jul 14, 2017 1:13 pm
by Maple
amazing work, very jealous.
i am sure it will be a show winner when done
