
Leaky Boiler

A very popular starting point for Live Steam. With their low cost comes a number of problems which can be discussed here
Post Reply
User avatar
dougrail
Driver
Driver
Posts: 1535
Joined: Mon Mar 14, 2011 5:11 pm
Location: Salopia; on the edge of Arcadia

Leaky Boiler

Post by dougrail » Mon Nov 05, 2012 5:30 pm

Hi guys,

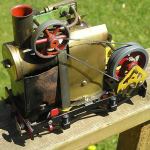
I've been restoring another Mamod - this time one that arrived as a carcass from an aborted R/C battery project.

I've pretty much managed to restore it and repaint it [and used lining pen too...;)]

However the boiler I got for it on a scavenge has leaked. I've replaced the gasket and sight glass, then placed in a second gasket that wraps about the narrower part of the sight glass and still it leaks.

Cold water - no leak
Warm water - no leak
Boiling water from kettle - no leak
Under constant heat pressure - leak.

The leak is at the bottom end, as the water seeps out to settle on the 'seat' of the combichamber that the brass backhead of the boiler sits on.

A last resort...crazy idea number one

Would gasket sealent be a good idea?

http://www.ebay.co.uk/itm/HIGH-TE...ies ... 20cbbe8f29

Like this, "high temperature, waterproof" ?

Okay, crazy idea number two:

I have TWO boiler o-ring gaskets. Do you guys reckon I could band them together with teflon tape to make a thicker gasket, then place them into place as per the normal gasket, tighten up and steam?

Would either [or both ideas combined] work? Any advice please?

Cheers
User avatar
Chris Cairns
Driver
Driver
Posts: 2372
Joined: Mon Oct 29, 2007 7:25 pm
Location: Glasgow, Scotland

Post by Chris Cairns » Mon Nov 05, 2012 6:37 pm

Doug,

I have been reading up about your boiler woes, and I hope my upcoming posting in the Reference Library may answer your problem.

Just give me some time to get Photobucket to work then I'll come back to this Topic.

Chris Cairns.

User avatar
Chris Cairns
Driver
Driver
Posts: 2372
Joined: Mon Oct 29, 2007 7:25 pm
Location: Glasgow, Scotland

Post by Chris Cairns » Mon Nov 05, 2012 7:38 pm

Doug,

I've posted my Topic on replacing Mamod SL/MSS sight glass's in the Reference Library - http://gardenrails.myfreeforum.org/about6423.html

From my measurements the problem lies with the replacement parts not being thick enough to get the 'O' ring compressed enough to form a good seal.

You have soldered 2 screws into the back of the boiler - do these have any solder build up on the exposed threads such that you cannot screw up a nut all the way to the boiler back face - that would leave the brass back plate off the boiler effectively increasing the depth of recess to be filled?

My best solution is to fit the thicker Mamod oval washer/seal that is sold with sight glass replacement kits. Sorry I have no spare ones available, and the cheapest I can find on-line is here - http://www.mamodparts.com/spares-Sight_ ... _id=100458 You can also use the thicker sight glass plastic but it needs trimming to the same shape as the loco one.

Another possible solution would be to fit 2 loco sight glass plastics, one on top of the other, and then with careful tightening of your nuts should get a good compression of the 'O' ring (this assumes your screw threads are long enough). Is your old sight glass plastic still usable? I can send you another loco sight glass plastic & 'O' ring.

I'm not sure that sticking 2 'O' rings together will work as they will have a mind of their own on being compressed and probably go different ways affecting your seal.

I've sent you a PM.

Chris Cairns.

User avatar
dougrail
Driver
Driver
Posts: 1535
Joined: Mon Mar 14, 2011 5:11 pm
Location: Salopia; on the edge of Arcadia

Post by dougrail » Mon Nov 05, 2012 11:36 pm

Hi again,

I'm now providing a photographic record of the problem and the circumstances.

The boiler.
Image

Brass removed - observed is the second gasket 'clinging' around the sight glass's narrower side
Image

The first gasket, in where it should be...
Image

Explaining the 'clinging on' of the o ring to the sight glass
Image

The screws and solder - these have been cleaned around the screws. Only a little lump; the rest was professionally smoothed by the kind chap who did the solder op for me.

A look at the recess and the hole incase this holds anything relevant for detectives:
Image

I made sure the threads were cleaned of any solder that could block the nut, followed the instructions and reassembled the setup, ensuring the sight glass was tight.

Bloody gasket flexing!
Image

Yes, yes, I can see that that might be a cause....but remember when I had two gaskets in, there were no 'flexing' and it still leaked, as per the picture - weeping out of the bottom of the brass backend.

I'm ordering some gasket sealent resistent upto 250Celsius and going to try that, fill in the recess and 'glue' the sight glass in.

Sound a plan?
Image

User avatar
Chris Cairns
Driver
Driver
Posts: 2372
Joined: Mon Oct 29, 2007 7:25 pm
Location: Glasgow, Scotland

Post by Chris Cairns » Tue Nov 06, 2012 12:13 am

Doug,

Looking at your 2nd photo the sight glass plastic is below the level of the outer 'O' ring so as you tighten up the back plate it is actually compressing that outer 'O' ring against the side of the boiler and the sight glass plastic, but I think there will be little or no compression of the 'O' ring behind the sight glass plastic.

Your 6th photo proves that you should be able to get a seal with just the one 'O' ring as it has been pushed out of the recess into the middle of the hole.

Do you still have the metal reflector as that may help as well? It should be fitted into the hole first then the 'O' ring rests on top.

Rub some oil or washing up liquid onto the 'O' ring to help it stay in place whilst you tighten up the nuts. With the 'O' ring in the correct place, place the plastic sight glass on top also in the right place, gently lower the back plate onto your threads without displacing the sight glass plastic or 'O' ring. Whilst holding the back plate down with a finger in the middle do the nuts up finger tight. Then use a spanner and tighten each nut up the same small amount at a time. It may take a couple of go's but I think that 'O' ring may seal properly.

Chris Cairns.

User avatar
dougrail
Driver
Driver
Posts: 1535
Joined: Mon Mar 14, 2011 5:11 pm
Location: Salopia; on the edge of Arcadia

Post by dougrail » Tue Nov 06, 2012 12:45 am

Chris Cairns:76525 wrote:Doug,

Looking at your 2nd photo the sight glass plastic is below the level of the outer 'O' ring so as you tighten up the back plate it is actually compressing that outer 'O' ring against the side of the boiler and the sight glass plastic, but I think there will be little or no compression of the 'O' ring behind the sight glass plastic.
Thing is, I took out the second ring [the one clinging to the glass] and it has once again started pissing water on the 'static but full of kettle boiled water' stage. I will try your advice though to see whether we can 'glue' the ring with il etc...
Your 6th photo proves that you should be able to get a seal with just the one 'O' ring as it has been pushed out of the recess into the middle of the hole.

Do you still have the metal reflector as that may help as well? It should be fitted into the hole first then the 'O' ring rests on top.
I do, and will fit that. Will it make a difference regards making a seal? :S
Rub some oil or washing up liquid onto the 'O' ring to help it stay in place whilst you tighten up the nuts. With the 'O' ring in the correct place, place the plastic sight glass on top also in the right place, gently lower the back plate onto your threads without displacing the sight glass plastic or 'O' ring. Whilst holding the back plate down with a finger in the middle do the nuts up finger tight. Then use a spanner and tighten each nut up the same small amount at a time. It may take a couple of go's but I think that 'O' ring may seal properly.

Chris Cairns.
I'll spend an hour trying this tomorrow. I'll report with film as to what happens.

What irritates me is that I can't even test anything else - pipes, motion or wheels with this leak as it steals the thunder so as to speak.

Thanks for your support and help in this Chris. :)

Spule 4

Post by Spule 4 » Tue Nov 06, 2012 2:38 am

Doug-

Go to your local auto parts dealer and get some high-tack. It works wonders. I mentioned this in another backhead-leaker post.

A couple other points, some washers help retain a larger surface area of the backhead.

Also snug is snug, no need to crank everything down super-tight.

Check the backhead against an edge to see if it is not bowed/bent.

I think I have a slight leak with Major Hitchcock right now when I re-assemble it, but I gotta solve the leaking goodall first.

Always something, keeps us all of the streets I guess. :D

Post Reply

Who is online

Users browsing this forum: No registered users and 16 guests